Transcription
ADT Security Services, Inc.1750 Clint Moore RoadBoca Raton, FL 33431(561) 988-3600 '7 & * %DWWHU\ &KDUJHU,QVWUXFWLRQ 0DQXDO'RFXPHQW 31 5HYLVLRQ(&1 A
&RQWHQWVIntroduction to the Charger . 1Overview. 1Specifications . 2Compliance with NFPA Codes and UL Standards . 2Charger Maintenance . 2Installing the Charger . 3Overview. 3Installation Precautions and Standards . 3Battery Precautions. 3Installation Standards . 4Charger Connections, Jumpers, and Switches . 4Connecting AC Power to the Charger . 5Connecting Batteries to the Charger . 6Mounting the Charger . 8Mounting the Charger into a CAB-3 Series Cabinet . 8Mounting the Charger into a BB-55 Battery Box. 9Connecting the Charger to a Load . 10Connecting the Charger to a Multiple Load . 10Connecting the Charger for Additional Current . 11Configuring the Charger . 12Delay loss of AC Reporting. 12Disable Ground Fault Detection . 12Trouble and Form-C Relay Connections (Optional) . 13Installing Optional Meters . 14Installing an AM-1. 14Installing a VM-1. 15Installing an MPM-3. 15Operating the Charger. 16Overview. 16Starting the Charger . 16Understanding the LED Status Indicators. 16Normal Operation . 17ADT-CHG-120 Instruction 05/01/98 PN 50938:Aiii
1RWHVivADT-CHG-120 Instruction 05/01/98 PN 50938:A
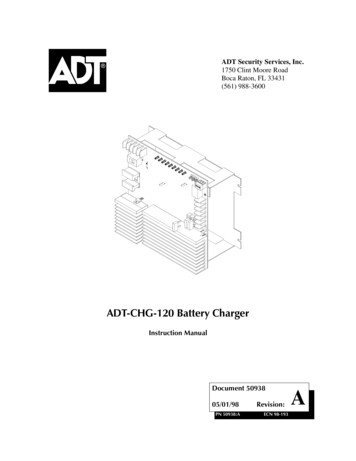
,QWURGXFWLRQ WR WKH &KDUJHU2YHUYLHZThe ADT-CHG-120 battery charger is designed to charge lead-acid batteries that provideemergency standby power for a Fire Alarm Control Panel (FACP). Two 12-volt batteriesare always used in series to supply 24 VDC nominal. The following list gives answers tosome common questions about the charger:1RWH 7KURXJKRXW WKLVPDQXDO WKH WHUP FKDUJHUµ What types of FACPs can be used with the charger? Any 24 VDC FACP that useslead-acid 25 AH to 120 AH batteries and that has the feature to disable the FACPbattery charger. Where does the charger mount? You can mount the charger into a CAB-3 SeriesCabinet or into a BB-55 Battery Box. How many outputs does the charger provide? The charger provides two outputcircuits for connection to multiple loads (such as a power supply, amplifier, auxiliaryamplifier, and so forth). What options are available with the charger? You can configure the charger todisable the charger’s ground fault detection, to delay AC loss reporting (8 or 16 hours),and to operate with 120 VAC or 240 VAC. How long does it take the charger to charge batteries? Typically, it takes 9 hours tocharge 25 AH batteries, 20 hours to charge 55 AH batteries, and 38 hours to charge120 AH batteries. Refer to “Specifications” on page 2 for details.UHIHUV WR D '7 & * Figure 1 identifies features of the charger:1RWH )RU GHWDLOHG GHVFULSWLRQV RI FKDUJHU FRQQHFWLRQV MXPSHUV DQGVZLWFKHV VHH &KDUJHU &RQQHFWLRQV -XPSHUV DQG 6ZLWFKHVµ RQ SDJH 1LQH /(' VWDWXVLQGLFDWRUV HDY\ GXW\ SULPDU\ & SRZHU2SHQ FROOHFWRU WURXEOH GDLV\FRQQHFWLRQVFKDLQ FRQQHFWLRQV9ROWDJH 6HOHFWLRQ([WHUQDO WURXEOH6ZLWFK IRU 9 & RULQSXW 9 & RSHUDWLRQ)RUP & WURXEOH UHOD\ WRRWKHU GHYLFHV7ZR RXWSXW FLUFXLWV WRORDGSRZHU VXSSO\ DX[LOLDU\ SRZHU VXSSO\ DPSOLILHUV HWF UHSODFHDEOH IXVHV SURYLGH ² VKRUW FLUFXLW DQG RYHUORDGEDWWHU\ FRQQHFWLRQVSURWHFWLRQ2SWLRQDO PPHWHUFRQQHFWLRQFigure 1 Charger FeaturesADT-CHG-120 Instruction 05/01/98 PN 50938:A1
,QWURGXFWLRQ WR WKH &KDUJHUSpecificationsThe charger also provides the following features: AM-1 ammeter (0-10A) ordered separately VM-1 voltmeter (0-50 V) ordered separately Disable local ground fault detection Selectable loss of AC delay (8 or 16 hours)6SHFLILFDWLRQVTable 1 contains electrical specifications for the charger:Primary AC power in (TB1)120 VAC, 60 Hz, 2 A240 VAC, 50 Hz, 1 AForm-C relay (TB3)5 A at 30 VDCFloat charge voltage27.6 VDCMaximum charging current4.5 AFuses F1-F3 (PN 12057)15 ABattery sizes25 AH to 120 AHCharging Time (to charge two fully discharged batteries25 AH – 9 hours55 AH/60 AH – 20 hours120 AH – 38 hoursTable 1 Charger Specifications&RPSOLDQFH ZLWK 1)3 &RGHV DQG 8/ 6WDQGDUGVThe charger complies with the following standards: NFPA 72-1993 National Fire Alarm Code UL 864 Standard for Control Units for Fire Alarm Systems and UL 1481 PowerSupplies for Fire Alarm Systems CAN/ULC-S527-M87&KDUJHU 0DLQWHQDQFHThe charger does not require regular maintenance. While installing the charger, however,make sure to maintain proper polarity when connecting power leads and batteryconnections. To ensure optimal operation of the charger, observe the following:2YHUORDG DQG UHYHUVH SRODULW\ SURWHFWLRQ Fuses F1, F2 and F3 (15 A, PN 12057)provide overload and reverse-polarity protection. Replace a blown fuse with a fuse with thesame rating and type.Periodically inspect the batteries for corrosion and make sure thatcorrosive effects to the batteries do not affect the charger or cabinet.3HULRGLF ,QVSHFWLRQMost problems with a charger are due to faulty batteries or looseconnections. If you encounter problems, inspect the charger, the battery, and allconnections for loose wiring or short circuits.7URXEOHVKRRWLQJOnly replace batteries with the same charge rate and capacity asother batteries in the set. For example, if replacing one of four 55 AH batteries, make surethe replacement battery has the same charge rate and capacity as the other three batteries.5HSODFLQJ %DWWHULHV2ADT-CHG-120 Instruction 05/01/98 PN 50938:A
,QVWDOOLQJ WKH &KDUJHU2YHUYLHZThis section contains instructions and illustrations for installing the charger, divided intothe following topics:SectionTopic(s) CoveredPageInstallation Precautions andStandardsPrecautions to take when installing the chargerand recommended installation standards.3Charger Connections,Jumpers, and SwitchesLocation and references to connections,jumpers, and switches used to configure,maintain, and operate the charger.4Connecting AC Power tothe ChargerHow to connect AC power to the charger.5Connecting Batteries to theChargerHow to connect batteries to the charger in twoconfigurations: using two batteries and usingfour batteries.6Mounting the ChargerHow to mount the charger to a CAB-3.How to mount the charger to a BB-55.8Connecting the Charger toa LoadInstructions and illustrations for wiring a chargerto a multiple load and for wiring a charger for alarge system installation.10Configuring the ChargerConfiguring the charger for the followingoptions:Delaying loss of AC reporting (DACT); andDisabling ground fault detection12Trouble and Form-C RelayConnections (Optional)Instructions and illustrations for connecting thefollowing:Open Collector Trouble In (JP5)Trouble Out (JP4)Master Trouble In (JP6)Form-C Trouble Relay (TB3)13Installing Optional MetersHow to install an optional ammeter, voltmeter,or both.14Table 2 Installation Topics,QVWDOODWLRQ 3UHFDXWLRQV DQG 6WDQGDUGV %DWWHU\ 3UHFDXWLRQV When installing the charger, observe the following precautions: Observe polarity when making connections.Do not connect the Battery Interconnect Cable until instructed.Batteries, although sealed, contain hazardous acid chemicals.Charging batteries can cause flammable hydrogen gas.Take care when handling batteries: batteries are heavy—take care in lifting andhandling them.Mounting batteries requires proper mounting hardware. Follow the batterymanufacture’s installation instructionsADT-CHG-120 Instruction 05/01/98 PN 50938:A3
,QVWDOOLQJ WKH &KDUJHUCharger Connections, Jumpers, and Switches,QVWDOODWLRQ 6WDQGDUGVAn installer should be familiar with the following standards: NEC Article 300 Wiring Methods. NEC Article 760 Fire Protective Signaling Systems. Applicable Local and State Building Codes. Requirements of the Authority Having Jurisdiction.&KDUJHU &RQQHFWLRQV -XPSHUV DQG 6ZLWFKHV/R &KDUJHWKH &KDUJHUµ RQ SDJH L &KDUJHVHH &RQQHFWLQJ & 3RZHU WRDQG -3 ² 2SHQ &ROOHFWRU 7URXEOH ,QEDWWHU\ OHVV WKDQ 9'&(DUWK *URXQG )DXOWRU 9 &&KDUJHU 7URXEOH7% ² & 3RZHU 9 & & 3ULPDU\ 2Q,QGLFDWRUVµ RQ SDJH -3 ² 2SHQ &ROOHFWRU 7URXEOH 2XWVHH 7URXEOH DQG )RUP & 5HOD\&RQQHFWLRQV2SWLRQDO µ RQ SDJH -3 ² 0DVWHU 7URXEOH ,QVHH 7URXEOH DQG )RUP &5HOD\ &RQQHFWLRQV2SWLRQDO µ RQ SDJH /RZ %DWWHU\ 8QGHUVWDQGLQJ WKH /(' 6WDWXV 9 EDWWHU\ YROWDJH ! 9'&LQGLFDWH VWDWXV RI WKH FKDUJHU VHH 9 EDWWHU\ YROWDJH EHWZHHQ 9'&/(' 6WDWXV ,QGLFDWRUV ² 1LQH /('V WR 9 EDWWHU\ YROWDJH EHWZHHQ 9'&Figure 2 shows all connections, jumpers, and switches needed to maintain, configure, andoperate the charger:7% ² )RUP & 7URXEOH 5HOD\VHH 7URXEOH DQG )RUP &5HOD\ &RQQHFWLRQV2SWLRQDO µ RQ SDJH 7% ² 2XWSXW &LUFXLWV DQG VHH &RQQHFWLQJ WKH&KDUJHU WR D /RDGµ RQ6: ² 9ROWDJH 6HOHFWLRQSDJH 6ZLWFK IRU VHOHFWLQJ 7% ² %DWWHU\9 & RU 9 &RSHUDWLRQ&RQQHFWLRQV VHH6HH )LJXUH RQ &RQQHFWLQJ %DWWHULHVSDJH WR WKH &KDUJHUµ RQ5HVLVWRU 5 ² &XW WRSDJH GLVDEOH JURXQG IDXOWGHWHFWLRQ UHIHU WR 'LVDEOH*URXQG )DXOW 'HWHFWLRQµRQ SDJH 5HVLVWRU 5 ² 8VHGZLWK-3 WR GHOD\ ORVV RI & UHSRUWLQJUHIHU WR 'HOD\ ORVV RI &5HSRUWLQJµ RQ SDJH )XVHV ) ) DQG ) ² 5HSODFHDEOHSOXJJHG IXVHV VHH &KDUJHU0DLQWHQDQFHµ RQ SDJH -3 0 FRQQHFWRU DQG -3 IRUHQDEOLQJ DQ RSWLRQDO 0 DPPHWHU VHH ,QVWDOOLQJ DQ 0 µRQ SDJH Figure 2 Charger Connections, Switches, and Jumpers4ADT-CHG-120 Instruction 05/01/98 PN 50938:A
,QVWDOOLQJ WKH &KDUJHUConnecting AC Power to the Charger&RQQHFWLQJ & 3RZHU WR WKH &KDUJHUCaution: Before connecting AC power to the charger—make sure to set the Voltage SelectSwitch (SW1) on the charger (Figure 2) to match your AC power source (120 VAC or 240VAC). Figure 3 shows the voltage selection positions for SW1:1RWH 7KH FKDUJHU LV UDWHGIRU 9 & RU 9 &RSHUDWLRQ 7KHUHIRUH 9RQ 6: LQGLFDWHV 9 &RSHUDWLRQ DQG 9 LQGLFDWHV 9 &RSHUDWLRQ 6: VHW WR 9 &6: VHW WR 9 &RSHUDWLRQRSHUDWLRQFigure 3 Using SW1 to Select AC VoltageFigure 4 shows the steps for connecting the charger to the main AC power source.3ODVWLF(DUWK JURXQG( 57 LQVXODWLQJFRYHU31 7% 7% Step 1: Remove the plastic insulating coverfrom TB1.(DUWK JURXQG( 57 Step 2: Connect the Earth ground line toTB1.3ULPDU\ RW OLQH LQ(DUWK JURXQG1HXWUDO OLQH LQ 27( 57 1875/1HXWUDO OLQH LQ1875/7% 7% Step 3: Connect the Primary Neutral line toTB1.Step 4: Connect the Primary Hot line to TB1.Check all connections, then replace theplastic insulating cover.Figure 4 Connecting AC Power to the ChargerADT-CHG-120 Instruction 05/01/98 PN 50938:A5
,QVWDOOLQJ WKH &KDUJHUConnecting Batteries to the Charger&RQQHFWLQJ %DWWHULHV WR WKH &KDUJHU 2YHUYLHZ you can connect 25 AH –120 AH batteries to the charger. This section providesillustrations and instructions for connecting two batteries or for connecting four batteries.&RQQHFWLQJ 7ZR %DWWHULHV Figure 5 shows how to connect two 25 AH batteries to thecharger:7% 7% '7 & * Warning: Do notconnect the BatteryInterconnect Cableat this time.036 Refer to “Starting theCharger” on page 16.Figure 5 Connecting 25 AH BatteriesTable 3 contains instructions for connecting batteries to the charger:StepAction1Remove all power sources to the charger.2Connect the battery negative cable to the TB2 terminal (on the charger labeled“Battery –” as shown in Figure 5.3Connect the battery positive cable to the TB2 terminal (on the charger)labeled “Battery ” as shown in Figure 5.4Proceed to the section “Connecting the Charger.” Do not connect the BatteryInterconnect Cable at this time—refer to “Starting the Charger” on page 16.Table 3 Connecting 25 AH Batteries6ADT-CHG-120 Instruction 05/01/98 PN 50938:A
,QVWDOOLQJ WKH &KDUJHUConnecting Batteries to the Charger&RQQHFWLQJ )RXU %DWWHULHV Figure 6 shows how to connect four 55 AH batteries to thecharger:7% 7% '7 & * Warning: Do notconnect the BatteryInterconnect Cableat this time.036 Refer to “Starting theCharger” on page 16.Figure 6 Connecting Four Batteries to a ChargerTable 4 contains instructions for connecting four batteries to the charger:StepAction1Remove all power sources to the charger.2Tie the batteries in pairs by connecting the battery negative terminals and thebattery positive terminals as shown in Figure 6.3Connect the battery negative cable to the TB2 terminal (on the charger labeled“Battery –”) as shown in Figure 6.4Connect the battery positive cable to the TB2 terminal (on the charger) labeled“Battery ”) as shown in Figure 6.5Proceed to the section “Connecting the Charger.” Do not connect the BatteryInterconnect Cable at this time—refer to “Starting the Charger” on page 16.Table 4 Connecting 55 AH BatteriesADT-CHG-120 Instruction 05/01/98 PN 50938:A7
,QVWDOOLQJ WKH &KDUJHUMounting the Charger0RXQWLQJ WKH &KDUJHUYou can mount a charger into thebottom row of a CAB-3 Series Cabinet, as long as the charger is within 20 feet of the load.Typically, a charger mounts into the lower right corner of the CAB-3—beside the powersupply (Figure 7, position 2). If using an additional CAB-3, you can mount the charger inthe lower left corner (Figure 7, position 2). Figure 7 shows the two mounting positions of acharger into a CAB-3.0RXQWLQJ WKH &KDUJHU LQWR D & % 6HULHV &DELQHW0RXQWLQJKRRNVPosition 1: Lower right corner.Position 2: Lower left corner.Figure 7 Mounting a Charger into a CAB-3 Series Cabinet (CAB-C3 shown)To mount a charger into a CAB-3 Series Cabinet, follow these instructions:StepAction1Place the charger chassis mounting slots in line with the mounting holes in the cabinet. Ifmounting in position 2, place the charger chassis onto the mounting hooks in the cabinet.2Insert the self-tapping screws through the charger chassis mounting slots and into themounting holes in the cabinet.6HOI WDSSLQJ VFUHZ38&KDVVLV PRXQWLQJVORWTighten the self-tapping screws.ADT-CHG-120 Instruction 05/01/98 PN 50938:A
,QVWDOOLQJ WKH &KDUJHUMounting the ChargerYou can also mount a charger into aBB-55 battery box, as long as the BB-55 is within 20 feet of the load. Note that a chargertakes up half the space of the BB-55. This means you only have room left for two 25 AHbatteries in the BB-55. Figure 8 shows the mounting position of a charger in a BB-55.0RXQWLQJ WKH &KDUJHU LQWR D %% %DWWHU\ %R[2SWLRQDO EUDFNHW IRUPRXQWLQJ DQ RSWLRQDO 0 RU 90 6HOI WDSSLQJ VFUHZVFigure 8 Mounting a Charger into a BB-55To mount a charger into a BB-55 battery box, follow these instructions:StepAction1Place the charger chassis mounting slots in line with the mounting holes in the BB-55.2Insert the self-tapping screws through the charger chassis mounting slots and into themounting holes in the BB-55.6HOI WDSSLQJ VFUHZ3&KDVVLV PRXQWLQJVORWTighten the self-tapping screws.ADT-CHG-120 Instruction 05/01/98 PN 50938:A9
,QVWDOOLQJ WKH &KDUJHUConnecting the Charger to a Load&RQQHFWLQJ WKH &KDUJHU WR D /RDGThis section provides two applications for connecting a charger to a load. While connectinga charger to a load, observe the following precautions: Make sure all power sources are off to the charger and the load. Follow polarity when making connections.&RQQHFWLQJ WKH &KDUJHU WR D 0XOWLSOH /RDGYou can connect a charger to multipleloads, such as a main power supply, auxiliary power supply, amplifiers, and so forth, asshown in Figure 9.036 3RZHU 6XSSO\1RWH )LJXUH VKRZV DZLULQJ GLDJUDP IRU W\LQJWKH ORDG WR EDWWHU\WHUPLQDOV WR REWDLQDGGLWLRQDO FXUUHQW )RUH[DPSOH WKH ILUVW GUDZV WKHGDLV\ FKDLQHG VGUDZ DQG WKH VHFRQG GUDZV RIDGGLWLRQDO FXUUHQW IURP WKHEDWWHULHV '7 & * PSOLILHUFigure 9 Typical Wiring for a Charger to a Multiple LoadTo connect a charger as shown in Figure 9, follow these steps:10StepAction1Connect the battery and battery– terminals of the power supply to the chargeroutput circuit (TB2: Out 1 and Out 1–) as shown in Figure 9.2Connect the battery and battery– terminals of the amplifier to the chargeroutput circuit (TB2: Out 2 and Out 2–) as shown in Figure 9.3Connect the batteries to the charger (for battery connections see Figure 5 orFigure 6).ADT-CHG-120 Instruction 05/01/98 PN 50938:A
,QVWDOOLQJ WKH &KDUJHUConnecting the Charger to a Load&RQQHFWLQJ WKH &KDUJHU IRU GGLWLRQDO &XUUHQW You can draw 10 A maximum fromeach charger output—with a maximum current draw of 45 A of alarm current from thecharger. To draw additional current from the charger, you can connect a load directly to thebatteries as shown in Figure 10:)LUVW 036 '7 & * 3RZHU 6XSSO\)LUVW 6HFRQG 9'& 9'& 6HFRQG 9'& 9'& Figure 10 Typical Connections for Drawing Additional CurrentTo connect a charger as shown in Figure 10, follow these steps:StepAction1Connect the Battery and Battery– terminals of the power supply to the chargerBattery output (TB2: Batt 1 and Batt 1–) as shown in Figure 10.2Connect the Battery and Battery– terminals of the first AA-120 to the chargeroutput circuit (TB2: Out 2 and Out 2–) as shown Figure 10.3Connect the Battery and Battery– terminals of the first AA-30 to the chargeroutput circuit (TB2: Out 1 and Out 1–) as shown in Figure 10.4Connect the Battery and Battery– terminals of the second AA-30 to the Battery and Battery– terminals of the first AA-30 as shown in Figure 10.5Connect the Battery and Battery– terminals of the second AA-120 to thebatteries as shown in Figure 10.6Connect the batteries to the charger.ADT-CHG-120 Instruction 05/01/98 PN 50938:A11
,QVWDOOLQJ WKH &KDUJHUConfiguring the Charger&RQILJXULQJ WKH &KDUJHUYou can configure the charger to do the following: Set the charger input power (see Figure 3 on page 5). Delay AC loss reporting (for Central Station applications); and Disable charger ground fault detection.Figure 11 shows how to configure the charger for delaying the loss of AC reporting and fordisabling ground fault detection:'LVDEOH JURXQG IDXOW GHWHFWLRQFXW DQG UHPRYH 5 'HOD\ ORVV RI & KUVFXW DQG UHPRYH 5 LQDGGLWLRQ WR FXWWLQJ -3 'HOD\ ORVV RI & KUV FXW-3 Figure 11 Configuring the Charger'HOD\ ORVV RI & 5HSRUWLQJ If using a Digital Alarm Communicator (DACT), you mustdelay the reporting of an AC loss condition to a central station. This delays activation of thetrouble bus and Form-C trouble contacts when AC fails. You can configure the charger foran 8-hour or a 16-hour delay as follows: 8-hour delay – Cut and remove jumper JP8 on the charger (Figure 11). 16-hour delay – Cut jumper JP8; then, cut and remove resistor R100 (Figure 11).'LVDEOH *URXQG )DXOW 'HWHFWLRQ To disable local (charger) earth fault detection, cut andremove resistor R104 (Figure 11). Figure 12 contains a simplified block diagram thatshows ground fault detection disabled on a charger connected to multiple power supplies:&KDUJHU2Q 036 HQDEOH JURXQG IDXOWGHWHFWLRQ GR QRW FXW-3 036 2Q WKH FKDUJHU GLVDEOH JURXQG IDXOWGHWHFWLRQ FXW 5 036 2Q 036 DQG036 GLVDEOH JURXQG IDXOW GHWHFWLRQ FXW -3 Figure 12 Disabling Ground Fault Detection12ADT-CHG-120 Instruction 05/01/98 PN 50938:A
,QVWDOOLQJ WKH &KDUJHUTrouble and Form-C Relay Connections (Optional)7URXEOH DQG )RUP & 5HOD\ &RQQHFWLRQV 2SWLRQDOTable 5 contains descriptions of optional connectors on the charger:FunctionConnectorUse open collector input and output to daisychain a trouble signal through the chargerwithout affecting charger operation.JP5 Open Collector Trouble InJP4 Open Collector Trouble OutReceive trouble signals from another device,such as a M500CH.JP6 Master Trouble InTransmit a charger trouble signal to anotherdevice.TB3 Form-C Trouble RelayTable 5 Charger Trouble and Form-C Relay ConnectionsFigure 13 shows charger trouble and Form-C relay connections:Figure 13 Connections for Optional DevicesADT-CHG-120 Instruction 05/01/98 PN 50938:A13
,QVWDOOLQJ WKH &KDUJHUInstalling Optional Meters,QVWDOOLQJ 2SWLRQDO 0HWHUVYou can also order and install a ammeter (AM-1), voltmeter (VM-1), or both (MPM-3) foruse with the charger. If mounting an AM-1 or a VM-1, mount the meter to a BB-55 asshown in Figure 14. If mounting an MPM-3, mount to a power supply (Figure 15) installedin a CAB-3. Table 6 contains descriptions and part numbers for these optional meters:ItemPart NumberDescriptionAmmeterAM-10-10 A ammeter with a 3-ft. cable for connection to thecharger (JP3). Mounts into a BB-55 battery box only.VoltmeterVM-10-50 V voltmeter with 3-ft. positive and negative leadsfor connection to the charger output circuit. Mountsinto a BB-55 battery box only.Ammeter andVoltmeterAssemblyMPM-3An AM-1 and VM-1 attached to a mounting bracket.Mounts onto a power supply.Table 6 Optional Meters,QVWDOOLQJ DQ 0 To install an AM-1, follow these steps:1.Cut jumper JP9 on the charger (Figure 13).2.Connect the AM-1 harness to JP3 on the charger (Figure 11)—making sure to observeproper polarity.3.Mount the AM-1 into a mounting slot on the front of the BB-55 (Figure 14): 0 RU 90 %% RQO\%% 0RXQWLQJ 6ORWFigure 14 Mounting an AM-1 or VM-1 to a BB-55 Battery Box14ADT-CHG-120 Instruction 05/01/98 PN 50938:A
You can connect a VM-1 across a charger output circuit. For example,to install a VM-1 to measure voltage from charger output circuit 1, follow these steps:,QVWDOOLQJ D 90 1.Connect the positive lead to TB2 Out 1 ( ). See Figure 13.2.Connect the negative lead to TB2 Out 1 (–). SeeFigure 13.3.Mount the VM-1 into a mounting slot on the front of the BB-55 battery box.,QVWDOOLQJ DQ 030 To install an MPM-3, follow these steps:1.Connect the AM-1 (Figure 13).2.Connect the VM-1 (Figure 13).3.Mount the MPM-3 onto a power supply connected to your system, such as anMPS-400 or MPS-24A (Figure 15).3RZHU VXSSO\ ERDUG036 RU036 030 0RXQWLQJ VFUHZVFigure 15 Mounting an MPM-3ADT-CHG-120 Instruction 05/01/98 PN 50938:A15
2SHUDWLQJ WKH &KDUJHUOverview 2SHUDWLQJ WKH &KDUJHU2YHUYLHZThis section contains information on starting the charger, interpreting the LED StatusIndicators on the charger, and normal operation of the charger. 6WDUWLQJ WKH &KDUJHUWarning: Before starting the charger, do the following: Follow the installation instructions in Section 2, “Installing the Charger.”Verify proper polarity on all connections between the charger and the batteries, load,and optional meters.Make sure there are no short circuits between leads and between battery terminals.Make sure the Battery Interconnect Cable(s) is not connected.To start the charger, follow these steps:1.Connect AC power to the charger. The AC On LED and Trouble LED go on.2.Connect the batteries to the charger3.Connect the Battery Interconnect Cable. The Trouble LED goes off.4.Connect the charger to the load (such as a power supply, an amplifier, and so on).8QGHUVWDQGLQJ WKH /(' 6WDWXV ,QGLFDWRUVThe charger provides nine LED Status Indicators, which are identified in Figure 16. Alsorefer to Table 7 for conditions, such as troubles, that cause LEDs to light. & 2Q 3ULPDU\ & RQ7URXEOH &KDUJHU LQ WURXEOH FRQGLWLRQVHH 7DEOH *URXQG )DXOW (DUWK IDXOW FRQGLWLRQ GHWHFWHG , &KDUJH &KDUJLQJ FXUUHQW JUHDWHU WKDQ P /2 &KDUJH &KDUJLQJ FXUUHQW OHVV WKDQ P ORVV RI & 9 %DWWHU\ YROWDJH JUHDWHU WKDQ 9'& 9 %DWWHU\ YROWDJH EHWZHHQ 9'& 9 %DWWHU\ YROWDJH EHWZHHQ 9'&/RZ %DWWHU\ %DWWHU\ YROWDJH OHVV WKDQ 9'&*UHHQ /(' HOORZ /('Figure 16 LED Status Indicators16ADT-CHG-120 Instruction 05/01/98 PN 50938:A
23 VLow BatteryTrouble (Master Trouble InJP6 connected)25 VTrouble (with AC TroubleDelay used)27 V ,, ,,,,,,,,Faulty Battery(or less the 21 V)LO Charge(Loss of AC),, ,, Ground FaultHI Charge Short CircuitTrouble Ground Fault DisconnectedBatteryAC OnAC TroubleLEDNormal OperationTable 7 shows the conditions that cause the charger LEDs to come on:,,, ,,,,,,,, ,,,, /HJHQG LED on., LED on or off, depending on battery voltage. Refer to “Normal Operation.”Table 7 LED Status Indicators1RUPDO 2SHUDWLRQThe ADT-CHG-120 charges batteries at 4.5 A. When batteries are fully charged, thecharger maintains a float charge of 27.6 VDC at a trickle charge rate of less than 400 mA.While charging the batteries, the HI and LO Charge LEDs switch on and off approximatelyevery 20 seconds. Also, one of the 23 V, 25 V, 27 V, or Low Battery LEDs also comes on,depending on the battery voltage.ADT-CHG-120 Instruction 05/01/98 PN 50938:A17
1RWHV18ADT-CHG-120 Instruction 05/01/98 PN 50938:A
The ADT-CHG-120 battery charger is designed to charge lead-acid batteries that provide emergency standby power for a Fire Alarm Control Panel (FACP). Two 12-volt batteries . For example, if replacing one of four 55 AH batteries, make sure the replacement battery has the same charge rate and capacity as the other three batteries. Primary AC .
