Transcription
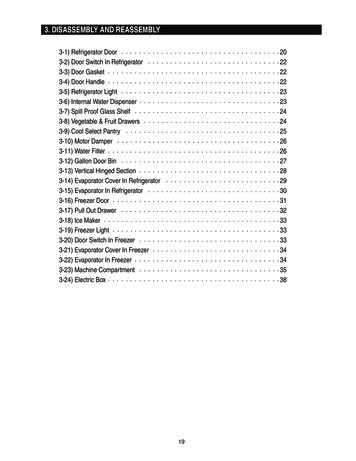
3. DISASSEMBLY AND REASSEMBLY3-1) Refrigerator Door3-2) Door Switch In Refrigerator3-3) Door Gasket3-4) Door Handle3-5) Refrigerator Light3-6) Internal Water Dispenser3-7) Spill Proof Glass Shelf3-8) Vegetable & Fruit Drawers3-9) Cool Select Pantry3-10) Motor Damper3-11) Water Filter3-12) Gallon Door Bin3-13) Vertical Hinged Section3-14) Evaporator Cover In Refrigerator3-15) Evaporator In Refrigerator3-16) Freezer Door3-17) Pull Out Drawer3-18) Ice Maker3-19) Freezer Light3-20) Door Switch In Freezer3-21) Evaporator Cover In Freezer3-22) Evaporator In Freezer3-23) Machine Compartment3-24) Electric 819
DISASSEMBLY AND REASSEMBLY3-1) Refrigerator DoorPart NameHow To Do1. Remove the cap-top table withusing a flat-blade(-) screwdriver.2. Remove 3 screws of the toptable.RefrigeratorDoor3. Remove the 3 housing-connectscrews of TOP-TABLE.(Refer to the picture)4. Disengage the housing-connectof upper hinge (left door).20Descriptive Picture
DISASSEMBLY AND REASSEMBLYPart NameHow To Do5. Remove the earth-screw ofupper hinge.6. Remove 3 bolt screws of hinge.RefrigeratorDoorCaution : Avoid damage orseparation of the doorwhen removing thebolt.7. Remove the door by lifting itstraight up.21Descriptive Picture
DISASSEMBLY AND REASSEMBLY3-2) Door Switch In RefrigeratorPart NameDoor SwitchIn RefrigeratorHow To DoDescriptive Picture1. Remove the magnet switch withusing a flat-blade(-) screwdriver.(Refer to the picture)3-3) Door GasketPart NameDoor GasketIn RefrigeratorHow To DoDescriptive Picture1. Remove the door-gasket bypulling it out of the retainingchannel.3-4) Door HandlePart NameHow To DoDoor HandleRefrigerator1. Remove the door handle ofrefrigerator by lifting it up andpulling it out.(Refer to the picture)Door HandleFreezer1. Remove the door handle offreezer by pushing it to the rightand pulling it out.(Refer to the picture)22Descriptive Picture
DISASSEMBLY AND REASSEMBLY3-5) Refrigerator LightPart NameHow To DoDescriptive Picture1. Remove the light cover bypulling it down with pushing therear of light cover.RefrigeratorLight2. Remove the lamp by turning itcounterclockwise.3-6) Internal Water DispenserPart NameHow To DoInternal WaterDispenser Cover1. Remove the internal waterdispenser cover by inserting aflat-blade(-) screwdriver to thegap of dispenser with pulling thecover.Water Hose Cap2. Remove the water hose cap bypulling it out.(Refer to the picture)23Descriptive Picture
DISASSEMBLY AND REASSEMBLYPart NameHow To DoDescriptive Picture1. Remove the micro switch withusing flat- blade(-) screwdriver.(Refer to the picture)Micro Switch2. Disengage the HousingConnect.(Refer to the picture)3-7) Spill Proof Glass ShelfPart NameHow To DoSpill ProofGlass Shelf1. Remove the shelf by lifting thefront plane of the shelf up andpulling it out.Descriptive Picture3-8) Vegetable & Fruit DrawersPart NameHow To DoVegetable &Fruit Drawers1. Remove the vegetable & fruitdrawer by pulling the roller partand lifting it up.24Descriptive Picture
DISASSEMBLY AND REASSEMBLYPart NameHow To DoVegetable & FruitDrawers Shelf1. Remove the vegetable & fruitdrawers shelf by pulling it out.(Refer to the picture)Descriptive Picture3-9) Cool Select PantryPart NameHow To DoCool Select Pantry1. Remove the cool select pantryby pulling the roller part andlifting it up.Cool Select PantryCover1. Remove the cool select pantrycover by lifting the central partof the cover with pushing it tothe left.Cool Select Pantry 1. Remove the cool select pantryshelf by lifting the front part ofShelfthe shelf with pulling it.1. Remove the cool select pantryrail by unscrewing the 3 screwparts and pulling the rail.Cool Select PantryRail2. Disconnect the housing connectof internal rail part.(Refer to the picture)25Descriptive Picture
DISASSEMBLY AND REASSEMBLY3-10) Motor DamperPart NameHow To DoDescriptive Picture1. Remove the cool select pantry.Remove the screw part of lowermotor damper part and thenpush the motor damper down.Motor Damper1. Disengage 2 housing connectsof the rear motor damper.(Refer to the picture)3-11) Water Filter (Disassembly)Part NameHow To Do1. Remove the shelf by lifting thefront plane of the shelf up andpulling it out.Water Filter2. Remove the water filter byturning it clockwise.(Refer to the picture)26Descriptive Picture
DISASSEMBLY AND REASSEMBLY3-11) Water Filter (Reassembly)Part NameHow To DoDescriptive Picture1. Place the part of ( ) arrow (thatis indicating in the picture) in themiddle of the front filter coverand push it up.WaterFilter2. Turn the water filtercounterclockwise until centralhorizontal line of filter cover andboth ends of water filter labelare made all of the same width.(Refer to the picture.)3-12) Gallon Door BinPart NameHow To DoGallon Door Bin1. Remove the gallon door bin bylifting it up.(Refer to the picture)27Descriptive Picture
DISASSEMBLY AND REASSEMBLY3-13) Vertical Hinged SectionPart NameHow To Do1. Remove 2 screw cap parts withusing flat-blade(-) screwdriver.(Refer to the picture)2. Unscrew 2 screws.Vertical HingedSection3. Disengage the internal housingconnect of vertical hinge.4. Remove the vertical hingedsection by lifting vertical hingeup.(Refer to the picture)28Descriptive Picture
DISASSEMBLY AND REASSEMBLY3-14) Evaporator Cover In RefrigeratorPart NameHow To Do1. Remove the angle cap withusing a flat-blade screwdriver.(Refer to the picture)2. Unscrew 4 screws.Evaporator CoverIn Refrigerator3. Remove the the lower part ofangle mid by pulling it out andpushing it down.(Refer to the picture)4. Remove the hook by pulling itfrom the lower part and pushingthe cover down.(Refer to the picture)5. Disconnect the housing connectof rear plane.(Refer to the picture)29Descriptive Picture
DISASSEMBLY AND REASSEMBLY3-15) Evaporator In RefrigeratorPart NameHow To Do1. Remove the the housing coverby pushing both lateral sides ofthe housing cover and pulling itout.(Refer to the picture)2. Disconnect the housing connectpart.(Refer to the picture)EvaporatorIn Refrigerator3. Unscrew 2 screws.4. Remove the evaporator by liftingthe bottom side of it up andpulling it out.(Refer to the picture)30Descriptive Picture
DISASSEMBLY AND REASSEMBLY3-16) Freezer DoorPart NameHow To Do1. Open the freezer door.Remove the tilting pocket bypushing it to the left.(Refer to the picture)2. Remove the 2 support tiltingpockets with temporary force.(Refer to the picture)FreezerDoor3. Remove the freezer drawer binby lifting the bottom part of it up.(Refer to the picture)4. Remove 4 internal bolts at bothlateral sides of rail part.(Refer to the picture)5. Remove the freezer door bytilting the bottom part of it andlifting it up.31Descriptive Picture
DISASSEMBLY AND REASSEMBLY3-17) Pull Out DrawerPart NameHow To DoDescriptive Picture1. Slide the drawer out as much aspossible.Pull Out Drawer2. Insert a flat screw driver(-) intothe gap and then push it up todiassemble.3. Remove the pull out drawer bylifting the bottom part of drawerbin and pulling it out.3-18) Ice MakerPart NameHow To Do1. Remove the ice maker cover bypulling the bottom part of icemaker cover out.Ice Maker2. Unscrew 2 screws.32Descriptive Picture
DISASSEMBLY AND REASSEMBLYPart NameHow To DoDescriptive Picture3. Remove the ice maker bypulling it out.Ice Maker4. Disconnect the housingconnector part.3-19) Freezer LightPart NameHow To DoFreezer Light1. Remove the light by pulling thelight cover down with pushingthe rear plane of light cover.Descriptive Picture3-20) Door Switch In FreezerPart NameHow To Do1. Remove the freezer drawer binwith using flat-blade(-)screwdriver.(Refer to thepicture)Door Switch InFreezer2. Disconnect the housingconnector part.33Descriptive Picture
DISASSEMBLY AND REASSEMBLY3-21) Evaporator Cover In FreezerPart NameHow To DoDescriptive Picture1. Remove the freezer door,freezer drawer bin, pull outdrawer, ice maker and thenunscrew 2 screws.Evaporator CoverInFreezer2. Remove the evaporator cover bypulling the bottom part of it out.3. Disconnect the housingconnector part.3-22) Evaporator In FreezerPart NameHow To Do1. Remove the housing cover bypushing both lateral sides ofhousing cover part and pulling itout.Remove the housing connectorpart.Evaporator InFreezer2. Remove the evaporator bypulling the lower part ofevaporator with lifting it up.34Descriptive Picture
DISASSEMBLY AND REASSEMBLY3-23) Machine CompartmentPart NameHow To Do1. Unscrew 8 screws of covercomp.2. Disengage the housingconnector.(Refer to the picture)3. Remove the hooker of supportcircuit motor by lifting the hookerup and pulling it out.Motor Fan4. Remove the spring with usingflat-blade screwdriver.(Refer to the picture)5. Remove the motor fan by pullingthe fan out with grasping themotor part.(Refer to the picture)6. Unscrew 2 screws fixed in themotor.7. Remove the hook of motorcover with using a flat-blade (-)screwdriver and then removethe motor.35Descriptive Picture
DISASSEMBLY AND REASSEMBLYPart NameHow To Do1. Disengage the housingconnector.RelayPTC & O/L2. Remove the relay PTC withusing a flat-blade screwdriver.(Refer to the picture)1. Unscrew the water valve fixed inthe screw part.2. Remove the the hook part ofhose fixer by pushing it down.Water Valve3. Remove 2 water hose parts withpushing upper part of .(Refer to the picture)4. Disengage 2 housing connectorparts.5. Remove the hose connectingnut with using a wrench(8mm).36Descriptive Picture
DISASSEMBLY AND REASSEMBLYPart NameHow To Do1. Unscrew 2 screws.2. Disengage the housingconnector.Power Cord &Noise Filter3. Unscrew 3 earth screws.4. Remove the cover by pushingthe hook up with using a flatblade(-) screwdriver.(Refer to the picture)5. Disengage the housingconnector to separate the powercord and noise filter.37Descriptive Picture
DISASSEMBLY AND REASSEMBLY3-24) Electric BoxPart NameHow To Do1. Pull the refrigerator forward forhaving enough space to work atthe rear side of the appliance.2. Unscrew 2 PCB cover fixedscrews.PBA Main3. Disengage all housingconnectors connected with mainPCB.4. Unscrew 2 PCB fixed screws.5. Remove the main PCB withlifting the upper part of the hookup.(Refer to the picture)PBA SMPS1. Remove the cover PCB andthen disengage the housingconnector connected with mainPCB.Remove the SMPS PCB withpushing the lower part of thehook down.38Descriptive Picture
3-1) Refrigerator Door 20 3-2) Door Switch In Refrigerator 22 3-3) Door Gasket 22 3-4) Door Handle 22 3-5) Refrigerator Light 23 3-6) Internal Water Dispenser 23 3-7) Spill Proof Glass Shelf 24 3-8) Vegetable & Fruit Drawers 24 3-9) Cool Select Pantry 25 3-10) Motor Damper 26 3-11) Water Filter 26 3-12) Gallon Door Bin 27 3-13) Vertical Hinged Section 28 3-14) Evaporator Cover In Refrigerator .
