Transcription
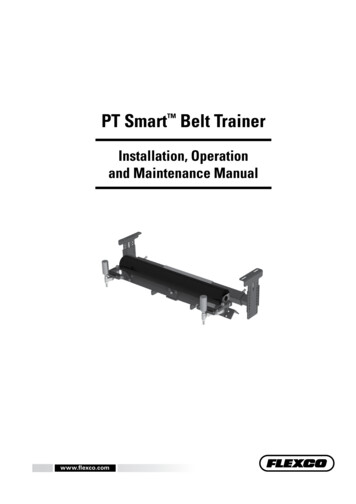
PT Smart Belt TrainerInstallation, Operationand Maintenance Manualwww.flexco.comwww.flexco.com
PT Smart Belt TrainerPurchase Date:Purchased From:Installation Date:This information will be helpful for any future inquiries or questions about belt cleanerreplacement parts, specifications or troubleshooting.2PT Smart Belt Trainer
Table of ContentsSection 1 - Important Information.41.1 General Introduction.41.2 User Benefits.41.3 Proper Belt Trainer Selection.5Section 2 - Safety Considerations and Precautions.62.1 Stationary Conveyors.62.2 Operating Conveyors.6Section 3 - Pre-Installation Checks and Options.73.1 Checklist.73.2 Optional Installation Accessories.8Section 4 - Installation Instructions.9Section 5 - Pre-Operation Checklist and Testing.125.1 Pre-Op Checklist.125.2 Test Run the Conveyor.12Section 6 - Maintenance.136.1 New Installation Inspection.136.2 Routine Visual Inspection.136.3 Routine Physical Inspection.136.4 Roller Replacement Instructions.146.5 Sensor Roller Replacement Instructions.166.6 Maintenance Log.176.7 Maintenance Checklist.18Section 7 - Troubleshooting.19Section 8 - Specs and CAD Drawings.208.1 Specs and Guidelines.208.2 CAD Drawing - PT Smart Standard.21Section 9 - Replacement Parts.229.1 Replacement Parts List.22Section 10 - Other Flexco Conveyor Products.233
Section 1 - Important Information1.1 General IntroductionWe at Flexco are very pleased that you have selected a PT Smart Belt Trainer for your conveyor system.This manual will help you to understand the installation, operation and maintenance of this product andassist you in making it work up to its maximum efficiency over its lifetime of service.It is essential for safe and efficient operation that the information and guidelines presented be properlyunderstood and implemented. This manual will provide safety precautions, installation instructions,maintenance procedures and troubleshooting tips. In addition, please follow all standard, approved safetyguidelines when working on your conveyor.If, however, you have any questions or problems that are not covered, please visit our website or contact ourCustomer Service Department:Customer Service: 27-11-608-4180Visit www.flexco.com for other Flexco locations and products.Please read this manual thoroughly and pass it on to any others who will be directly responsible forinstallation, operation and maintenance of this product. While we have tried to make the installation andservice tasks as easy and simple as possible, this product does however require correct installation andregular inspection and maintenance to maintain top working condition.1.2 User BenefitsBelt mistracking is a common problem that produces various problems, ranging from belt and structuredamage to product spillage and safety issues. By utilising the PT Smart , it is possible to correct a belt thatis mistracking and causing these problems. Multiple units may be required depending on the length of themistracking belt.4PT Smart Belt Trainer
Section 1 - Important Information1.3 Proper Belt Trainer SelectionMODELAPPLICATION RANGEBelt PositionerReturn side only, 140 N/mm max tension on Small,Medium and Large; 210 N/mm max tension onExtra Large. Also works on reversing belts.PTEZ Medium-duty belts up to 280 N/mm max tension.Also works on reversing belts.PT Smart Medium-duty belts up to 280 N/mm max tension.Belt width 75mm idler. Belt thickness 25mmmaximum.PT Max AdjustableHeavy-duty belts up to 525 N/mm maxGenerally 19mm to 25mm thickBelt width 900 - 1500mmHD PT Max AdjustableHeavy-duty belts up to 1050 N/mm max tension.Belt width 1350 - 2100mm Belt Positioner PTEZ PT Smart StandardPT Smart UndergroundStructurePT Max AdjustableTop SidePT Max AdjustableReturn SidePT Max AdjustableV-ReturnConveyor CriteriaBeltPositioner PTEZ PT Smart PT Max HeavyDuty PTMax SuperDuty PTMax Top side mistrackingNoNoNoYesYesYesReturn side NoBetterBetterBetterBetterBetterBetterBelt mistracking to both sidesAcceptableBetterBestBestBestBestInconsistent tracking problemGoodBetterBestBestBestBestBelt is cupped t has edge damageBestBestGoodGoodGoodGoodEase of InstallationBestBetterGoodGoodGoodGoodBelt has low running tension (150-52.5 N/mm)GoodGoodGoodGoodN/AN/ABelt has medium running tension (300-280 N/mm)BetterBetterBetterBestBestBestBelt has high running tension (280 N/mm)N/AN/AN/ABetterBestBestApprox. "upstream" effect* 15 M6M6M15 M15 M15 MApprox. "downstream" effect* 15 M30 - 36 M36 - 45 M45 - 61 M45 - 61 M45 - 61 MBelt mistracking to one side‡ Installed on the clean side of the return belt* Typical results; actual results may vary Disc idlers have the potential to reduce these numbers5
Section 2 - Safety Considerations and PrecautionsBefore installing and operating the PT Smart Belt Trainer, it is important to review and understand the followingsafety information.There are setup, maintenance and operational activities involving both stationary and operating conveyors. Eachcase has a safety protocol.2.1 Stationary ConveyorsThe following activities are performed on stationary conveyors: Installation Tension adjustments Roll Replacement Repairs Cleaning! DANGERIt is imperative that OSHA/MSHA Lockout/Tagout(LOTO) regulations, 29 CFR 1910.147, be followedbefore undertaking the preceding activities. Failure touse LOTO exposes workers to uncontrolled behaviourof the trainer caused by movement of the conveyorbelt. Severe injury or death can result.Before working: Lockout/Tagout the conveyor power source Disengage any takeups Clear the conveyor belt or clamp securelyin place! WARNINGUse Personal Protective Equipment (PPE): Safety eyewear Hardhats Safety footwearClose quarters and heavy components create a worksitethat compromises a worker’s eyes, feet and skull.PPE must be worn to control the foreseeable hazardsassociated with conveyor belt components. Seriousinjuries can be avoided.2.2 Operating ConveyorsThere are two routine tasks that must be performed while the conveyor is running: Inspection of the sealing performance Dynamic troubleshooting! DANGEREvery belt conveyor is an in-running nip hazard. Nevertouch or prod an operating trainer. Conveyor hazardscan cause instantaneous amputation and entrapment.! WARNINGBelt trainers can become projectile hazards. Stay as farfrom the trainer as practical and use safety eyewear andheadgear. Missiles can inflict serious injury.6PT Smart Belt Trainer! WARNINGNever adjust anything on an operating trainer.Unforeseeable belt projections, tares, and materialscan cause violent movements of the trainer structure.Flailing hardware can cause serious injury or death.
Section 3 - Pre-installation Checks and Options3.1 Checklist Check the model and size of the belt trainer. Is it the right one for your beltline?Check the PT Smart to be sure all the parts are included in the shipment.Find the Information Packet in the shipment.Review the “Tools Needed” section on the front of the installation instructions.Prepare the conveyor site:· Identify the point(s) of mistracking, expecting 36-45m of downstreaminfluence. Position the unit 6m after the start of the mistracking. Identify an opening of at least 6m if possible to avoid interference withsensor rollers during installation. Remove old tracking devices. If the conveyor has disc idlers, replace one idler before and one idler afterthe location where the trainer will be installed with a standard idler.Clearance500mm min7
Section 3 - Pre-Installation Checks and Options (cont.)3.2 Optional Installation AccessoriesOptional tools can make the installation of the PT Smart Belt Trainer easier and faster.Flex-Lifter Conveyor Belt LifterDescriptionMedium Flex-Lifter 900 - 1500 mmLarge Flex-Lifter 1200 - 1800 mmXL Flex-Lifter 1800-2400 83Flex-Lifter Conveyor Belt LifterThe Flexco Flex-Lifter makes the job of lifting theconveyor belt easy and safe. Using two Flex-Lifters,the belt can be quickly lifted out of the way to installthe PT Smart . The Flex-Lifter has the highest safelift rating available at 1810 kg. And it’s versatile. Itcan also be used to lift topside or return side belt forsplicing, roller replacement or other maintenancejobs. Available in three sizes: Medium for belt widths900 - 1500mm, Large for belt widths 1200 - 1800mm,and XL for belt widths 1800 - 2400mm.8PT Smart Belt Trainer
Section 4 - Installation Instructions - PT Smart RollerMountingBracketExtendingBracketBelt DirectionSensor AdjusterAssyPivot ShieldSensorRollerAdjusting BoltRoller RetainerSensorArmIdlerBracketPivot AssyPhysically lock out and tag the conveyor at the power sourcebefore you begin cleaner installation.CAUTION: Components may be heavy. Use safety-approved lifting procedures.Tools Needed:- Tape measure- 19mm Spanner- Medium or largeadjustable spannerClearance500mm min- Cutting torch- Come-alongs (2) (680 Kg min.)- Any necessary equipment for movingand lifting heavy components1.Prepare the conveyor site: Identify the point(s) of mistracking, expecting 36-45 M ofdownstream influence. Position the unit 6 M after the start of the mistracking. Identify an opening of at least 500mm if possible to avoidinterference with sensor rollers during installation (Fig. 1). Remove old tracking devices.2. Position mounting brackets. May be mounted to existing idlerbracket mounts OR to outside of structure, if structure width is beltwidth 450mm or less. Be sure belt passes between top and bottommounting holes (Fig 2).Fig. 1StructureBeltBelt must pass betweentop and bottom holesFig. 23. Install mounting brackets. Measure from a fixed location on bothsides to ensure alignment.4. Lift the belt approximately 75mm where the trainer will be installed(Fig. 4).5. Remove existing idler (if there is one in the location). NOTE: If theconveyor has disc idlers, replace one idler before and one idler afterthe location where the trainer will be installed with a standard idler.Lift Belt 75mmBeltFig. 4 9
Section 4 - Installation Instructions - PT Smart 6. Remove Roller by unbolting Roller Retainer (Fig. 6a). Determine orientation of trainer and remove far sideExtending Bracket (Fig. 6b).RemoveRollerRoller RetainerExtendingBracketUnbolt RollerRetainerBelt DirectionFig. 6aFig. 6b7. Attach Extending Bracket to mounting bracket already installed on far side of conveyor (Fig. 7). Fingertighten bolts for future adjustment. Top bolt holes should be even with the normal height of the belt.8. Slide the far end of main frame onto the extending bracket assembled in Step 7 (Fig. 8).MountingBracketecturStruExtendingBracketMain FrameExtendingBracketFig. 7Belt DirectionFig. 89. Lift near end of main frame and attach extending bracket to mounting bracket (Fig. 9a). Ensure main frame iscentred on the Extending Brackets (equal length of extenders showing on both sides) (Fig. 9b).StructureMounting BracketEqual on both sidesExtending BracketFig. 9a10Fig. 9bPT Smart Belt Trainer
Section 4 - Installation Instructions - PT Smart 10. Reinstall roller and re-bolt roller retainer (Fig. 10).Roller RetainerReinstallRoller11. Lower the belt. Ensure belt completely contacts roller.Raise extending brackets one hole if there is not goodcontact (Fig. 9). Tighten all bolts.Roller Retainer bolt &washerBeltRollerINCORRECT - raise rollerBeltRollerCORRECTFig. 11Fig. 1012. Install sensor adjuster assemblies using included bolts. Ensure left and right assemblies are installed on thecorrect sides. Adjust sensor rolls vertically using the adjustment nuts so the belt is centered on the roller.Adjuster ArmSensorRollerTop ViewAdjusterArm Bolts(Roller)SensorRollerltFig. 12C-BoltC-BoltBeAdjustmentNutsA Bolt C BoltBeltB BoltFig. 1319mmSensorRollerBelt Direction19mm13. Adjust sensor rollers so they are 19mm from the belt on each side. Adjust by loosening “A” and “B” bolts(shown in Fig. 12), then turning the “C” bolts (Fig. 13).14. Pivot the frame 13mm to the side it is mistracking. Bring sensor roller in until it touches the belt. Moveopposite sensor roller out to 38mm from the belt (Fig 14).15. Tighten all bolts and proceed to next page for pre-op checklist.MistrackingsideTop ViewBeltPivot frame13mm(Roller)Move Sensor Rollerto touch beltBelt DirectionFig. 14Move opposite Sensor Roller38mm away from belt11
Section 5 - Pre-Operation Checklist and Testing5.1 Pre-Op Checklist Recheck that all fasteners are tightApply all supplied labelsBe sure that all installation materials and tools havebeen removed from the belt and conveyor area5.2 Test Run the Conveyor Run the conveyor for at least 15 minutes and confirm the belt is tracking properly.If belt is still mistracking too far to one side, bring that sensor roller in toward the centre.Make adjustments of 6mm at a time (Fig. 1). Do not pinch the belt between the rollers;rollers overall should be 38mm wider than the belt (Fig. 2).NOTE: If the conveyor has disc idlers, the belt may not get the full downstream tracking effect.MistrackingsideTop ViewBelt(Roller)Move Sensor Roller6mm incrementsBelt DirectionMove opposite Sensor Roller38mm away from beltFig. 1OR19mmeach side(both sensor rollerstouching the belt)Fig. 212IncorrectPT Smart Belt Trainer38mmCorrectCorrect
Section 6 - MaintenanceFlexco belt trainers are designed to operate with minimum maintenance. However, to maintain superiorperformance some service is required. When the trainer is installed a regular maintenance program should be setup. This program will ensure that the trainer operates at optimal efficiency, and problems can be identified andfixed before any damage is done to the belt, the trainer, other conveyor components, or structure.All safety procedures for inspection of equipment (stationary or operating) must be observed. The PT Smart is indirect contact with the moving belt. Only visual observations can be made while the belt is running. Service taskscan be done only with the conveyor stopped and by observing the correct lockout/tagout procedures.6.1 New Installation InspectionAfter the PT Smart has run for 15 minutes a visual inspection should be made to ensure the trainer isperforming properly. Make adjustments as needed.6.2 Routine Visual Inspection (every 2-4 weeks)A visual inspection of the PT Smart can determine: If the belt is tracking as required If the trainer is moving freely If the main frame is free of material and rolling properly If there is damage to the main frame or other components If the sensor rollers are turning freely and without damageIf any of the above conditions exist, a determination should be made on when the conveyor can bestopped for trainer maintenance.6.3 Routine Physical Inspection (every 6-8 weeks)When the conveyor is not in operation and properly locked and tagged out, a physical inspection of thetrainer to perform the following tasks: Clean material buildup off the trainer and components. Closely inspect both sensor rollers for free movement and wear. Replace if needed. Closely inspect main roller for free movement and wear. Replace if needed. Pivot unit to ensure full and easy movement. Closely inspect complete unit for damage. Inspect all fasteners for tightness and wear. Tighten or replace if needed. When maintenance tasks are completed, test run the conveyor to ensure the trainer isperforming properly.13
Section 6 - Maintenance6.4 Roller Replacement InstructionsPhysically lock out and tag the conveyor at the power sourcebefore you begin cleaner installation.CAUTION: Components may be heavy.Use safety-approved lifting procedures.Roller RetainerRemoveRollerUnbolt RollerRetainer1. Remove tension from belt. Use a Flex-Lifter or otherappropriate lifting equipment to lift the belt approx. 75mmoff the trainer.2. Remove roller by unbolting Roller Retainers (Fig. 2).ReinstallRollerRoller RetainerRoller Retainer bolt& washerFig. 23. Install new roller and re-bolt roller retainer (Fig. 3).Confirm roller turns smoothly.BeltRollerFig. 3INCORRECT - raise roller4. Lower the belt. Ensure belt completely contacts roller.Raise brackets if there is not good contact (Fig. 4).Tighten all bolts.BeltRollerFig. 45.CORRECTAdjust sensor rollers so they are 19mm from the belt on each side. Adjust by loosening the “A” and “B” bolts,then turning the “C” bolts (Fig. 5a & b).Top RollerC-BoltFig. 5a14A Bolt C BoltB BoltFig. 5bPT Smart Belt TrainerC-Bolt19mm19mm
Section 6 - Maintenance6.Pivot the frame to the side it is mistracking. Bring sensor roller in until it touches the belt. Move oppositesensor roller out to 38mm from the belt (Fig 6).MistrackingsideTop ViewBeltPivot frame13mm(Roller)Move Sensor Rollerto touch belt7.Belt DirectionFig. 14Move opposite Sensor Roller38mm away from beltTighten all bolts and refer to pre-op checklist (page 10) before running the conveyor.If belt is still mistracking, refer to Section 5.2 on page 10.15
Section 6 - Maintenance (cont.)6.5 Sensor Roller Replacement Instructions1.Loosen “A” and “B” bolts, turn “C” bolts to move sensor rollers away from the belt (Fig. 1).2.Loosen nut at base of sensor roller and remove from adjuster arm (Fig. 2).SensorRollerFig. 1Adjuster ArmBeltBeltSensorRoller“A” Bolt“C” Bolt“B” BoltLoosen nutFig. 23.Install new sensor roller, reinstall nut, and adjust the sensor roll vertically using the adjustment nuts so the beltaligns with the center of the roller.4.Adjust sensor rollers so they are 19mm from the belt on each side. Adjust by turning the “C” bolts (Fig. 4).Top ViewBelt(Roller)SensorRollerSensorRoller“C” BoltFig. 45.“C” Bolt19mm19mmPivot the frame 12mm to the side it is mistracking. Bring sensor roller in until it touches the belt.Move opposite sensor roller out to 38mm from the belt (Fig 5).MistrackingsideTop ViewBeltPivot frame13mm(Roller)Move Sensor Rollerto touch belt6.16Belt DirectionFig. 14Move opposite Sensor Roller38mm away from beltTighten all bolts and refer to pre-op checklist (page 10) before running the conveyor. If belt is stillmistracking, refer to Section 5.2 on page 10.PT Smart Belt Trainer
Section 6 - Maintenance (cont.)6.6 Maintenance LogConveyor Name/No.Date:Work done by:Service Quote #:Activity:Date:Work done by:Service Quote #:Activity:Date:Work done by:Service Quote #:Activity:Date:Work done by:Service Quote #:Activity:Date:Work done by:Service Quote #:Activity:Date:Work done by:Service Quote #:Activity:Date:Work done by:Service Quote #:Activity:Date:Work done by:Service Quote #:Activity:17
Section 6 - Maintenance6.7 Belt Trainer Maintenance ChecklistSite:Inspected by:PT Smart:Date:Serial Number:Beltline Information:Beltline Number:Belt Width: 450mm 600mmBelt Condition: 750mm 900mm 1050mm 1200mm 1350mm 1500mm 1800mmBelt Speed: Belt Thickness:Idler Roller Life::Date Roller Installed: Date Roller Inspected: Estimated Roller Life:Roller Condition:Sensor Roller Life (Right Side):Date Roller Installed: Date Roller Inspected: Estimated Roller Life:Roller Condition:Sensor Roller Life (Left Side):Date Roller Installed: Date Roller Inspected: Estimated Roller Life:Roller Condition:PT Smart Frame Condition: Good Bent RustedOverall PT Smart Performance: ( Rate the following 1 - 5, 1 very poor - 5 very good )Appearance: Comments:Location: Comments:Maintenance: Comments:Performance: Comments:Other Comments:18PT Smart Belt Trainer
Section 7 - TroubleshootingProblemPossible CausePossible SolutionsUnit installed in wrong locationRelocate unit 6M after start of problem area of beltIncorrect tension on unitIncrease height of unit to provide 13-25mm lift on beltUnit mis-adjustedAdjust sensor roller to provide more activation of unitBuildup on main rollerClean unitUnit mis-adjustedAdjust sensor roll to provide more activation of unitDisc idlers on conveyorReplace one disc idler before and one after the trainer witha standard idlerBelt moving over too muchUnit mis-adjustedAdjust sensor roll to provide less activation of unitBelt is jumping sensor rollUnit located too low in structureIncrease height of unit to provide 13-25mm lift on beltBelt contacting both sidesensorsUnit mis-adjustedAdjust sensors to provide the 25mm clearance so bothsensors do not touch beltUnit does not pivotBuildup of materialClean unitBuildup on main rollerClean unitMain roller bearing badReplace main rollerLittle to no effect on troublearea of beltBelt not correcting enoughMain roller not turning19
Section 8 - Specs and CAD Drawings8.1 Specs and GuidelinesAB495mmPT Smart StandardDBelt WidthC20PT Smart Belt mm1925-2225mm250-575 mm400-725 mm550-875 mm700-1025 mm825-1175 mm1000-1325 mm1150-1475 mm1300-1625 mm1600-1925 mm250 mm0-250 mm
0600750900105012001350150018001500 mm60"PTS-RR21600 mm24"PTS-RR27750PTS-RR33mm30"PTS-RR39900 mm36"PTS-RR451050mmPTS-RR5142"PTS-RR571200 21273339455157637552523-3527"725-1025mm67529-4133" 825875-1175mm35-4797541-5339" 1025-1325 mm112547-5945" 12751175-1475mm53-65142559-7151" 1325-1625 mm157565-7757" 19051475-1775mm76-8863"1325-1925 mm65-77"1700 032mm26"in650 mm32"in.DIM "C"mmDim “C"575-8752629-41"800 mm725-10253235-47"875-1175 950 mm381025-13254441-53"1100 mm1175-14755047-59"1250 mm1325-1625561475-17756253-65"1400 mm1325-19256859-71"1550 mm1935-224580REPLACEMENTDim “A"Belt WidthDim “B"BELT WIDTHROLLERSDIM "A"DIM "B"ITEM CODEItem Codemmin.mmin.mmin.ORDERING ITEMNUMBERin 21" mm575-875inmm7766418" CODE525mm23-35"inmm 450 mmBBAB(IDLER ROLL NOT SHOWN FOR CLARITY)C336.613 1/4"833 1/4"486.719.16SECTION B-B541.121 1/4"252.710"127 MOD-DIAM 5"Section 8 - Specs and CAD Drawings8.2 CAD Drawing - PT Smart Standard21
Section 9 - Replacement Parts9.1 Replacement Parts List5910a7a107861a1a115244a33aReplacement RollersReplacement PartsRef11a233a44a5677a89DescriptionPTS STD Sensor Roller (2")PTS HD Sensor Roller (3")PTS Sensor Arm Kit (incl. 1 ea.)PTS RH Sensor Adjuster AssyPTS LH Sensor Adjuster AssyPTS Idler Bracket Kit (incl. L & R)PTS HD Idler Bracket Kit (incl. L & R)PTS Pivot ShieldPTS Pivot Assy (Axle and housing)PTS Mounting Bracket KitPTS Mounting Bracket Kit U/GPTS Extending Bracket Kit (incl. L & R)Roller Retainer 9677697776987769977700777017770273163*Hardware includedLead time: 1 working dayLegacy Replacement Sensor Rollers - For PT Smart UnitsShipped Prior to Feb. 24, 2021RefDescriptionL1L1aPTS STD Sensor Roller (2")PTS HD Sensor Roller (3")22PT Smart Belt 0DescriptionPTS Repl Roller 525mmPTS Repl Roller 675mmPTS Repl Roller 825mmPTS Repl Roller 975mmPTS Repl Roller 1125mmPTS Repl Roller 1275mmPTS Repl Roller 1425mmPTS Repl Roller 1575mmPTS Repl Roller 1875mmLead time: 1 working 807768177682776837768477685776867768777689
Section 10 - Other Flexco Conveyor ProductsFlexco provides many conveyor products that help your conveyors to run more efficiently and safely.These components solve typical conveyor problems and improve productivity. Here is a quick overviewon just a few of them:EZP1 PrecleanerFlex-Lok Skirt Clamps Patented ConShear blade renews its cleaning edgeas it wears Visual Tension Check for optimal blade tensioningand simple retensioning Quick and easy one-pin blade replacement Material Path Option for optimal cleaning andreduced maintenance Eliminates transfer zone spillage Interlocking design for easy installation and oneperson maintenance Unique wedge pin holds rubber securely in placeand is easy to adjust Available in various models and in stainless steelMMP PrecleanerPT Max Belt Trainer Extra cleaning power for tough applications 250mm TuffShear blade provides increased blade-to-belttension A 3-piece telescoping pole is lighter to lift and easierto install Dual Quick-Mount Tensioners ensure optimal tensionthroughout the life of the blade MHS Secondary Cleaner withService Advantage CartridgeBelt Ploughs An easy slide-out cartridge for service Cartridge design to speed up blade-change maintenance Patented PowerFlex Cushions for superior cleaningperformance Compatible with Flexco mechanical splices Patented “pivot & tilt” design for superior training actionDual sensor rollers on each side to minimise belt damagePivot point guaranteed not to freeze upAvailable for topside and return side beltsA belt cleaner for the tail pulleyExclusive blade design quickly spirals debris off the beltEconomical and easy to serviceAvailable in vee or diagonal models23
236 Albert Amon Rd Meadowdale Ext. 7 Germiston 1614 South AfricaTel: 27-11-608-4180 Fax: 27-11-454-5821 E-mail: flexco@flexco.co.zaVisit www.flexco.com for other Flexco locations and products. 2021 Flexible Steel Lacing Company. 03/25/21. For reorder: X4784
2.2 Operating Conveyors There are two routine tasks that must be performed while the conveyor is running: Inspection of the sealing performance Dynamic troubleshooting Every belt conveyor is an in-running nip hazard. Never touch or prod an operating trainer. Conveyor hazards can cause instantaneous amputation and entrapment.