Transcription
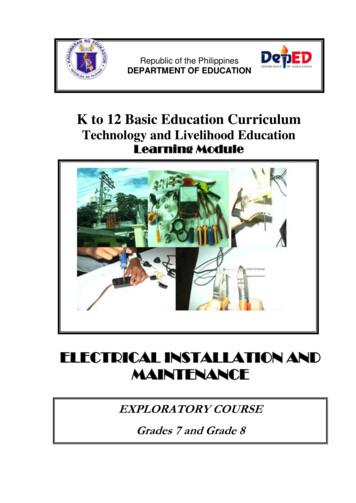
Republic of the PhilippinesDEPARTMENT OF EDUCATIONK to 12 Basic Education CurriculumTechnology and Livelihood EducationLearning ModuleELECTRICAL INSTALLATION ANDMAINTENANCEEXPLORATORY COURSEGrades 7 and Grade 8
TABLE OF CONTENTSWhat Is This Module About ? . 2How Do You Use This Module . 4LESSON 1 – Prepare Electrical Supplies, Materials and Tools .5 - 45LESSON 2 – Perform Mensuration and Calculation . 46 - 74LESSON 3 – Interpret Technical Drawing and Plans . .75 - 93LESSON 4 – Maintain Tools and Equipment . .94 - 127LESSON 5 – Practice Occupational Safety and Health . 128 - 158ANSWER KEYS . 159 - 169Acknowledgment. 170ELECTRICAL INSTALLATION MAINTENANCEK to 12 – Technology and Livelihood Education1
What Is This Module About?Welcome to the world of Electrical Installation and Maintenance!This Module is an exploratory course which leads you to Electrical Installationand Maintenance National Certificate Level II ( NC II)1. It covers5commoncompetencies that a Grade 7 / Grade 8 Technology and Livelihood Education (TLE) studentlike you ought to possess, namely:1)2)3)4)5)Prepare electrical supplies, materials, and tools;Perform mensuration and calculations;Interpret technical drawings and plans;Maintain tools and equipment; andPractice occupational health and safetyThese 5 common competencies are covered separately in 5 Lessons. As shownbelow, each Lesson is directed to the attainment of one or two learning outcomes:Lesson 1 – Prepare electrical supplies, materials, and toolsLO1. Identify electrical supplies, materials, and tools needed in electrical/wiringinstallationLO 2. Request appropriate supplies, materials, and tools for a specific jobLO 3. Receive and inspect electrical supplies, materials and toolsLesson 2 – Perform Mensuration and CalculationsLO 1. Select measuring tools and instrumentsLO 2. Carry out Measurements and CalculationsLesson 3 – Interpret Technical Drawing and PlansLO1. Analyze signs, symbols and dataLO2. Interpret technical drawings and plansLesson 4 – Maintain Tools and EquipmentLO 1. Check condition of tools and equipmentLO 2 Perform basic preventive maintenanceLO 3 Store tools and equipment1NATIONALCERTIFICATE (NC) is a certification issued to individuals who achieved all the required units of competency for a nationalqualification as defined under the Training Regulations. NCs are aligned to specific levels within the PTQF. (TESDA Board ResolutionNo. 2004-13, Training Regulations Framework)NATIONAL CERTIFICATE LEVEL refers to the four (4) qualification levels defined in the Philippine TVET Qualifications Framework(PTQF) where the worker with:a. NC I performs a routine and predictable tasks; has little judgment; and, works under supervision;b. NC II performs prescribed range of functions involving known routines and procedures; has limited choice and complexity offunctions, and has little accountability;ELECTRICAL INSTALLATION MAINTENANCEK to 12 – Technology and Livelihood Education2
Lesson 5 – Practice Occupational Health and SafetyLO 1. Identify hazards and risksLO 2 Evaluate risks and hazardsLO 3 Control hazards and risksYour success in this exploratory course on Electrical Installation and Maintenanceis shown in your ability to perform the performance standards found in each learningoutcome.ELECTRICAL INSTALLATION MAINTENANCEK to 12 – Technology and Livelihood Education3
How Do You Use This Module?This Module has 5 Lessons. Each Lesson has the following parts. Learning OutcomesPerformance StandardsMaterials/ResourcesDefinition of TermsWhat Do You Already Know?What Do You Need to Know?How Much Have You Learned?How Do You Apply What You Learned?How Well Did You Perform?How Do You Extend Your Learning?ReferencesTo get the most from this Module, you need to do the following:1. Begin by reading and understanding the Learning Outcome/s and PerformanceStandards. These tell you what you should know and be able to do at the end of thisModule.2. Find out what you already know by taking the Pretest then check your answeragainst the Answer Key. If you get 99 to 100% of the items correctly, you mayproceed to the next Lesson. This means that you need not go through the Lessonbecause you already know what it is about. If you failed to get 99 to 100% correctly,go through the Lesson again and review especially those items which you failed toget.3. Do the required Learning Activities. They beginwith one or more InformationSheets. An Information Sheet contains important notes or basic information that youneed to know.After reading the Information Sheet, test yourself on how much you learnedby means of the Self-check. Refer to the Answer Key for correction. Do not hesitateto go back to the Information Sheet when you do not get all test items correctly.This will ensure your mastery of basic information.4. Demonstrate what you learned by doing what the Activity / Operation /Job Sheetdirects you to do.5. You must be able to apply what you have learned in another activity or in real lifesituation.6. Accomplish the Scoring Rubrics for you to know how well you performed.Each Lesson also provides you with references and definition of key terms for your guide.They can be of great help. Use them fully.If you have questions, ask your teacher for assistance.ELECTRICAL INSTALLATION MAINTENANCEK to 12 – Technology and Livelihood Education4
LESSON 1Prepare Electrical Supplies, Materials,and ToolsLEARNING OUTCOMES:At the end of this Lesson, you are expected todo the following:LO 1. identify electrical supplies, materials, and tools;LO 2. request appropriate supplies, materials, and tools for aspecific job; andLO 3. receive and inspect electrical supplies, materials andtools.ELECTRICAL INSTALLATION MAINTENANCEK to 12 – Technology and Livelihood Education5
Definition of TermsAmpere - a unit of measure of electric currentCircuit - the path of electric current from the source to the components and goesback to the sourceKilowatt - a unit of power which is equivalent to 1000wConductor - a wire or a cord which provides path for current flowResistance - the quality of electric current measured in ohms that resist the flow ofcurrentHot wire - a wire through which current flowsInsulator – material used to cover electric wires which may be made from plastic,rubber, or asbestos.Tools - are implements used to modify raw materials for human useCorrugated plastic conduit (CPC) - commonly known as flexible non-metallicconduit or the “moldflex”Metallic Conduits- metal raceways that was classified into four; rigid steel conduit(RSC), intermediate metallic conduit or tubing (IMC or IMT), electrical metallicconduit or tubing (EMC or EMT) and the flexible metallic conduit (FMC)Non-metallic conduits- plastic conduits or raceways designed to be a channel ofwire that are classified as; rigid non-metallic conduit or the PVC, the flexible nonmetallic or CPC, and the surface plastic moldingConnectors and Adapters - accessories that are used to connect from boxes toconduits or raceways to the other boxes in the electrical systemELECTRICAL INSTALLATION MAINTENANCEK to 12 – Technology and Livelihood Education6
LEARNING OUTCOME 1Prepare electrical supplies, materials, and toolsPERFORMANCE STANDARDS Tools and materials are identified as per job requirement.Tools are classified according to its function as per job requirement.Materials are classified according to its uses on a specific project.Tools and materials are selected.Materials/ Resources1. Utility box2. Connectors8. Electrical Wires9. Corrugated Plastic Conduit (CPC)3.4.5.6.7.10. Receptacles11. Fuse Panel/ Safety switch12. Square boxes13. PVC conduit14. SwitchesMale PlugFuseJunction BoxConduitsCircuit Breaker15. Switch Plates16. Cut-out boxesTOOLS:1.2.3.4.5.6.7.8.Long Nose PliersStubby Screw DriverWire StripperPortable Electric DrillPhilips Screw DriverCombination PliersHammerElectrician’s Knife9. Hacksaw10. Diagonal cutting pliers11. Half-round file12. Round file13. Spirit levelELECTRICAL INSTALLATION MAINTENANCEK to 12 – Technology and Livelihood Education7
What Do You Already Know?Let us determine how much you already know about preparing electrical supplies,materials and tools. Take this test.Pretest LO 1Directions: Read the statement carefully and identify what is being described or defined.Choose your answer from the words inside the box.Long Nose PliersCircuit BreakerHammerElectrician’s KnifeUtility boxPortable Electric DrillPhilips Screw DriverConnectorsWire StripperMale PlugFuse Combination PliersJunction BoxStubby Screw DriverConduits1. This is used for griping, holding, cutting electrical wires and cablesand even small nails. Usually used by linemen in doing heavy tasks.2. Used for cutting and holding fine wires. This can reach tight space orsmall opening where other pliers cannot reach and also used in making terminal loops ofcopper wires.3. This has a cross tip resembling a positive ( ) sign. It is used to drivescrews with cross slot heads.4. This is tools used in driving or pounding and pulling out nails.5. A tool used for removing insulation of medium sized wires rangingfrom gauge #10 to gauge #16.6. A small drilling machine with a chuck capacity of ¼‖ to 3/8‖. It is usedin making holes on metal sheets and concrete walls.7. Comes in either Standard or Philips screw driver with short shank orblade and shorted handle used to turn screws in tight space where standard screw drivercannot be used.ELECTRICAL INSTALLATION MAINTENANCEK to 12 – Technology and Livelihood Education8
8. Used by linemen to remove insulation of wire and cables in low andhigh voltage transmission lines.9. Is a device inserted to a convenience outlet to conduct electriccurrent. A flat cord is attached to it on one end and the other end is connected to acurrent consuming instrument or appliance.10. This is a circuit protective device that automatically blows and cutthe current when an over load or short circuit happens.11. This is a rectangular shaped metallic or plastic (PVC) material inwhich flush type convenience outlet and switch are attached.12. Are electrical materials used as the passage of wires for protectionand Insulation.13. Are used to attach metallic or non-metallic conduit to the junctionor utility boxes.14. This is a protective device used to automatically cut off the currentwhen trouble in the circuit such as short circuit or over load occurs.15. Is an octagonal shaped electrical material where the connections orjoints of wires are being done. It is also where the flush type lamp holder is attached.Now check your answers using the Answer Key. If you got 90100% of the items correctly, proceed to the next Learning Outcome. Ifnot, do the next activity/ies again to gain knowledge and skillsrequired for mastery.ELECTRICAL INSTALLATION MAINTENANCEK to 12 – Technology and Livelihood Education9
What Do You Need To Know?Read the Information Sheet 1.1 very well then find out how much you canremember and how much you learned by doing Self-check .Information Sheet 1.1Electrical Tools and EquipmentElectrical task can be accomplished systematically to save time, effort, andresources. Most of the work cannot be done using bare hands. To do the task, electricaltools or equipment are needed to perform the job. This lesson will discuss the function/use ofeach tool or equipment used in electrical wiring installations.The following are common electrical tools and equipment needed in the installationof electrical wiring.I.SCREW DRIVERS. Thesetools are made of steelhardened and tempered at thetip used to loosen or tightenscrews with slotted heads.They come in various sizesand shapes.A. Standard/Flat Screw Driver.The blade tip is wedge-shapedand resembles a negative (-)sign. This is used to drivescrews with a single slot head.ELECTRICAL INSTALLATION MAINTENANCEK to 12 – Technology and Livelihood Education10
B. Philips Screw Driver. Thishas a cross tip resembling apositive ( ) sign. This is usedto drive screws with cross slotheads.C. Stubby Screw Driver. Itcomes in either Standard orPhilips screw driver with shortshank or blade and a shortedhandle used to turn screws intight space where standardscrew driver cannot be used.D. Allen Screw Driver/Wrench.This could be in the shape of ascrew driver or a wrench. Itsfunction is to drive screw withhexagonal slot head.II.HAMMERS. These are toolsused in driving or poundingand pulling out nails. They aremade of hard steel, wood,plastic or rubber. The followingare types of hammer:A. Claw hammerB. Mallet(rubber head)C. Ballpeen hammerABELECTRICAL INSTALLATION MAINTENANCEK to 12 – Technology and Livelihood EducationC11
III.PLIERS. These made frommetal with insulators in thehandle and are used forcutting, twisting, bending,holding, and gripping wires andcables.A. Combination Pliers (Lineman’sPliers). This is used forgripping, holding, and cuttingelectrical wires and cables andeven small nails. They areusually used by linemen indoing heavy tasks.B. Side Cutting Pliers. This typeof pliers is used for cutting fine,medium and big wires andcables.C. Long Nose Pliers. This is usedfor cutting and holding finewires. This can reach tightspace or small opening whereother pliers cannot reach andalso used in making terminalloops of copper wires.ELECTRICAL INSTALLATION MAINTENANCEK to 12 – Technology and Livelihood Education12
IV.Wire Stripper- A tool used forremoving insulation of mediumsized wires ranging fromgauge #10 to gauge #16.V.Electrician’s Knife. This is usedby linemen to removeinsulation of wire and cables inlow and high voltagetransmission lines.VI.Portable Electric drill. A smalldrilling machine with a chuckcapacity of ¼‖ to 3/8‖. It isused in making holes on metalsheets and concrete walls.Portable electric drillELECTRICAL INSTALLATION MAINTENANCEK to 12 – Technology and Livelihood Education13
VII.Hacksaw. This tool is used tocut metal conduit and armoredcable.HacksawElectrical Supplies and MaterialsElectrical materials are developed and constructed for a special purpose such as to:1.2.3.4.control the flow of current in an electrical circuit;carry electrical current from the source to the load or current consuming apparatus;hold and secure wires to its fixtures inside and outside houses and buildings; andprotect the houses, buildings, appliances’ and instruments from any destruction anddamage.The following are the most commonly used electrical materials.MATERIALS AND DESCRIPTIONConvenience outlet- a device that acts asa convenient source of electrical energy forcurrent consuming appliances. It is wherethe male plug of an appliance is insertedand usually fastened on the wall orconnected in an extension cord. It maybesingle, duplex, triplex or multiplex and couldbe surface type or flush type.PICTURESSurface type (duplex)Flush type (duplex)Male plug- a device inserted to aconvenience outlet to conduct electriccurrent. A flat cord is attached to it on oneend and the other end is connected to acurrent consuming instrument or appliance. plugsELECTRICAL INSTALLATION MAINTENANCEK to 12 – Technology and Livelihood EducationMale14
Lamp holders- devices that hold andprotect the lamp and are also called as―Lamp Sockets/Receptacles‖. These comein many designs and sizes. They areclassified as flush, hanging (weatherproof/chain) and surface types.Flush typeSurface typeSwitch - a device that connects anddisconnects the flow of electric current in acircuit. There are many shapes, designs,and types and they are classified ashanging, flush, and surface types.Hanging (chain)Hanging (weather)Surface typeFlush typeFuse - a circuit protective device thatautomatically blows and cut the currentwhen and over load or short circuithappens.ELECTRICAL INSTALLATION MAINTENANCEK to 12 – Technology and Livelihood EducationKnife bladeHanging typeCartridgePlug type15
Circuit Breaker - a protective device usedto automatically blows and cuts the currentwhen trouble in the circuit such as shortcircuit or overload occurs.Circuit breakerJunction Box - an octagonal shapedelectrical material where the connections orjoints of wires are being done. It is alsowhere the flush type lamp holder isattached. This could be made of metal orplastic (PVC) Polyvinylchloride.PlasticMetalUtility Box - a rectangular shaped metallicor plastic (PVC) material in which flush typeconvenience outlet and switch are attached.METALPLASTICFlat Cord- Is a duplex stranded wire usedfor temporary wiring installation andcommonly used in extension cordassembly. It comes in a roll of 150 metersand with sizes of gauge # 18 and gauge #16 awg (American wire gauge).Flat cordELECTRICAL INSTALLATION MAINTENANCEK to 12 – Technology and Livelihood Education16
Electrical Wire/Conductor- electricalmaterial that could be:a. Stranded wire which is made of multiplestrands joined together to make a singlewire.a. Stranded wireb. Solid wire is made of a single strand ofcopper or aluminum wire. These are usedin wiring installation inside and outside thebuildings.b. Solid wireMetallic conduitConduits/Pipes- electrical materials usedas the passage of wires for protection andinsulation. These could be rigid metallic,flexible metallic conduit (FMC), rigid nonmetallic (PVC), and flexible non-metallic orcorrugated plastic conduit (CPC)Flexible Non-metallic conduit or corrugatedplastic conduit (CPC)Rigid Non-metallic conduit (PVC)Clamps- electrical materials used to holdand anchor electrical conduits in its properposition.Metal clampConnectors- used to attach metallic ornon-metallic conduit to the junction or utilityboxes.ELECTRICAL INSTALLATION MAINTENANCEK to 12 – Technology and Livelihood EducationMetal connectorPlastic clampFlexible nonmetallic connector17
COMMON WIRE SPLICES AND JOINTSIntroductionAs a student in Electrical Installation and Maintenance you should acquire theimportant knowledge and skills in wire splices and joints and should be familiar with theactual application of every splice and joint. This will serve as your tool in performing actualwiring installation. Of course, another factor is the knowledge in interpreting and analyzingthe wiring diagram especially if the circuit is complicated.The following are the Common Electrical Wire Splices and Joints.Rat Tail or Pig Tail. This kind of joint iscommonly used to join two or moreconductors inside the junction box. It issuitable for service where there is nomechanical stress when wires are to beconnected in an outlet box, switch, orconduit fittingY-splice. This method of wrapping isgenerally used on small cables becausethe strands are flexible and all can bewrapped in one operation.Knotted tap. This is used where the tap Plain tap joint. This is used where thetap wire is under considerable tensilewire is under heavy tensile stress.stress circuit.Aerial tap. This is used as a temporary tapELECTRICAL INSTALLATION MAINTENANCEK to 12 – Technology and Livelihood EducationDuplex cross joint. This is a two-tapwire turned simultaneously and is used18
usually done in constructions sites. The where the two tap wire is under heavyeasy twist will facilitate tap wire movement tensile stress.Western Union Short-tie Splice. This isthe most widely used splice or joint ininterior wiring installation to extend the Western Union Long Tie. This is usedextensively for outside wiring to extendlength of wire from one point to another.the length of wire from one end toanother.Wrapped Tap or Tee Joint. This isCross joint. The same application is doneused on large solid conductors where itas in plain tap and the only difference isis difficult to wrap the heavy tap wirethat this tap is a combination of two plainaround the main wire.taps place side by side with each other.EXTENSION CORDAn extension cord is a span of flexible electrical power cable with a plug on one endand multiple sockets on the other end. It comes in several varieties to suit the needs of theuser. One of the most important considerations is the power handling capacity to make itsafe and functional.Electrical gadgets are product of modern technology to make our life better. Thenumber of electrical gadgets available at home and in offices may exceed the existingconvenience outlet installed in every room. The best remedy to address the insufficiency ofavailable outlet is to use an extension cord especially if the electrical gadgets need tooperate at the same time.REMINDERBe careful in buying an extension cord. You have to look for the Department of Tradeand Industry (DTI) markings. The Product Standard (PS) or Import Commodity Clearance(ICC) markings on it signify that the product passed the DTI standard for safety and quality.ELECTRICAL INSTALLATION MAINTENANCEK to 12 – Technology and Livelihood Education19
Sample pictures of extension cords using different materialsHow Much Have You Learned?Self-Check 1.1Direction. Identify each of the following tools/materialsRefer to the Answer Key. What is your score?ELECTRICAL INSTALLATION MAINTENANCEK to 12 – Technology and Livelihood Education20
How Do You Apply What You Have Learned?Show that you learned something by doing this activityOperation Sheet 1.1SKINNING OF WIRE USING DIFFERENTTOOLS AND EQUIPMENTDIRECTION. Given are sets of tasks and their corresponding pictures, practice those usingappropriate tools and materials. Your performance will be judged using the following criteria:PERFORMANCE RUBRICS:CRITERIAAccuracy1234WorkmanshipProper handling oftoolsSpeedLegend:1- Pooroooo2- Fair3- Good4. od86-922Fair79-851Poor78 and belowAccuracy- the ability to follow the procedures/directions with precision.Workmanship- the art, skill and finality of work.Proper handling of tools- the ability to apply proper handling of tools for a giventask.Speed- efficiency of work.ELECTRICAL INSTALLATION MAINTENANCEK to 12 – Technology and Livelihood Education21
TOOLS:1.2.3.4.5.Combination PlierSide cutting plierLong nose plierWire stripperElectrician’s knifeMATERIALS:Solid and stranded copper wires of different sizes; #14, #12, #10TasksPictures of the Tasks1. Skin a wire using an electrician’sknife, about 1 to 1 ½ inches long.2. Skin a wire using combination andside cutting pliers about 1 ½ inches long.Make sure that there will be no knick (deep cut across the wire) on yourskinned wires.3. Remove insulators using wire stripperabout 1 to 1 ½ inches longOperation Sheet 1.2AA CONNECTING SKINNED WIRES TO WIRING MATERIALSOBJECTIVE: To be able to properly connect skinned wires to bulb receptacles,convenience outlets, switches, or any other wiring materials.TOOLS1. Combination pliers2. Side cutting pliersELECTRICAL INSTALLATION MAINTENANCEK to 12 – Technology and Livelihood Education22
3.4.5.6.7.Long nose pliersWire stripperElectrician’s knifePhillips screw driversFlat screw driversMATERIALS: Electrical wires used in Activity 1.1PROCEDURE:Follow procedure on the table below1. Make terminal loops using long nosepliers from your skinned wires ofabout 1 to 1 ½ inches long.2. Connect the skinned wire to screwterminals of the bulb receptacle.*Be sure that the wire loop is to beconnected or attached to theterminal screw in clockwisedirection.3. Insert the loop to the screw andtighten it to the convenience outlet.*Be sure that the wire loop is to beconnected or attached to theterminal screw in clockwisedirection.ELECTRICAL INSTALLATION MAINTENANCEK to 12 – Technology and Livelihood Education23
4. Insert the loop to the screw of theswitch and tighten it.*Be sure that the wire loop is to beconnected or attached to theterminal screw in clockwisedirection.5. Insert the loop to the screw of thefuse terminal and tighten it.*Be sure that the wire loop is to beconnected or attached to theterminal screw in clockwisedirection.Operation Sheet 1.2BSPLICING OF WIRESDIRECTIONS: Below are pictures of common wire splices and joints used in electricalwiring installations. Practice doing the task by following the steps given. Your performancewill be judged using the rubric:Steps in splicing a rat tail jointStepsFigures1. Strip the wire insulator at theends of the conductor to bejoined at about 50 mm. Cleanboth wires to be joined.ELECTRICAL INSTALLATION MAINTENANCEK to 12 – Technology and Livelihood Education24
2. Place the two ends of barewire in crossed position.3. Then,twistthebareconductors about five to seventimes.Steps in splicing western union long- tie jointStepsFigures1. Strip the wire ends for about75 mm.2. Place the wires in crossedposition about mid halfwayfrom the insulation.3. Make four to six long twists ofwires.ELECTRICAL INSTALLATION MAINTENANCEK to 12 – Technology and Livelihood Education25
4. Wrap each side of the wire forabout four to five turns asshown in figure 4.Steps in splicing aerial tap jointSteps Strip the tap wire end about 75mm. and the main wire endabout 25 mm. Place the wires in crossedposition intersecting about 5mm from the insulation of thetap wire and the main wire. Bend the tap wire over themain wire making a long twist. Turn the tap wire around themain wire making four to fiveturns.ELECTRICAL INSTALLATION MAINTENANCEK to 12 – Technology and Livelihood EducationFigures26
How Much Have You Learned?Self-Check 1.2A. Direction: Inside each piece of puzzle are jumbled letters. Arrange these letters toform the correct word on types of joints and splices/wire connections.1.ATAAA CAL INSTALLATION MAINTENANCEK to 12 – Technology and Livelihood Education27
How Do You Apply What You Have Learned?Show that you learned something by doing this activity.Operation Sheet 1.3AINTRODUCTIONUnderwriter’s knot is one of the skills needed in making an extension cord. It isneither a joint nor a splice but a knot that is made in an extension cord. Its purpose is torelieve the strain on small wires of the cord and binding screws of convenience outlets andmale plug.For you to make a quality and safe output you have to strictly follow the givenprocedure in making an underwriter’s knot. Below is the procedure.You will be rated by the use of this performance rubics.PERFORMANCE RUBRICS:CRITERIAAccuracyWorkmanshipProper handling oftoolsSpeedLegend:1- poor 2- fairSCALE4321123- good4. 3-10086-9279-8578 and belowMaterials: Flat cord no.18 AWGTools: Side cutting long nose combination pliers Wire stripper/electrician’s knifeELECTRICAL INSTALLATION MAINTENANCEK to 12 – Technology and Livelihood Education28
Procedure and picture:1. Split the end of the flat cord about 8centimeters long.1. Bend the left strand of the cord andplace it at the back of the main cordfollowing the arrow.2. Bend the right strand of cord. Placeit at the back of left strand and overthe main cord.3. Insert the right strand cord insidethe loop made by left strand cord.4. Pull both strands of the flat cord totighten the knot.ELECTRICAL INSTALLATION MAINTENANCEK to 12 – Technology and Livelihood Education29
Operation Sheet 1.3BPROJECT PLAN IN MAKING AN EXTENSION CORDINTRODUCTIONYou might be wondering why there are several projects which are not completelydone. Well, there are several reasons why this happens. It might be out of budget or notproperly planned. So, this Lesson will help you achieve the desired quality project.A project plan is necessary before undertaking any project because it serves asyour guide in accomplishing an activity. It will give you an idea what needs to be done, howmuch to spend and what procedures to undertake.A well prepared project plan saves time and cost of materials. Below is a sampleproject plan of an extension cord. This format can also be used in preparing a plan for otherprojects in the future.Project Plan - (Making an extension cord)Name of Student: Year & Section:I. Name of Project: Extension Cord Assembly Date Started:Date Finished:II. Objective:a. Demonstrate how to make an extension cord.b. Observe safety measures while doing the project.III. Sketch/Drawing:ELECTRICAL INSTALLATION MAINTENANCEK to 12 – Technology and Livelihood Education30
IV. Materials Needed:Qty.UnitDescriptionUnit CostTotal Cost1pc.Convenience Outlet (surface type Php 40.00duplex)Php 40.003metersFlat Cord # 18 AWGPhp 12.00Php 36.001pc.Male PlugPhp 15.00Php 15.002Pcs.Eyelet Wire ConnectorsPhpPhp1.503.00TOTAL COST OF MATERIALSPhp 94.00 cost of labor (approximately 20%-30% of cost of materials)Php 28.00(30%)SELLING COSTPHP 122.00Sample Pictures of Materials NeededFlat CordMale Plug Eyelet wire connectorsConvenience OutletV. Tools and Equipment Needed:1.2.3.4.5.6.Standard/Flat Screw DriverPhilips Screw DriverLong Nose PliersSide Cutting PliersElectrician’s knife/ Pocket knifeContinuity Tester or Multi-testerVI. Procedure:1.2.3.4.Prepare the plan.Gather all necessary materials, tools and equipment needed.Insert cord into the male plug, split the cord wires about 8 centimeters long.Remove insulation of both wires 1 centimeter long with a pocket knife as ifsharpening a pencil. Be careful not to cut any strand.5. Scrape bare wire with the back of the knife until shiny. Twist the wire stands.6. Tie the underwriter’s knot.ELECTRICAL INSTALLATION MAINTENANCEK to 12 – Technology and Livelihood Education31
7. Make a loop on terminal wires and connect the wires to the screw of the maleplug. The loop should go with the thread clockwise direction.8. Split the cord wires at the other end about 4 centimeters long, then followprocedure no. 4.9. Connect the wires to the connectors.10. Open the convenience outlet
ELECTRICAL INSTALLATION MAINTENANCE 2 K to 12 – Technology and Livelihood Education Welcome to the world of Electrical Installation and Maintenance! This Module is an exploratory course which leads you to Electrical Installation and Maintenance 1National Certificate Level II ( NC II) . It covers 5 common competen