Transcription
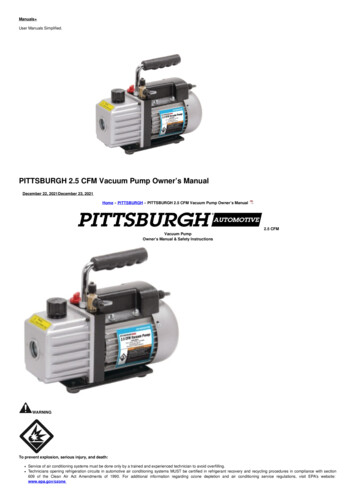
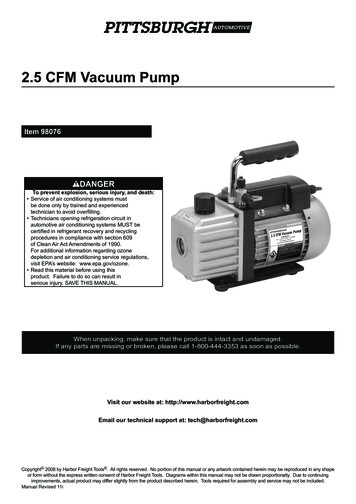
2.5 CFM Vacuum PumpItem 98076DangerTo prevent explosion, serious injury, and death: Service of air conditioning systems mustbe done only by trained and experiencedtechnician to avoid overfilling. Technicians opening refrigeration circuit inautomotive air conditioning systems MUST becertified in refrigerant recovery and recyclingprocedures in compliance with section 609of Clean Air Act Amendments of 1990.For additional information regarding ozonedepletion and air conditioning service regulations,visit EPA’s website: www.epa.gov/ozone. Read this material before using thisproduct. Failure to do so can result inserious injury. SAVE THIS MANUAL.When unpacking, make sure that the product is intact and undamaged.If any parts are missing or broken, please call 1-800-444-3353 as soon as possible.Visit our website at: http://www.harborfreight.comEmail our technical support at: tech@harborfreight.comCopyright 2008 by Harbor Freight Tools . All rights reserved. No portion of this manual or any artwork contained herein may be reproduced in any shapeor form without the express written consent of Harbor Freight Tools. Diagrams within this manual may not be drawn proportionally. Due to continuingimprovements, actual product may differ slightly from the product described herein. Tools required for assembly and service may not be included.Manual Revised 11i
Save This ManualKeep this manual for the safety warnings and precautions, assembly, operating, inspection,maintenance and cleaning procedures. Write the product’s serial number in the back ofthe manual near the assembly diagram (or month and year of purchase if product has nonumber). Keep this manual and the receipt in a safe and dry place for future reference.Important Safety InformationIn this manual, on the labeling, and all otherinformation provided with this product:This is the safety alert symbol.It is used to alert you to potentialpersonal injury hazards. Obey all safetymessages that follow this symbol toavoid possible injury or death.DANGER indicates a hazardous situation which,if not avoided, will result in death or serious injury.Work Area1. Keep the work area clean and well lighted.Cluttered benches and dark areas increase therisks of electric shock, fire, and injury to persons.2. Do not operate the pump in explosiveatmospheres, such as in the presenceof flammable liquids, gases, or dust.3. Keep bystanders, children, and visitors awaywhile operating the pump. Distractions areable to result in the loss of control of the pump.Electrical SafetyWARNING indicates a hazardous situation which,if not avoided, could result in death or serious injury.1. Pump plugs must match the outlet. Never modifythe plug in any way. Do not use any adapterplugs with grounded pumps. Unmodified plugsand matching outlets will reduce risk of electric shock.CAUTION, used with the safety alert symbol,indicates a hazardous situation which, if not avoided,could result in minor or moderate injury.2. Do not expose Pump to rain or wetconditions. Use in dry locations only.NOTICE is used to address practicesnot related to personal injury.3. Do not abuse the cord. Never use the cordfor carrying, pulling or unplugging the pump.Keep cord away from heat, oil, sharp edgesor moving parts. Damaged or entangledcords increase the risk of electric shock.CAUTION, without the safety alert symbol, is usedto address practices not related to personal injury.4. When operating a pump outdoors, use anextension cord suitable for outdoor use.Use of a cord suitable for outdoor usereduces the risk of electric shock.General Safety WarningsPersonal SafetyWARNING Read all safety warningsand instructions. Failure to follow the warningsand instructions may result in electric shock, fireand/or serious injury.Save all warnings and instructionsfor future reference.The warnings and precautions discussedin this manual cannot cover all possibleconditions and situations that may occur.It must be understood by the operator thatcommon sense and caution are factorswhich cannot be built into this product,but must be supplied by the operator.Page 21. Stay alert. Watch what you are doing and usecommon sense when operating the pump.Do not use the pump while tired or under theinfluence of drugs, alcohol, or medication.A moment of inattention while operating thepump increases the risk of injury to persons.2. Do not overreach. Keep properfooting and balance at all times.3. Use safety equipment. Non-skid safety shoesand a hard hat must be used for the applicableconditions. Wear heavy-duty work gloves during use.For technical questions, please call 1-800-444-3353.SKU 98076
4.Always wear eye protection.Wear ANSI-approved safety goggles.5. People with pacemakers should consult theirphysician(s) before use. Electromagnetic fields inclose proximity to heart pacemaker could causepacemaker interference or pacemaker failure.Caution is necessary when near coil, spark plugcables, or distributor of running engine.In addition, people with pacemakers should: Avoid operating alone. Properly maintain and inspect to avoidelectrical shock. Any power cord must be properly grounded.Ground Fault Circuit Interrupter (GFCI)should also be implemented – it preventssustained electrical shock.6. WARNING: The brass components of thisproduct contain lead, a chemical knownto the State of California to cause birthdefects (or other reproductive harm).(California Health & Safety Code § 25249.5, et seq.)Handling the cord on this product will expose you tolead, a chemical known to the State of California tocause cancer, and birth defects or other reproductiveharm. Wash hands after handling.(California Health & Safety Code § 25249.5, et seq.)Pump Use and Care1. Do not force the pump. Use the correctpump for the application. The correctpump will do the job better and safer at therate for which the pump is designed.2. Disconnect the pump from the outletbefore making any adjustments, changingaccessories, or storing the pump.Such preventive safety measures reducethe risk of starting the pump unintentionally.Unplug the pump before leaving the work area.3. Store the pump when it is idle out of reachof children and other untrained persons.A pump is dangerous in the hands of untrained users.4. Check for misalignment or binding ofmoving parts, breakage of parts, and anyother condition that affects the pump’soperation. If damaged, have the pump servicedbefore using. Many accidents are causedby poorly maintained pumps. There is a riskof bursting if the pump is damaged.SKU 980765. Service of air conditioning systems mustbe done only by trained and experiencedtechnician to avoid overfilling.6. Technicians opening refrigeration circuit in automotiveair conditioning systems MUST be certified inrefrigerant recovery and recycling proceduresin compliance with section 609 of Clean Air ActAmendments of 1990.For additional information regarding ozonedepletion and air conditioning service regulations,visit EPA’s website: www.epa.gov/ozone.7. Follow vehicle service manual instructions.8. Do not leave this Vacuum Pump unattended when itis plugged into an electrical outlet. Turn off the Pumpand unplug it from its electrical outlet before leaving.9. Do not cover this unit. This Vacuum Pump gets veryhot when in use. Do not use near combustiblesand allow the unit to cool down completely afterusing, and/or before moving or storage.Service1. Have your Pump serviced by a qualifiedrepair person using only identicalreplacement parts. This will ensure thatthe safety of the Pump is maintained.Save theseinstructions.GroundingTo prevent electric shock anddeath from incorrect groundingwire connection:Check with a qualified electrician if you arein doubt as to whether the outlet is properlygrounded. Do not modify the power cord plugprovided with the tool. Never remove the groundingprong from the plug. Do not use the tool if the powercord or plug is damaged. If damaged, have itrepaired by a service facility before use. If the plugwill not fit the outlet, have a proper outlet installed bya qualified electrician.For technical questions, please call 1-800-444-3353.Page 3
Grounded Tools:Tools with Three Prong Plugs6. If you are using an extension cord outdoors, makesure it is marked with the suffix “W-A” (“W” inCanada) to indicate it is acceptable for outdoor use.7. Make sure the extension cord is properly wiredand in good electrical condition. Always replacea damaged extension cord or have it repairedby a qualified electrician before using it.8. Protect the extension cords from sharp objects,excessive heat, and damp or wet areas.Table A: RECOMMENDED MINIMUM WIREGAUGE FOR EXTENSION CORDS* (120/240 VOLT)3-Prong Plug and Outlet1. Tools marked with “Grounding Required” have a threewire cord and three prong grounding plug. The plugmust be connected to a properly grounded outlet.If the tool should electrically malfunction or breakdown, grounding provides a low resistance path tocarry electricity away from the user, reducing the riskof electric shock. (See 3-Prong Plug and Outlet.)2. The grounding prong in the plug is connected throughthe green wire inside the cord to the groundingsystem in the tool. The green wire in the cord mustbe the only wire connected to the tool’s groundingsystem and must never be attached to an electrically“live” terminal. (See 3-Prong Plug and Outlet.)3. The tool must be plugged into an appropriate outlet,properly installed and grounded in accordance withall codes and ordinances. The plug and outlet shouldlook like those in the preceding illustration.(See 3-Prong Plug and Outlet.)NAMEPLATEAMPERES(at full load)0 – 2.018181818162.1 – 3.418181816143.5 – 5.018181614125.1 – 7.018161412127.1 – 12.018141210-12.1 – 16.0141210--16.1 – 20.01210---* Based on limiting the line voltage drop to five volts at150% of the rated amperes.SymbologyDouble InsulatedCanadian Standards AssociationExtension Cords1. Grounded tools require a three wire extension cord.Double Insulated tools can use eithera two or three wire extension cord.2. As the distance from the supply outlet increases,you must use a heavier gauge extension cord.Using extension cords with inadequately sizedwire causes a serious drop in voltage, resultingin loss of power and possible tool damage.(See Table A on page 4.)3. The smaller the gauge number of the wire, thegreater the capacity of the cord. For example,a 14 gauge cord can carry a higher currentthan a 16 gauge cord. (See Table A.)4. When using more than one extension cord to makeup the total length, make sure each cord contains atleast the minimum wire size required. (See Table A.)5. If you are using one extension cord for morethan one tool, add the nameplate amperesand use the sum to determine the requiredminimum cord size. (See Table A.)Page 4EXTENSION CORDLENGTH25 50 75 100 150 Underwriters Laboratories, Inc.V AVolts Alternating CurrentAmperesWARNING marking concerning Riskof Eye Injury. Wear ANSI‑approvedsafety goggles with side shields.Read the manual beforeset-up and/or use.WARNING markingconcerning Risk of Fire.Do not cover ventilation ducts.Keep flammable objects away.WARNING marking concerningRisk of Electric Shock.Properly connect power cordto appropriate outlet.For technical questions, please call 1-800-444-3353.SKU 98076
SpecificationsMotorOil CapacityFittingsAir FlowFunctions120V / 60 Hz / 1720 RPM200 mlR12/R22 and R134A2.5 CFMThis Vacuum Pump is useful for pumping gasfrom sealed containers, for example:a. Refrigeratorsb. Medical appliancesc. Printing machineryd. Vacuum packinge. Other types of high-vacuum equipmentOperationIMPORTANT: It is unlawful and hazardous todischarge refrigerants into the atmosphere. Beforebeginning work with this Vacuum Pump, safely capturerefrigerants using an approved refrigerant recoverysystem (not included) and dispose of them properly.Contact the EPA (Environmental Protection Agency) forimportant certification regulations and other regulationsthat apply. (See front cover of this manual.)1. Check the oil level before each use:a. Place the Vacuum Pump on a flat levelsurface and looking at the Oil Level Glasslocated on the end of the Pump. The oilshould be at the fill line on the pump cover.b. If oil is needed, unscrew the RED OilFill Plug (21) and fill with HFV-46 oilonly. CAUTION! Do not overfill.c. Replace the Red Oil Fill Plug and tighten securelyto prevent oil from escaping under pressure duringuse. Inspect the Sealing “O” Rings (22) each timethe Oil Fill Plug is removed. Look for possibletears, cracks, or damage. Replace if needed.8. The vacuum will build for approximately 2 minutesbefore reaching full power. Allow the Pumpto draw vacuum on the system for approximately10 minutes to thoroughly remove allmoisture and any gas from the system.9. The Gauge (not included) should show negativepressure and maintain that reading for 10 minutes.If, during that time the pressure reading rises backtoward “0”, there may be a leak in the system.10. Turn the Power Switch (13) off beforedisconnecting the hose from the vacuum fitting.11. To prevent accidents, disconnect the PowerCord from the electrical outlet after use.12. Allow the Vacuum Pump to completelycool before wiping down and storingindoors out of children’s reach.NOTE: The operational process is the same forboth vehicle and/or other refrigeration systems.2. Use only one of the L-Shaped Brass InletFittings (23) at a time. Keep the other partof the Fitting capped while not in use.3. Turn the vehicle/appliance and AC system OFF.4. Attach the shop AC refrigerant recoverysystem. Then drain the refrigerant.5. After reaching 26 to 28 in/hg vacuum, stopand disconnect the recovery system.6. As appropriate, attach the R-12, R-22, or R-134Amanifold to the AC drain port of the vehicle/appliance.This is a “quick release” fitting. The drain port isgenerally the lower of the two manifold ports andwill be located downstream from the compressorin the vehicle. Refer to the vehicle/applianceservice manual for vehicle-specific information.Make sure to tightly cap the unused port.7. Turn on the Vacuum Pump, usingthe Power Switch (13).SKU 98076For technical questions, please call 1-800-444-3353.Page 5
MaintenanceTo prevent serious injury from accidental operation:Turn the Power Switch (13) of the Vacuum Pump to its “OFF” position and unplug the tool fromits electrical outlet before performing any inspection, maintenance, or cleaning procedures.To prevent serious injury from tool failure:Do not use damaged equipment. If abnormal noise or vibrationoccurs, have the problem corrected before further use.1. BEFORE EACH USE, inspect the general conditionof the tool. Check for loose screws, misalignmentor binding of moving parts, cracked or brokenparts, damaged electrical wiring, and any othercondition that may affect its safe operation.2. AFTER USE, clean external surfacesof the tool with clean cloth.3. WARNING! If the supply cord of thisPump is damaged, it must be replacedonly by a qualified service technician.Parts ListPart123456789101112131516171819DescriptionFan CoverLong ScrewScrewFanMotor CoverCentrifugal SwitchScrewRotorPower CableBearingWaveform GasketInsulating BushingSwitchHandle coverScrewCapacitorMotor 2728293031323334353637DescriptionHandle NutOil Filling PlugO-RingL-Shaped Inlet FittingBracketOil SealRotary VaneSpringPump RotorPump BodyScrewBack Pump CoverCap BoardOil Gas SeparatorO-RingOil TankOil Level GlassOil Seal 4950515253DescriptionSeal GasketO-RingBoltRubber FootNutFlat WasherScrewBaseboardBearing PadScrewBearingStatorCapacitor CoverBearingBoltDisplacing ValveQty1144444114111142PLEASE READ THE FOLLOWING CAREFULLYThe manufacturer and/or distributor has provided the parts list and assembly diagramin this manual as a reference tool only. Neither the manufacturer or distributormakes any representation or warranty of any kind to the buyer that he or she isqualified to make any repairs to the product, or that he or she is qualified to replaceany parts of the product. In fact, the manufacturer and/or distributor expresslystates that all repairs and parts replacements should be undertaken by certified andlicensed technicians, and not by the buyer. The buyer assumes all risk and liabilityarising out of his or her repairs to the original product or replacement partsthereto, or arising out of his or her installation of replacement parts thereto.REV 11iPage 6For technical questions, please call 1-800-444-3353.SKU 98076
2Assembly Diagram13 4548 679810 491213 15504616 171847194411 343536Page 7For technical questions, please call 1-800-444-3353.SKU 98076Record Product’s Serial Number Here: Note: If product has no serial number,record month and year of purchase instead.Note: Some parts are listed and shown for illustrationpurposes only, and are not available individually as replacement parts.REV 11i
90 Day WarrantyHarbor Freight Tools Co. makes every effort to assure that its products meet high quality and durability standards,and warrants to the original purchaser that this product is free from defects in materials and workmanship for theperiod of 90 days from the date of purchase. This warranty does not apply to damage due directly or indirectly,to misuse, abuse, negligence or accidents, repairs or alterations outside our facilities, criminal activity, improperinstallation, normal wear and tear, or to lack of maintenance. We shall in no event be liable for death, injuriesto persons or property, or for incidental, contingent, special or consequential damages arising from the use ofour product. Some states do not allow the exclusion or limitation of incidental or consequential damages, so theabove limitation of exclusion may not apply to you. This warranty is expressly in lieu of all otherwarranties, express or implied, including the warranties of merchantability and fitness.To take advantage of this warranty, the product or part must be returned to us with transportation chargesprepaid. Proof of purchase date and an explanation of the complaint must accompany the merchandise.If our inspection verifies the defect, we will either repair or replace the product at our election or we mayelect to refund the purchase price if we cannot readily and quickly provide you with a replacement. We willreturn repaired products at our expense, but if we determine there is no defect, or that the defect resultedfrom causes not within the scope of our warranty, then you must bear the cost of returning the product.This warranty gives you specific legal rights and you may also have other rights which vary from state to state.3491 Mission Oaks Blvd. PO Box 6009 Camarillo, CA 93011 (800) 444-3353
accessories, or storing the pump. Such preventive safety measures reduce the risk of starting the pump unintentionally. Unplug the pump before leaving the work area. 3. Store the pump when it is idle out of reach of children and other untrained persons. A pump is dangerous in the hands of untrained users. 4. Check for misalignment or binding of
