Transcription
Entrust Identity as aService and EntrustCloudControlIntegration Guide29 Apr 2022
Contents1. Introduction . . . . . . . . . . . . . . . . . . . . . . . . . . . . . . . . . . . . . . . . . . . . . . . . . . . . . . . . . . . . . . . . . . . 31.1. Product configurations . . . . . . . . . . . . . . . . . . . . . . . . . . . . . . . . . . . . . . . . . . . . . . . . . . . . . 31.2. Requirements . . . . . . . . . . . . . . . . . . . . . . . . . . . . . . . . . . . . . . . . . . . . . . . . . . . . . . . . . . . . 32. Procedures . . . . . . . . . . . . . . . . . . . . . . . . . . . . . . . . . . . . . . . . . . . . . . . . . . . . . . . . . . . . . . . . . . . 42.1. Download the CloudControl software . . . . . . . . . . . . . . . . . . . . . . . . . . . . . . . . . . . . . . . 42.2. Set up a content library in vCenter for the CloudControl OVA . . . . . . . . . . . . . . . . . 42.3. Deploy the CloudControl VM from the OVA . . . . . . . . . . . . . . . . . . . . . . . . . . . . . . . . . 52.4. Power on the appliance . . . . . . . . . . . . . . . . . . . . . . . . . . . . . . . . . . . . . . . . . . . . . . . . . . . 52.5. Configure the CloudControl virtual appliance . . . . . . . . . . . . . . . . . . . . . . . . . . . . . . . . 52.6. Set up the CloudControl GUI . . . . . . . . . . . . . . . . . . . . . . . . . . . . . . . . . . . . . . . . . . . . . . 52.7. Domain controller setup . . . . . . . . . . . . . . . . . . . . . . . . . . . . . . . . . . . . . . . . . . . . . . . . . . . 62.8. Active Directory setup . . . . . . . . . . . . . . . . . . . . . . . . . . . . . . . . . . . . . . . . . . . . . . . . . . . . 62.9. Active Directory setup - CloudControl . . . . . . . . . . . . . . . . . . . . . . . . . . . . . . . . . . . . . . 72.10. Entrust IDaaS registration . . . . . . . . . . . . . . . . . . . . . . . . . . . . . . . . . . . . . . . . . . . . . . . . 102.11. Active Directory setup - Entrust IDaaS . . . . . . . . . . . . . . . . . . . . . . . . . . . . . . . . . . . . . 102.12. Entrust IDaaS application configuration. . . . . . . . . . . . . . . . . . . . . . . . . . . . . . . . . . . . 162.13. Add a resource rule to the application . . . . . . . . . . . . . . . . . . . . . . . . . . . . . . . . . . . . . 192.14. Enable external authentication in CloudControl to use Entrust IDaaS. . . . . . . . . . 212.15. Test external authentication using Entrust IDaaS . . . . . . . . . . . . . . . . . . . . . . . . . . . 23Entrust IDaaS Entrust CloudControl Integration Guide2/26
1. IntroductionThis guide describes how to integrate Entrust IDaaS with Entrust CloudControl. EntrustIdentity as a Service is Cloud-based identity and access management (IAM) solution withmulti-factor authentication (MFA), credential-based passwordless access, and singlesign-on (SSO). Entrust CloudControl can be configured to use Entrust IDaaS as anexternal authentication method.1.1. Product configurationsEntrust has successfully tested the integration of Entrust CloudControl with EntrustIDaaS in the following configurations:SystemVersionEntrust CloudControl6.5.0Entrust IDaaS5.24VMware vCenter7.0.1 U11.2. RequirementsBefore starting the integration process, familiarize yourself with: Entrust IDaaS. You can request a free trial at the Entrust Identity as a Service productpage. The documentation and setup process for Entrust CloudControl. The onlinedocumentation contains everything you need to successfully install and deployCloudControl.Entrust IDaaS Entrust CloudControl Integration Guide3/26
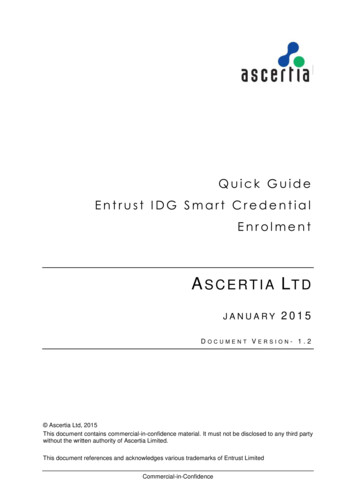
2. ProceduresThis guide uses a standalone CloudControl deployment configured with Active Directoryfor authentication. CloudControl supports a cluster environment. For more informationrefer to the Entrust CloudControl Installation Guide in the online documentation.2.1. Download the CloudControl software1. Go to https://my.hytrust.com/s/software-downloads.2. Log in and select HyTrust CloudControl.3. Open the HTCC 6.5.0 2022-03-01 folder. This folder contains version 6.5.0 that wasused in this guide.4. Select the Entrust-CloudControl-6.5.0.650509.zip link to download the file.5. After the file has been downloaded, open the ZIP file to access to the OVA file.2.2. Set up a content library in vCenter for theCloudControl OVA1. Log in to vCenter.2. Go to Menu Content Libraries.3. Create a content library called HyTrust CloudControl.4. In the HyTrust CloudControl library, select Actions Import item. For example:Entrust IDaaS Entrust CloudControl Integration Guide4/26
The Import Library Item dialog appears.5. Select Local File and upload the CloudControl OVA file.6. After the file has been uploaded, select Import to import the OVA file into the library.2.3. Deploy the CloudControl VM from the OVAAfter the file has been imported into the content library, it is listed accordingly. Rightclick the Name and select New VM from this Template to deploy the VM.Follow the instructions during the deployment as needed. For more information refer to Installing CloudControl from an OVA inthe online documentation.2.4. Power on the appliance1. Log in to the vSphere Client.2. Locate the Entrust CloudControl virtual machine in the inventory.3. Right-click the CloudControl virtual machine and select Power Power On.2.5. Configure the CloudControl virtual applianceThis guide uses a Standalone Node setup. For more information refer to Creating aStandalone Node in the online documentation.2.6. Set up the CloudControl GUIAfter the standalone node has been configured, you must finish the setup using the GUI.For more information refer to Setting Up the CloudControl GUI in the onlinedocumentation.Entrust IDaaS Entrust CloudControl Integration Guide5/26
2.7. Domain controller setupAdd a DNS Host entry in the domain controller for the CloudControl server.For the purposes of this guide, the following Host was added to the local DNS server:FQDN: cloudcontrol1-65.example.com2.8. Active Directory setupYou must have Active Directory configured in order to use External Authentication withCloudControl.Refer to the CloudControl online documentation for details instructions on how to setupActive Directory in CloudControl.Adapt the steps below to match your organization Active Directory settings.2.8.1. UsersFor the purposes of this guide, four AD users were required. These are used in theconfiguration steps described in this guide.htaServiceAccountThis is used in the Entrust CloudControl AD settings, to connect to the AD server.etccadminThis is used to log in to Entrust CloudControl after Active Directory services havebeen configured. It is whitelisted when external authentication is enabled, to show thewhitelist feature that is available on the external authentication setup.etccuserThis is used to log in to Entrust CloudControl after Active Directory services havebeen configured. It is the user that logs in to demonstrate the IDaaS login process.idaasaduserThis is used in the Entrust IDaaS AD settings, to connect to the AD server. When creating the users in AD, make sure that the Last Name andEmail fields are not empty.2.8.2. GroupsCreate a group in AD called ASC SuperAdmin and make the etccadmin and etccuserEntrust IDaaS Entrust CloudControl Integration Guide6/26
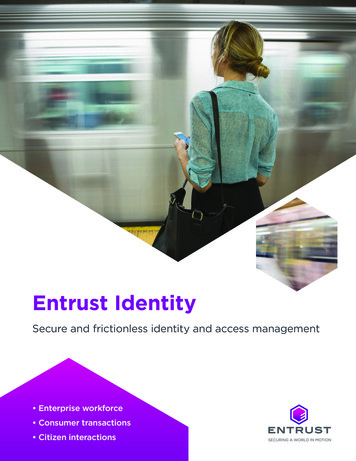
users members of this group.2.9. Active Directory setup - CloudControlAfter Active Directory has the users and groups needed to setup Active Directory inCloudControl, you can configure Active Directory.1. Select Home System Primary Authentication.2. Select Configure Active Directory and Confirm you want to configure ActiveDirectory.Once Active Directory is configured, local authentication is disabled.3. In the Details tab of the Configure Active Directory window, enter the following:a. Configuration Method: Select Manual.This guide uses a Manual configuration. However, in a production environmentEntrust recommends that this field is set to Automatic Mode. The mode can alsobe changed later using the Actions menu, using Change to Automatic Mode.b. Default Domain Name: Enter the domain name.c. Root Domain Name: Enter the domain name.d. Security: Select None.e. Service Account: Enter the service account.f. Service Account Password: Enter the password used for the service account.Entrust IDaaS Entrust CloudControl Integration Guide7/26
4. In the Domain Controllers tab of the Configure Active Directory window, select theAdd Domain Controller Now link.5. In the Add Domain Controller window, enter the following information:a. Name: The IP address/FQDN of the AD server.b. Priority: Select Primary.c. Port: 389 (for LDAP)d. User Search Context (Base DN): Enter the search context that applies to you.For example, DC example,DC com.e. Group Search Context (Base DN): Enter the search context that applies to you.For example: DC example,DC com.6. Select Continue.7. In the Global Catalogs tab of the Configure Active Directory window, select the Adda Global Catalog Now link.Entrust IDaaS Entrust CloudControl Integration Guide8/26
8. In the Add Global Catalog window, enter the following information:a. Name: The IP address/FQDN of the AD server.b. Priority: Select Primary.c. Port: 3268d. User Search Context (Base DN): Enter the search context that applies to you.For example, DC example,DC com.e. Group Search Context (Base DN): Enter the search context that applies to you.For example, DC example,DC com.9. Select Add.10. Select Continue.11. In the Add Additional Domains window, select Skip.12. In the ASC SuperAdmin Role Mapping tab of the Configure Active Directorywindow, enter the AD Group Name to map to the ASC SuperAdmin role.In this example, an AD Group with the same name as the role was created.13. Select Continue.Entrust IDaaS Entrust CloudControl Integration Guide9/26
14. The summary window displays the details.15. Select Apply to make the changes effective.A confirmation window is shown asking you to confirm the changes to ActiveDirectory.16. Select Apply AD Settings and Log Out.You are logged out of CloudControl.17. Log back in with the AD user account and password. In this example, these accountsare etccadmin or etccuser, the only two accounts in the ASC SuperAdmin group inAD.2.10. Entrust IDaaS registrationNow you need to register for Entrust IDaaS. Entrust provides a 60-day free trial.Get Entrust Identity as a Service free for 60 days.Once you register for Entrust IDaaS, you will have a unique IDaaS URL. For example,https://example.US.trustedauth.com.2.11. Active Directory setup - Entrust IDaaSAfter CloudControl is set up using Active Directory, you must setup Entrust IDaaS to usethe same Active Directory services. To do this, configure a Gateway to sync users from anon-premises Active Directory. Changes made to your Active Directory are automaticallysynced with Identity as a Service through this Gateway. Adapt the steps below to matchyour configuration. The examples in this guide use the Identity as a Service Gatewayprovided by Entrust IDaaS.For additional information, refer to Configure an on-premise directory in the onlineEntrust IDaaS Entrust CloudControl Integration Guide10/26
documentation.2.11.1. Install the Identity as a Service GatewayDownload the Identity as a Service Gateway OVA and deploy it using vCenter. This is theGateway that allows connection to the On-Premise Active Directory used by EntrustIDaaS.For additional information, refer to Create and configure a Gateway Instance in the onlinedocumentation.1. On the Entrust IDaaS Home page, select Gateways.2. On the Gateways page, select IDENTITY AS A SERVICE GATEWAY to download thesoftware.The Identity as a Service Gateway Download URL dialog appears.3. Select one of the following options:a. VMware vSphere to download a vSphere (.ova) image file.b. Microsoft Hyper-V to download a Hyper-V (.vhd) image file.In this guide, the VMware vSphere is selected. The file is downloaded to your device.4. Import your Gateway image file.Consult the VMware vSphere or Microsoft Hyper-V documentation for instructionson how to import your image file. Once the Gateway has been deployed, configure it.Power on your the virtual machine.5. In your Web browser, enter the IP address of your Virtual Machine using port 9090.https://xxx.xxx.xxx.xxx:90906. Accept the browser self-signed certificate warning.The Identity as a Service Gateway Web Interface opens. Internet Explorer is not supported.Entrust IDaaS Entrust CloudControl Integration Guide11/26
7. At the User Name prompt, enter entrust.8. At the password prompt, enter entrust.You are prompted to create a new password. After you have changed your password, when you log in to theWeb Interface, you must select Reuse my password for privilegedtasks.9. At the (current) UNIX password prompt, enter entrust to confirm your existingpassword and select Log In.10. Enter a new password.11. At the Retype new password prompt, re-enter the password.The Identity as a Service Enterprise Gateway Configuration Tool dialog appears.12. Select Get Started.The Network Settings page appears.13. To change the default hostname:a. Select the Hostname link. The Hostname dialog appears.b. Enter a new hostname and select Save.14. To change the IP Configuration, select the IP Address link.a. Select Static or DHCP.b. Make the required network settings changes. A confirmation dialog appears.c. Select Save.15. Select Next. The NTP Settings page appears.16. Optionally, if you want to change any of the NTP Settings, do the following:a. On the NTP Settings page, select Edit.b. Make the required NTP Settings changes and select Save.17. Select Next.18. If required, select Configure. The Configure Proxy page appears.a. Enter the Proxy server host IP or Proxy host name.b. Enter the Proxy port number.c. Enter the Proxy username.d. Enter the Proxy password.e. Select Save.19. Select Next. The Registration Parameters dialog appears.Entrust IDaaS Entrust CloudControl Integration Guide12/26
Leave this window open. You will paste content from the Add a Gateway procedureinto this page.2.11.2. Add a GatewayTo add a Gateway to Entrust IDaaS:1. Access the Entrust IDaaS Home page. For example:2. Select Gateways.The Gateways page appears.3. Select the icon on the left of the page and select Gateway.The Add Gateway dialog appears.4. Enter a Gateway Name and then select Add.The Gateway is added. The Waiting for Gateway to Establish connection dialogappears.5. Copy the registration code.Entrust IDaaS Entrust CloudControl Integration Guide13/26
6. Back in the Identity as a Service Gateway registration page, paste the RegistrationCode you copied when you created the Gateway.7. Select Register.8. Back in the Waiting for Gateway to Establish connection dialog, select Close.After the Identity as a Service Gateway is configured and connected to a Gateway inEntrust IDaaS, you can create a directory.2.11.3. Creating a directoryTo tie the AD server to Entrust IDaaS, create a directory using the Gateway that wascreated in the previous step.1. Access the Entrust IDaaS Home page. For example:2. Select Directories.The Directories List page appears.3. Select the icon on the left of the page and select Active Directory (on-premise).The Add Directory page appears.4. In the Connection Settings section of the page, enter the following information:a. Directory Name - Name of the directory.b. Username - Name of the AD user used to read the Active Directory inventory.c. Password - The password for the AD user to access the Active Directory server.d. Directory Servers - Select Add to enter the Active Directory server information.i. On the Directory Server Dialog, enter the IP/FQDN of the Active Directoryserver, the Port and select Add.Entrust IDaaS Entrust CloudControl Integration Guide14/26
5. In the Attribute Mappings section, leave the default settings.You may need to adjust some of the fields according to your AD settings.6. In the SearchBase & Group Filters section, enter the following:a. Root Domain Name Context - Enter the AD search string to view the directory.b. Group Filters - Enter the Group Name you created in your AD server for EntrustCloudControl. Only users in this group will be allowed.7. In the Synchronization section, do the following:a. Select the Synchronization Agent. This is the Gateway that was created in theprevious section.b. Once selected, either adjust the other fields in the section according to your ADsettings or leave the defaults.Entrust IDaaS Entrust CloudControl Integration Guide15/26
8. Once all the information has been provided, select AddThe Directory List page appears.9. Select the Sync icon on the directory list row to sync the directory.10. Once synced, the users belonging to the Group filter specified in the Directoryappears under Users in the Home page.2.12. Entrust IDaaS application configurationAfter the AD is setup and configured, you can create a Generic Web Application thatEntrust IDaaS Entrust CloudControl Integration Guide16/26
uses OpenID Connect and OAUTH Cloud Integration. This is the application thatCloudControl uses to be able to integrate with IDaaS.1. Log in to Entrust IDaaS.2. Select Applications on the Home page.3. Select the icon on the left of the page to create a new Generic OpenID Connectand OAuth Cloud Integration.The Add Application Select an Application Template page appears.4. Scroll down the template list and from the OpenID Connect and OAuth CloudIntegrations section select Generic Web Application.The Add Generic Web Application page appears.5. Change the Application Name, Description and Add an Application Logo ifrequired.6. Select Next.The Add Generic Web Application page appears.7. In the Setup page, under General Settings, do the following:a. Capture Client ID and Client Secret. These details are needed to configure theOpenID connect in Entrust CloudControl. For example: Client ID: 080fe01a-xxxx-xxxx-xxxx-dc3f2c5f6c42Entrust IDaaS Entrust CloudControl Integration Guide17/26
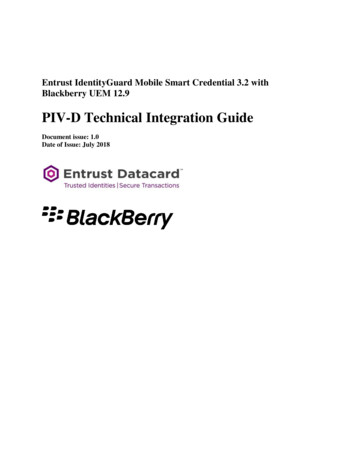
Client Secret: 9bIXVaDyxxxxxxxx xxxxxxxxx1xN83TGyoEb. Change Token / Revocation Endpoint Client Authentication Method to ClientSecret Post.c. Change Subject ID Attribute to UserPrincipalName.d. For Login Redirect URLs, select ADD to add the login redirect for yourCloudControl instance. You must use the FQDN of the CloudControl server and not itsIP address.e. For Logout Redirect URLs, select ADD to add the logout redirect for yourCloudControl instance. You must use the FQDN of the CloudControl server and not itsIP address.For example:8. In the Setup page, under Supported Scopes:Entrust IDaaS Entrust CloudControl Integration Guide18/26
a. Select Your Unique Identifier.b. Select Email Address.c. Leave all other settings as default.For example:9. Select Submit.The Add Generic Web Application Complete page appears.You can now add a resource rule to the application.2.13. Add a resource rule to the applicationYou must add a resource rule to the application so that an AD group and users from thatAD group can access the application.For additional information, refer to Create a resource rule in the online documentation.Entrust IDaaS Entrust CloudControl Integration Guide19/26
1. In the Entrust IDaaS application, select the Main Menu Resources ResourceRules.The Resource Rules List page appears.2. Select the icon on the Generic Web Application - Entrust CloudControlapplication created in the previous section.The Add Resource List page appears.3. In the General Settings setup, select the Group(s) you want to use that applies tothe users for the application.4. Select Next.5. In the Authentication Conditions setup, under Authentication Decision:a. Change Low Risk First Factor to Password.b. Enable the following Low Risk Second Factors and drag them to the followingorder, or to the order that applies to your organization: One Time Password Entrust Soft Token PushEntrust IDaaS Entrust CloudControl Integration Guide20/26
FIDO2 Software / Hardware Token Grid Cardc. Clear the remaining Low Risk Second Factors check boxes.6. Keep the defaults for the remaining fields in the Authentication Decision setup. Forexample:7. Select Submit.2.14. Enable external authentication in CloudControl touse Entrust IDaaSAfter Entrust IDaaS is set up, you can enable external authentication in CloudControl touse Entrust IDaaS. CloudControl must be setup using the same Active Directory server asthe one configured in Entrust IDaaS.1. Log in to the CloudControl instance2. Select Home System External Authentication.Entrust IDaaS Entrust CloudControl Integration Guide21/26
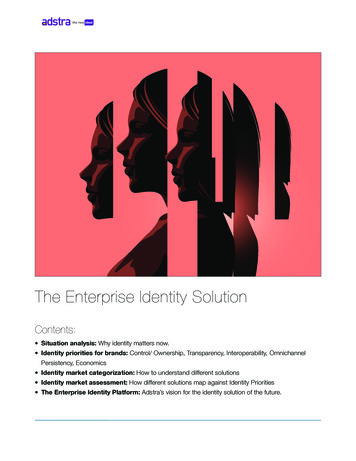
3. In the External Authentication tab, under Configuration, enter the followinginformation:a. For Authentication Type, select OpenId Connect.b. For Client ID, enter the Client ID of the Entrust IDaaS application created earlier.c. For Client Secret, enter the Client Secret of the Entrust IDaaS applicationcreated earlier.d. For Base URL, enter your Entrust IDaaS URL followed by api/oidc.e. For Name, enter a name.For example:4. In the External Authentication tab, under Whitelist, enter the user ID of a user thatyou do not want to use IDaaS for authentication.This provides a user that can bypass external authentication in the event ofconfiguration issues. In this example, the etccadmin user was added. If you want tobypass external authentication, log in with etccadmin@example.com.Entrust IDaaS Entrust CloudControl Integration Guide22/26
5. Select Enable.The OpenID Connect Configuration dialog appears.6. Select Verify and Enable.External configuration is enabled.2.15. Test external authentication using Entrust IDaaSAfter Entrust IDaaS and Entrust CloudControl are set up, you can test the configurationand make sure Entrust IDaaS is used when you attempt to log in to CloudControl.Make sure you do the steps below on a server that has access to the CloudControl DNSentry and the Entrust IDaaS URL.In this section, the etccuser and etccadmin users are used, which were created earlier inthis guide. Use the AD users that you have setup.2.15.1. Testing IDaaS authenticationTo test Entrust IDaaS with CloudControl using external authentication:1. Open a browser and access the URL of the CloudControl server. Log in using theetccuser user.This is the user that was created for testing the IDaaS integration. For example:Entrust IDaaS Entrust CloudControl Integration Guide23/26
2. Select Continue.The login screen takes you to the Entrust IDaaS login screen.3. Select Next.4. Enter the etccuser password.Entrust IDaaS sends an OTP code to the email for etccuser.5. Enter the OTP code.6. Select Login.Entrust IDaaS authenticates the user and redirects you back to the CloudControlhome screen.Entrust IDaaS Entrust CloudControl Integration Guide24/26
2.15.2. Testing whitelist authenticationYou can now test the whitelist configuration. When external authentication was set up, auser was added to the whitelist configuration. If that user is used for logging in,CloudControl will not use Entrust IDaaS to authenticate the user. Instead, the internalauthentication method configured is used. In this example, the user in the whitelistconfiguration is etccadmin@example.com.If you log in, it will not use IDaaS. For example:1. Open a browser and access the URL of the CloudControl server. Log in usingetccadmin@example.com.This is the user created and added to the whitelist of the external authenticationsettings:2. Select Continue.The login screen asks for the user password.3. Enter the password and select SIGN IN.Entrust IDaaS Entrust CloudControl Integration Guide25/26
CloudControl logs the user into the application without going to IDaaS.Entrust IDaaS Entrust CloudControl Integration Guide26/26
CloudControl, you can configure Active Directory. 1. Select Home System Primary Authentication. 2. Select Configure Active Directory and Confirm you want to configure Active Directory. Once Active Directory is configured, local authentication is disabled. 3. In the Details tab of the Configure Active Directory window, enter the following: a.