Transcription
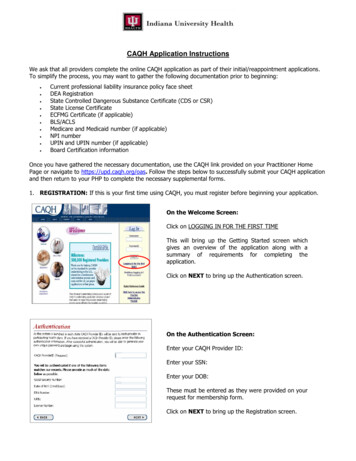
CAQH Application InstructionsWe ask that all providers complete the online CAQH application as part of their initial/reappointment applications.To simplify the process, you may want to gather the following documentation prior to beginning:Current professional liability insurance policy face sheetDEA RegistrationState Controlled Dangerous Substance Certificate (CDS or CSR)State License CertificateECFMG Certificate (if applicable)BLS/ACLSMedicare and Medicaid number (if applicable)NPI numberUPIN and UPIN number (if applicable)Board Certification informationOnce you have gathered the necessary documentation, use the CAQH link provided on your Practitioner HomePage or navigate to https://upd.caqh.org/oas. Follow the steps below to successfully submit your CAQH applicationand then return to your PHP to complete the necessary supplemental forms.1. REGISTRATION: If this is your first time using CAQH, you must register before beginning your application.On the Welcome Screen:Click on LOGGING IN FOR THE FIRST TIMEThis will bring up the Getting Started screen whichgives an overview of the application along with asummary of requirements for completing theapplication.Click on NEXT to bring up the Authentication screen.On the Authentication Screen:Enter your CAQH Provider ID:Enter your SSN:Enter your DOB:These must be entered as they were provided on yourrequest for membership form.Click on NEXT to bring up the Registration screen.
On the Registration Screen:Enter your registration information. This shouldinclude your email information along with the emailof the credentialing contact or practice managerthat is assisting you with completing yourapplication requirements (if applicable).Enter a user name and password. Your user nameand password must be at least 6 characters and nomore than 15 characters in length. Keep your username/password in a safe place as you will needthese to make updates and re-attest in the future.Click SUBMITIf your registration is successful a log-in screen willdisplay. Enter the user name and password thatyou created.Click LOG IN2. COMPLETE/UPDATE APPLICATION: Once you have successful logged into the CAQH Universal ProviderDatasource, you will begin entering your information following the requirements listed below. If you have tostop or break before you have completed the application, save your work. This may be done by selecting the“Audit” tab, clicking the “Run Audit” tab and then the “Log Out” tab.From the Start Page/Tab:If you are new to CAQH or need to updateinformation on an existing application: Click theCOMPLETE/UPDATE Application bubble.If you have a CAQH application on file, and allinformation is current: Click the Re-Attest bubbleto re-attest for a reappointment applicationALL providers must have a current CAQH on fileYou must Re-Attest as of the date of request.Prior reattestations (regardless of how recent)WILL NOT be accepted for reappointments.
On the Preparation Tab:Use the Prepare Tab to begin the application entryprocess or to make changes to your provider type,primary practice office state or hospital-basedprovider information.1. Select your provider type from the drop-down list.2. Select your primary practice office state from thedrop-down list. (Indiana)3. Select Yes or No to indicate if you practice only inan inpatient setting.Click NEXT to advance to the ANSWER tab and thePersonal Information page.On the Answer Tab:The first section on the ANSWER Tab, Personalinformation, includes basic personal info alongwith personal addresses. In this section be sure topay close attention to the help menu along the righthand side of the page. Be as thorough as possible.As you work through the Answer tab, many pageswill include ADD, DELETE, EDIT, IMPORT andUPDATE buttons. – Use ADD to add anotheroccurrence for an item such as other names/aliasesor new sections to Answer tab pages. The Addbutton will bring up an additional window. Afterentering information, use the UPDATE or CANCELbutton on the window to update/save or cancelinformation.Note: Do not use the close window (X) button inthe top right-hand corner of the window.Use EDIT to edit information within the additionaloccurrences or sections. – Use DELETE to delete anentire occurrence or section ofUse IMPORT to bring information entered in thePractice Administrator Module into your application,reducing data entry necessary for some sections.IMPORT is only available on the Practice Locations,Hospital Affiliations and Professional LiabilityInsurance pages. You will only see this button if youare associated with the practice manager.Click NEXT to advance to the next section of theANSWER tab, Professional IDs.
On the Answer Tab:In the Professional ID Section of the ANSWERtab you will be asked to provide the following:State license number, license type, licensestatus, current practice state, issue date,expiration date. If you do not yet have yourlicense, enter Indiana in the license number andIndiana for the state. You will need to updateyour CAQH when you receive your licensure.DEA registration (if applicable), issue date andexpirationControlled Substances Registration(if applicable), issue date and expiration dateMedicare and Medicaid numberUPIN and UPIN number (if applicable)ECFMG and issue date. (if applicable)NPI number (10 digits): You must have an NPInumber to complete the application. If youhave not yet obtained your NPI, enter9999999996. You will need to update yourCAQH when you receive your NPIClick NEXT to advance to the next section of theANSWER tab,Education and PersonalTraining.On the Answer Tab:The next two sections of the ANSWER tab are theEducation and Personal Training sections.Education Section:Select the Graduate TypeAdd Professional Schooling including address,phone numbers, and degree start and enddates.Professional Training Section:Complete all relevant sections within this section:Institution’s Name, address, phone numbersStart/End DatesAffiliate UniversityProgram DirectorUse the ADD button to enter additional Internships,Residency Programs, and Fellowships. Include ALLprior training.Click NEXT to advance to the next section of theANSWER tab, Specialties.
On the Answer Tab:The next section of the ANSWER tab, theSpecialties section, is broken up into several parts:Primary and Secondary Specialties:Select specialtyBoard CertificationDirectory PreferencesInclude Additional Specialties if appropriateCertifications:Basic Life Support (Exp. Date)Advanced Cardiac Life Support (Exp. Date)Advanced Life Support in OB (Exp. Date)Pediatric Advanced Life Support (Exp. Date)Advanced Trauma Life Support (Exp. Date)Neonatal Advanced Life Support (Exp. Date)Cardio-Pulmonary Resuscitation (Exp. Date)Additional Interests:Provide additional areas of professional practiceinterest, activities, procedures, diagnoses orpopulations, ex. HIV/AIDS.Click NEXT to advance to the next section of theANSWER tab, Credentialing Contact.On the Answer Tab:The next section of theCredentialing Contact.ANSWERtabisYour credentialing contact will be cc’d on ALL emailupdates/requirements sent to the practitioner. It isimperative that the email for this contact beaccurate and not a yahoo or AOL account as theseare not considered secure.Click NEXT to advance to the next section of theANSWER tab, Practice Locations.
On the Answer Tab:The next section of the ANSWER tab is PracticeLocations.Use the ADD button to enter a new location or usethe IMPORT button to import practice locationsinformation entered by your practice manager.Use COPY to create an identical copy of the practiceyou select and list it as an additional practice location.This precludes having to completely re-enter all of theinformation multiple times.Providers who indicate that they practice exclusivelywithin the inpatient setting are not required tocomplete the Practice Locations section.Click NEXT to advance to the next section of theANSWER tab, Hospital Affiliations.On the Answer Tab:The next section of the ANSWER tab is HospitalAffiliations.Hospital specific location information may beimported by selecting the IMPORT button andhospital name.List ALL hospitals where you currentlyprivileges and include the following detail:holdHospital PrivilegesAffiliation start/end dateAdmitting arrangements privilege statusFull/restricted privilegesTotal annual admissions and % of admissions tothis hospitalDepartment Name/ DirectorUse ADD or IMPORT to include additional hospitalaffiliationsClick NEXT to advance to the next section of theANSWER tab, Hospital Affiliations.
On the Answer Tab:The next section of the ANSWERProfessional Liability InsurancetabisEnter Current Professional Liability information: Ifyou have not updated you Liability insurance enteryour current policy/student policy so that you cancontinue through the application. You will need toupdate the CAQH as soon as you have obtainedinsurance or your application will not be consideredcomplete.Include the following detail:Carrier/Self Insured namePolicy #Original/Current effective datesCurrent Exp. DateIndividual/Tail/Unlimited coverageAmount of occurrence/aggregate coverageClick ADD to enter other current, future, or iousProfessional Liability Carrier(s) if you have been with yourcurrent carrier(s) for less than ten (10) years.Click NEXT to advance to the next section of theANSWER tab, Work History.On the Answer Tab:The next section of the ANSWER tab is WorkHistoryEnter both your current and prior work historybeginning with the most recent. Provide 10 yearsof work history, if applicable. In addition, pleaseexplain any time gaps greater than 3 months. Thisinformation must be complete; otherwise, a healthplan may need to contact you for additionalinformation and you may experience a delay in theprocessing of your credentialing application.Include the following detail:Practice/Employer name, address, contactReason for departureCurrent active or reserve militaryWork history gaps greater than 3 monthsincluding explanation.Click ADD to additional work informationClick NEXT to advance to the next section of theANSWER tab, Professional References.
On the Answer Tab:The next section of theProfessional ReferencesANSWERtabisProvide three professional references that are notcolleagues in your own group practice and are notrelatives.References listed should be personally acquainted withapplicant’s professional and clinical performance,competence, and ability to perform the privilegesrequested.Include:In Reference #1 Enter your Department Chair orProgram Director(If applicant out of training for less than 5 years)Initial Applicants MUST include at least one referencefrom applicant’s immediate past affiliationMid-level providers (CRNAs, NPs, CNS) must include theSupervising/Collaborating PhysicianClick NEXT to advance to the next section of theANSWER tab, Disclosure.On the Answer Tab:The final section of the ANSWER tab is theDisclosureThis section includes questions regarding:LicensureHospital PrivilegesEducations, Training and Board CertificationDEA or CDSMedicare/Medicaid. Other Governmental ProgramsSanctions and InvestigationsProfessional Liability Insurance and ClaimsMalpractice ClaimsCriminal and Civil HistoryAbility to Perform JobThis section must be complete and accurate.An answer of YES to ANY disclosure question will requirea full written explanation.Click NEXT to advance to the AUDIT tab.
3. When application has been completed, run an audit by clicking on the “Audit” tab and selecting “Run Audit”.Any “Required Fixes” must be corrected before you can move forward. You may disregard any “SuggestedFixes” that may be identified.4. Once the “Required Fixes” have been made, click “Next” which will take you to the Healthcare OrganizationAuthorization section. Click on the button to grant access to your information to ALL CAQH healthcareorganizations. Then click “Save” and “Next”.5. You are now in the Attestation section of the application. Click “Review and a completed file of yourinformation will display. Please review and, if necessary, go back and make any changes. When all isaccurate, click “Review Complete”. This brings up the attest button. Read the attestation statement and, ifyou are in agreement, click the “Attest” tab.6. You are now in the Attachments section of the application. For providers with historical information in CAQH:please remove attachments that are no longer valid. This will assist the Credentialing Office and speed up theapplication process.7. Print the Authorization, Attestation and Release Form and the Fax Cover Sheet/ Email Coversheet. Sign anddate the authorization form.8. Complete the fax cover sheet and fax it, with copies of the applicable supporting documents, to include theauthorization form, to CAQH at: 866-293-0414. OR Sign, Date, and Scan the form. Create an email toSupportingdocsupd@acsgs.com and attach the AAR Form, email cover sheet, and supporting documents. Include yourCAQH Provider ID, full name and the documents you are sending in the body of the email.
CAQH Application Instructions We ask that all providers complete the online CAQH application as part of their initial/reappointment applications. To simplify the process, you may want to gather the following documentation prior to beginning: Current professional liability insurance policy face sheet DEA Registration