Transcription
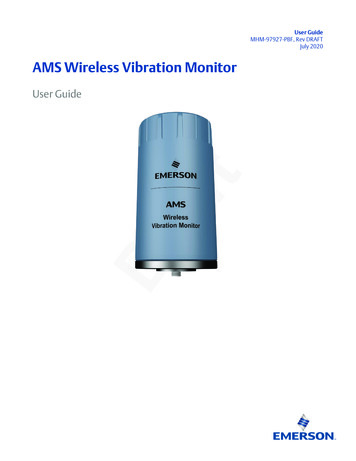
Echo Wireless Vibration SensorInstallation and Operation ManualPage 1 of 14
Table of ContentsIntroduction. 4Proper Handling . 4The Magnet Switch and LED Status Indicator . 4LED Status Messages. 5Programming the Echo Wireless Sensor. 6Attaching the Programming Cable . 6Connecting to the Sensor with the Echo Data Server Software . 6Reading the Current Programmed Parameters. 8Explanation of Echo Wireless Sensor Parameters. 9Saving Changes to the Echo Sensor . 9Updating the Database to Match Sensor Programming . 10The RV (Raw Vibration) Option . 11Mounting. 13Outline Drawing. 13Spot Face Tool . 13Replacing the Battery Pack. 14Page 2 of 14
FCC NOTICEFCC ID: ZOC-IMI670A01This device complies with part 15 of the FCC Rules. Operation is subject to the followingtwo conditions: (1) This device may not cause harmful interference, and (2) this devicemust accept any interference received, including interference that may cause undesiredoperation.Changes or modifications not expressly approved by the party responsible for compliancecould void the user's authority to operate the equipment.This equipment has been tested and found to comply with the limits for a Class A digitaldevice, pursuant to part 15 of the FCC Rules. These limits are designed to providereasonable protection against harmful interference when the equipment is operated in acommercial environment. This equipment generates, uses, and can radiate radiofrequency energy and, if not installed and used in accordance with the instruction manual,may cause harmful interference to radio communications. Operation of this equipment ina residential area is likely to cause harmful interference in which case the user will berequired to correct the interference at his own expense.INDUSTRY CANADA (IC) NOTICEIC: 9732A-IMI670A01Operation is subject to the following two conditions: (1) this device may not causeinterference, and (2) this device must accept any interference, including interference thatmay cause undesired operation of the device.Page 3 of 14
IntroductionThe Echo Wireless Vibration Sensor is a one-way wireless transmitter used for thecondition monitoring of plant equipment. The sensor, when activated by a magnet, will“wake up” at determined intervals (8 hours by default) to measure and transmit vibrationlevels. An Echo Receiver connected to a computer with the Echo Data Server softwareinstalled is required to receive and collect transmissions. For information on the setupand installation of the Echo Receiver and Echo Data Server, please consult the Echo Receiver System Manual.Proper HandlingProper handling of the Echo Wireless Vibration Sensor is critical to preventing damage.The following should be avoided: Dropping the unit. Hitting the unit against hard surfaces. “Slapping” the unit when mounting with a strong magnet. Submersing or spraying the units with fluids of any kind. Touching the electronic components under the cap. Using excessive torque when mounting the unit. Forcing a stud without ¼-28 UNF threads into the base. Twisting the isolated base and housing of transmitter. Exposing the unit to temperatures above 170 F. Exposing the cap to any reactive chemicals.CautionThe sensor cap is easily cross threaded. To avoid cross threading thesensor cap, turn the cap counter-clockwise until a click is heard. Whena click is heard, begin turning the cap clockwise slowly and carefully. Ifthe cap does not easily thread on do not force it.Page 4 of 14
The Magnet Switch and LED Status IndicatorThe Echo Wireless Vibration Sensor is activated by a magnet switch located on the sideof the housing. The exact location of the magnet is etched on the sensor housing. If afairly strong magnet is held near the location of the magnet switch, the blue LED lightwill begin blinking quickly. If the sensor was previously deactivated it will becomeactive and immediately take its first measurement. If the sensor was previously active itwill deactivate and no longer take measurements. The blue LED light allows the user toquickly.LED Status MessagesBlue LED MessageFast continuous blinking4 second intermittent blink8 second intermittent blinkDim illuminated LEDBright illuminated LEDCurrent Sensor StatusMagnet switch is currently being activated.Sensor is turned on and waiting for the next transmission.Sensor is turned off and will not make measurements.Sensor is currently measuring vibration levels.Sensor is currently transmitting information to receiver.Page 5 of 14
Programming the Echo Wireless SensorThe Echo Wireless Vibration Sensor can be programmed with a computer running theEcho Data Server software through a serial port.TipIf your computer is not equipped with a serial port, a USB to RS232adaptor can be used. These are readily available from computerelectronics vendors.Attaching the Programming CableTo begin programming the Echo Wireless Vibration Sensor, unscrew the cap carefullyto expose the USB port inside the sensor. Carefully attach the programming cable to thesensor and your computer’s serial port (use the USB to RS232 adaptor if necessary).Connecting to the Sensor with the Echo Data Server SoftwareLaunch the PCB Echo Data Server and click Echo EchoPlus Sensors under theConfiguration drop down menu in the upper left hand corner of the screen.Page 6 of 14
The program will then ask if you wish to set up a Echo Wireless Sensor or an EchoPlus Wireless Junction Box. Select “I want to add, update, or view an Echo WirelessSensor’s Parameters”.Select the receiver that you would like this specific sensor attuned to. If you are using asingle receiver select the default setting.The software will then ask if you would like to set up the sensor, the database, or both. Ifthis is the first time you are activating this sensor you must do both. Installing a newsensor and configuration of the database is covered in the Echo System Setup Manual.We will continue by only changing the programming of the Echo Sensor. Select “I willonly configure the Echo device at this time” button and click Next.Make sure the sensor is connected to the computer through the USB to RS232programming cable and hit OK.Page 7 of 14
The connection window will appear. Select the appropriate COM port to which the cableis connected.Reading the Current Programmed ParametersClick “Link to Echo ” and the green light will illuminate indicating the connection hasbeen made. The fields at the right of the window will populate with the currentprogrammed parameters.TipThe Sensor ID is set at the factory and CANNOT be changed. This ID isunique to each sensor we manufacture. The factory default theTransmission Interval is 8 hours, RVL is 0 (off), and the CF ReportThreshold is 0.15.Page 8 of 14
Explanation of Echo Wireless Sensor ParametersSensor ID – The Sensor ID is a unique ID programmed and etched onto each sensor atthe factory. This number cannot be changed.Transmission Interval – The Transmission Interval is the time between transmissions.The factory default level is 8 hours, that is the sensor will “wake up” and make ameasurement every 8 hours (3 times per day). At the default 8 hour transmission intervalthe primary lithium-ion batteries are expected to last 5 to 10 years.TipDecreasing the Transmission Interval will provide data more often;however, transmitting more often will decrease battery life. Keep inmind “more data is not better data” and may be more than you canprocess and manage.RVL (Residual Vibration Level) – This is the minimum Residual Vibration (that is,vibration that is currently present) for the sensor to wake up and make a measurement. Ifthe current vibration is below the RVL, the sensor will assume the equipment is turnedoff and will not waste battery power transmitting unusable data. If the value is set to “0”this feature is disabled and will always make a measurement.CF Report Threshold – Because crest factor is the ratio of true peak divided by RMSvibration, in some instances where the RMS value is extremely low (such as slow speedequipment) the crest factor will appear exceptionally high. This report factor is theminimum RMS level in g for the Crest Factor to be reported.Saving Changes to the Echo SensorClick the “Set” button next to each field you wish to update. The new value will besaved in the Echo Sensor. To verify the programming has been saved click “Link toEcho ” and verify the desired values re-populate the fields.When you are satisfied with the programming of the sensor, click the X close button inthe upper right hand corner of the window.Page 9 of 14
Updating the Database to Match Sensor ProgrammingIf this is the first time you are putting the sensor in the database the following dialog willappear. This dialog will indicate the standard template has been assigned to this sensor.If this is the case, refer to the Echo System Manual for instructions on setting up thedatabase.When a sensor programming has been changed the database will automatically update tomatch the current programming.Page 10 of 14
Changing the Transmission Interval, RVL, or CF Report Thresholdmanually in the Database is NOT recommended. These values determinewhat the software expects the sensor to do, not what the sensor willTipactually do. For example, if you change the Database from 8 hours to 1hour, the sensor will still transmit every 8 hours, but the Database will expecttransmissions every 1 hour. The software will think the transmitter is late ormissing transmissions.The values below should only be changed in the sensor programming.Page 11 of 14
The RV (Raw Vibration) OptionSensors ordered with the RV prefix including the optional raw vibration output feature.These sensors are easily distinguished due to the small connector located on the side ofthe unit. This connector is not present on the standard unit.A special cable can be used to connect to the sensor’s 4 pin connector and a standardBNC connector on your data collector. To collect data, treat the sensor like a standardICP or IEPE 100 mV/g accelerometer. Your data collector should provide 18-30VDC2-20mA constant current excitation power. The output will be a 5 VAC dynamic signalfrom -50 to 50 g.Ensure the shorting cap is replaced after raw vibration data is collected.The transmitter will not be able to collect data without it!CautionPage 12 of 14
MountingThe Echo Wireless Vibration Sensor should be stud mounted on a clean, flat surface.The sensor is sensitive in the axis that passes through the mounting hole in the base of theunit. It is not recommended to mount the sensor with a magnet or adhesive due to thesize and mass of the sensor.Outline DrawingSpot Face ToolIf a clean and flat spot is not available, it is recommended to prepare a flat machinedsurface with IMI model 080A127 1” spot face tool. This tool will prepare a flat surfaceand drill the appropriate pilot hole for a ¼-28 UNF thread. The tap is not included in thekit.Page 13 of 14
Replacing the Battery PackTo replace the battery pack, carefully slide the battery pack out and disconnect the smallpower connector on the circuit board.DO NOT ATTEMPT TO RECHARGE BATTERIES.DO NOT REPLACE WITH STANDARD AA SIZE BATTERIES.The Echo Sensor is equipped with primary lithium-ion batteries thatCautionare not rechargeable. Please consult the factory or your localdistributor for replacement battery packs.Page 14 of 14
The Echo Wireless Vibration Sensor is activated by a magnet switch located on the side of the housing. The exact location of the magnet is etched on the sensor housing. If a fairly strong magnet is held near the location of the magnet switch, the blue LED light will begin blinking quickly. If the sensor was previously deactivated it will become