Transcription
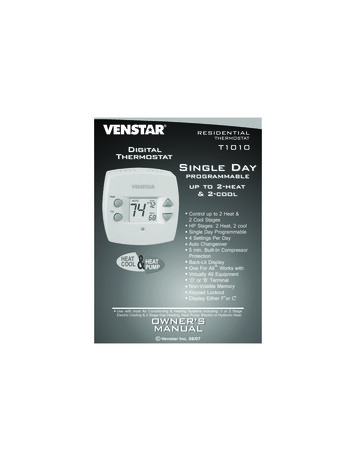
GRAMMABLEup to 3-heat& 2-coolHEATCOOLControl up to 3 Heat &2 Cool Stages3 Configurable OutputsAdjustable 2nd & 3rd StageTimers & DeadbandsBacklit Display & ButtonLegendsAux Heat IndicatorDry Contact EquippedAccepts Comfort CallPhone Control AccessoryHEATPUMPOutdoor Sensor Ready withHigh/Low Readouts for the DaySet Point LimitingAccepts EZ ProgrammerEconomizer ControlPreoccupancy Fan PurgeRemote AveragingProgrammable OutputLight Activation EquippedAccepts Optional Humidity Module:Controls Humidification,Dehumidification and ReheatAccepts Optional IR Remote ControlMeets Commercial California Title 24Use with most Air Conditioning & Heating Systems including: 1 or 2 StageElectric Cooling & 3 Stage Gas Heating, Heat Pump, Electric or Hydronic Heat.OWNER’SMANUALVenstar Inc. 04/08
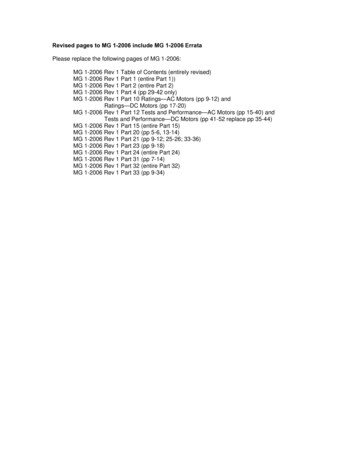
CAUTIONFollow the Installation Instructions before proceeding.Set the thermostat mode to “OFF” prior to changingsettings in setup or restoring Factory Defaults.CAUTIONNEVER PUT MORE THAN ONEJUMPER ON THE SAME MISCJUMPER BLOCK!THIS MAY DAMAGE YOURTHERMOSTAT AND VOIDYOUR WARRANTY.MISC3MISC3OKNOTE: Due to variations in environmental conditions, it is notalways possible to achieve the desired humidification ordehumidification setpoint.This device complies with Part 15 of the FCC Rules. Operation issubject to the following two conditions: (1) this device may not causeharmful interference, and (2) this device must accept any interferencereceived, including interference that may cause undesired operation.ThermostatT2900cFCTested to Complywith FCC Standards4Z95FOR HOME OR OFFICE USEPage i
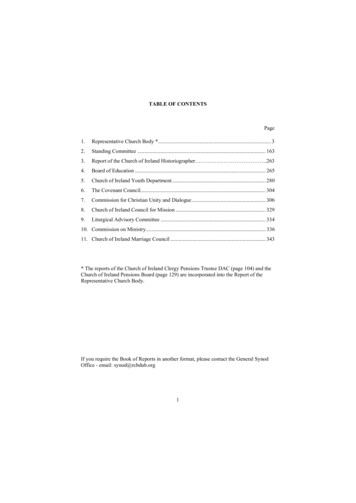
How to Use This ManualThe Table of Contents divides the thermostat features into sectionsmaking it easier to quickly find information.The first page of each section contains a more detailed Table of Contentsfor each section, such as the example page shown below.SECTION 14Timers and DeadbandsHeader shows section #and title of sectionSection 14 Contents:Adjusting the Heat/CoolDifferential.14.2Adjusting the CyclesPer Hour.14.3Adjusting the Deadband.14.4Adjusting the Minutes ofRun-Time Before the14Next Stage.14.6Selecting 2nd Stage TurnOff Temperature.14.7Section contentsVisible section tabon the side of thepageSection and page #Page 14.1In addition, this manual also has an Index to help you find any informationregarding this thermostat quickly.Page ii
Glossary of TermsAuto-Changeover: A mode in which the thermostat will turn onthe heating or cooling based on room temperature demand.Configurable Output Jumper: Using jumpers on the thermostatyou can configure the MISC1, MISC2, and MISC3 terminals tocontrol humidification, dehumidification, 2nd stage cooling, 3rdstage heating, and a programmable output.Cool Setpoint: The warmest temperature that the space shouldrise to before cooling is turned on (without regards todeadband).Deadband: The number of degrees the thermostat will wait, oncesetpoint has been reached, before energizing heating or cooling.Dehumidify: To reduce the amount of moisture in the air.Differential: The forced temperature difference between theheat setpoint and the cool setpoint.Heat Setpoint: The coolest temperature that the space shoulddrop to before heating is turned on (without regards todeadband).Humidify: To increase the amount of moisture in the air.Icon: The word or symbol that appears on the thermostatdisplay.Mode: The current operating condition of the thermostat (i.e. Off,Heat, Cool, Auto, Program On).Non-Programmable Thermostat: A thermostat that does nothave the capability of running the Time Period Programming.Programmable Thermostat: A thermostat that has the capabilityof running the Time Period Programming.Reheat: Running the cooling and 2nd stage strip heaters at thesame time in order to dehumidify the air without cooling downthe room temperature.Temperature Swing: Same as Deadband.Time Period Programming: A program that allows thethermostat to automatically adjust the heat setpoint and/or thecool setpoint based on the time of day.Page iii
Table of Contents123Basic Operation4Viewing Outdoor and Remote5Temperature and HumidityProgramming the6Daily ScheduleProgramming the7Fan OperationThermostat ewing Equipment11Run-TimesElectric Heat and12Heat Pump OperationTimers and Deadbands13Using the14Programmable OutputProgramming Remote15Sensor OperationProgramming the Dry Contact 16Light Activated17OperationEnergy Save18OperationProgramming Run-Time19AlertsProgramming Holiday Mode 20Configuring the MISC21OutputsFactory Defaults, Calibration,22and SensorsAccessories23AdvancedSetupTable24Page ivQuick StartGetting to Know YourThermostatSetting Clock and Day
SECTION 1Quick Start1Section 1 Contents:Setting the Clock and Day.1.2Selecting the Heat or CoolMode.1.3Selecting Your DesiredTemperature.1.4Using the Fan Button.1.4Note: Following the instructions in this section will allow you tooperate your thermostat using the factory default settings. Thesesettings are depicted in the illustrations throughout this manual.Page 1.1
MODE1HUMIDITYSET CLOCKPress the MODE andHUMIDITY buttonsat the same timeSetting the Clock12:00 AmSetupDuring Setup & Programming:Pressing the UP or DOWNbuttons will modify the flashingselection.1To adjust theClock or Day usePressSetting the DayMODESetupMoPress the MODEand HUMIDITYbuttons at thesame time toreturn to normaloperation.MODE2HUMIDITYSET CLOCKPage 1.2Buttons.
1Selecting the Heat or Cool ModeSelect Mode by Pressing the MODE ButtonHeating OnlyThe HEAT setting indicates thetemperature the room has toreach before the furnace willturn on to heat the room.Cooling OnlyThe COOL setting indicates thetemperature the room has toreach before the air conditionerwill turn on to cool the room.12:00 PmSu70 68HEAT12:00 Pm76CSuOOL7012:00 PmHeating or CoolingAUTO will automatically selectheat or cool based on roomtemperature demand.PressMODEPressMODE76CSuOOLAUTO70 68HEATPressMODETime Schedule forHeating or CoolingThe Program On setting willactivate the time periodprogramming for the coolingor heating setpoint ONLY(Morning, Day, Evening& Night Periods).12:00 Pm Program OnSuOOLoccupied70 68HEAT12:00 PmOffOFF indicates both heatingand air conditioningsystems are turned off.76CSuOFF70Page 1.3PressMODE
Selecting Your Desired Temperature1(adjusting the setpoints)AUTO OR PROGRAM MODEPressing the UP or DOWN buttons in Auto or Programmode will adjust both the heat and cool set temperaturessimultaneously.Adjust the desiredset temperature with the12:00 Pm76CSuOOLAUTO70 68HEATbuttons.HEAT OR COOL MODEPressing the UP or DOWN buttons in Heat or Cool mode willadjust only the heat or cool set temperature.12:00 PmAdjust the desiredset temperature with the76CSuOOL70buttons.Using the Fan Button12:00 PmSu76COOLAUTO70 68HEATFanOnPressFANFan On indicates constant fan operation.If Fan On is selected the fan will runcontinuously at all times, except in Off,and will only run if there is a heating orcooling demand in Unoccupied periods.Pressing the FAN button toggles thisfeature on or off.Page 1.4
SECTION 2Getting to Know Your Thermostat2Section 2 Contents:Front Panel Buttons.2.2Display Features.2.3Page 2.1
Front PanelWarmer Button(glows red)Backlit LCD Display12:00 PmMo2[]sometimes referredto as the UP button74COOLAUTO72 72HEATCooler Button(glows blue)Heat or Cool Demand Indicator OverrideButtonRed Heat, Green CoolPLATINUM[eriesCOMMERCIAL PROGRAMMABLE THERMOSTAT12:00 Pm74CMoOOLAUTO72 72HEATMODEHUMIDITYFANPROGRAM HOLIDAY OVERRIDESET CLOCKOUTDOORQUICK RELEASE FORACCESSORY PORT(pg. 23.1)MODEHUMIDITYFANPROGRAM HOLIDAYOUTDOORSET CLOCKPage 2.2]sometimes referred to as theDOWN button
Display Features2Am Program On Setup18:88 PmStartStopHISuMoTuWeThFrSa DeHumidifyService FilterPan UV LightAUTOOFFON88COOLOutsideRemoteAUXHEAT188 88Unoccupied123OverrideFanOnLOMode Indicators - Section 4Selects the operational mode of the equipment.HEAT - Indicates the heating mode.COOL - Indicates the air conditioning mode.AUTO - Indicates the system will automatically changeoverbetween heat and cool modes as the temperature varies.OFF - Indicates heating and cooling is turned off.PROGRAM ON - Indicates the time period program is enabled torun.Clock with Day of the Week - Section 3Indicates the current time and day. This clock is also used to programthe time period schedules.Room Temperature Display - Section 5Indicates the current room temperature and displays the outdoortemperature when selected.Desired Set Temperature - Section 4/5Indicates desired room temperature(s). Also displays the highestand lowest outdoor temperatures for the day.Outside icon - Section 5Indicates the temperature displayed is from the optional outdoorsensor.Page 2.3
Display Features22Am Program On Setup18:88 PmStartStopHISuMoTuWeThFrSa DeHumidifyService FilterPan UV Light88COOLOutsideRemoteAUXHEATAUTOOFFON188 88Unoccupied123OverrideFanOnLOOccupied & Unoccupied icons - Section 6Indicates the program number: Occupied 1,2,3,or Unoccupied.Override icon - Section 6Indicates the program is currently being overridden for up to 4 hours.Setup icon - Sections 7-20Indicates the thermostat is in the setup mode.Fan On icon - Section 7Indicates constant, continuous fan operation. When Fan On is notlit - indicates the fan will only operate when necessary to heat or tocool.Service Filter icon - Section 19Appears when the filter should be serviced under normal conditions.Adjustable from 0 - 1950 hours of blower operation.icon - Section 8Indicates keypad has been locked.StartStop icon - Section 6Appears when programming occupied time periods.Page 2.4
Display Features2Am Program On Setup18:88 PmStartStopHISuMoTuWeThFrSa DeHumidifyService FilterPan UV Light88COOLOutsideRemoteAUXHEATAUTOOFFON188 88Unoccupied123OverrideFanOnLOUV Light icon - Section 11/19Appears when the UV bulb should be serviced under normalconditions. Adjustable from 0 - 1950 days of operation.Remote icon - Page 22.4Indicates the remote sensor reading of the thermostat is beingviewed.AuxHeat icon - Pages 10.5 & 13.4Indicates 2nd stage electric strip heat is being used when the thermostat is programmed for Heat Pump operation. Only the Aux iconwill appear during Cool to Dehumidify to indicate Reheat operation.Humidify/DeHumidify icon - Sections 9-10Indicates the system is currently humidifying/dehumidifying the air.Lo icon - Section 5Indicates the lowest recorded outdoor temperature for the day.Hi icon - Section 5Indicates the highest recorded outdoor temperature for the day.Service Pan icon - Section 16Indicates that a sensor (accessory) has detected the condensatedrain pan is full and the compressor (Y1) has been locked out.Page 2.5
SECTION 3Setting the Clock and Day3Section 3 Contents:Setting the Clock.3.2Setting the Day.3.2Note: During setup & programming pressing the UP or DOWNbuttons will modify the flashing selection.Page 3.1
MODEHUMIDITYSET CLOCK3Press the MODE andHUMIDITY buttonsat the same timeSetting the Clock12:00 AmSetupDuring Setup & Programming:Pressing the UP or DOWNbuttons will modify the flashingselection.1To adjust theClock or Day usePressSetting the DayMODESetup2MoPress the MODEand HUMIDITYbuttons at thesame time toreturn to normaloperation.MODEHUMIDITYSET CLOCKPage 3.2Buttons.To adjust the time byhours press and holdthe FAN button whilepressing the UP orDOWN buttons.
SECTION 4Basic Operation4Section 4 Contents:Programming for Auto orProgram Operation.4.2Selecting the ProperOperating Mode.4.3Selecting Your DesiredTemperature.4.7Note: During setup & programming pressing the UP or DOWNbuttons will modify the flashing selection.Page 4.1
Programmable or Non-ProgrammableThermostat4When the very simplest operation is desired, this thermostatmay be configured to be non-programmable, with or withoutAuto-Changeover. Follow the step below.If ‘NO’ is selected, the thermostat will lockout the Program On screen;only the Off, Heat, Cool, and Auto screens may be accessed bypressing the MODE button.Select ‘YES’ if you would like your thermostat to be programmable,then the Program mode will be accessible through the use of theMODE button.MODEPROGRAMPress the MODE button. While holdingthe MODE, press the PROGRAMbutton to enter Setup screens.Y ESYESProgram On SetupSelect Yes if you would likethe thermostat to be programmable or No for non-programmable.Note: Press the MODEbutton momentarilyto move through thesetup screens. Pressand hold the MODEbutton to move backwards through thesetup screens.1PressNOPROGRAMPress the PROGRAM button to leave the Setup screens. If no buttons arepressed, the display will leave the setup screens after 30 seconds.Page 4.2
Manual or Auto-ChangeoverThermostatWhen the very simplest operation is desired, this thermostat maybe configured to be a manual heat and cool thermostat, with orwithout time period programmability. Follow the step below.4The thermostat may be programmed to function as a Heat Only orCool Only thermostat by selecting ‘NO’ in the setup screen below.This will lockout the Auto-Changeover screen and only allow the Off,Heat, Cool, and Program On screens to be accessed.MODEPROGRAMMODEPress the MODE button. While holdingthe MODE, press the PROGRAMbutton to enter Setup screens.Press the MODE button repeatedlyuntil this setup screen appears.YESSelect Yes if you wouldlike the thermostat tobe Auto-Changeover orNo for a Heat Only andCool Only Thermostat.Y ESSetupNote: Press the MODEbutton momentarilyto move through thesetup screens. Pressand hold the MODEbutton to move backwards through thesetup screens.2AUTOPressNOPROGRAMPress the PROGRAM button to leave the Setup screens. If no buttons arepressed, the display will leave the setup screens after 30 seconds.Page 4.3
Operating Mode when the Thermostatis Configured to be:4NON-PROGRAMMABLE WITH MANUAL CHANGEOVER - If thethermostat is configured to be a non-programmable thermostat withManual Changeover, the following screens will be available bypressing the MODE button.Select the Mode by Pressing the MODE ButtonHeating OnlyThe HEAT setting indicates thetemperature the room has toreach before the furnace willturn on to heat the room.12:00 PmSu70 68HEATPressMODE12:00Cooling OnlySuThe COOL setting indicates thetemperature the room has toreach before the air conditionerwill turn on to cool the room.76CPmOOL70PressMODEOffOFF indicates both heatingand air conditioningsystems are turned off.12:00 PmSuOFF70Page 4.4
Operating Mode when the Thermostatis Configured to be:NON-PROGRAMMABLE WITH AUTO-CHANGEOVER - If thethermostat is configured to be a non-programmable thermostatwith Auto-Changeover, the following screens will be available bypressing the MODE button4Select the Mode by Pressing the MODE ButtonHeating OnlyThe HEAT setting indicates thetemperature the room has toreach before the furnace willturn on to heat the room.12:00 PmSu70 68HEATPressMODECooling OnlyThe COOL setting indicates thetemperature the room has toreach before the air conditionerwill turn on to cool the room.Heating or CoolingAUTO will automatically selectheat or cool based on roomtemperature demand.OffOFF indicates both heatingand air conditioningsystems are turned off.12:00 Pm76CSuOOL70PressMODE12:00 Pm76CSuOOLAUTO70 68HEAT12:00 PmSuOFFPressMODE70Page 4.5
Operating Mode when the Thermostatis Configured to be:PROGRAMMABLE WITH MANUAL CHANGEOVER - If the thermostat isconfigured to be a programmable thermostat with Manual Changeover, the4 following screens will be available by pressing the MODE button.Select the Mode by Pressing the MODE Button12:00 PmHeating OnlyThe HEAT setting indicates thetemperature the room has toreach before the furnace willturn on to heat the room.Su70 68HEATCooling OnlyThe COOL setting indicates thetemperature the room has toreach before the air conditionerwill turn on to cool the room.Time Schedulefor HeatingThe HEAT Program On settingwill activate the time periodprogram for the heatingsetpoint ONLY (occupied orunoccupied periods).12:00 Pm76CSuOOL70PressMODE12:00 Pm Program OnSuoccupied70 68HEATTime Schedule12:00 Pm Program Onfor CoolingSuThe COOL Program On settingwill activate the time periodprogram for the coolingoccupiedsetpoint ONLY (occupied orunoccupied periods).7012:00 PmOffOFF indicates both heatingand air conditioningsystems are turned off.PressMODESuOFF70Page 4.6PressMODE76COOLPressMODE
Operating Mode when the Thermostatis Configured to be:PROGRAMMABLE WITH Auto-Changeover - If the thermostat isconfigured to be a programmable thermostat with Auto-Changeover,the following screens will be available by pressing the MODE button.4Select the Mode by Pressing the MODE Button12:00 PmHeating OnlyThe HEAT setting indicates thetemperature the room has toreach before the furnace willturn on to heat the room.SuCooling OnlyThe COOL setting indicates thetemperature the room has toreach before the air conditionerwill turn on to cool the room.Heating or CoolingAUTO will automatically selectheat or cool based on roomtemperature demand.Time Schedule forHeating or CoolingProgram On will activate thetime period program for theheating and coolingsetpoints. (occupied orunoccupied periods)70 68HEAT12:00 Pm76CSuOOL7012:00 PmPressMODE76CSuOOLAUTO70 687670 68HEAT12:00 Pm Program OnSuPressMODECOOLoccupiedHEAT12:00 PmOffOFF indicates both heatingand air conditioningsystems are turned off.PressMODESuOFFPressMODE70Page 4.7
Selecting Your Desired Temperature (adjusting setpoints)AUTO OR PROGRAM MODEPressing the UP or DOWN buttons in Auto or Programmodes will adjust both the heat and cool set temperaturessimultaneously. For more information on this see page 13.2.412:00 Pm76CSuAdjust the desiredset temperature with theOOLAUTO70 68HEATbuttons.HEAT OR COOL MODEPressing the UP or DOWN buttons in Heat or Cool modes willadjust only the heat or cool set temperature.12:00 Pm76CSuAdjust the desiredset temperature with theOOL70buttons.Note: Due to the Random Start feature (see page 16.4) there will be a 2 to 30second delay before heating or cooling may be energized. This delayhelps to keep multiple thermostats from energizing their outputs atthe same time after a power outage.Page 4.8
SECTION 5Viewing the Temperature and Humidity Sensors5Section 5 Contents:Viewing the OutdoorTemperature.5.2Viewing the IndoorHumidity.5.3Page 5.1
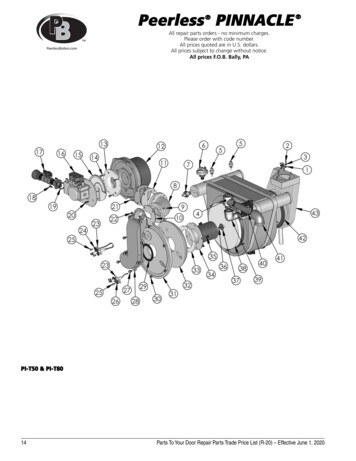
Viewing the Outdoor TemperatureRequires an outdoor sensor (optional accessory) to be installed (seepage 15.2 for wiring instructions). To read the temperature from theoutdoor sensor, press the PROGRAM and HOLIDAY buttons. Thedisplay will then show the current outdoor temperature along with the5 highest and lowest temperatures for the day.PROGRAM HOLIDAYOUTDOORPress the PROGRAMbutton. While holdingPROGRAM, press theHOLIDAY button to viewthe Outdoor temperature.The highest and lowesttemperatures for the daywill be displayed alongwith the current outdoortemperature.This reading is from thesensor connected to RS2.Press the PROGRAMbutton. While holdingPROGRAM, press theHOLIDAY button to leavethe Outdoor temperaturescreen.HI92Outside83 68LOHigh temperaturefor the day.Current outdoortemperature.Low temperaturefor the day.PROGRAM HOLIDAYOUTDOORNote: If no sensors are connected 2 dashes [- -] will appear.Page 5.2
Viewing the Indoor HumidityRequires the Humidity Module (optional accessory) to beinstalled. To display the current humidity at the thermostat,press the HUMIDITY button. The display will then show thecurrent indoor humidity along with the humidification setpoint(Section 9).5Note: The humidity reading will not appear unless the HumidityModule has been installed. If the Humidity Module has not beeninstalled dashes will appear in place of the humidity reading.HUMIDITYTo view the indoor humidityreading, press theHUMIDITY buttonCurrent Room HumiditySetup40Humidify10 rhPressHUMIDITYPress the HUMIDITY buttonagain to return the displayto normal operation.NOTE: Due to variations in environmental conditions, it is not always possibleto achieve the desired humidification or dehumidification setpoint.Page 5.3
SECTION 6Programming the Daily ScheduleSection 6 Contents:6Programming a DailySchedule.6.2Overriding the DailySchedule.6.6Page 6.1
Programming a Daily SchedulePressPROGRAMPress the PROGRAM button to enter time period programming.Use the Programming Worksheet on the back coverto help with this section.Select the maximum # ofoccupied periods to beused on any one day.Typically most installationsuse only Occupied 1.(1,2 or 3)6occupied1PressMODEAdjust the coolingsetpoint for Occupied 1.(35 - 99, OF )74COOLoccupied1PressMODEAdjust the heatingsetpoint for Occupied 1.(OF, 35 - 99 )Adjust the coolingsetpoint for unoccupiedperiods.(35 - 99, OF ssMODEPage 6.2Continued
Adjust the heating setpoint for Unoccupiedperiods.85COOLHEATUnoccupied55(OF, 35 - 99 )PressMODE6MoSelect the day forOccupied 1.(Mo - Su)occupied1PressMODE7:00 AmMoAdjust the start timefor Occupied 1.Startoccupied1PressMODE6:00 PmMoAdjust the stop timefor Occupied 1.Stopoccupied1PressMODEOnMoSelect Occupied 1 to runon this day (On), or not torun on this day (Off).OffONoccupied1PressMODEPage 6.3Continued
The copy command becomes available after the maximum # ofoccupied periods are programmed in a day. This example usesonly one occupied period.YesSelect Yes to copy theprevious day’s programto this day.NOTuCO PYNoIf Yes is selected:Selecting Yes, then pressing mode will copy theprevious day’s program. If yes is selected again,or each time, this routine will repeat.PressMODEIf No is selected:6PressMODETuSelect the dayfor Occupied 1.(Tu - Mo)occupied1PressMODE7:00 AmTuAdjust the start timefor Occupied 1.Startoccupied1PressMODE6:00 PmTuAdjust the stop timefor Occupied 1.Stopoccupied1PressMODEContinuedPage 6.4
OnTuSelect Occupied 1 to runon this day (On), or not torun on this day (Off).OffNOYesSelect Yes to copythe previous day’sprogram to this day.6NoPressMODEONoccupied1If Yes is selected:WeCO PYSelecting Yes, then pressing mode will copy theprevious day’s program. If yes is selected eachtime, this routine will repeat.If No is selected:PressMODEIf No is selected, as in previous steps, flashing prompts will appear to input startand stop times for Occupied 1. If more than one occupied period was selected inthe first programming step (page 6.2), then the cool and heat setpoints, and startand stop times for each additional occupied period will be prompted.PressPROGRAMAfter programming for all seven days is complete, press the PROGRAM button toleave the Setup screens. If no buttons are pressed, the display will leave the setupscreens after 30 seconds.PROGRAMMING TIPSIf only the Occupied 1 period is selected in the first programming step ( page 6.2), Occupied 2& 3 programming steps are skipped. Further , if Occupied 2 is selected, Occupied 3 programming steps are skipped.Heat & Cool setpoints for Occupied 1 are the same for every day of the week. If desired,Heat & Cool setpoints for Occupied 2 & 3 can be adjusted differently for each day of the week.If the start time is set later in the day than the stop time, the program will run from thestart time to midnight and from midnight to the stop time on the same day. For example: 9pmstart, 8am stop, on Monday. In this example the program will run from 12am Monday to 8amMonday and again from 9pm Monday to 12am Tuesday.Unoccupied Operation: The unoccupied settings take effect at all times when: (1) the program is on and (2) the current time is outside a preset occupied period. For this reason startand stop times are not necessary for unoccupied time periods.If the same start and stop times are programmed for an occupied period, then it will run 24 hours.If one occupied period starts and stops within another occupied period the lower occupied #has priority. For example: If Occupied 3 is programmed to be on 24 hours, and Occupied 2 isprogrammed to run that day, then the Occupied 2 setting will take over for Occupied 3between Occupied 2 start and stop times.Page 6.5
Overriding the Daily ScheduleThe OVERRIDE button may be used to interrupt the normal timeschedule programming of the thermostat. Override may only be usedwhen the thermostat is running the time schedule, in Program Onmode.Unoccupied Operation - During programmed, unoccupiedperiods, pressing the OVERRIDE button will temporarily 6force the thermostat into Occupied 1 comfort settings for 30minutes. The remaining Override time will alternate with theclock (refer to the second display below). The Override timercan be set up to a maximum of four (4:00) hours, in incrementsof 30 minutes. If the timer has been set for the maximum time,the next press of the OVERRIDE button will reset the timer,returning the thermostat to the correct time period program forthe day.Occupied Operation - During programmed, occupied periods, apress of the OVERRIDE button will force the thermostat into anunoccupied period for the remainder of the day. During thisforced unoccupied period the OVERRIDE button will operate asdescribed above.7:56 Pm Program OnWe85COOLUnoccupied65 55HEAT7:56 Pm:30 Pm Program OnWe74COOLoccupied1OverridePressOVERRIDE65 72HEATPage 6.6
SECTION 7Programming the Fan OperationSection 7 Contents:7Using the Fan Button.7.2Smart Fan Operation.7.2Setting the Fan-Off TimeDelay.7.3Fan Purge Operation.7.4Page 7.1
Using the Fan ButtonWhen the fan is set for automatic operation it will energize any timethere is a call for heating or cooling, otherwise the fan will remain off.Pressing the FAN button will energize the fan and display the FanOnicon on the thermostat display. To operate the fan in the automaticmode, press the FAN button again and the FanOn icon will disappear.PressFAN12:00 AmSu7Fan On indicates constant fan operation.If Fan On is selected the fan will runcontinuously at all times, except in Off,and will only run if there is a heating orcooling demand in Unoccupied periods.Pressing the FAN button toggles thisfeature on or off.76COOLAUTO70 68HEATFanOnSmart Fan OperationThis feature allows the fan to run continuously during Occupied 1, 2or 3 and automatically de-energize during Unoccupied, except whennecessary to heat or cool. To use this feature, place the thermostat inthe Program On mode. Next, press the FAN button to display theFanOn icon (see below).12:00 Am76CSuOOLoccupied1FanOn70 68Page 7.2HEAT
Setting the Fan-Off Time DelayTo increase the cooling efficiency of your unit, the thermostat may beprogrammed to continue running the fan after a call for cooling hasbeen satisfied. This delay may be set for 30, 60, or 90 seconds. Ifthe Fan Off Delay is set for zero seconds, the fan will not energizeafter a call for cooling has been satisfied.7MODEPROGRAMMODEPress the MODE button. While holdingthe MODE, press the PROGRAMbutton to enter Setup screens.Note: Press the MODEbutton momentarilyto move through thesetup screens. Pressand hold the MODEbutton to move backwards through thesetup screens.Press the MODE button repeatedlyuntil this setup screen appears.:00Set the Fan Off Delayto 0, 30, 60, or 90seconds.Setup3FanOnPressPROGRAMPress the PROGRAM button to leave the Setup screens. If no buttons arepressed, the display will leave the setup screens after 30 seconds.Page 7.3
Fan Purge OperationWhen this feature is activated, the fan will turn on during anunoccupied period at a preset amount of time prior to Occupied 1.This preoccupancy fan purge timer may be set from zero to threehours, in 15 minute increments. Zero means this feature is turned off.7MODEPROGRAMMODEPress the MODE button. While holdingthe MODE, press the PROGRAMbutton to enter Setup screens.Press the MODE button repeatedlyuntil this setup screen appears.Adjust the preoccupancyfan purge timer.0 - 3 hours.0:00 offSetup0:00Note: Press the MODEbutton momentarilyto move through thesetup screens. Pressand hold the MODEbutton to move backwards through thesetup screens.4PUPress the PROGRAM button to leave the Setup screens. If no buttons arepressed, the display will leave the setup screens after 30 seconds.Page 7.4PressPROGRAM
SECTION 8Thermostat Display OptionsSection 8 Contents:8Turning On/Off theBacklight.8.2Programming the Thermostatto Display Temperature inFahrenheit or Celsius.8.2Locking/Unlocking theKeypad.8.3Programming a SecurityLevel.8.4Page 8.1
Turning On/Off the BacklightMODEPROGRAMMODEPress the MODE button. While holdingthe MODE, press the PROGRAMbutton to enter Setup screens.Press the MODE button repeatedlyuntil this setup screen appears.Note: Press the MODEbutton momentarilyto move through thesetup screens. Pressand hold the MODEbutton to move backwards through thesetup screens.8SetupSelect backlight operation:AUTO - Light from 6pm to6am nightly.ON - Light continuously.OFF - Light for 8 secondsafter a button press.AUTO5L1PressMODEProgramming the Thermostat to DisplayTemperature in Fahrenheit or CelsiusSetupCSelect thermostatoperation in degreesFahrenheit or Celsius.6FFPressPROGRAMPress the PROGRAM button to leave the Setup screens. If no buttons arepressed, the display will leave the setup screens after 30 seconds.Page 8.2
Locking/Unlocking the KeypadTo preve
Use with most Air Conditioning & Heating Systems including: 1 or 2 Stage Electric Cooling & 3 Stage Gas Heating, Heat Pump, Electric or Hydronic Heat. HEAT COOL HEAT PUMP Digital Thermostat PROGRAMMABLE up to 3-heat & 2-cool 7-DAY THERMOSTAT T2900 commercial Control up to 3 Heat & 2 Cool Stages 3 Configurable Outputs Timers & Deadbands Backlit .