Transcription
8/20/2019http://bit.ly/Bb4EveryoneBlackboard for EveryoneThis session will provide a brief overview of how Blackboard is used at Montgomery College forsupplementing face to face courses. Participants will learn about ELITE’s Blackboard Trainingopportunities, and the differences between the various courses that are offered. There will be ademonstration of preparing a simple Blackboard site for on campus use with students. Thisdemonstration will include posting a course syllabus, organizing a course site, uploading files to aBlackboard site, and creating links to external websites. Faculty will also learn about MC Specific policiesand procedures for when sites become available to faculty and students.At the end of the session participants should be able to:1. Explain ELITE’s Blackboard Training opportunities2. Describe proper techniques for organizing a Blackboard Course3. Review the steps for uploading a course syllabus, files, and linking to websites in a BlackboardCourse.4. Review MC specific policies and procedures for when courses become available to faculty andstudents.1
8/20/2019http://bit.ly/Bb4Everyone1. ELITE: Who we are, and what we doELITE stands for ELearning, Innovation, and Teaching Excellence. For more information about who we are,and what we do, visit our ELITE website at www.montgomerycollege.edu/ELITEInstructional Designers are available to help faculty with their teaching, whether improving in classroominstruction or helping faculty integrate technology into their teaching .There are two ELITE instructionalDesigners available on each of the three campuses. GermantownRockvilleTakoma ParkEach pair ofinstructional designershas a specific focus.There are OnlineInstructional Designersthat focus on the use oftechnology in theclassroom (such asBlackboard), and thereare Classroom BasedInstructional Designers.Online Designers arepictured to the right.Face to Faceinstructional designersare concerned withhelping you get theskills you need to be amore effectiveclassroom teacher. Seethe ELITE InstructionalDesigners on yourcampus /contact-us.htmlGermantownTom CantuInstructional DesignerPhone: 240.567.6006Email: Tom.Cantu@montgomerycollege.eduRockvilleMichele KnightInstructional DesignerPhone: 240.567.1733Email: Michele.Knight@montgomerycollege.eduTakoma ParkAlison YuInstructional DesignerPhone: 240.567.1392Email: alison.yu@montgomerycollege.eduBook NowUse the Book now button to access a calendar forpersonal Blackboard help and assistance. Hours are: Monday – Friday between 8:30 AM to 4PM. Get help with tricky tech support issues. Ramp up and quickly learn to create tests, use theGrade Center, etc.To book now, use the Book now button on the portalpage. The url is:https://facultybbsupport.youcanbook.me/2
8/20/2019http://bit.ly/Bb4Everyone2. How to Sign up for Training on MC Learns1. Using your Web Browser, go to: www.montgomerycollege.edu2. Click the Access MyMC Button in the upper right hand corner.3. Login to My MC.1234. Click on the Training and Professional Development link.45. In the Center of the Training and Dev page, click the “MC Learns" link.56. Click "Schedule of Classes & Events".3
8/20/2019http://bit.ly/Bb4Everyone667. All ELITE offerings are listed under Pedagogy & Instruction.77*If you have questions or problems with being able to access MCLearns, those questions should bedirected first to your supervisor, and then to Human Resources.Please note that you will need to be able to sign up for training on MC Learns to be able to take any ofthe ELITE Trainings.4
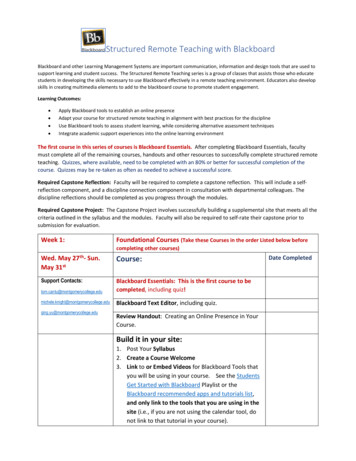
8/20/2019http://bit.ly/Bb4Everyone3. Five Main Blackboard Trainings that ELITE Offers1.Blackboard Essentials: This is the prerequisite course for every Blackboard course that isoffered for faculty taking Blackboard Training at Montgomery College. This course will teachyou how to navigate Blackboard, how to organize a site, post files for your students, create linksand announcements. You must complete this course before taking any of the other Blackboardcourses.The courses below are optional. Feel free to take any or all of these courses as you are ready to expandwhat you are doing with your students in Blackboard.2. Blackboard Assessments: This course will teach you how to create online tests for yourstudents that are automatically scored by Blackboard. Some instructors give their studentsweekly quizzes as a way of ensuring that they do weekly readings before they come to class.3. Blackboard Communication tools: This course will teach you how to create and manage anOnline Discussion board for your students. If you find that there are topics that you talkedabout in class that students want to explore further, you might set up discussions on thesetopics to further engage students.4. Blackboard Grade Center: This course will teach you how to set up an Online Gradebook foryour students that can be automatically updated throughout the semester as you enter grades.This can help keep students on track with their grades throughout the semester and allowsthem to monitor their own progress and improve performance as the semester progresses.5. Blackboard Text Editor: Learn how to create pages in Blackboard with text, links, images andembedded videos. The text editor can be used to create more interactive lessons for yourstudents. For example, you can embed a video on a webpage, include student learningoutcomes and ask your students a few questions to guide their thinking as they watch the video.5
8/20/2019http://bit.ly/Bb4Everyone4. How do faculty and students log onto Blackboard?1. Using your Web Browser, go to: www.montgomerycollege.edu2. Click the Access MyMC Button in the upper right hand corner.123. Login to My MC.34. Click on the Blackboard Icon in the upper right hand corner of the course.45.Blackboard will launch. If you have beenenrolled in any training offered on Blackboard,or you have a for credit course offered onBlackboard, those courses will appear in theMy Courses area at the right of the screen.6. To enter one of your courses, click the linkfor the course.566
8/20/2019http://bit.ly/Bb4Everyone5. When will I receive access to my Blackboard Courses?Faculty will automatically receive access to their Blackboard course sites, approximately four weeksbefore the semester begins. Students will receive access to the Blackboard courses approximatelyseven calendar days before the semester begins.Prior to the semester beginning, you may see the word unavailable beside your course site when you logonto Blackboard. This means the course is not yet available to your students. However, the course isavailable for your use. About seven calendar days before the semester begins, the word unavailableshould disappear from the course site. At that point, the course is available to your students.6. How can I prepare a simple course site for my students?Tour a Course HomepageWhen you first click the link to enter a Blackboard Course, you will see the Course Homepage.You will notice an icon that looks like aswitch on the upper right hand corner ofyour screen called Edit Mode ON. Youwill be in Edit Mode On by Default, and inthat view, you can make changes to yourcourse as an instructor.Edit Mode off is used toPreview the course as astudent.1. Content Frame: This displays theselected Tool or Content Area. By default,when you first enter your course, theHomepage for the course appears.2. Bread Crumb Trail: The BreadcrumbTrail appears at the top of each page, andprovides the path that you navigated to getto the current page.3. Course Menu: You and your studentscan use the course menu to access coursetools, as well as your Course Content.While you can add links to this menu, weencourage you to keep your course menusimple (like the illustration on the left).4. Control Panel: The central access point for course management functions. Use it to customize the course,access files, and the grade center.7
Post a Course Syllabus8/20/2019http://bit.ly/Bb4EveryoneWhen you click the Syllabus Link in your instructor course site, you will be presentedwith a blank syllabus page.In the upper right hand corner, be sure that Edit Mode is set to ON, beforeproceeding to post your syllabus.Follow the steps below to post a syllabus.3. Click Submit tosave the syllabus1. Craft some text introducing your syllabus.2. Attach a File to your Syllabuswith the attach File button(browse your computer to findthe file). Use any format yourstudents have the software toopen (PDF, Word, HTML, etc.)Make sure you click submit before leaving the Syllabus page, or else your syllabus will not save!8
8/20/2019http://bit.ly/Bb4EveryoneThe Course Content AreaClicking on the CourseContent link will bring youto the main area of thecourse site where you willpresent course materials tostudents.Content Area.Create Learning ModulesHere are the steps for adding Learning Modules to theCourse Content Area1.Be sure that you are in the Course Contentarea. Note: The words Course Content willappear at the top of the screen.2.Move your Mouse over the Build ContentModule Menu.3.Select Learning Module on the Menu thatappears.4.On the Create Learning Module Screen, Type aname for your Learning Module in the NameField.5.Clickat either the top, or thebottom of the page to create the LearningModule.The Learning Module will be created with thename that you typed for the Learning Modulein Step #4.This area is blank whenyou first enter the CourseBlackboardwill allow youto neatlyorganizecoursematerials foryour studentsby usingLearning Modules to group handouts.We recommend that you use Learning Modules toorganize the files that you will provide for yourstudents. See the sample from the ComputerApplications course below.In this example, four Learning Modules have beencreated to organize the content that corresponds toeach unit of the course, Word, Excel, PowerPoint, andAccess.6.This instructor can click the link for a Learning Module,and any handouts that they upload will be placed neatlywithin the Learning module.9
8/20/2019http://bit.ly/Bb4EveryoneUpload Files to a Learning ModuleTo upload files to a Learning Module, click the link toenter one of the Learning Modules you created. Byclicking the link to enter the Learning Module, the filesthat you upload will be added within the LearningModule that you created, helping you organizehandouts for your students.After entering a weekly Learning Module, you will see arow of buttons at the top of the screen called an ActionBar.The Action Bar contains fourbuttons, Build Content,Assessments, Tools, and PartnerContent.As you add new or existingcontent to your course, you willbe most concerned with theBuild Content menu.The File option on this menuwill allow you to Add Files tothe Course.1.2.3.4.Click the Link to enter the Learning Modulewhere you want to add the file.Move your Mouse over the Build Content menuOn the menu that appears, Select File.On the Create File screen that appears, clickthe Browse My Computer button to find yourfile to upload.5.Type a Name for the File in the Name Field.6.ClickModule.Create Web Links1.2.Click the link to enter the Learning Modulewhere you want to add the Web Link.On the Action Bar, Select Build Content WebLink.3.The Create Web Link Page appears.4.5.Give your Web Link a Name in the Name field.Paste or type the URL for the website youwant to link to. Note, it must start withhttp://, for example http://www.google.com6.Type a description if desired.7.8.Clickto create your Web link.Your Web Link is added to the LearningModule.to add your File to the Learning10
8/20/2019http://bit.ly/Bb4Everyone7. Who to Contact with Questions?The ELITE instructional designers below provide support for faculty using Blackboard during regular MC businesshours. There is also a book it now feature for faculty to schedule an appointment to receive customized support.GermantownTom CantuInstructional DesignerPhone: 240.567.6006Email: Tom.Cantu@montgomerycollege.eduRockvilleMichele KnightInstructional DesignerPhone: 240.567.1733Email: Michele.Knight@montgomerycollege.eduTakoma ParkAlison YuInstructional DesignerPhone: 240.567.1392Email: alison.yu@montgomerycollege.eduBook NowUse the Book now button to access a calendar for personal Blackboard help andassistance. Hours are: Monday – Friday between 8:30 AM to 4 PM. Get help with tricky tech support issues. Ramp up and quickly learn to create tests, use the Grade Center, etc.To book now, use the Book now button on the portal page. The url is:https://facultybbsupport.youcanbook.me/Support for MC Students Using Blackboard / Support for Faculty after Regular BusinessHoursStudents needing support with Blackboard can call the Blackboard helpdesk at 240-567-7222. Aftercalling the main switchboard, they should select the option for assistance with Blackboard.Faculty needing support with Blackboard after regular business hours can also call the 24 / 7 helpdesk at240-567-7222.11
8/20/2019http://bit.ly/Bb4EveryoneBonus Material: For those who want to know about MC Mail & Grades1. Course Mail (Messages) (watchthe video)The Course Mail, (or Course Messages) tool on the lefthand Course Menu is a tool that allows you to send andreceive messages directly within the Blackboard Coursesite.If you are accessing theTools menu, the Course Mailtool is named CourseMessages.Blackboard Course Mail orCourse Messages arecontained within the Coursesite.2. Using the Send Email tool insteadof the Course Mail Tool (watch thevideo)Blackboard Course Mail is contained within the coursesite.When using Course mail, students and faculty need tolog onto Blackboard to check their mail messages. Ifyou would prefer to have your messages come to yourMontgomery College email account, Blackboardprovides a Send Email tool for convenience.Note: To prevent confusion,instructors should use one method foremailing students, not both!When using Course Mail,students and faculty needto log onto Blackboard to check their mail messages.3. Hiding the default Course Mail(Course Messages tool) optionalTo hide the Default Course Mail tool and use SendEmail Instead, you will first hide the Course Mail Tool.Next, you will add the send email tool to the left handcourse menu.Hiding the Course Mail Tool1. Click the Action link (chevron) next to theCourse Mail.2. Select Hide Link on the menu that appears.3.Tools that are hidden will have an icon to theright that is a box, with a line runningdiagonally through the center. (See the imagebelow)4a. Adding the Send Mail tool to theCourse MenuAdding the Send Email Tool1. Move your mouse over the plus sign in the upperleft hand corner of the course menu.2. Click the Tool Link option on the menu that appears.3. The Add Tool link Menu appears.1.2.3.12
8/20/2019http://bit.ly/Bb4Everyone4b. Adding Send email tool to Course(continued)5. Send MC email with Send EmailTool (watch the video)4. In the Name Field, type the name of the link. SendMC Email is the recommended name to use.5. Click the drop down next to type, and select Email.6. Click the checkbox next to Available to All Users tomake the link visible to students.7. Click64.44.College mail.1. Click the Send Email Link.2. On the Send Email Page,that appears click the link toselect the group of users tosend an email.3. Select the appropriaterecipients.4. Fill in the subject andmessage fields as appropriate.5. Attach a file in theattachments area if desired.6. Click Submit to send yourmail message via Montgomery54. mail messagesYou may now use Send MC Email to sendto your student’s Montgomery College email accounts.Note: Faculty and students will need to use theirMontgomery College email to check for any replies tomessages sent using the Send email tool.13
8/20/2019http://bit.ly/Bb4Everyone1. Enter Student Preview Mode and setpreview settings to keep data (watch video)To effectively use the Blackboard Grade Center, you need tohave access to a Test Student. A recent blackboard upgrade hasadded a Student Preview Mode. This feature works byautomatically logging faculty into the course as a student.To access Student Preview Mode:1. Click the Student preview icon located in the upperright hand corner of the screen.2.Since Student Preview Mode logs you on as an actualstudent, you will be returned to the course homepage.3.An orange bar across the top of the screen will indicatethat you are in student preview mode.2. Accessing the Grade Center (watch video)4.In the Control Panel, Click the Grade Center Link.5.Click the Full Grade Center Link.6.The Grade Center is displayed.Note: Only you can see the Grade Center. Students willIn order to set up your Grade Center, you will need to adjust theStudent Preview Settings to save student preview data.Adjust the settings to Save Preview User Data1. While in Student Preview Mode, click the settingsbutton in the Upper Right hand corner of the screen.2.3.4.5.On the Student Preview settings screen, select theoption to keep the preview User and all Data. Thiswill create a Preview user in the Grade Center so thatyou can experiment with adding grades to a columnand checking any scoring you develop in the GradeCenter.Click the checkbox next to “Do not ask me about thepreview user when exiting student preview.”only be able to see a record of the grades that are released tothem on the My Grades Page. You will receive instructions onlinking to this page on the main menu of the course later in thehandout.3. Default Columns already in the GradeCenter (watch the video)The columns in the following list are default columns inthe Grade Center. Any column can be hidden from view,except the Last Name column. The first four columnslisted are automatically added by Banner when studentsare populated in the course. ClickClick the Exit Preview Button in the upper right handcorner of the screen to return to Instructor View. Now You will see a Preview User in the Grade Center whenyou visit the Grade Center in the next step.Note: You may delete this user from the Grade Center, andany submissions by editing the setting again and deletingthe Preview user.Last NameFirst NameUsernameStudent IDLast AccessAvailabilityWeighted Total – The Weighted Total column isprovided as a placeholder for instructors whowant to create a calculated column that weighsthe data in grade or category columns. We willlook at this default column in more detail later.Total – By default, the Total column displays arunning total of the items in all grade columns.You can edit the columns used by the Totalcolumn.14
8/20/2019http://bit.ly/Bb4Everyone4. Adding Manual Columns to theGrade Center (watch the video)5. Editing Grades (watch video)Since Blackboard automatically generates columns foritems that you create in Blackboard, such as tests,discussions, and assignments, the only reason to addmanual columns to the grade center is if you havestudent items to grade that you have created outside ofBlackboard.To change a grade in blackboard, click the Grade Cell.When the cell becomes active, you can update thegrade in the field, much like you would update a gradein Excel. Simply type a new grade inthe field and click enter to updatethe grade.If you are supplementing, and you have paper tests forexample, you can create a column manually to helpstudents keep track of their score.Creating a Grade Center column:1. Enter the Grade Center2. Click the Create Column Button in the upperleft hand corner.To Access Advanced Grading Features, such asOverwriting Grades, Click the Arrow (Action Link) tothe Right of the Grade Colum Field.On the Menu that Appears, Click View Grade Details.3.Column Name: Type a name for your columnin the Column Name Field. All Grade CenterColumns must be named.4.It is recommended that you leave the GradeCenter Name blank. This feature would beused to create an alternate abbreviated nameof the column, which can be confusing.Primary Display: For Ease of Grade Calculationleave this set to Score.Secondary Display: This is a secondary displaythat is visible only to you as the CourseInstructor.Points Possible: This is a mandatory field.You should type the highest possible score forstudents to receive for the column.Dates: Dates on manual columns are notrecommended, otherwise students will bemarked as having submitted assignments lateif you grade them after the due date.Options: Include this Column in Grade CenterCalculations- Yes Show this Column to Students- Yes5.6.7.8.9.10. Clickto create the column.On the Grade Details page, you can see the history ofthe Grade, and other Details about the Column.You can use the Edit Grade Button toEdit a Grade. This opens the Edit GradeScreen.After clicking the Edit Grade Button,you can change the Current GradeValue.You also have the option to give feedback to theLearner about the reason for a Grade Change. You canalso create Grading Notes. Note that Grading Notesare only for your record as the instructor.Manual Grade Override is also available to you on theGrade Details Page.: is useful if youwant to grade a group of student tests, on the “curve”.An orange triangle in the upper right hand corner of agrade cellis a grade that was manuallyoverwritten.Finally Grade History will show you allchanges to the Grade.15
8/20/2019http://bit.ly/Bb4Everyone6. Organize Grade Center Columns(watch the video)7. Organize Grade Center ColumnscontinuedAs Grade Center Columns are created through theCreate Column button, or by deploying gradable itemsin Learning Modules, they are created in order that youcreate these items.To hide a Grade Center Column from yourinstructor view:Note: Hiding a column from your view does nothide a column from the student view!1. Click the checkboxes to the left of thecolumns to hide.You may decide you want to change this order. Youmay want to organize your grade center columns by theorder of the assignments in your course. Or, you maywant to group different types of assignments,discussions, and tests.How to Organize Grade Center Columns:1. Locate the Action Bar at the Top of the GradeCenter:2. Move your Mouse Over the Manage Menu.2. Move your Mouse over the Show Hidebutton at the top or bottom ofthe screen.3. On the Menu that appears, select HideSelected Columns.213.13On The Menu that appears select ColumnOrganization.4.3These Columns will be grayed out with ahidden message displayed to the right.4This opens the Column Organization PageThe Column Organization page provides an easy toscan, one page view of the columns in Grade Center.Each column is represented by a row, with the top rowrepresenting the leftmost column in the Grade Center.Recommended Changes to the Grade CenterOrganization: Hide the Username, Student ID, and AvailabilityColumn.ClickSubmit to apply all the changes on thispage your Grade Center organization.To hide a column from Student View:1. Access the full grade Center ViewYou can use the drag-and-dropfunction to rearrange the order ofGrade Center Columns.You can Also Freeze and Unfreeze Columns. A Frozencolumn remains fixed on the left while Grade Centercolumns scroll to the right.To FreezeColumns, dragthem above theFrozen ColumnLine.2.Click the arrow to the right of the column:3.Click the Hide from Students (on/off) optionon the menu that appears.4.You will see a circle with a line running throughit, indicating that the column is hidden fromstudents.16
8/20/2019http://bit.ly/Bb4EveryoneBlackboard AttendanceBlackboard Q4 2018 now has a feature much requested by faculty, the ability to take student attendance. Clickingthe add attendance button causes an attendance column to be automatically generated. While faculty can hidethe attendance column in the Grade Center, it is generally best to avoid generating the column if you are notplanning to use the attendance feature. If you have enabled the attendance column, follow these directions tohide the columnYour students are automatically added to your live Blackboard Course (the course with the 5 digit CRN), 4 weeksbefore the semester begins. So, all you need to do is follow the directions in the following videos to begingrading your students1. Accessing Attendance: https://youtu.be/ 8Cu3DxDHCg2. Blackboard Error in Adjusting Attendance Percentage Settings:https://youtu.be/60g32qxjrZA3. The Attendance Page: https://youtu.be/d9bU0Ziv7yc4. Blackboard Attendance Overall Page: https://youtu.be/dx9Jl6gIjHg5. Download Excel Records of Attendance:https://youtu.be/0v8AR5h4tiw6. Attendance in the Grade Center: https://youtu.be/Jo7zlFSFH7E7. Hiding the Attendance Column: https://youtu.be/k46NnseRtAQ8. Where do my Students See their Attendance Records?https://youtu.be/KSI9Et2237s17
8/20/2019http://bit.ly/Bb4EveryoneDownload a copy of these notes from ELITE’s the 17/08/22/blackboard-for-everyone/You can also find this article by typing “blackboard for everyone elite the hub” into anysearch engine.The first result will pull up this article:QR Code to download handout:Shortened URL for handouthttps://bit.ly/Bb4Everyone18
4. Click on the Blackboard Icon in the upper right hand corner of the course. 5. Blackboard will launch. If you have been enrolled in any training offered on Blackboard, or you have a for credit course offered on Blackboard, those courses will appear in the My Courses area at the right of the screen. 6. To enter one of your courses, click the link