Transcription
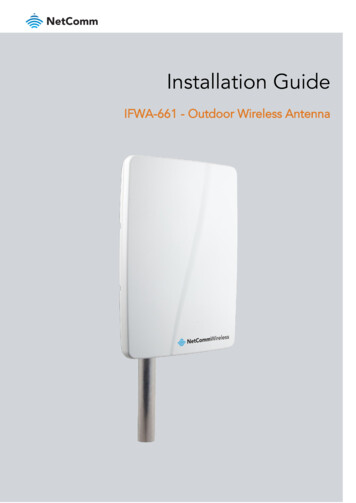
Installation GuideIFWA-661 - Outdoor Wireless Antenna
Important NoticeThis device, like any wireless device, operates using radio signals which cannot guarantee the transmission andreception of data in all conditions. While the delay or loss of signal is rare, you should not rely solely on anywireless device for emergency communications or otherwise use the device in situations where the interruption ofdata connectivity could lead to death, personal injury, property damage, data loss, or other loss. NetCommWireless accepts no responsibility for any loss or damage resulting from errors or delays in transmission orreception, or the failure of the NetComm Wireless IFWA-661 Outdoor Wireless Antenna to transmit or receive suchdata.Safety and HazardsWarning – Do not connect or disconnect cables or devices to or from the SIM card tray or Ethernet port in hazardous locations such asthose in which flammable gases or vapours may be present, but normally are confined within closed systems; are prevented fromaccumulating by adequate ventilation; or the location is adjacent to a location from which ignitable concentrations might occasionally becommunicated.CopyrightCopyright 2019 NetComm Wireless Limited. All rights reserved.NetComm Wireless Limited was acquired by Casa Systems, Inc. a Delaware company on 1 July 2019. Theinformation contained herein is proprietary to Casa Systems, Inc. No part of this document may be translated,transcribed, reproduced, in any form, or by any means without prior written consent of Casa Systems, Inc.Trademarks and registered trademarks are the property of NetComm Wireless Limited or their respective owners.Specifications are subject to change without notice. Images shown may vary slightly from the actual product.Note – This document is subject to change without notice.IFWA-661 Outdoor Wireless Antenna – Installation Guidev1.0 September 20, 20192 of 63 NetComm Wireless 2019
Document historyThis document covers the following product:NetComm Wireless IFWA-661 Outdoor Wireless AntennaVER.v1.0DOCUMENT DESCRIPTIONInitial document releaseDATESeptember 20, 2019Table i. - Document revision historyIFWA-661 Outdoor Wireless Antenna – Installation Guidev1.0 September 20, 20193 of 63 NetComm Wireless 2019
ContentsOverview . 6Introduction . 6Target audience . 6Prerequisites . 6Product introduction . 7Physical dimensions and interfaces . 8Physical dimensions . 8Interfaces . 9Installation considerations . 10Installing the Outdoor Wireless Antenna. 11Determining the best location for the Outdoor Wireless Antenna . 11Assemble and attach the mounting bracket . 12Connect the Smart Antenna Tool to the Outdoor Wireless Antenna . 14Perform the site survey . 15Install mount on roof top. 16Place the Outdoor Wireless Antenna on the pole . 17Assemble the Outdoor Wireless Antenna Power supply weather seal. 18Aligning the Outdoor Wireless Antenna . 23Process flow (subject to change) . 23Installation flow – Site survey . 36Installation flow - Post site survey . 36Connecting the Outdoor Wireless Antenna . 49Grounding and power surges . 49Powering the Outdoor Wireless Antenna . 50Acronyms . 51Appendix . 52Inserting a SIM card . 52Using the Smart Antenna Tool . 54Quick Copy Items . 58Safety and product care . 59RF Exposure . 59FCC Statement. 59Electrical safety . 60Connection to a car . 60Distraction . 60Product handling . 60Faulty and damaged products . 61Interference . 61Explosive environments. 62IFWA-661 Outdoor Wireless Antenna – Installation Guidev1.0 September 20, 20194 of 63 NetComm Wireless 2019
Product Warranty . 63IFWA-661 Outdoor Wireless Antenna – Installation Guidev1.0 September 20, 20195 of 63 NetComm Wireless 2019
OverviewIntroductionThis document provides you with an overview of the installation process for the IFWA-661 Outdoor WirelessAntenna.Target audienceThis document is intended for system integrators or experienced hardware installers who understandtelecommunications terminology and concepts.PrerequisitesBefore continuing with the installation of your IFWA-661 router, please confirm that you have:An electronic computing device with a working wireless network adapter and a web browser such as InternetExplorer , Mozilla Firefox or Google Chrome .Read the entire Safety and product care section of this document and RF Exposure information.NotationThe following symbols may be used in this document:Note – This note contains useful information.Important – This is important information that may require your attention.Warning – This is a warning that may require immediate action in order to avoid damage or injury.IFWA-661 Outdoor Wireless Antenna – Installation Guidev1.0 September 20, 20196 of 63 NetComm Wireless 2019
Product introductionProduct overviewRural and regional homes and businesses, remote commercial sites and metropolitan fringe districts locatedbeyond the reach of fixed line infrastructure rely on mobile networks to access broadband Internet.Designed to optimise signal strength in weak signal areas, the Outdoor Wireless Antenna (OWA) is positioned onthe exterior of the premises to overcome distance limitations and geographical obstructions and deliver highspeed LTE broadband connectivity to wired and wireless clients in the property via an indoor router.Package contentsThe NetComm Wireless IFWA-661 in-box contents include:1 x NetComm Wireless IFWA-661 Outdoor Wireless Antenna (also referred to as the IFWA, OWA and OA).1 x Assembled mount bracket and hardware compatible with all DIRECTV 2” mountsAccessories used in this solution (packaged separately):1 x Antenna Power Supply (POE-03) – used to power the OWA during normal operation1 x Smart Antenna Tool – used to power and provide a wireless interface to the OWA during installationIf any of these items are missing or damaged, please contact NetComm Wireless Support immediately. TheNetComm Wireless Support website can be found at: http://support.netcommwireless.com.IFWA-661 Outdoor Wireless Antenna – Installation Guidev1.0 September 20, 20197 of 63 NetComm Wireless 2019
Physical dimensions and interfacesPhysical dimensionsBelow is a list of the physical dimensions of the IFWA-661.Figure 1 – IFWA-661 Outdoor Wireless Antenna DimensionsIFWA-661 DIMENSIONSLength17.5” (445 mm)Width11.3” (287 mm)Height4.5” (113 mm)Weight 5.7lbs ( 2.59 kg)Table 1 - Device DimensionsIFWA-661 Outdoor Wireless Antenna – Installation Guidev1.0 September 20, 20198 of 63 NetComm Wireless 2019
InterfacesAntenna panelSIM hatchAntenna PowerSupply port (PoE)Smart Antenna ToolportFigure 2 – InterfacesITEMDESCRIPTIONAntenna panelIncludes 2 x pairs Cross polarised antennasand GPS antennaSmart Antenna Tool portConnect the Smart Antenna Tool hereSIM hatchOpen the hatch to insert SIM hereAntenna Power Supply port (PoE)Provides power and data connectivity to theOutdoor Wireless Antenna with EthernetcableTable 2 – InterfacesIFWA-661 Outdoor Wireless Antenna – Installation Guidev1.0 September 20, 20199 of 63 NetComm Wireless 2019
Installation considerationsAs the Outdoor Wireless Antenna is aligned specifically for a property, please take note of the following wheninstalling the equipment:After alignment, do not move, place anything in front of, or adjust the position of the Outdoor WirelessAntenna since this will likely have a negative impact on the signal quality and performance of the wirelessservice.Keep trees and branches away from the Outdoor Wireless Antenna.The equipment must be protected from running water, steam and excessive heat and must be installedaccording to the guidelines in this document.The Antenna Power Supply (POE-03) and Wi-Fi Gateway must be installed in a well-ventilated area and neara dedicated power outlet which allows easy visibility of the indicator lights.If an existing customer has carried out external construction work on the property, the antenna may need tobe re-aligned to ensure the installation is still operating at peak performance.The Outdoor Wireless Antenna location is determined by radio frequency performance and it may not bepossible to relocate the antenna when moving to a new property. It is advised that a site survey beconducted before initiating the installation process.IFWA-661 Outdoor Wireless Antenna – Installation Guidev1.0 September 20, 201910 of 63 NetComm Wireless 2019
Installing the Outdoor Wireless AntennaThe image below illustrates a typical installation of the Outdoor Wireless Antenna.Figure 3 - Typical Outdoor Wireless Antenna InstallationDetermining the best location for the Outdoor WirelessAntennaDetermining the best location for the Outdoor Wireless Antenna involves:1Performing a survey of the site using the Smart Antenna Tool.2Consulting the customer about mounting location, grounding and cable routing based on results of the RFtest, aesthetics and any planned renovations to the property.When selecting a location to mount the Outdoor Wireless Antenna, ensure that:lock of the desired cell and optimal signal level is achieved.the mounting position is unobtrusive and aesthetically pleasing where possible.the mount/antenna is not closer than three feet from other antenna equipment.the customer has obtained HOA approval for installation if required. This is the sole responsibility of thecustomer.Where possible, avoid mounting the Outdoor Wireless Antenna so that it is aimed back over the roof of theproperty.IFWA-661 Outdoor Wireless Antenna – Installation Guidev1.0 September 20, 201911 of 63 NetComm Wireless 2019
Assemble and attach the mounting bracketNotes on mounting:Use a standard 13mm socket wrench for all boltsTighten bolts to the following torque settings:Captive radome mount bolts: 35 in-lbsAngle pivot bolt: 65 in-lbsPipe clamp bolt: 80 in-lbsDo not over tighten boltsRadomemountPipe clampPipe clampboltAngle pivotboltCaptive radomemount boltFigure 4 - IFWA-661 mounting bracket and boltsIFWA-661 Outdoor Wireless Antenna – Installation Guidev1.0 September 20, 201912 of 63 NetComm Wireless 2019
Mounting bracket assembly1Attach the pipe clamp to the radome mount using the angle pivot bolt, nut and washer.Pipe clampPipe clampboltCaptive radomemount boltAngle pivot boltRadome mountAngle pivotAngle pivotbolt nutbolt washerFigure 5 - Mounting bracket assembly2Attach the assembled mounting bracket to the antenna as shown below. Tighten the captive radome mountbolts to the torque settings described here.Figure 6 - Attaching the mounting bracket to the Outdoor Wireless AntennaIFWA-661 Outdoor Wireless Antenna – Installation Guidev1.0 September 20, 201913 of 63 NetComm Wireless 2019
Connect the Smart Antenna Tool to the OutdoorWireless Antenna1Turn the plug on the console port hatch counter-clockwise so that it is in the unlocked (vertical) position asshown in the image below.Figure 7 - Unlocking the console port hatch2Pull the plug out to reveal the console port.Figure 8 - Console portIFWA-661 Outdoor Wireless Antenna – Installation Guidev1.0 September 20, 201914 of 63 NetComm Wireless 2019
3Remove the cap from the head of the Smart Antenna Tool and insert it into the console port as shown in thepicture below.Figure 9 - Attached Smart Antenna ToolPerform the site surveyPush the power button on the Smart Antenna Tool to turn it on. After a few seconds, the LEDs illuminate. On eachstart up, the Smart Antenna Tool LEDs flash both red and green twice a second, indicating that the compassrequires calibrating. To calibrate the device, first isolate it from any magnetic field or metal structures (for example,vehicles, the antenna pole, power lines, etc) and then rotate the unit fully through all three axes. See the diagramsbelow.The LEDs stop flashing when calibration has been performed successfully.IFWA-661 Outdoor Wireless Antenna – Installation Guidev1.0 September 20, 201915 of 63 NetComm Wireless 2019
When the Smart Antenna Tool is connected to the OWA, it enters Cell scanning mode.During cell scanning mode, the LED indicators display as below, depending on the status.Figure 10 - Smart Antenna Tool LED statuses in cell scanning modeConnect your wireless device (e.g. laptop/tablet/smartphone) to the SSID of the alignment tool. In a web browser,go to http://192.168.3.1 and use the alignment tool to estimate the best position for the Outdoor Wireless Antennawhile you are on the ground. If the web user interface is not displayed, use http://192.168.3.1/data entry.htmlInstall mount on roof topWhen you have found the best spot to install the Outdoor Wireless Antenna, install the mount on the roof usingappropriate materials.IFWA-661 Outdoor Wireless Antenna – Installation Guidev1.0 September 20, 201916 of 63 NetComm Wireless 2019
Place the Outdoor Wireless Antenna on the pole1Assemble the Pipe Bracket to pole, pointing bracket in desired antenna direction. Secure the pipe clampboltsFigure 11 - Assembling pipe bracket to pole2Alternately tighten the top and bottom pipe clamp bolts to maintain even pressure on the pipe, to 80 in-lb.Figure 12 - Tightening pipe clamp boltsIFWA-661 Outdoor Wireless Antenna – Installation Guidev1.0 September 20, 201917 of 63 NetComm Wireless 2019
Assemble the Outdoor Wireless Antenna Power supplyweather sealThe Outdoor Wireless Antenna Power supply weather seal must be properly attached to prevent dust and waterfrom entering the Outdoor Wireless Antenna’s housing.To connect Ethernet cable via the Power supply weather seal:1Unscrew the weather cap and remove the rubber gasket.2Separate the rubber seal and the ferrule.Figure 13 - Rubber seal and ferrule3Twist the neck for the seal counter-clockwise to remove it from the Outdoor Wireless Antenna. You shouldnow have 5 pieces of the weather seal.Figure 14 - Weather seal in five parts4Place the Ethernet cable through the nut first, as shown below.Figure 15 - Nut placed over Ethernet cableIFWA-661 Outdoor Wireless Antenna – Installation Guidev1.0 September 20, 201918 of 63 NetComm Wireless 2019
5Place the ferrule over the Ethernet cable as shown, making sure that the “teeth” are facing the nut.Figure 16 - Ferrule placed over Ethernet cable6Place the rubber seal over the Ethernet cable with the wide end toward the RJ45 plug. See the image belowfor the correct orientation.Figure 17 - Rubber seal placed over Ethernet cable7Push the ferrule over the rubber seal to prevent it from coming apart.Figure 18 - Ferrule placed over rubber sealIFWA-661 Outdoor Wireless Antenna – Installation Guidev1.0 September 20, 201919 of 63 NetComm Wireless 2019
8Place the washer seal over the Ethernet cable as shown below. Ensure that the inside protruding lip is on theopposite side of the Ethernet plug.Figure 19 - Washer seal placed over Ethernet cable9Place the neck over the Ethernet cable as shown below.Figure 20 - Neck placed over Ethernet cableIFWA-661 Outdoor Wireless Antenna – Installation Guidev1.0 September 20, 201920 of 63 NetComm Wireless 2019
10Plug the Ethernet cable into the Ethernet port.Figure 21 - Plugging in the Ethernet cable11Put the neck into the opening and turn the neck clockwise until it locks in place.12Push the rubber seal and ferrule into the neck then screw the nut on to the neck.Figure 22 - Rubber seal and ferrule inserted into neckIFWA-661 Outdoor Wireless Antenna – Installation Guidev1.0 September 20, 201921 of 63 NetComm Wireless 2019
13Turn the nut clockwise to tighten it the washer seal against the housing. Continue turning the nut untilcompletely assembled. This will allow the washer seal to grip the cable while also applying enough pressureto the washer seal to prevent dust and moisture entering the unit.Figure 23 - Turning the nut clockwiseIFWA-661 Outdoor Wireless Antenna – Installation Guidev1.0 September 20, 201922 of 63 NetComm Wireless 2019
Aligning the Outdoor Wireless AntennaBefore proceeding with the installation of the IFWA-661, please ensure that the following steps have been taken:Perform an indoor site surveyCapture the customer’s signatureScan the antenna barcode to activate the unitConnect the Smart Antenna Tool to the antenna and power it onConnect your wireless device for alignment to the Smart Antenna Tool’s wireless networkLaunch the wireless device’s browser and navigate to the antenna’s IP addressProcess flow (subject to change)Figure 24 - Alignment process flowIFWA-661 Outdoor Wireless Antenna – Installation Guidev1.0 September 20, 201923 of 63 NetComm Wireless 2019
Process flow – User interface screensSuccessful Installation1. Data Entry ScreenIFWA-661 Outdoor Wireless Antenna – Installation Guidev1.0 September 20, 201924 of 63 NetComm Wireless 2019
2. Network Scan Screen3. CBRS Install Parameters Screen - If LTE limited service or SIM card error, error status is shown alongwith a guideline.IFWA-661 Outdoor Wireless Antenna – Installation Guidev1.0 September 20, 201925 of 63 NetComm Wireless 2019
CBRS Install Parameters Screen - If no error in LTE service and SIM card:a) If CPI credential is provided in Quick Copy, installers are not asked to provide Key File and Pass-codeb) If the given key file and passcode are valid and correct:Note: If CPI credential is not provided in Quick Copy, the page show input fields for installers can provide Key Fileand Passcode.IFWA-661 Outdoor Wireless Antenna – Installation Guidev1.0 September 20, 201926 of 63 NetComm Wireless 2019
c) If either the given key file or passcode are invalid or incorrect, an indicator in red color is shown:The .P12 file is encrypted. The Install Toolwill decrypt the package using thePasscode and extract the CPI Private Keywhen signing the CBRS Install Parameters.CBRS Install Parameters Screen (Successful Registration) - Installer can click on the button Register totrigger the CBRS Registration process.IFWA-661 Outdoor Wireless Antenna – Installation Guidev1.0 September 20, 201927 of 63 NetComm Wireless 2019
4. Speed Test (Success)5. Mount Installation (Installer installs supporting hardware for antenna mounting)IFWA-661 Outdoor Wireless Antenna – Installation Guidev1.0 September 20, 201928 of 63 NetComm Wireless 2019
6. Data Entry ScreenIFWA-661 Outdoor Wireless Antenna – Installation Guidev1.0 September 20, 201929 of 63 NetComm Wireless 2019
7. Network Scan ScreenIFWA-661 Outdoor Wireless Antenna – Installation Guidev1.0 September 20, 201930 of 63 NetComm Wireless 2019
8. CBRS Install Screen (Successful Registration)9. Speed Test (Success)IFWA-661 Outdoor Wireless Antenna – Installation Guidev1.0 September 20, 201931 of 63 NetComm Wireless 2019
10. Finish Installation (QR Code Generation)IFWA-661 Outdoor Wireless Antenna – Installation Guidev1.0 September 20, 201932 of 63 NetComm Wireless 2019
Site Survey with Failed Install Location1. Data Entry ScreenIFWA-661 Outdoor Wireless Antenna – Installation Guidev1.0 September 20, 201933 of 63 NetComm Wireless 2019
2. Network Scan Screen3. CBRS Install Screen (Successful Registration)IFWA-661 Outdoor Wireless Antenna – Installation Guidev1.0 September 20, 201934 of 63 NetComm Wireless 2019
4. Speed Test (Fail)5. Move to New Location (QR Code Generation)IFWA-661 Outdoor Wireless Antenna – Installation Guidev1.0 September 20, 201935 of 63 NetComm Wireless 2019
Installation flow – Site surveyTo find the correct position and orientation at site to install the antenna.1Data Entry2Network Scan3Move to New Location (Capturing QR Code)4QR Code Screen5Move to New LocationInstallation flow - Post site surveyAfter confirming the installation position on site, including manual mounting of antenna, the following steps finalizethe installation process.1Data Entry2Network Scan3CBRS Install4Speed Test5Physically mount the antenna6Data Entry (Some data retained)7Network Scan8CBRS Install9Speed Test10Finish Installation (Capturing QR Code)11QR Code Screen12Finish InstallationData entry screen1Verify that the Smart Antenna Tool’s battery charge level is above 20%.2Verify that the compass calibration is good.3Enter the following details:aCustomer BAN (from WFE)bCell Sector IDs (from WFE)cBand Selection (Band 30 or Band 48)dCall Sign (Optional)eUser ID (Required)fInterference Grouping ID (Optional)IFWA-661 Outdoor Wireless Antenna – Installation Guidev1.0 September 20, 201936 of 63 NetComm Wireless 2019
Figure 25 - Data entry screenIFWA-661 Outdoor Wireless Antenna – Installation Guidev1.0 September 20, 201937 of 63 NetComm Wireless 2019
Note that until a selection is made using the Band Select drop down list, the antenna will not be scanning.Once the settings are applied, the device will start scanning on the targeted band and will connect. At thetime of connection, any pending SIM OTA will occur.Note also that if the unit was previously powered on and had gone through this page, all previous data willstill be populated, but no network connectivity will occur on this page in case any data changes.4Click Apply to move to the next screen.Network scan1Perform an outdoor survey to identify the best install location.The network scan screen shows for Cell Sectors entered:Serving Cell IndicatorMinimum Allowable RSRPMeasured RSSINRMeasured RSRQMeasured RSRPIndicator if the Cell is acceptableThis screen generates a tone, related to the strongest signal. The installer can use the device speaker orheadphones to hear the tone.At the top of the page, Azimuth and Downtilt of the current orientation are shown.Figure 26 - Network scan screenThe installer has the option to proceed with the current signal results (using the Next button), try a newlocation (using the Move to New Location button) or perform Advanced Operations.To proceed with current signal results, continue to CBRS Install Parameters page.IFWA-661 Outdoor Wireless Antenna – Installation Guidev1.0 September 20, 201938 of 63 NetComm Wireless 2019
To try a new location, continue to the Move to New Location section.To perform Advanced Operations, continue to the Advanced Operations section.CBRS Install ParametersCBRS screen shows for the installation parameters with two columns. The first column is what is current from thetool and the second is what can be used for Registration.Figure 27 - CBRS Install ParametersThe first column is read-only and will continue to be updated throughout the Install procedure.Installation parameters shown are:IFWA-661 Outdoor Wireless Antenna – Installation Guidev1.0 September 20, 201939 of 63 NetComm Wireless 2019
LatitudeLongitudeHeight (Above Mean Sea Level – WGS84)Azimuth (with respect to True North, not magnetic north)Downtilt (when the antenna is mounted facing the horizon, the downtilt reading is zero. When it faces theground, the reading is positive, otherwise it will display a negative reading.)The Copy button provides the option to copy Smart Antenna Tool data to Registration side. The copy operationwill overwrite any data in the Registration column. The fields in the Registration column are editable, in case anycorrections need to be made by the installer.The CPI certificate content field allows the installer to copy in a textual representation of their certificate(assumption is that this is also obtained from WFE,
1 x Assembled mount bracket and hardware compatible with all DIRECTV 2" mounts Accessories used in this solution (packaged separately): 1 x Antenna Power Supply (POE-03) - used to power the OWA during normal operation 1 x Smart Antenna Tool - used to power and provide a wireless interface to the OWA during installation