Transcription
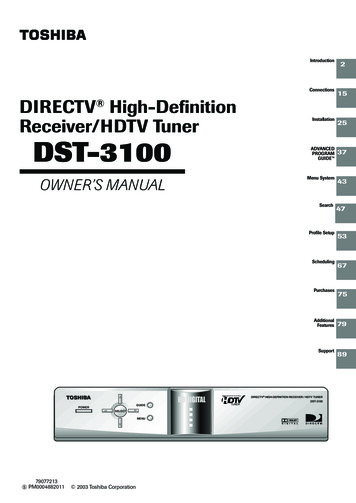
IntroductionConnectionsDIRECTV High-DefinitionReceiver/HDTV TunerDST-3100OWNER’S MANUALInstallationADVANCEDPROGRAMGUIDE Menu SystemSearchProfile IRECTV HIGH-DEFINITION RECEIVER / HDTV 011 2003 Toshiba Corporation215253743475367757989
IntroductionSAFETY PRECAUTIONSWARNINGRISK OF ELECTRIC SHOCKDO NOT OPENAVISRISQUE DE CHOC ELECTRIQUE NEPAS OUVRIRWARNING :TO REDUCE THE RISK OFELECTRIC SHOCK, DO NOT REMOVECOVER (OR BACK). NO USERSERVICEABLEPARTS INSIDE. REFER SERVICING TOQUALIFIED SERVICE PERSONNEL.The lightning flash with arrowhead symbol, within an equilateral triangle, is intended to alert the user to the presence ofuninsulated “dangerous voltage” within the product’s enclosure that may be of sufficient magnitude to constitute a riskof electric shock to persons.The exclamation point within an equilateral triangle is intended to alert the user to the presence of important operating and maintenance (servicing) instructions in the literatureaccompanying the appliance.The symbol for CLASS II (Double Insulation)WARNING: TO REDUCE THE RISK OF FIRE OR ELECTRIC SHOCK, DO NOTEXPOSE THIS APPLIANCE TO RAIN OR MOISTURE. DANGEROUSHIGH VOLTAGES ARE PRESENT INSIDE THE ENCLOSURE. DO NOTOPEN THE CABINET. REFER SERVICING TO QUALIFIED PERSONNELONLY.CAUTION: TO PREVENT ELECTRIC SHOCK, MATCH WIDE BLADE OF PLUG TOWIDE SLOT; FULLY INSERT.CAUTION: To ensure proper use of this product, please read this owner’s manualcarefully and retain for future reference. Should the unit requiremaintenance, contact an authorized service location. See serviceprocedure, found at the end of this manual.WARNING: Changes or modifications made to this equipment, not expresslyapproved by Toshiba, or parties authorized by Toshiba, could void theuser’s authority to operate the equipment.2
In the spaces provided below, record the Model No. and Serial No. located on therear panel of your receiver. Retain this information for future reference.IntroductionModel No.Serial No.3
IntroductionIMPORTANT SAFETY INSTRUCTIONS1. Read these instructions.2. Keep these instructions.3. Heed all warnings.4. Follow all instructions.5. Do not use this apparatus near water.6. Clean only with a dry cloth.7. Do not block any ventilation openings. Install in accordance with themanufacturer’s instructions.8. Do not install near any heat sources such as radiators, heat registers, stoves,or other apparatus (including amplifiers) that produce heat.4
Introduction9. Do not defeat the safety purpose of the polarized or grounding-type plug. Apolarized plug has two blades with one wider than the other. A groundingtype plug has two blades and a third grounding prong. The wide blade or thethird prong are provided for your safety. If the provided plug does not fit intoyour outlet, consult an electrician for replacement of the obsolete outlet.10. Protect the power cord from being walked on or pinched, particularly at plugs,convenience receptacles, and the point it exits the apparatus.11. Only use attachments/accessories specified by the manufacturer.12.Use only with the cart, stand, tripod, bracket, or table specified by themanufacturer or sold with the apparatus. When a cart is used, use cautionwhen moving the cart/apparatus combination to avoid injury from tip-over.S3125A13. Unplug the apparatus during lightning storms or when unused for long periodsof time.14. Refer all servicing to qualified service personnel. Servicing is required whenthe apparatus has been damaged in any way, such as power supply cord orplug is damaged, liquid has been spilled or objects have fallen into theapparatus, or the apparatus has been exposed to rain or moisture, does notoperate normally, or has been dropped.15. Never overload wall outlets, extension cords, or integral conveniencereceptacles, as this can result in a risk of fire or electric shock.16. Never insert objects of any kind through the openings in the apparatus, asthey may touch dangerous voltage points or short-out parts, which couldresult in a fire or electric shock. Never spill liquid of any kind on the apparatus.17. Never place a heavy object on the apparatus. The object may fall, causingserious personal injury and serious damage to the apparatus.5
IntroductionFCC InformationFederal Communications Commission (FCC)—This equipment complies with both Part 15 and Part 68 of the FCC rules.Part 68This equipment complies with Part 68 of the FCC rules and the requirements adopted by the ACTA. On the back cover of thisequipment is a label that contains, among other information, a product identifier in the format US:AAAEQ##TXXXX. If requested, thisinformation must be provided to the telephone company. A plug and jack (RJ11C) used to connect this equipment to the premises wiring and telephone network must comply with theapplicable FCC Part 68 rules and requirements adopted by the ACTA. A compliant telephone cord and modular plug is providedwith this product. It is designed to be connected to a compatible modular jack that is also compliant. See installationinstructions for details. The REN is used to determine the number of devices that may be connected to a telephone line. Excessive RENs on atelephone line may result in the devices not ringing in response to an incoming call. In most but not all areas, the sum of RENsshould not exceed five (5.0). To be certain of the number of devices that may be connected to a line, as determined by the totalRENs, contact the local telephone company. For products approved after July 23, 2001, the REN for this product is part of theproduct identifier that has the format US:AAAEQ##TXXXX. The digits represented by ## are the REN without a decimal point(e.g., 03 is a REN of 0.3). For earlier products, the REN is separately shown on the label. It is unlikely, but if your DST-3100 causes harm to the telephone network, the telephone company will notify you in advancethat temporary discontinuance of service may be required. But, if advance notice isn’t practical, the telephone company willnotify the company as soon as possible. Also, you will be advised of your right to file a complaint with the FCC if you believe itis necessary. The telephone company may make changes in it’s facilities, equipment, operations, or procedures that could affect theoperation of the equipment. If this happens the telephone company will provide advance notice in order for you to makenecessary modifications to maintain uninterrupted service. If trouble is experienced with your DST-3100, for repair or warranty information, please contact Toshiba America ConsumerProducts, Inc. at 1 (888) 867-4377. If the equipment is causing harm to the telephone network, the telephone company mayrequest that you disconnect the equipment until the problem is resolved.This equipment Does Not contain any user serviceable parts. All repairs should be performed only by Toshiba Authorized Servicestation personnel.Connection to party line service is subject to state tariffs. Contact the state public utility commission, public service commission orcorporation commission for information.If your home has specially wired alarm equipment connected to the telephone line, ensure the installation of your DST-3100 does notdisable your alarm equipment. If you have questions about what will disable alarm equipment, consult your telephone company or aqualified installer.Electrical Safety Advisory:You should consider adding a surge arrestor prior to the AC input and telephone line of your DST-3100. Telephone companies reportthat electrical surges, typically lightning transients, are very destructive to customer terminal equipment connected to AC powersources. This has been identified as a major nationwide problem.Users should ensure for their own protection that the electrical ground connections of the power utility, telephone lines and internalmetallic water pipe system, if present, are connected together. This precaution may be particularly important in rural areas.CAUTION: Users should not attempt to make such connections themselves, but should contact the appropriate electric inspectionauthority, or electrician as appropriate.Part 15FCC Declaration of Conformity Compliance Statement (Part 15)The Toshiba DST-3100 DIRECTV High Definition Receiver/HDTV Tuner complies with Part 15 of the FCC rules. Operation is subjectto the following two conditions: (1) this device may not cause harmful interference, and (2) this device must accept any interferencethat may cause undesired operation.The responsible party for compliance to these rules is: Toshiba America Consumer Products, Inc. 82 Totowa Rd.,Wayne, NJ 07470, Ph: (888) 867-4377.6This equipment has been tested and found to comply with the limits for a Class B digital device, pursuant to Part 15 of the FCC rules.These limits are designed to provide reasonable protection against harmful interference in a residential installation. This equipmentgenerates, uses and can radiate radio frequency energy and, if not installed and used in accordance with the instructions, may causeharmful interference to radio communications. However, there is no guarantee that interference will not occur in a particular installation.If this equipment does cause harmful interference to radio or television reception, which can be determined by removing and applyingpower to the equipment, the user is encouraged to try to correct the interference by one or more of the following measures: Reorient or relocate the receiving antenna. Increase the separation between the equipment and the receiver. Connect the equipment into an outlet on a circuit different from that to which the receiver is connected. Consult the dealer or an experienced radio/TV technician for help.
Disclosure InformationIntroductionDIRECTV Due to copyright restrictions, you may not be able to view some high-definition programs inhigh-definition format using this product.ACTIVATION OF PROGRAMMING MAY BE SUBJECT TO CREDIT APPROVAL ANDREQUIRES VALID SERVICE ADDRESS, SOCIAL SECURITY NUMBER, AND/OR MAJORCREDIT CARD. DEPOSIT OR PREPAYMENT MAY BE REQUIRED.Programming is subject to change. Receipt of DIRECTV programming is subject to theterms of the DIRECTV customer agreement; a copy is provided at DIRECTV.com and inyour first bill. DIRECTV service is not available outside the U.S. DIRECTV programmingis sold separately and independently of DIRECTV System hardware. A valid programmingsubscription is required to operate DIRECTV System hardware. Activate your DIRECTVprogramming today at 1-800-DIRECTV (1-800-347-3288).You may be able to subscribe to local channels from DIRECTV in certain areas. Additionalequipment may be required in some markets. Check with your retailer or visitDIRECTV.com for information on availability of local channels from DIRECTV in your area.For access to High-Definition programming, a triple LNB Multi-Satellite dish antenna, HighDefinition capable DIRECTV Receiver, and High-Definition television are required. Satellitedish antenna is sold separately.DIRECTV, the Cyclone Design logo, and ADVANCED PROGRAM GUIDE are trademarksof DIRECTV, Inc., a unit of Hughes Electronics Corp., and are used with permission.Macrovision This product incorporates copyright protection technology that is protected by U.S. patentsand other intellectual property rights. Use of this copyright protection technology must beauthorized by Macrovision and is intended for home and other limited pay-per-view usesonly, unless otherwise authorized by Macrovision. Reverse engineering or disassembly isprohibited.Dolby Digital Manufactured under license from Dolby Laboratories. “Dolby” and the double-D symbol aretrademarks of Dolby Laboratories.Confidential Unpublished Works. 1992-1997 Dolby Laboratories, Inc. All rights reserved.7
IntroductionTable of ContentsIntroductionSafety Precautions . 2Important Safety Instructions . 4FCC Information . 6Part 68 . 6Part 15 . 6Disclosure Information . 7DIRECTV . 7Macrovision . 7Dolby Digital . 7Table of Contents . 8Identification of Controls . 9Front Panel . 9Remote Control . 10Loading Batteries . 11Programing Your Remote . 11Remote Control Codes . 12ConnectionsCables . 16Connecting to an Antenna . 17Connecting to a TV . 18Connecting to a VCR . 21Connecting to Optional Equipment . 22InstallationSystem Configuration Types . 26DIRECTV Satellite Dish Antenna andAntenna/Cable . 27DIRECTV Satellite Dish Antenna Only . 31Local Antenna/Cable Only . 33Installation Complete . 35Types of Programing . 35Profile SetupCustomizing Profile Settings .Edit User Profiles Selection .Edit Guide Channels .Favorite Channels Setup .Channel Block .Rating Limits .Lock/Unlock Profile .Preferences sub-menus .5454565758596162SchedulingScheduling an Event . 68Editing a Scheduled Event . 71Viewing Scheduled Programs . 72Event Reminders . 73Purchase HistoryFuture Purchases . 76Past Purchases . 77Spending Limt . 77Additional FeaturesPassword Management . 80Audio/Video . 81Video Definitions . 82Video Formats . 82Video Resolutions . 83Caller ID . 84Messages . 85Help . 86Remote Control RF Settings . 87SupportAdvanced Program Guide Advanced Grid Guide . 37Basic Grid Guide . 37Surf Guide . 38Banner Guide . 38General Guide Features . 40Purchase Menu . 40Menu SystemMenu Tree . 44Search MenuMain Search Window . 48Search Titles . 49Search Credits . 50Search Categories . 518System Status . 90Before Calling Service Personnel . 92Specifications . 93Limited Warranty . 94
Identification of ControlsIntroductionFront PanelDIRECTV HIGH-DEFINITION RECEIVER / HDTV TUNERDST-3100GUIDEPOWERSELECTMENUPOWER - Press to turn the DST-3100 receiver on and off. The power light illuminates when the unitis on. The power light also flashes as the receiver is rebooting.SELECT - Press to access a highlighted guide or menu item.ARROWS ( , , , and ) - Press to move the highlight around the program guide and menus.The up and down arrow keys also change channels when menus are not displayed.GUIDE - Press to display the on-screen guide, which lists all available programs.MENU - Press to display the menu system. This will grant access to all user settings and allow forsystem locks to be implemented. While in the menu system, press the menu button on the frontpanel to exit. (Note: the channel banner will time out automatically)9
IntroductionIdentification of Controls (continued)Remote ControlINPUT/RESOLUTIONMUTEPOWERNumbered buttonsDashBACKNavigation( / / / )SELECTSAT / TV1 / TV2 SwitchACTIONUSER/FAVJUMP / HOMEMENUHELP10EXITChannel up and down /Page up and downVolume up and downGUIDEINFO/STYLE
12Open the cover.Programming Your Remote Control12Slide the remote control’s SAT/TV1/TV2switch to either TV1 or TV2.While holding down MUTE, use thenumbered buttons to enter the appropriate3-digit code for your brand of TV. (See thenext page for applicable codes.)Insert the four AAA batteries.Make sure to match the and – on the batteries tothe marks inside the battery compartment.3Close the cover.Notes on batteries:Improper use of batteries may cause battery leakage andcorrosion. To operate the remote control correctly, follow theinstructions below. Do not insert batteries into the remote control in the wrongdirection. Do not charge, heat, open, or short-circuit the batteries. Donot throw batteries into a fire. Do not leave dead or exhausted batteries in the remotecontrol. Do not use different types of batteries together, or mix oldand new batteries. If you do not use the remote control for a long period of time,remove the batteries to avoid possible damage from batterycorrosion. If the remote control does not function correctly or if theoperating range becomes reduced, replace all batteries withnew ones. If battery leakage occurs, wipe the battery liquid from thebattery compartment, then insert new batteries.11IntroductionLoading Batteries
IntroductionIdentification of Controls (continued)Remote Control Codes for your TelevisionAdmiral014, 021Akai032, 070, 073Alba113A-Mark120AmstradAnam009, 041, 120, 121, 191,198AOC005, 006, 019, 020, 120, 195, tar005, 023, 026, 045, 046, 073, 088,193, 212Granada195, 211Grand195Gradiente211Grundig047Hallmark195Harmon Kardon061Hinari034Hitachi023, 026, 048, 049, 050, 051, 052,053, 054, 055, 085, 097, 126, 202,218066Brockwood195Broksonic062, 191InfinityCandle006, 022,023,025,036,191,195, 212JBL066JC Penney003, 005, 006, 016, 026, 031, 043,096, 201, 214Capehart019, 195Circuit City195Citizen006, 016, 022, 023, 024, 025, 026,191, 212ColortymeJensen056, 073JVC057, 058, 059, 060073, 195Kawasho006, 073, 212Concerto023Kenwood006, 073, 212Contec027, 028, 041, 091, 191Kloss022, 061, 110, 198Craig036, 041, 191, 194KTV026, 039, 040, 041, 191, 196, 212Crown12033Genexxa026, 036Curtis Mathes006, 016, 026, 073, 203, 208, 212CXC041, 191Daewoo005, 024, 026, 029, 030, 031, 032,198, 212, 219Daytron026, 195Dixi032, 088, xman023LXI003, 063, 066, 090, 095, 117, 125,201Magnavox006, 020, 025, 036, 064, 065, 066,067, 068, 069, 073, 075, 110, 210,212Echostar222Electrohome023, 073, 209, 213Magnasonic073Elta032Marantz006, 066, 073, 088, 212026, 027, 028, 033, 034, 035, 036,037, 038, 039, 040, 041, 073, 122,191, 192, 195, 196, 199, 220Matsui032, 109EmersonMegatron195Memorex018, 032, 090, 195, 220Envision006, 212Etron032FisherMGA004, 005, 006, 071, 073, 195042, 090Mitsubishi004, 005, 070, 071, 072, 097, 123,195, 205, 207, 212Formenti111MTC005, 006, 016, 023, 031, 195, 212Fortress073, 105NAD002, 117, 195Fujitsu034, 194National009, 197, 198National Quenties197NEC005, 006, 007, 017, 023, 073, 127,212Nikkai112, 113, 118Funai034, 041, 191, 194Futuretech041, 191, 194General Electric (GE)003, 008, 009, 015, 040, 043, 044,130, 195, 198, 201, 214, 215, 216
051217Novabeam061, 198Nyon201Onwa041, 191Optonica105, 107Orion194Soundesign025, 036, 041, 191, 195Spectricon020, 120Squareview194SSS005, 041, 073, 191, 08, 009, 010, 011, 012, 066, 074,185, 187, 189,197, 198, 200, 206,214, 216006, 025, 036, 064, 065, 066, 068,073, 075, 100, 110, 111, 212Symphonic132, 192, 194Philco005, 006, 025, 036, 064, 065, 068,073, 110, 212Philips066, 088Technics008Pioneer002, 048, 051, 076, 208Techwood023, 073Portland005, 026, 212Proscan003TeknikaProton013, 019, 026, 036, 085, 124, 195004, 005, 016, 018, 022, 023, 024,025, 026, 034, 036, 041, 114, 115,186, 191, 212051Tandy105, 113Tatung009, 198Pulsar001TeleaviaQuasar008, 009, 077, 198, 200Telefunken051Radio Shack026, 041, 107, 112, 191, 198Teletech032003, 005, 015, 048, 079, 080, 081,082, 083, 084, 086, 087, 125, 133,134, 191, 198, 201, 208, 214, aba051Thomson051, 116Saisho032, 033, 109TMK023, 073, 195Sampo006, 019, 198Toshiba016, 090, 096, 117, 118, 131, 188Samwon120Tosonic028Samsung005, 006, 016, 023, 032, 088, 112,195, 204, 212, 221Totevision026Sanyo042, 089, 090, 091, 092, r Research006Scott026, 034, 037, 041, 093, 100, 191,196, 201Sears003, 023, 034, 042, 063, 089, 090,094, 095, 096, 098, 099, 101, 102,103, 104, 117, 195, 203Seimitsu195Victor057Video Concepts070, 191Vidtech005, 195, 212Viking022Wards005, 006, 015, 018, 034, 036, 043,064, 065, 067, 068, 107, 119, 212,214, 215Yamaha005, 006, 212073York195Solavox112Zenith001, 018, 193Sony000, 078, 109, 119, 122, 190Zonda120Sharp026, 085, 091, 105, 106, 107, 108,128, eNormandic13
ConnectionsCable TypesConnecting to an AntennaConnecting to an HDTV equippedwith DVIConnecting to a StandardDefinition TVConnecting to a VCRConnecting to an amplifierequipped with a digital audio inputConnecting to a standard amplifier
ConnectionsCablesRefer to the diagram below to identify the types of cables that may be used to connect your receiver.Cable TypesCoaxial (antenna) cableStandard stereo A/V cables(typically color-coded red and whitefor audio)S-video cableComponent video cables(typically color-coded red, green, blue)DVI-D digital single-link cable16
Connecting to an AntennaConnect the receiver to a satellite dish, terrestrial antenna, or cable service.DIRECTV Satellite Dish Antenna/Terrestrial Antenna/Cable ServiceConnectionsLAUODUI TOYSATANT 1ServiceOnlyPBRPRANT 2TV OUTCOLORSTREAMHDVIDEO OUTS-VIDEO OUTDIGITALAUDIODVI / HDCPPHONEJACKTo your SatelliteDish AntennaTo your TerrestrialAntenna or CableService17
ConnectionsConnecting to a TVConnect the receiver to your TV.Connecting to an HDTV with DVI/HDCPLAUDIOYSATANT 1PBRPRANT 2TV OUTCOLORSTREAMHDVIDEOS-VIDEODIGITALAUDIODVI / HDCPPHONEJACKNotes DVI/HDCP Digital Visual Interface/High-bandwidth Digital Content Protection. The DVI/HDCP connection is designed for best performance with 1080i high-definition video signals. The DVI/HDCP connection will also accept and display 720p and 480p picture signals. The DVI/HDCP connection will not display 480i picture signals. Refer to the owner’s manual of the connected TV as well. When you connect the receiver to your TV, be sure to turn off the power and unplug both units from the wall outlet beforemaking any connections. If your television set has one audio input, connect the left and right audio outputs of the receiver to a Y cable adapter (notsupplied) and then connect to your TV.18
ConnectionsConnecting to a HDTV with Component VideoLAUDIOYSATANT 1PBRPRANT 2TV OUTCOLORSTREAMHDVIDEOS-VIDEODIGITALAUDIODVI / HDCPPHONEJACKNotes Refer to the owner’s manual of the connected TV as well. When you connect the receiver to your TV, be sure to turn off the power and unplug both units from the wall outlet beforemaking any connections. If your television set has one audio input, connect the left and right audio outputs of the receiver to a Y cable adapter (notsupplied) and then connect to your TV. Some TVs may not support all HD formats.INTERLACED outputs/inputs (ColorStream ) Some TVs are equipped with component video inputs. Connecting to these inputs allows you to enjoy a higherquality picture. Actual labels for component video inputs may vary depending on the TV manufacturer. (ex. Y, B-Y, R-Y or Y, CB, CR) ColorStream 480i on Y, PB, PR. ColorStream HD 480i, 480p, 1080i; and sometimes 720p.19
ConnectionsConnecting to a TV (continued)Connect the receiver to your TV.Connecting to a Standard Definition TVLAUDIOYSATANT 1PBRPRANT 2TV OUTCOLORSTREAMHDVIDEOS-VIDEODIGITALAUDIODVI / HDCPPHONEJACKNotes Refer to the owner’s manual of the connected TV as well. When you connect the receiver to your TV, be sure to turn off the power and unplug both units from the wall outlet beforemaking any connections. If your television set has one audio input, connect the left and right audio outputs of the receiver to a Y cable adapter (notsupplied) and then connect to your TV. Connect the receiver directly to your TV.20
Connecting to Optional EquipmentConnectionsConnecting to a VCRLAUDIOYSATANT 1PBRPRANT 2TV OUTCOLORSTREAMHDVIDEOS-VIDEODIGITALAUDIODVI / HDCPPHONEJACKVCRTo your TV21
ConnectionsConnecting to Optional Equipment (continued)Connecting to an amplifier equipped with a Dolby Digital decoderLAUDIOYSATANT 1PBRPRANT 2TV OUTVIDEOS-VIDEODIGITALAUDIO COLORSTREAMHDDVI / HDCP(optional cable)DOLBY DIGITALAMPLIFIER22PHONEJACK
Connecting to a standard amplifierConnectionsLAUDIOYSATANT 1PBRPRANT 2TV OUTCOLORSTREAMHDVIDEOS-VIDEODIGITALAUDIODVI / HDCPPHONEJACKAMPLIFIER23
InstallationInstallation TypeDish and Antenna/Cable SetupDish Only SetupAntenna/Cable Only SetupInstallation CompleteTypes of ProgrammingQuit Installation
InstallationInstallationThis section describes the installation process.System Configuration TypesPreparations Install a DIRECTV Satellite Dish Antenna, Terrestrial Antenna, or Cable Service. Turn on the TV.1Press the POWER button.The receiver turns on and thePower On indicator illuminates.When the receiver is turned on for the first timeyou will see the TOSHIBA logo, followed by anon-screen display of installation settings.2Press or to highlight the appropriatesystem configuration, and then press theSELECT key.Refer to the following pages for theinstallation steps necessary for yoursystem configuration.27 Satellite (DIRECTV) and Antenna/Cable31 Satellite (DIRECTV) Only33 Local Antenna/Cable Only26
DIRECTV Satellite Dish Antenna and Antenna/CableConfiguring your receiver to work with a DIRECTV Satellite Dish Antenna and Antenna/Cable.Dish Setup ScreenPreparations Select DIRECTV Satellite Dish Antenna and Antenna/Cable from the Installation screen.1Pressor to highlight the Dish Type field andthen pressorto highlight the type of dishantenna that is connected to the receiver.3Pressto highlight Save and then press SELECT.Notes The Auto Dish option should only be used if you cannotNone: Terrestrial antenna or cable signal only.determine your dish type or location. If you use this settingRound: 18” round satellite dish antennayou must highlight Start AutoConfig and press SELECT.(no HD reception).Oval 2: Oval dish antenna with two LNBs.Oval 3: Oval dish antenna with three LNBs(recommended).Auto: This option should only be used if you cannotdetermine your dish type or location.Dish Types: 2Press to highlight the Location field and thenorto select either ZIP Code orpressLatitude/Longitude.Press to navigate to the first digit field and usethe numbered keys on your remote control to enteryour ZIP Code or Latitude and Longitude.Signal Strength ScreenThe Signal Strength screen displays a numerical strength (0 to 100) anda meter accompanied by an audible tone to indicate signal strength.A strong signal is indicated by a high number, large amount of the meterbeing occupied, and a high-pitched, rapidly beeping tone.From the Source field you can check the signals from each of thesatellites you configured on the previous Dish Setup screen. (Satellite A:Single; Satellite A, B: Oval 2; Satellite A, B, C: Oval 3)When you have received the strongest signal from several transponderson each of the satellites, you have completed the setup for digital satellite channels.If you are not receiving a strong signal, the dish antenna pointing requires further fine-tuning.When you are satisfied with the si
your first bill. DIRECTV service is not available outside the U.S. DIRECTV programming is sold separately and independently of DIRECTV System hardware. A valid programming subscription is required to operate DIRECTV System hardware. Activate your DIRECTV programming today at 1-800-DIRECTV (1-800-347-3288).

