Transcription
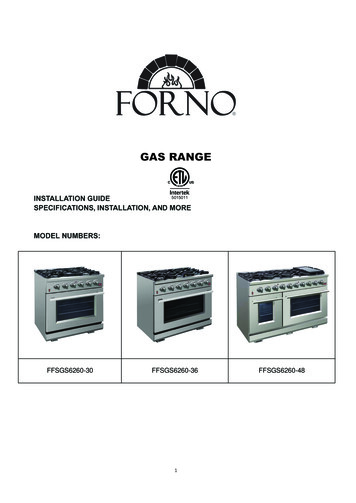
GAS RANGE5015011FFSGS6260-30FFSGS6260-361FFSGS6260-48
34610Door Handle Installation11Cooktop Burner Grates Installation11Oven Racks Installation11Electrical12Gas Supply13Pressure Regulator14Gas Shut-off Valve14Product Dimensions and Cabinets15Exhaust Hood Installation17Gas Conversion Operation17Gas Supply Connection22Ignition23Simmer and Boil23Burner Grates24Griddle Operation24Cooktop Cleaning Tips24242424Preheating25Convection Bake25Convection Roast25Setting Broil26Oven Cleaning Tips26272728Wire Diagram302
Customer CareThank you for purchasing a FORNO cooking range. Please read the entire instruction manual before operating your newappliance for the first time. Whether you are an occasional cook or an expert chef, it will be beneficial to familiarize yourselfwith the safety practices, features, operation and care recommendations of your cooking range.Both the model and serial number are listed in the front panel of the product. For warranty purposes, you will also need thedate of purchase. Record this information below for future reference.SERVICE INFORMATIONModel Number:Use these numbers in any correspondence or servicecalls concerning your cooking range.Serial Number:If you received a damaged cooking range, immediatelycontact the dealer (or builder) that sold you the cookingrange.Date of Purchase:Save time and money. Before you call for service, checkthe Troubleshooting Guide. It lists the causes of minoroperating problems that you can correct yourself.Purchase Address & Phone:SERVICE IN CANADA:Keep the instruction manual handy to answer your questions. If you don’t understand something or you need moreassistance, please call our Customer Service: 1-800-561-7265Or email: service@distinctive-online.comOr contact: CTM Household Appliances Inc.11420 Albert Hudon, Montreal, Quebec, H1G 3J6, CanadaSERVICE IN THE UNITED STATES:Keep the instruction manual handy to answer your questions. If you don’t understand something or you need moreassistance, please call our Customer Service: 1-866-231-8893Or email: info@forno.caIf your cooking range ever requires servicing, be sure to use a FORNO Factory Certified Service provider recommended byour customer care center. All Factory Certified Service providers are carefully selected and thoroughly trained by us.3
.Your safety and the safety of others are very important.We have provided many important safety messages in this manual and on your appliance.Always read and obey all safety messages.This is a safety alert symbol. It will alert you to potential personal or property safety hazards.Obey all safety messages to avoid any property damage, personal injury or death.WARNING indicates a potentially hazardous situation which, if not avoided, could result inserious injury or death.CAUTION indicates a moderate hazardous situation which, if not avoided, could result inminor or moderate injury.All safety messages will alert you what the potential hazard is, tell you how to reduce thechance of injury, and let you know what can happen if the instructions are not followed.- WHAT TO DO IF YOU SMELL GAS Do not try to light any appliance. Do not touch any electrical switch. Do not use any phone in your building. Immediately call your gas supplier from a neighbor’s phone. Follow the gas supplier’sinstructions. If you cannot reach your gas supplier, call the fire department.4
DTo reduce the risk of tipping the range, the range must be secured by properly installed anti-tipdevice packed with the range. See installation instructions shipped with the bracket for completedetails before attempting to install.All ranges can tip and cause injuries.Slide range forward.Make sure the anti-tip bracket is securely attachedto the wall behind the range.Safely tilt the front of the range upward slightlyand move back against wall. Making sure the pinslides under bracket.! WARNING55
Read all safety instructions before using the product. Failure to follow theseinstructions may result in fire, electrical shock, serious injury or death.1. Use this range for its intended purpose as described in this instruction manual.2. Have your range installed and properly grounded by a qualified installer in accordance withthe provided installation instructions.3. Any adjustment and service should be performed only by a qualified gas range installer orservice technician. Do not attempt to repair or replace any part of your range unless it isspecifically recommended in this manual.4. Your range is shipped from the factory set for use with natural gas or propane (LP) gas. Itcan be converted for use with either. If required, these adjustments must be made by aqualified technician in accordance with the installation instructions and local codes. The agencyperforming this work assumes responsibility for the conversion.5. Have the installer show you the location of the range gas shut-off valve and how to turn it offif necessary.6. Plug your range into a 120-volt grounded outlet only. Do not removed the round groundingprong from the plug. If in doubt about the grounding of the home electrical system, it is yourresponsibility and obligation to have an ungrounded outlet in accordance with the NationalElectrical Code. Do not use an extension code with this range.7. Before performing any service, unplug the range or disconnect the power supply at thehousehold distribution panel by removing the fuse or switching off the circuit breaker.8. Be sure all packing materials are removed from the range before operating to preventignition of these materials.9. Avoid scratching or impacting glass displays. Doing so may lead to glass breakage. Do notcook on a product with broken glass. Shock, fire, or cuts may occur.10. Do not leave children alone or unattended in an area where an appliance is in use. Theyshould never be allowed to climb, sit or stand on any part of the range.11.Do not store items of interest to children in cabinets above an oven-childrenwho climb onto the oven to reach items could be seriously injured.12. Never block the vents (air openings) of the range. They provide the air inlets and outletsthat are necessary for the range to operate properly with correct combustion. Air openings arelocated at the rear of the cooktop, at the top and bottom of the oven door, and at the bottom ofthe range.13. Use only dry pot holders--moist or damp pot holders on hot surfaces may result in burnsfrom steam. Do not let pot holders touch surface burners, burner grate, or oven heatingelement. Do not use a towel or other bulky fabrics in place of pot holders.6
14. Do not touch the heating elements or the interior surface of the oven. These surfaces maybe hot enough to burn even though they are dark in color. During and after use, do not touch, orlet clothing or other flammable materials contact any interior area of the oven; allow sufficienttime for cooling first. Other surfaces of the appliance may become hot enough to cause burns.Potentially hot surfaces include the burners, grates, oven vent opening, surfaces near theopening, crevices around the oven door, metal trim parts above the door, any backguard, orhigh shelf surface.15. Do not heat unopened food containers. Pressure could build up and the container couldburst, causing any injury.Extremely Heavy.Proper equipment and adequate manpower are needed when move the range to avoidpersonal injury or damage to the unit or the floor.Failure to follow this advice may result in damage or personal injury.DO NOT carry or lift the cooking range by the oven door handle or the control panel!7
Cook food thoroughly to help protect against foodborne illness. Minimum safe food temperaturerecommendations can be found at www.IsItDoneYet.gov and www.fsis.usda.gov. Use a foodthermometer to take food temperatures and check several locations.Do not allow anyone to climb, stand or hang on the oven door, drawer or cooktop. They coulddamage the range or tip it over causing severe injury or death.Keep the ventilator hood and grease filter clean to maintain good venting and to avoid greasefires. Turn the ventilator OFF in case of a fire or when intentionally "flaming" liquor or otherspirits on the cooktop. The blower if in operation, could spread the flames.Do not store or use flammable materials in an oven or near the cooktop, including paper,plastic, pot holders, linens, wall coverings, curtains, drapes and gasoline or other flammablevapors and liquids.Never wear loose-fitting or hanging garments while using the appliance. These garments mayignite if they contact hot surfaces causing severe burns.Do not let cooking grease or other flammable materials accumulate in or near the range.Grease in the oven or on the cooktop may ignite.Do not use water on grease fires. Never pick up a flaming pan. Turn the controls off. Smother aflaming pan on a surface unit by covering the pan completely with a well-fitting lid, cookie sheetor flat tray. Use a multi-purpose dry chemical or foam-type fire extinguisher.If there is a fire in the oven during baking, smother the fire by closing the oven door andturning the oven off or by using a multi-purpose dry chemical or foam-type fire extinguisher.If there is a fire in the oven during self-clean, turn the oven off and wait for the fire to go out.Do not force the door open. Introduction of fresh air at self-clean temperatures may lead to aburst of flame from the oven. Failure to follow this instruction may result in severe burns.8
Never leave the surface burners unattended at medium or high heat settings. Foods, especially oilyfoods, may ignite resulting in fire that could spread to surrounding cabinets.Never leave oil unattended while frying. If allowed to heat beyond its smoking point, oil may igniteresulting in fire that may spread to surrounding cabinets. Use a deep fat thermometer wheneverpossible to monitor oil temperature.To avoid oil spillover and fire, use the minimum amount of oil when frying in a shallow pan andavoid cooking frozen foods with excessive amounts of ice.Use proper pan size and avoid pans that are unstable or easily tipped. Select cookware thatmatches the size of the burner. Burner flames should be adjusted so that they do not extendbeyond the bottom of the pan. Excessive flames may be hazardous.When using glass/ceramic cookware, make sure it is suitable for cooktop use; others may breakbecause of a sudden change in temperature.To minimize the possibility of burns, ignition of flammable materials and spillage, cookware handlesshould be turned toward the center of the range without extending over nearby burners.Do not use a wok with a round metal support ring. The ring may trap heat and block air to the burnerresulting in a carbon monoxide hazard.Do not attempt to lift the cooktop. Doing so may damage the gas tubing to the surface burnersresulting in a gas leak and risk of fire.Do not use aluminum foil to cover the grates or line any part of the cooktop. Doing so may result incarbon monoxide poisoning, overheating of the cooktop surfaces, or a potential fire hazard.NEVER cover any slots, holes, or passages in the oven bottom or cover an entire rack withmaterials such as aluminum foil or oven liners. Doing so blocks air flow through the oven and maycause carbon monoxide poisoning. Never place foil or oven liners on the oven bottom. They can trapheat causing risk of smoke or fire.Stand away from the range when opening the oven door. Escaping hot air or steam can causeburns to hands, face and/or eyes.Never place cooking utensils, pizza or baking stones, or any type of foil or liner on the oven floor.These items can trap heat or melt, resulting in damage to the product and risk of shock, smoke orfire.Place oven racks in desired location while oven is cool. If the rack must be moved while the oven ishot, be careful to avoid touching hot surfaces.Do not leave items such as paper, cooking utensils, or food in the oven when not in use. Items storedin an oven can ignite.Do not leave items on the cooktop near the oven vent. Items may overheat resulting in a risk of fireor burns.Never broil with the door open. Open-door broiling is not advised due to overheating of control knobs.9
ea rera ge8 burnersNot all features are on all models.Appearance may vary.6 burners5 burners101Oven Vents2Cooktop Burner Grates3Griddle (on some models)4Magic Eyes (on some models)5Control Panel6Rotisserie7Convention Fan Control Panel8Oven Lights9Oven/Broil Burner10Kick Panel11Leveling System12Wok Support
Installation InstructionsDoor Handle InstallationThe door handle is not preinstalled. Find it in the frontside of the whole package. Follow the illustrations belowto install the door handle quickly and easiliy.Keep the square rubber mat of the handlemount to avoid scratching the oven door until this side isready to be installed.1. Remove the round black rubber mat from the inside door, and the square rubber mat on thehandle mount.2. Insert the screwdriver to the hole, and remove the screw nut from outside.3. Install the handle with the exposed screw.4. Repeat for the other side as step 1 to 3.5. Put the round black rubber mats back to cover the two holes on the inside door.Cooktop Burner Grates InstallationRemove the packing materials from the cooktop burnergrates. Place the burner grates to the right position. Payattention to the middle right grates as illustrated, as thethicker side should be in the left.Put the griddle (only for FFSGS6260-48) and the woksupport to the burner(s) you like to cook.Oven Racks InstallationInstallationHang the rack to the side rails and push in slowly11
DisassembleLift the rack up and pull out slowly until free of the side rails.e ri aYour range must be electrically grounded in accordance with local codes or, in the absence of localcodes, in accordance with the National Electrical Code (ANSI/NFPA 70, latest edition). In Canada,electrical grounding must be in accordance with the current CSA C22.1 Canadian Electrical CodePart 1 and/or local codes.The power supply must be the correct polarity. Reverse polarity will result in continuous sparkingof the electrodes, even after flame ignition. If there is any doubt as to whether the power supplyhas the correct polarity or grounded, have it checked by a qualified electrician.ELECTRICAL REQUIREMENTSElectrical SupplyGrounded, 110/120 VAC, 60 Hz15 amp or 20 amp dedicated circuitServiceReceptacle3-prong grounding-typePower Cord6' (1.8 m)this cooking range is equipped with a three-prong(grounding) plug for your protection against shock hazard and should be plugged directly into aproperly grounded three-pronged receptacle.cut or removes the grounding prong from the plug.Label all wires prior to disconnection when servicing controls. Wiring errors cancause improper and dangerous operation. Verify proper operation after servicing.12
aInstallation must comply with local codes or, in the absence of local codes, with the National FuelGas Code, ANSI Z223.1 / NFPA 54. In Canada, installation must conform to the current naturalGas Installation /code, CAN 1-1.1-M81 and with local codes where applicable.This range has been design-certified according to ANSI Z21.1b-2012 latest edition.GAS REQUIREMENTSNATURAL GASSupply PressureMinimum Supply PressureMax Regulator PressureLP GASSupply PressureMinimum Supply PressureMax Regulator PressureWC5" (12.5 mb)6"14" (34.9 mb), 0.5 psi (3.5 kPa)WC10" (25 mb)11"14" (34.9 mb), 0.5 psi (3.5 kPa)Ventilation: it is recommended that the unit be operated with an oven head, vented exhausthood of sufficient size and capacity.Electric Power Supply Requirements13
Pressure RegulatorSince service pressure may fluctuate with local demand, every gas cooking range must beequipped with a pressure regulator on the incoming service line for safe and efficient operation.The pressure regulator shipped with the range has two female threads 34" NPT. The regulatorshall be installed properly in order to be accessible when the appliance is installed in its finalposition.Pressure regulator can withstanda maximum input pressure of 0.5psi (3.5 kPa), and is set at 5"wc out let pressure.Pressure RegulatorGas Shut-off ValveGas Shut-off ValveThe supply line must be equipped with an approved external gas shut-off valve located near therange in an accessible location. Do not block access to the shut-off valve. Refer to the illustrationbelow.A 3/4" (19) ID gas supply line must be provided to the range. If local codes permit, a certified,3' (.9 m) long, 1/2" (13) or 3/4" (19) ID flexible metal appliance connector is recommended toconnect the unit’s 1/2" NPT female inlet to the gas supply line. Pipe joint compounds suitable foruse with natural or LP gas should be used.The appliance and its shut-off valve must be disconnected from the gas supply piping systemduring any pressure testing of the system at test pressures in excess of 0.5 psi (3.5 kPa). Theappliance must be isolated from the gas supply piping system by closing its individual manualshutoff valve during any pressure testing of the system at test pressures equal to or less than 0.5psi (3.5 kPa).14
rDimeiaa i eFFSGS6260-30FFSGS6260-3615
FFSGS6260-48This range may be installed directly adjacent to existing countertop-height cabinets (36" or 91.5cm from the floor).To achieve the best look, the cooktop should be level with the cabinetcountertop. This can be accomplished by raising the unit using the adjustment spindles on thelegs.WOPENING WIDTHTo wall on either sideOPENING WIDTH30" Model36" Model48" ModelW30" (762)36" (914)48" (1219)16
aa aiThe bottom of the hood should be 30" min. to 36" above the countertop. This would typically resultin the bottom of the hood being 66" to 72" above the floor. These dimensions provide safe andefficient operation of the hood.After Installation:1. Check ignition of cooktop burners.2. Check the air shutter adjustment – sharp blue flame, with no yellow tipping or lifting flames.3. Check ignition of oven burner.4. Visually check tubular burner (oven burner) re-ignition to be sure both rows ofburner ports are relighting each time.5. Check for gas leaks at all gas connections (using a gas detector, never a flame).6. Check oven bake and convection bake function.aer iera iThis cooking range can be used with LP gas and NG gas. It is shipped from the factory adjustedfor use with NG(Nature Gas). Conversion nozzles are included. Follow the instruction shownbelow for gas conversion.Gas conversion shall be conducted by a factory- trained professional.Call thecustomer service hotline to identify a factory-trained professional near your home.Before carrying out this operation, disconnect the range from gas and electricity.1. Pressure regulator2. Cooktop burners3. Oven burner4. Broil burner5. Gas valves6. Reconnect Gas and Electrical Supply7. Air shutter oven burner8. Installation of new rating label17
The conversion is not completed if all 8 steps have not been concluded properly.Before performing the gas conversion, locate the package containing the replacement nozzlesshipped with every range.STEP 1: Pressure RegulatorTo access the gas regulator, pull the range away from the cabinet wall. The gas regulatoris located at the bottom right corner of the range.Electrical shock hazard can occur and result in injury or death. Disconnect electricalpower to the range before servicing. Do not remove regulator or allow it to turn during servicing.a. Unscrew the cap from the regulator.Do not remove the spring from the regulator.b. Unscrew the insert from the cap and turn it over so the longer stem is facing the cap. Replaceinsert on the cap. Replace the cap on the regulator.STEP 2: Cooktop Burnersa. Remove cooking grates, burner caps and inner burner rings.b. Lift off outer burner heads and burner bases.c. Remove the factory installed natural gas nozzles from the centerof the nozzle holders using a 7mm socket wrench. Replace the LPnozzle in each nozzle holder. Tighten each nozzle until snug. Usecaution not to over tighten.Care should be taken when removing and replacing gascomponents. Use proper support to prevent damage to components.Socket WrenchEach nozzle has a number indicating its flow diameter printed on the body. Consultthe table below for matching nozzles and burners.18
1.38*2 0.75NG1.38*2 0.75LPG 0.9*2 0.460.9*2 0.461.38*2 0.75NG1.38*2 0.751.38*2 0.751.38*2 0.750.9*2 0.46LPG 0.9*2 0.460.9*2 0.460.9*2 0.46NG1.38*2 0.751.38*2 0.75NG1.38*2 0.751.38*2 0.751.38*2 0.75LPG0.9*2 0.460.9*2 0.46LPG 0.9*2 0.460.9*2 0.460.9*2 0.46ee1.38*2 0.75 1.38*2 0.75 1.38*2 0.75 1.38*2 0.75NGLPG 0.9*2 0.46NG0.9*2 0.460.9*2 0.460.9*2 0.461.38*2 0.75 1.38*2 0.75 1.38*2 0.75 1.38*2 0.75LPG 0.9*2 0.460.9*2 0.460.9*2 0.460.9*2 0.46eSave the nozzles removed from the range for future use.STEP 3: Oven Burnera. Remove 3 screws between the kick panel and the oven door . Hold the toe kick panel on bothends and slowly pull away towards the front.b. Remove 2 screws which holding the nozzle bracket and locate the nozzle.Replace with oven burner nozzle, size 1.32mm and tighten. Replace the nozzle bracket, aligningthe new nozzle into the air shutter of the oven burner.Repeat upon steps for 18”oven (48" ranges only).Model:FFSGS6260-30Oven8 3223NG1.7LPG1219
STEP 4: Broil Burnera. Remove 2 screws which fixing the nozzle bracket and locate the nozzle.b. Using a 5/8”or 19mm open wrench, remove the gas line from the nozzle holder. Using a ½”openwrench, remove the nozzle from the orifice holder. Replace with 0.94 mm oven broiler SGS6260-361.81.19Model:FFSGS6260-481.81.19STEP 5: Gas Valvea. Remove control knobs.b. Using a flat screwdriver, adjust main burner bypass jets toward to 1/4 circle for LP until the flameis normal.STEP 6: Reconnect Gas and Electrical SupplyLeak testing of the range shall be conducted according to the installation instructions provided withthe range.Before operating the range after the gas conversion, always check for leaks with a soapy watersolution or other acceptable method in at gas connections installed between the gas inlet pipe of therange, gas regulator, and the manual shut-off valve.20
STEP 7: Air Shutter Oven Burner (no necessary)The air shutter for the oven burner may need adjustment, especially if the unit has been convertedfor use with LP. The approximate flame height at the oven burner is one inch (distinctiveinner blue flame).To determine if the oven burner flame is acceptable:a. With the kick plate removed, set the oven to bake at 350 F and observe the flame. If the flameyellow in color, increase the air shutter opening size. If the flame is blue and lifting away from theburner, reduce the air shutter opening size.b. Turn off the oven and allow it to cool before adjusting the air shutter. To adjust, loosen the lockscrew, reposition the air shutter and tighten the lock screw. Retest the burner by repeating thesteps above. When the burner flame is a distinct blue colour and burning steadily, the air shutter isadjusted correctly.STEP 8: Installation of New Rating LabelRecord the model and serial number on the LP / Propane Rating serial plate provided in this kit.The information can be obtained from the existing Rating / Serial plate. Place the new plate asclose as possible to the existing Rating / Serial plate on the range.PreparationBefore moving the range, protect any finished flooring and secure oven door(s) closed to preventdamage.The oven door(s) can be removed to lighten the load or to fit the unit through a doorway. Onlyremove if necessary. Do not remove the griddle or any other component. Door removal should onlybe done by a certified installer or service technician.PlacementDo not lift or carry the oven door by the door handle. The range has rear casters which allow foreasy movement by lifting the front of the unit.Use an appliance dolly to move the range near the opening. Remove and recycle packingmaterials. Do not discard the anti-tip bracket supplied with the range.LevelingRaise the range to the desired height by adjusting the legs. The legs can be adjusted byrotating the hexagonal leg clockwise to raise and counter clockwise to lower.Anti-Tip BracketTo prevent the range from tipping forward, the anti-tip bracket must be installed. Refer to theillustration on page 5.21
Gas Supply ConnectionAll connections to the gas piping must be wrench-tightened. Do not overtighten or allow pipes toturn when tightening.When all connections have been made, check that all range controls are in the “OFF” position andturn on the main gas supply valve.If a flexible metal connector is being used, verify it is not kinked, then attach the gas supply line tothe regulator on the range. Open the valve and check for leaks by placing a liquid detergentsolution onto all gas connections. Bubbles around connections indicate a gas leak. If a leakappears, close the shut-off valve and adjust connections.Leak testing of the appliance shall be conducted according to the manufacture’s instructions .Usesome soap water (50% water and 50% soap) or a leak detector at all joints and connections tocheck for leaks in the system. Do not use a flame to check for gas leaks.The appliance must be isolated from the building’s gas supply piping system by closing itsindividual manual shut-off valve during any pressure testing of the gas supply piping system at testpressure equal to or less than 0.5 psi (3.5kPa).Getting StartedBefore you start cooking, please take the following steps. Remove the exterior and interior packing. Remove the protective film on steel and aluminum parts. Clean the range thoroughly with hot water and a mild detergent. Rinse and dry with a soft cloth toremove any residual oil and grease left over from the manufacturing process. Check that surface burner components are assembled correctly. Furnish the interior of the oven by inserting the shelves and tray.Cooktop OperationThe burner design combines all burnerparts in one assembly. The burner cap mustbe seated flatly on the burner. Referto the illustration below.22
g iiTo light the cooktop burners, push and turn the appropriate control knob counter clockwise to a “Hi”position. You will hear a clicking noise –the sound of the electric spark igniting the burner.Once burner ignition has been achieved, turn the burner control knob to adjust the flame size. Ifthe knob stays at “Hi”, it will continue to click.NOTE: When one burner is turned to the “Hi” position, all the burners will spark. Do not attempt todisassemble or clean around any burner while another burner is on. Do not touch any burner cap,burner base, or igniter while the igniters are sparking.Heat Settings:HiSimmerIgnites the burners.Melting small quantities, steaming rice, warming food, meltingchocolate or butter.Melting large quantities.Low-temperature frying, simmering large quantities, heating milk,cream sauces, gravies.Sautéing and browning, braising, pan-frying, maintainingslow boil on large quantities.High-temperature frying, pan boiling, maintaining slow boilon large quantities.Boiling liquid quickly, deep frying.LowLow-MediumMediumMedium-HiHiimmer aiA smaller flame will give the best results when simmering. Small flames offer precise cookingperformance for delicate foods, keeping food warm, melting chocolate or butter, and for cookingover low heat for long period of time.The highest (larger) flame settings provide the maximum heat that is available on your range. Thissetting should be used for heavy cooking jobs such as boiling water and cooking pasts.Flame Size When you select the flame size, watch the flame when you turn the knob. Any flame larger than the bottom of the cookware is wasted. The flame should be steady and blue in color. Foreign material in the gas line may cause anorange flame during initial operation.Power Failure If the gas does not ignite within four seconds, turn off the valve and allow at least fiveminutes for any gas to dissipate. Repeat the lighting procedure. In the event of a power failure, the surface burners can be lighted manually. Hold a lighted matchnear a burner and turn the knob counter-clockwise to “HI”. After burner lights, turn knob to thedesired setting.23
r erra e1. The grates must be properly positioned before cooking. Improper installation of the grates mayresult in scratching of the cooktop and / or poor combustion.2. Do not operate the burners without a pan or utensil on the grates.rieera ia ai a eemeBefore Using the Griddle1. Clean the griddle thoroughly with warm, soapy water to remove dust or any protective coating.2. Rinse with clean water and wipe off to dry with soft, clean, lint-free towel/cloth.Use of the Griddle1.Place the griddle to the position you need to cook.2. Preheat the griddle for 10-12 minutes.3. Butter or cooking oil can be added for more flavor, then place the food to cook.ea i g i To prevent the cooktop from discoloring or staining, clean cooktop after each use, and wipe upacidic or sugary spills as soon as the cooktop has cooled. The sealed burners of your range are not secured to the cooktop and are designed to beremoved. Boil overs or spills will not seep underneath the cooktop. The burners should be cleanedafter each use.eigThe oven light is controlled by a push switch on the control panel.The light can be used while cooking or cleaning the oven.Check that power is disconnected from the electrical box before replacing the light bulb.Allow the oven to cool completely, then unscrew the light cover and remove the light bulb by unscrewingit from the socket. Replace with a 40-watt halogen bulb.agi e eThe red Magic Eyes will turn on automatic when the room becomes dark.ea i gSome ranges are equipped with an automatic rotisserie for roasting.The rotisserie feature allows for an even cooking and all-over browning of the meat while preventingthe meat from cooking in its rendered grease. The rotisserie will tu
1. Use this range for its intended purpose as described in this instruction manual. 2. Have your range installed and properly grounded by a qualified installer in accordance with the provided installation instructions. 3. Any adjustment and service should be performed only by a qualified gas range installer or service technician.

