Transcription
Digital AdapterEasy Setup GuideInstallation Operation Troubleshooting3698674A final4 110/5/11 4:37 PM
Table of ContentsWhat’s included in this Install Kit?4Connecting to a TVwith HDMI Cable8Connecting to a TV with Coax Cable9Power Up10Connecting to the Network and Activating your Digital Adapter12Remote Control Setup Instructions14Verify your Services18Digital Adapter Operation Guide19Remote Operation Guide21Troubleshooting Guide2423698674A final4 210/5/11 4:37 PM
What you need to knowTo bring you better service now and in the future your cable operator isupgrading to anAll-Digital network – All-Digital for every channel, on every TV set.What you need to doTo continue to receive all the channels you are used to, you will needto make sure that every TV in your home is equipped withone of our Digital Adapter or Digital Cable Boxes.33698674A final4 310/5/11 4:37 PM
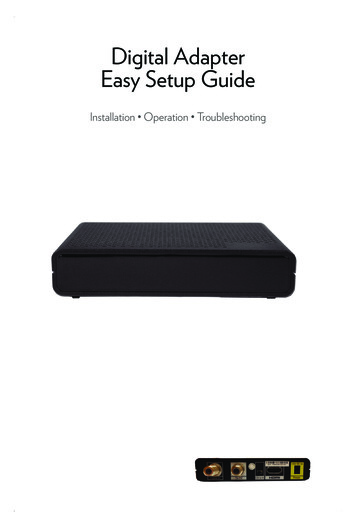
What’s included in this Install Kit?Digital AdapterEach TV will need to be connected to a Digital Adapter or aDigital Cable Box, but not both.HDMI Cable5 Foot Coax CablePower CordRemote ControlIn order to operate the Digital Adapter you must usethe remote control included with this kit. Programminginstructions for the remote control are included in this guide.2 AAA BatteriesAdhesive FastenersUse these if you want to stick the Digital Adapter to your TV.43698674A final4 4Note: Please be careful. Your operator is not responsible forany damage done to any surface you stick these to.10/5/11 4:38 PM
Items that you may also need:FlashlightPower StripYou’ll need a power strip if you already have 2 items pluggedinto the electrical outlet that you plan to use.Extension CordYou’ll need an extension cord if you already have 2 itemsplugged into the electrical outlet closest to your TV.53698674A final4 510/5/11 4:38 PM
63698674A final4 610/5/11 4:38 PM
The last four digits of the serial number ofeach Digital Adapter that you will be activating:Serial NumberLocation in your homeOutput ChannelNote: The serial number can be found on the bottom of theDigital Adapter itself and is also printed on the outsideof the Digital Adapter package.73698674A final4 710/5/11 4:38 PM
Connecting to a TVwith HDMI Cable1Connect the Digital Adapterto the Cable OutletATurn off your TV.BLocate the cable that currently runs fromthe cable wall outlet to the back of yourTV. Leave one end of the cable connectedto the wall, but disconnectthe other end from the back of your TV.2Connect the Digital Adapterto the TVAFind the HDMI cable included in this kit.Connect one end of the cable to the “HDMI”output on the back of the Digital Adapter.BConnect the other end to the “HDMI” inputon the back of your TV.TVTVBWallBCable OutletCReconnect this end of the cable to theA“Cable In” input on the back of theDigital Adapter.Cable OutletCWall83698674A final4 810/5/11 4:38 PM
Connecting to a TVwith Coax Cable1Connect the Digital Adapterto the Cable OutletATurn off your TV.BLocate the cable that currently runs fromthe cable wall outlet to the back of yourTV. Leave one end of the cable connectedto the wall, but disconnectthe other end from the back of your TV.2Connect the Digital Adapterto the TVAFind the 5-foot coax cable included in thiskit. Connect one end of the cable to the“To TV” output on the back of the DigitalAdapter.BConnect the other end to the “Cable In/RFIn” input on the back of your TV.TVCable IN / RF INWallBBACable OutletCReconnect this end of the cable to the“Cable In” input on the back of theDigital Adapter.Cable OutletCWall93698674A final4 910/5/11 4:38 PM
Power UpAIf you are connecting the Digital Adapter to a television with HDMI,set your TV to choose “HDMI” as the input source.OrPick which output channel your TV will use and make sure your televisionis set to that selected channelby setting the switch on the back of the Digital Adapterto the proper output channel (Ch 3 or Ch 4).ABFind the power cord included in the kit. Plug the end of thepower cord into the power input “ 5V DC In” on the back of the DigitalAdapter.B103698674A final4 1010/5/11 4:38 PM
CPlug the other end into a working electrical outlet or power strip.Make sure that the outlet is not controlled by aswitch that gets turned on and off.BDCCheck the front of the Digital Adapter to see if the green light is on andblinking.If it is not on, check to make sure the power plug was pluggedinto the power input “ 5V DC In” and that the other endis plugged into a working electrical outlet.Note: After activation, this light will remain on and constantly lit.DPlease wait 20 minutes before calling to activate.This will allow the Digital Adapter to connect tothe network and get the latest updates.113698674A final4 1110/5/11 4:38 PM
Connecting to the Network andActivating your Digital AdapterRemember, you must wait 20 minutes before calling to activate.This will allow the Digital Adapter to connect to the network andget the latest updates.AIf you received more than one Digital Adapter, this would be a good time toget the others installed so you can activate them all with one call.Note: To complete your activation, you will need your account informationand the serial number of each Digital Adapter you are activating.Note: The serial number can be found on the bottom of theDigital Adapter itself and is also printed on the outside of theDigital Adapter package.123698674A final4 1210/5/11 4:38 PM
BCall your cable operator’s automated activation lineand follow the instructions.CTurn on your TV and tune it to the proper output channel (Ch 3 or Ch 4).Channel 3/4133698674A final4 1310/5/11 4:38 PM
Remote Control Setup InstructionsThe RF Remote Control you received with your Digital Adapter Kit mustbe setup before it will work with your Television and Digital Adapter.This is a two step process.First, you must setup the Remote to control the Digital Adapter.Next you setup the Remote to control the television.Setup Remote to Control the Digital AdapterRF Remote Pairing Process:When multiple remotes work in a shared space, interference can result.To avoid this problem, the remote must be paired with the Digital Adapter.Step 1Turn on your TV using the buttons on the TV or theTV remote.Make sure power is connected to your DigitalAdapter and it is plugged into the TV.Note: Your TV must always be set to the properchannel (Ch 3 or Ch 4) or HDMI Input to matchthe output channel on the back of your digitaladapterStep 2Install the batteries (included in your kit) in your new remote control.Step 3Make certain no other Digital Adapter remote is in the area.Make sure power is connected to your Digital Adapter.Turn on your TV using the buttons on the TV or the TV remote(not a digital adapter remote in this instance).143698674A final4 1410/5/11 4:38 PM
Step 4Press and hold both DTAPOWER and SELECT keys atthe same time.Once the red light on the remoteturns on, then release both keys.Wait 10 seconds, then a 3 digitvalidation code will display on theTV.Code appears on the screen.123Step 5Enter the 3 digit code using the Digital Adapter remote.When remote is successfully paired with the digital adapter, the remote’sred light will blink twice.Red light locationBlinks twiceProceed to next page to setup the Remote Control with your television.3698674A final4 151510/5/11 4:38 PM
Setup Remote to Control the TelevisionStep 6Press and hold both Digit 1 and Digit 3 keys together until the red light turnson. Release both keys.Keep your eyes on the Remote so you can watch the red light.Press and holdboth buttons atthe same timeKeep your eyeson the remoteso you canwatch the redlight.Note: Your TV must always be set to the proper channel (Ch 3 or Ch 4)or HDMI Input to match the output channel on the back of your DigitalAdapter.Step 7Point the new remote at the TV.Press and hold the TV POWERkey.The remote will start searchingfor the right code while you areholding this key.When the TV turns off, release the key within 2seconds to lock in the code.163698674A final4 1610/5/11 4:38 PM
Step 8Point the new remote at the TV.Press TV POWER on your Remote to turn on your TV.If your TV responds (turns on), then you have successfully programmed yourRemote.The setup of the Remote is now complete.If you are not successful the first time, try again.When the Remote Control is programmed to operate the TV, there are 5keys that control the television:INPUTTV POWERMUTEVOLUME VOLUME -Two RemotesIf you were unable to program your remote, you will need to use tworemotes to operate your TV:the Digital Adapter Remote and the one that came with your TV.Setting the Remote Volume1. Use the remote control that came with your TV to adjust the volume toa comfortable level. This should be the last time you’ll use this remote forvolume control.2. Going forward use only your Digital Adapter Remote to adjust volume upor down.Caution:Don’t use your TV remote to change channels.Your TV must always be set to the properInput, HDMI, Ch 3 or Ch 4or you will see a snowy or blank screen.3698674A final4 171710/5/11 4:38 PM
Verify your ServicesAfter completing the activation step, wait a few minutesfor programming to appear.AConfirm that the Digital Adapter is connected to the power and thatthe light on the front is solid (not blinking).BMake sure that the TV is on.CUse the Digital Adapter’s remote control to operate your Digital Adapter.Scroll through your channels to make sure they are all working.Note: If the light is blinking or your channels are not showing up, turn to thetroubleshooting section of this guide.A183698674A final4 18CB10/5/11 4:38 PM
Digital Adapter Operation GuideQuick Troubleshooting Checklist TV set on the proper output channel (Ch 3 or Ch 4) or HDMI InputDigital Adapter light is onBe sure that the TVis on the proper inputfor HDMI or channel(Ch 3 or Ch 4).Be sure that theDigital Adapteris on.You should see agreen light.Be sure that theDigital Adapter is setto the proper outputchannel (Ch 3 or Ch 4).Always use the remote that came with the Digital Adapter tochange channels and for volume control.3698674A final4 191910/5/11 4:38 PM
Low Battery Indicator:The Remote Control will blink 10 times fast when the battery is low.Replace with new batteries at that time.203698674A final4 2010/5/11 4:38 PM
Remote Operation GuideKEYFUNCTIONWhen the remote has been programmed to the TV,TV POWER will turn the TV on and off.Use DTA POWER to turn the Digital Adapter onand off.Note: the DTA Power Off feature may not beenabled.Use the key pad (0-9) to directly select the channels.Use MENU to display the Menu screen.Use CLEAR to erase the last digit you entered.Use Navigation Keys to move the cursor UP, DOWN,LEFT, DOWN.Use SELECT to select the item the cursor is pointingto.Press MUTE once to turn the sound on or off.213698674A final4 2110/5/11 4:38 PM
Remote Operation GuideKEYFUNCTIONUse LAST to recall the last channel.Use GUIDE to display the Electronic Program Guide.Note: Guide feature may not be offered on yourDigital Adapter.Use INFO to display information relating to currentcontents.Use INPUT to toggle among TV Input signals.Use VOL (or VOL-) to raise (or lower) the volume.Use CH (or CH-) to select the next higher (or lower)channel.223698674A final4 2210/5/11 4:38 PM
This remote will allow for volume control eitherthrough the TV or through the digital adapter.When Volume Punch-through is enabled, theVOLUME and MUTE keys will control the TV.Below are the steps required to disable Volume Punch-throughto the TV.Step Description1 Press and hold the MUTE key and DTA POWER key.234Hold both keys for 3 seconds.The red LED on the remote will turn on.Release both keys. Volume Punch-through is disabled.Below are the steps required to enable Volume Punch-throughto the TV.Step Description1 Press and hold the MUTE key and TV POWER key.2343698674A final4 23Hold both keys for 3 seconds.The red LED on the remote will turn on.Release both keys. Volume Punch-through is enabled.2310/5/11 4:38 PM
Troubleshooting GuideIf the remote control does not work: Check that the batteries still have charge and are insertedcorrectly.If there is no picture on the TV and the light on the DigitalAdapter is blinking: Check your cables and make sure that they are attachedcorrectly. Unplug the Digital Adapter, plug it back in, then wait 5 minutesfor it to reset.If there is no picture on the TV and the light on the DigitalAdapter is on (not blinking): Check that the TV is tuned to the proper channel (Ch 3 or Ch 4).If you are also connected to a VCR, try turning the VCR off.Check that the Digital Adapter is connected directly to thecable provider outlet in your wall.Make sure that all cables are firmly connected.Check the input setting on your TV, make sure that it is set onHDMI, ANT or CABLE.243698674A final4 2410/5/11 4:38 PM
If the remote is turning the TV off and on and changing thechannels but not changing the volume: Your TV volume may have been turned all the way down or muted with theold TV remote. .If your Digital Adapter is not coming on: Make sure that the power cord is securely connected to the back of theDigital Adapter.Make sure that the Digital Adapter power cord is plugged into a workingpower outlet.If you cannot get the Digital Adapter remote programmed toyour TV: You may not be holding “POWER” long enough (up to 2 minutes).Be sure to release the “POWER” button within 2 seconds once your TVturns off.VCR is not recording the right channel: The VCR will only record the channel that the Digital Adapter is tuned to.Set your TV and VCR to the proper channel (Ch 3 or Ch 4), then use theDigital Adapter remote to tune the Digital Adapter to the channel to berecorded.253698674A final4 2510/5/11 4:38 PM
If you received more than one Digital Adapter, this would be a good time to get the others installed so you can activate them all with one call. Connecting to the Network and . you must setup the Remote to control the Digital Adapter. Next you setup the Remote to control the television. 3698674A final4 14 10/5/11 4:38 PM. 15 Code appears on .