Transcription
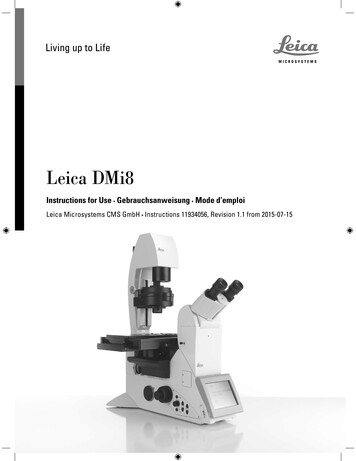
Leica DMi8Instructions for Use t Gebrauchsanweisung t Mode d’emploiLeica Microsystems CMS GmbH t Instructions 11934056, Revision 1.1 from 2015-07-15
COPYRIGHT/ CONTENTS2
Leica DMi8Instructions for UseLeica Microsystems CMS GmbH t Instructions 11934056, Revision 1.1 from 2015-07-15
COPYRIGHT/ CONTENTSCopyrightContentsAll rights to this documentation are held by Leica Microsystems CMS GmbH. Reproduction of text or illustrations(in whole or in part) by print, photocopy, microfilm or othermethod (including electronic systems) is not allowed without express written permission from Leica MicrosystemsCMS GmbH.11.1Important Notes about this Manual . 4Text symbols and their meanings . 42.Intended Purpose of the Microscope . 6The instructions contained in the following documentationreflect state-of-the-art technology. We have compiled thetexts and illustrations as accurately as possible. Still, weare always grateful for comments and suggestions regarding potential mistakes within this documentation.3.3.13.23.33.3.13.3.23.3.33.3.3.1The information included in this manual may be changed without prior Safety Notes . 8General safety notes . 8Electrical safety . 8Laser safety . 11Safety switch (interlock) on the microscope . 11Screwed-on filter turret cover. 12Laser coupling by the user . 12Safety hazard due to folded backTransmitted Light arm . 13Safety hazard at eyepiece. 13Safety hazard in the condenser areaduring operation. . 13Safety hazard above the condenser. 14Safety hazard in the specimen area . 14Safety hazard due to openings at microscope . 15Note regarding the safety hazards in Sections3.3.3.1 and Section 3.3.3.2 . 16Exception for Class 1 lasers . 17Storage and transport . 18Ambient conditions. 18Notes on handling light sources . 19Notes on handling the Touch Screen . 20Notes on handling immersion oil. 20Notes on handling acids and bases . 20Disposal . 204.4.14.24.34.44.4.14.4.24.4.34.4.44.4.5Leica DMi8 configurations instrument overview 21Microscope configurations (examples) . 21Dimensions (specified in mm). 22Specifications ) . 24Controls . 28Control panel fields. 29Additional control elements . 31The Touch Screen . 34The Leica SmartMove control element. 36Leica STP4000/8000 external control panel. 373.3.3.43.3.3.53.3.3.63.3.3.7Revision 1.1, published on 2015-07-15 by:Leica Microsystems CMS GmbHErnst-Leitz-Straße 17-37D-35578 Wetzlar ble for contents:Marketing CMS2
CONTENTS5.Operation . 385.1Switching on the microscope . 395.2Illumination . 415.2.1Transmitted Light. 415.2.2Fluorescence . 425.2.3Infinity port . 445.2.4Shutter . 455.3Objectives . 465.4Tube . 495.5Eyepieces . 505.6Stages and object displacement. 515.6.1Object displacement . 515.6.2Adjusting the step sizes on motorized stages. 525.7Focusing . 545.7.1Focusing the image . 545.7.2Focus thresholds . 555.7.3Adjusting the step sizes . 565.7.4AFC (Adaptive Focus Control) . 575.8Selecting the ports . 585.9Magnification Changer . 595.10Aperture diaphragm and field diaphragm . 605.11Filter . 625.11.1 Transmitted Light filter . 625.11.2 Fluorescence Cubes. 635.11.3 Leica RFID Module. 655.11.3.1 Product Description . 655.11.3.2 Specifications LID Module 1.0 .655.11.3.3 Specifications RFID Tag D6.7 special . 655.11.3.4 Ports . 655.11.3.5 FCC / IC Compliance . 655.12The memory function on the Touch Screen . 665.13Transmitted Light contrast method . 665.13.1 Brightfield (TL) . 675.13.2 Phase Contrast (TL) . 695.13.3 Darkfield (TL) . 715.13.4 Polarization (TL) . 725.13.5 Differential Interference Contrast – DIC (TL) . 745.13.6 Integrated Phase Contrast – IPH (TL) . 765.13.7 Integrated Modulation Contrast – IMC (TL) . 785.14Fluorescence . 825.15Combination method . 856.Troubleshooting . 867.7.17.27.3Care of the Microscope. 89Dust Cover . 89Cleaning . 89Handling acids and bases . 908.Essential Consumable and Spare Parts . 919.9.19.29.39.4Appendix . 92Assigning the variable function keys . 92Abbreviation glossary . 94Overview of Touch Screen pictograms . 95Additional information. 9610.Index . 9711.EC Declaration of Conformity . 993
1. IMPORTANT NOTES ABOUT THIS MANUAL1 Important Notes about this ManualCaution!These Instructions for Use are an essential componentof the product; they must be read carefully before theproduct is assembled, put into operation or used, andmust be kept for later reference.These Instructions for Use include important instructionsand information related to the operating safety and maintenance of the instrument.1.1Text symbols and their meanings(1.2)Numbers in brackets, e.g. (1.2), refer to illustrations, in theexample to Fig. 1, item 2.o p.20Numbers with an arrow, e.g. o p. 20, refer to a specificpage of the manual.WARNINGWARNING indicates a hazard with a medium degree of riskthat, if not avoided, can result in death or serious injury.CAUTIONCAUTION indicates a hazard with a low degree of risk that,if not avoided, can result in minor or moderate injury.Caution!In this manual, additional safety notes are indicated withthe triangle symbol shown here, and have a gray background.!4Caution! The instrument and accessories can be damagedwhen operated incorrectly.
1. IMPORTANT NOTES ABOUT THIS MANUALWarning of hazardous electrical voltage! Risk of electricalshock!Danger due to hot surfaceWarning of optical radiation! Never look directly into thelight beam! Wear safety goggles!Warning of electromagnetic fieldWarning of UV radiation! Wear safety goggles!Warning of hazardous laser radiation – take appropriatesafety precautions!Warning of hand injuriesInstructions for disposing of the instrument, its accessories and consumables.Connection to groundExplanatory note*MM/YYYYItem not contained in all equipment configurationsManufacturing date, e.g. 11 / 2011 for November 2011China RoHS 50 years EFUP(Environmentally friendly use period)5
2. INTENDED PURPOSE OF THE MICROSCOPE2. Intended Purpose of the MicroscopeDMi8 Leica microscopes are inverted light microscopesand are intended for use as general lab microscopes forroutine examinations of biological specimens.The Leica DMi8 series can be used universally. All contrast methods, such as Brightfield, Darkfield, PhaseContrast, DIC, fluorescence or modulation contrast,are integral components of the microscope and canbe adapted or exchanged quickly and easily. Variable illumination and imaging beam paths as well asHCS optics, modular accessories and a wide range of availableperipherals supplement the inverted Leica research standfrom Leica Microsystems CMS GmbH.Leica DMi8 microscopes:Leica DMi8 manualLeica DMi8 codedLeica DMi8 automatedLeica DMi8 automatedLeica DMi8 Directives of European Community (EC-Directives)The named microscope meets the requirements of theCouncil Directives 2006/95/EC and 2014/35/EC concerningelectrical apparatus and 2004/108/ EC and 2014/30/EC concerning electromagnetic compatibility.Reasonably foreseeable misuseThe following are prohibited:t To use the microscope for any purpose not in accordancewith the Declaration of Conformity (e.g. the use of medicalproducts in accordance with EU Directive 93/42/EEC)t Making use of auxiliary equipment to use the area between the microscope stage and objectives as a clamp orholder (working like a vice)t Operating the microscope in an inclined positiont Cleaning the microscope in a way other than specified inthe manualt Modifying the built-in safety circuits in the instrumentt Allowing unauthorized personnel to open the instrumentt Using cables that Leica Microsystems CMS GmbH has notprovided or permittedt Using the swiveling Touch Screen of the microscope as atransport handlet Using combinations with non-Leica components that gobeyond the scope of the manual
2. INTENDED PURPOSE OF THE MICROSCOPECaution!The manufacturer assumes no liability for damagecaused by, or any risks arising from, using the microscope for other purposes than those for which they areintended or not using them within the specifications ofLeica Microsystems CMS GmbH.In such cases, the Declaration of Conformity shall be invalid.WARNINGNotes on handling laser devicesIn the standard design without additional laser safetyprecautions, the microscopes are not suitable for coupling laser radiation (such as to the camera ports), sincethis radiation poses a hazard for the user (eye injury inparticular).For use of the microscope with lasers,Leica Microsystems CMS GmbH offers special microscope variants with additional safety features. Lasercouplings require corresponding safety devices thathave to be inspected and installed by trained personnel.For further information, please contact your authorizedLeica Microsystems CMS GmbH representative.7
3. SAFETY NOTES3. Safety Notes3.1General safety notesThese instruments of protection class 1 are built and inspected in accordance withEN 61010-1 /IEC 61010-1 Safety requirements forelectrical equipment for measurement, control and 6-1Electricalequipmentfor measurement, control and laboratory use – EMC requirements.The products were also tested in accordance with EN62471 / IEC 62471 Photobiological safety of lamps and lampsystems.Caution!The instruments and accessories described in this Instructions for Use have been tested for safety and potential hazards.The responsible Leica Microsystems CMS GmbH affiliate or the main plant in Wetzlar must be consultedwhenever the device is altered, modified or used in conjunction with non-Leica components that are outside ofthe scope of this manual.Unauthorized alterations to the instrument or noncompliant use shall void all rights to any warranty claims!3.2Electrical safetyGeneral specificationsCaution!In order to maintain this condition and to ensure safeoperation, the user must follow the instructions andwarnings contained in this operating manual.Compact Leica CTR electronics boxFor indoor use only.Supply voltage:Frequency:Power consumption:Fuses:Ambient temperature:Relative humidity:Protection class:Overvoltage category:Pollution degree:8100 – 240 VAC50 / 60 Hzmax. 150 VA3.15 A, slow-blowing,Breaking capacity H, 250 VACSize: 5x20 mm15 - 35 C90% up to 30 C,non-condensingIII2
3. SAFETY NOTESAdvanced/Advanced Leica CTR electronics boxLeica DMi8 automatedFor indoor use only.Supply voltage:Frequency:Power consumption:Fuses:For indoor use only.Supply voltage:Frequency:Power consumption:Fuses:Ambient temperature:Relative humidity:Ambient temperature:Relative humidity:Protection class:Overvoltage category:Pollution degree:100 – 240 VAC50 / 60 Hzmax. 290 VA6.3 A, slow-blowing,Breaking capacity H, 250 VACSize: 5x20 mm15 - 35 C90% up to 30 C,non-condensingIII2Protection class:Overvoltage category:Pollution degree:100 – 240 VAC (o Leica CTR)50 / 60 Hz (o Leica CTR)see Leica CTRsee Leica CTR15 - 35 C90% up to 30 C,non-condensingI (o Leica CTR)II (o Leica CTR)2 (o Leica CTR)Leica EL6000*Leica DMi8 manualFor indoor use only.Supply voltage:Frequency:Power consumption:Fuses:Ambient temperature:Relative humidity:Protection class:Overvoltage category:Pollution degree:100 – 240 VAC50 / 60 Hzmax. 55 VA1.6 A, slow-blowing,Breaking capacity H, 250 VACSize: 5x20 mm15 - 35 C90% up to 30 C,non-condensingIII2For indoor use only.Supply voltage:Frequency:Power consumption:Fuses:100 – 240 VAC50 / 60 Hzmax. 200 VA2.5 A, slow-blowing,Breaking capacity H, 250 VACSize: 5x20 mmAmbient temperature:0 - 40 CRelative humidity:90% up to 30 C,non-condensingProtection class:IOvervoltage category:IIPollution degree:2(* See provided Instructions for Use)Leica DMi8 codedFor indoor use only.Supply voltage:Frequency:Power consumption:Fuses:Ambient temperature:Relative humidity:Protection class:Overvoltage category:Pollution degree:100 – 240 VAC50 / 60 Hzmax. 55 VA1.6 A, slow-blowing,Breaking capacity H, 250 VACSize: 5x20 mm15 - 35 C90% up to 30 C,non-condensingIII2WARNINGThe power plug may only be plugged into an outletequipped with a grounding contact.Do not interfere with the grounding function by using anextension cord without a ground wire. Any interruptionof the ground wire inside or outside of the instrument, orrelease of the protective conductor terminal, can causethe instrument to become hazardous. Intentional groundinterruption is not permitted!9
3. SAFETY NOTESCaution!By connecting it to the grounding connection (earthscrew at the back of the electronics box) ancillaryequipment with its own and/or extra power supply maybe brought to the same ground wire potential. For connections without a ground protection conductor, LeicaMicrosystems CMS GmbH Service must be consulted.Caution!Never use any fuses as replacements other than thoseof the types and the current ratings listed here. Usingother fuses or bridging the fuse holder is not permitted.The use of incorrect fuses may result in a fire hazard.Caution!The microscope's electrical accessory components arenot protected against water. Water can cause electricshock.Caution!Protect the microscope from excessive temperaturefluctuations. Such fluctuations can lead to the accumulation of condensation, which can damage the electricaland optical components.Operating temperature: 15-35 CWARNINGBefore exchanging the fuses or lamps, be absolutelycertain to switch off the main power switch and removethe power cable.10! Caution!Only insert or unplug data and control circuits when theinstrument is switched off; otherwise, the instrumentmay be damaged.WARNINGBy definition, the main circuit breaker of this instrumentis the connection between the power cable and deviceport. The user must ensure unobstructed access to themain circuit breaker at all times.WARNINGOnly use power cables, or alternative cables with VDE/HAR codes that minimally fulfill the following conditions:3x0.75 mm2 and 10A/250V.
3. SAFETY NOTES3.3Laser safety3.3.1Safety switch (interlock) on the microscopeTwo safety switches are integrated into the microscope using a laser safety kit option. These must be integrated intothe laser safety concept so that the light path of the laserbeam is interrupted when the interlock switch is opened.Two equivalent interlock connectors, which lead to themicroscope's interlock switch, are attached to the back ofthe microscope. The interlock connector of the microscopemust be connected to your laser beam interrupter.Interlock connectors on the rear side of the standTechnical data for the interlock connector:Plug:Manufacturer: BinderType: 09-0097-20-05(5-pin flange plug,711 series subminiature round plug connector)12Interlock switch (1) and (2)Interlock switch 1:An interlock switch is integrated on the Transmitted Lightarm and activated when the Transmitted Light arm is foldedback (interlock switch opens).Interlock switch 2:An additional interlock switch is also installed in the microscope, which is activated (interlock switch opens) whenthe beam path to the eyepiece is released.Compatible coupling:Manufacturer: binderType: 99-0096-102-05(5-pin cable socket,711 series subminiature round plug connector)Type: 79-1414-12-05(5-pin cable socket with 2m cable,702 series subminiature round plug connector)Type: 99-0414-00-05(5-pin cable socket,712 series subminiature round plug connector)Pin assignment:Switching contact between pin 1 and pin 5.Maximum permitted electrical characteristic values of theintegrated interlock switch:Umax 40 V DCImax 0.2 A11
3. SAFETY NOTES3.3.2Screwed-on filter turret coverAs a safety precaution on laser microscope systems, thefluorescent turret disk cover is secured using 2DIN 912 M4x6 lens head Allen screws.(Order No. 11 703 121 630 000)3.3.3Laser coupling by the userBecause of a danger for the user due to laser radiation, theLeica DMi8 microscopes in the standard version are notsuitable without additional laser safety measures for coupling laser radiation1).If you are, however, modifying a microscope and couple alaser beam into it, as the user, you assume responsibilityas the manufacturer of the complete system.WARNINGStore the screws in a safe place. Never operate themicroscope when the cover is not screwed into place!We do not make provisions for your interference with thedevice and, therefore, you are fully responsible for themodifications regarding the adherence to basic safety requirements and laser protective measures set forth by theEuropean Union guidelines and by the national legal andtechnical directives and standards.If you modify your microscope by coupling a laser beamwithout authorization, when determining and implementing laser safety measures, also take note of the subsequently described hazards at the microscope, as here thedanger exists of serious and irreversible eye damage andskin injuries!WARNINGTurn the screws to secure the filter turret coverDanger of serious and irreversible eye damage from laser radiation!Radiation of the eye or skin from direct or indirect laserradiation has to be avoided by all means! The laser lightcan cause serious eye damage and skin damage!1) Laser radiation of Class 1 lasers is exempt. Further detailsregarding this topic in Section 3.3.412
3. SAFETY NOTES3.3.3.1 Safety hazard due to folded backTransmitted Light armIf you fold back the Transmitted Light arm, the laser radiation escaping from the lenses is beamed directly into theopen space.Important safety noteAs a safety measure, we recommend the microscopemodels with integrated interlock connectors as mentioned in Section 3.3.3.7.Folded back Transmitted Lightarm; the light output out of theobjective is not shadowed bythe condenser base.3.3.3.2 Safety hazard at eyepieceThe laser radiation that you coupled into the microscopecan disperse from the eyepiece and directly hit the user'seye!Important safety noteAs a safety measure, we recommend the microscopemodels with integrated interlock connectors as mentioned in Section 3.3.3.7.Eyepieces3.3.3.3 Safety hazard in the condenser areaduring operation.If you couple a high power laser beam into the microscope,the laser radiation, broadened by the lens, that passes thecondenser laterally, can exceed the permitted limit valuesfor eyes and skin.Increased laser radiation canbeam laterally past the condenser13
3. SAFETY NOTES3.3.3.4 Safety hazard above the condenserThe laser beam path between the condenser base and theilluminated field diaphragm is without obstruction.Laser beam path between condenser base and illuminated field diaphragm without obstruction3.3.3.5 Safety hazard in the specimen areaThe laser radiation is accessible without obstruction in thespecimen area of the microscope!Specimen area14
3. SAFETY NOTES3.3.3.6 Safety hazard due to openings at microscopeMake sure, as part of your risk assessment, that all openings at the microscope are tightly sealed and can only beopened with tools to prevent laser radiation from escaping!Furthermore, the terminals that are not occupied by objectives have to be closed with caps at the objective nosepiece.The openings to consider, for example: top port next to theeyepieces, left and right side port, bottom port, infinity port,connection for Transmitted Light lamp housing at the arm,lamp connection for fluorescence/connection for incidentlight lamp housing, cover for fluorescent turret disk.The material that is used to seal off the openings has to besuitable for the intensity of the coupled laser beam.Openings at the stand that have to be tightly sealedaCover for fluorescent turret diskbTransmitted Light lamp housingcIncident light lamp housingdSide port righteBottom portfSide port, leftgObjective nosepiecehTop portiInfinity portjOpenings at objective nosepiecejbhaicgfde15
3. SAFETY NOTES3.3.3.7 Note regarding the safety hazards in Sections3.3.3.1 and Section 3.3.3.2Important safety noteThe overall responsibility for laser safety of the lasermicroscope system assembled by you remains with youas the responsible body, even if you use the microscopesfrom Leica Microsystems CMS GmbH listed below inconjunction. Within the context of your system composition and modifications, you have to verify whether thecomponent selected by you from this chapter is effective and suitable for your laser protection concept.We recommend that for your laser applications you usea microscope variant with the following selection optionsbecause the microscope is already equipped with interlockswitches at the factory:Leica No. 11889086Laser Safety Kitand also one of the following options:a) Safety function for the safety hazard mentionedin Section 3.3.3.1.The special microscope variants have a built-in interlockswitch on the Transmitted Light arm that is activated whenfolding back the Transmitted Light arm (interlock switchopens).The interlock connector of the microscope must be connected to your laser beam interrupter, which interrupts thelaser beam coupled into the microscope when opening theinterlock switch or folding back the illumination arm.b) Safety function for the safety hazard mentionedin Section 3.3.3.2.An additional interlock switch is also installed in the microscope, which is activated (interlock switch opens) whenthe beam path to the eyepiece is released.The interlock switch of the microscope must be connectedto your laser beam interrupter, which interrupts the laserbeam coupled into the microscope when opening the interlock switch or releasing the beam path towards the eyepiece.Please note that the laser radiation may not be coupled viathe bottom port!Leica No. 11889077Left motorized side port, 100% and interlockLeica No. 11889078Right motorized side port, 100% and interlockLeica No. 11889079Right/left motorized side port, 100% and interlockLeica No. 11889087Manual side port (100/0), Int.Leica No. 11889088Left manual side port (100/0)Note:The fixed Transmitted Light arm (order No. 11525105 (withshort cable) or order No. 11525116 (with long cable) is notsuitable for laser applications and therefore is not providedfor these applications.16Bottom portBoth interlock switches a) and b) are routed to a shared interlock connector on the microscope; you have to connectyour laser beam interrupter to this connector.
3. SAFETY NOTESWhen doing so, note the electrical characteristic values ofthe integrated interlock switches in the microscope. Youmust not exceed these values by connecting a laser beaminterrupter, as otherwise the interlock switches will bedamaged and no longer function safely and reliably:Maximum permitted electrical characteristic values of theintegrated interlock switch:Umax 40 V DCImax 0.2 AThe integrated interlock switches in the microscope andtheir wiring with a laser beam interrupter/laser ensure thatthe laser radiation you coupled into the microscope cannotget into the user's eyes through the eyepieces.3.3.4. Exception for Class 1 lasersCoupling a laser of Class 1 in accordance with IEC/EN60825-1 into a microscope does not result in any danger tothe user.The listed safety hazards apply only for lasers of Class 1M,2, 2M, 3R, 3B and 4.Note that the rules and regulations of the United States FDA21CFR1040.10 Class I (CFR – Code of Federal Regulation Title21, revised as of April 1, 2011) do not distinguish betweenClass 1 and 1M. Thus the statement that there are no safetyhazards on the microscope do not apply for the laser classification in accordance with FDA Class 1.Important safety noteIn addition, observe the safety hazards described inSection 3.3.3.3 to 3.3.3.6!17
3. SAFETY NOTES3.5Storage and transportWeightCAUTIONTransportCaution!Transport and storage at -20 C – 85 C and max. 90%humidity.For shipping or transporting the microscope and its accessory components, the original packaging should be used.As a precaution to prevent damage from vibrations, the following components should be disassembled and packagedseparately:At a full load, the microscope weighs more than 18kg. The user must take corresponding precautions fortransporting the instrument.Caution!For transport, always remove all components listed under "Transport!".3.6Ambient conditionst 6OTDSFX UIF PCKFDUJWFT t 4FDVSF UIF PCKFDUJWF OPTFQJFDF F H XJUI BEIFTJWF UBQF t 3FNPWF UIF FZFQJFDFT Caution!This microscope may not be used at elevations over2000 m above sea level.t 3FNPWF UIF DPOEFOTFS t 3FNPWF UIF TQFDJNFO TUBHF t 3FNPWF UIF 5SBOTNJUUFE -JHIU BSN t 3FNPWF UIF MBNQ IPVTJOHT t 4FDVSF UIF NBHOFUJD nVPSFTDFOU UVSSFU DPWFS F H XJUI adhesive tape.t 3FNPWF BMM NPWJOH PS MPPTF QBSUTt 1SPUFDU UIF NJDSPTDPQF GSPN EVTU BOE EJSU VTJOH B QMBTUJD bag.18Caution!Do not use this instrument near sources of high electromagnetic radiation (for example, unshielded, intentionally operated ultra-high frequency sources), becausethese can disrupt proper operation.We recommend assessing the electromagnetic environment before operation of this instrument and then givingcorresponding instructions.
3. SAFETY NOTESInstallation location3.7Work with the microscope should be performed in a dustfree room, which is free of oil vapors, other chemical vapors and extreme humidity. At the workstation, large temperature fluctuations, direct sunlight and vibrations shouldbe avoided. These conditions can distort measurementsand longer microscopic scans.Permitted ambient conditions:TemperatureRelative humidity15–35 C )maximum 90% up to 30 Cnon-condensingMicroscopes in warm and warm-damp climatic zones require special care in order to prevent fungus contamination.For additional instructions, see the chapter on "Care of theMicroscope" o S. 89Caution!The microscope must be set up so that the power voltage input is not obstructed and the instrument canquickly be removed from the power supply if necessary.Caution!Electrical components must be placed at least 10 cmaway from the wall and from flammable substances.Notes on handling light sourcesCAUTIONLight sources pose a potential irradiation risk (glare, UVradiation, IR radiation). Therefore, lamps may only beoperated in closed housing and in an installed condition.Never look directly into the beam path (blinding hazard).CAUTIONDo not switch on the light source until the light guide isconnected to the microscope.Uncontrolled light outp
Instructions for Use t Gebrauchsanweisung t Mode d'emploi Leica Microsystems CMS GmbH t Instructions 11934056, Revision 1.1 from 2015-07-15 Leica DMi8