Transcription
EAM 9.0.2Customization Guide
Copyright 2017 One Identity LLC.ALL RIGHTS RESERVED.This guide contains proprietary information protected by copyright. The software described in this guideis furnished under a software license or nondisclosure agreement. This software may be used or copiedonly in accordance with the terms of the applicable agreement. No part of this guide may be reproducedor transmitted in any form or by any means, electronic or mechanical, including photocopying andrecording for any purpose other than the purchaser’s personal use without the written permission ofOne Identity LLC .The information in this document is provided in connection with One Identity products. No license,express or implied, by estoppel or otherwise, to any intellectual property right is granted by thisdocument or in connection with the sale of One Identity LLC products. EXCEPT AS SET FORTH IN THETERMS AND CONDITIONS AS SPECIFIED IN THE LICENSE AGREEMENT FOR THIS PRODUCT,ONE IDENTITY ASSUMES NO LIABILITY WHATSOEVER AND DISCLAIMS ANY EXPRESS, IMPLIED ORSTATUTORY WARRANTY RELATING TO ITS PRODUCTS INCLUDING, BUT NOT LIMITED TO, THEIMPLIED WARRANTY OF MERCHANTABILITY, FITNESS FOR A PARTICULAR PURPOSE, OR NONINFRINGEMENT. IN NO EVENT SHALL ONE IDENTITY BE LIABLE FOR ANY DIRECT, INDIRECT,CONSEQUENTIAL, PUNITIVE, SPECIAL OR INCIDENTAL DAMAGES (INCLUDING, WITHOUTLIMITATION, DAMAGES FOR LOSS OF PROFITS, BUSINESS INTERRUPTION OR LOSS OFINFORMATION) ARISING OUT OF THE USE OR INABILITY TO USE THIS DOCUMENT, EVEN IFONE IDENTITY HAVE BEEN ADVISED OF THE POSSIBILITY OF SUCH DAMAGES. One Identity make norepresentations or warranties with respect to the accuracy or completeness of the contents of thisdocument and reserves the right to make changes to specifications and product descriptions at anytime without notice. One Identity do not make any commitment to update the information containedin this document.If you have any questions regarding your potential use of this material, contact:One Identity LLC.Attn: LEGAL Dept4 Polaris WayAliso Viejo, CA 92656Refer to our Web site (http://www.OneIdentity.com) for regional and international office information.PatentsOne Identity is proud of our advanced technology. Patents and pending patents may apply to thisproduct. For the most current information about applicable patents for this product, please visit ourwebsite at emarksOne Identity and the One Identity logo are trademarks and registered trademarks of One IdentityLLC. in the U.S.A. and other countries. For a complete list of One Identity trademarks, please visitour website at www.OneIdentity.com/legal. All other trademarks are the property of theirrespective owners.LegendWARNING: A WARNING icon indicates a potential for property damage,personal injury, or death.CAUTION: A CAUTION icon indicates potential damage to hardware or lossof data if instructions are not followed.IMPORTANT, NOTE, TIP, MOBILE, or VIDEO: An information icon indicates supportinginformation.EAM Customization GuideUpdated - December 2017Version - 9.0.2
ContentsPreface5Customizing EAM Windows1Customizing EAM Bitmaps1Changing Banners of EAM Authentication Windows1Changing the Banner of the Enterprise SSO "Security Data Collect" Window2Customizing the Authentication Screen Tiles (Windows 7/2008 only)3Customizing the Banner of the Multi-User Desktop Welcome Screen3Customizing EAM Windows for Smart Card Authentication4Changing the Smart Card icon4Changing the Text Labels5Customizing SSO Windows6SSO Window/Interaction Types6’New Account’ Window6’Bad Account’ Window7’Change Password’ Window7Activating the Customization8Managing the HTML Files9Placing the Files9Naming the Files9Organizing the Content of the files9Customizing the Windows10Removing the "Confirm password" Field from the "New account" Window10Informing Users of Password Constraints in the "Change Password"Window forthe "Ticket Reservation Manager" Application11Customizing Error Messages12Localizing and Naming the Message File13Encoding the Messages File14Managing a Cache14Customizing the Data Displayed on the Desktop (Cluster and Multi-UserDesktop)EAM 9.0.2 Customization Guide163
Customizing the Question Display for the SSPR17Customizing the PDF Report Graphic Style20Customizing the EAM Portal24Hiding EAM Portal Features24Adding an Additional Security Control (Captcha)26About us27Contacting us27Technical support resources27EAM 9.0.2 Customization Guide4
PrefaceSubjectThis guide describes how to use the Primary account, Access toapplications and Self Enrollment menus of the Enterprise AccessManagement (EAM) portal.This guide is intended for:AudienceRequired SoftwarelSystem Integrators.lAdministrators.EAM 9.0 evolution 2 and later versions. For more information aboutthe versions of the required operating systems and softwaresolutions quoted in this guide, please refer to One Identity EAMRelease Notes.Bold Indicates:Typographical ConventionslInterface objects, such as menu names, buttons, icons andlabels.lFile, folder and path names.lKeywords to which particular attention must be paid.Italics - Indicates references to other guides.Code - Indicates portions of program codes, command lines ormessages displayed in command windows.CAPITALIZATI ON Indicates specific objects within the application(in addition to standard capitalization rules). Identifies parameters to be supplied by the user.LegendWARNING: A WARNING icon indicates a potential forproperty damage, personal injury, or death.CAUTION: A CAUTION icon indicates potential damageto hardware or loss of data if instructions are notfollowed.IMPORTANT, NOTE, TIP, MOBILE, or VIDEO: An informationicon indicates supporting information.DocumentationsupportThe information contained in this document is subject to changewithout notice. As our products are continuously enhanced, certainpieces of information in this guide can be incorrect. Send us yourcomments or suggestions regarding the documentation on the OneIdentity support website.EAM 9.0.2 Customization GuidePreface5
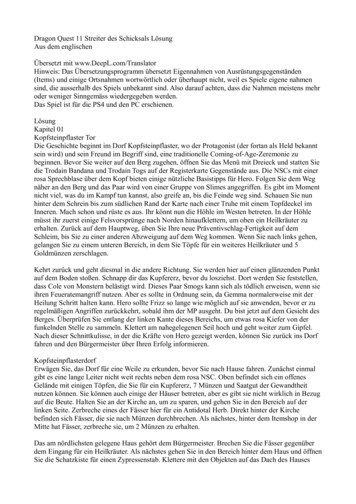
1Customizing EAM WindowsCustomizing EAM BitmapsOne Identity EAM allows you to easily customize bitmaps that are displayed in EAMwindows. You can change:lThe banners displayed in EAM authentication windows.lThe banner that appears when Enterprise SSO needs to collect users security data.lThe bitmaps displayed in the authentication screen tiles (Windows 7/2008 only).lThe banner that appears when the Multi-User Desktop Welcome screen is displayedin fullscreen mode.Changing Banners of EAMAuthentication Windows1. Modify or create a bitmap file (.bmp) that fits the following requirements:lWidth: 700 px (centered on the middle 500 pixels).lHeight: 72 px.lName: WGLogo.bmp.2. Copy this file in the installation directory of your EAM software module (preferably inC:\Program Files\One Identity\Enterprise SSO to modify the Enterprise SSOauthentication window banner).The new banner appears in the authentication window, as in the following example:EAM 9.0.2 Customization GuideCustomizing EAM Windows1
Changing the Banner of the Enterprise SSO"Security Data Collect" Window1. Modify or create a bitmap file (.bmp) that fits the following requirements:lWidth: 360 px.lHeight: 34 px.lName: ssobanner16M.bmp (24/32 bit colors) or ssobanner256.bmp (256 colors).2. Copy this file in the installation directory of your Enterprise SSO software module(preferably in C:\Program Files\One Identity\Enterprise SSO).When the Security Data Collect window appears, the new banner is displayed:EAM 9.0.2 Customization GuideCustomizing EAM Windows2
Customizing the Authentication Screen Tiles(Windows 7/2008 only)In the Authentication Manager installation folder (by default: C:\Program Files\OneIdentity\Enterprise SSO), create the following bitmaps, with the size of 96x96 pixels:llllllllESSOBioCredProv.bmp: the icon displayed for the biometric tile.ESSOBioCredProvActive.bmp: the icon displayed when the biometric tile is selected orselectable.ESSOCredProv.bmp: the icon displayed in the initial authentication screen for thesmart card tile when no smart card is inserted.ESSOCredProvActive.bmp: the icon displayed when the smart card tile is selectedor selectable.ESSOMobileCredProv.bmp: the icon displayed for the QRentry tile.ESSOMobileCredProvActive.bmp: the icon displayed when the QRentry tile isselected or selectable.ESSOPwdCredProv.bmp: the icon displayed for the password tile.ESSOPwdCredProvActive.bmp: the icon displayed when the password tile isselected or selectable.lESSOResetSecretCredProv.bmp: the icon displayed for the SSPR tile.lESSORFIDCredProv.bmp: the icon displayed for the RFID tile.lESSORFIDCredProvActive.bmp: the icon displayed when the RFID tile is selectedor selectable.Customizing the Banner of the Multi-UserDesktop Welcome ScreenNOTE: This banner appears only when the Multi-User Desktop welcome screen isdisplayed in fullscreen mode.In the EAM installation folder (by default: C:\Program Files\One Identity\EnterpriseSSO), create a new FUSBanner image file with the following guidelines:lMaximum recommended size: 850 x 240 pixels.lSupported file extension: .bmp.EAM 9.0.2 Customization GuideCustomizing EAM Windows3
Customizing EAM Windows for SmartCard AuthenticationOne Identity EAM allows you to easily customize icons and text labels that are displayed inAuthentication Manager and Enterprise SSO windows. This customization is only availablefor Smart Card authentication. You can change:llThe icons of the different states of the Smart Card displayed in EAMauthentication windows.The text labels (Login, PIN and Log on to) displayed in EAM authenticationwindows.Changing the Smart Card icon1. Modify or create an icon file (.ico) that fits the following requirements:lWidth x height: 16 px.lIcons and names:l: BlankToken.ico.l: ErrorToken.ico.l: ReadyToken.ico.2. Copy this file in the installation directory of your EAM software module (preferably inC:\Program Files\One Identity\Enterprise SSO).The new smart card icon appears in the authentication window, as in thefollowing example:EAM 9.0.2 Customization GuideCustomizing EAM Windows4
Changing the Text Labels1. Create the following registry keys under HKEY LOCAL tication:Key NameTypeDescriptionUserLabelREG SZChanges the value of Login.UserLabelToken REG SZChanges the value of Login when the SmartCard authentication method is selected.SecretLabelREG SZChanges the value of PIN.Note: the modification is enabled only forsmart card authentication.LogOnToLabelREG SZChanges the value of Log on to.NOTE:These keys can be deployed by GPO.The new labels appear in the authentication window, as in the following example:EAM 9.0.2 Customization GuideCustomizing EAM Windows5
Customizing SSO WindowsSubjectYou can change the appearance of certain Enterprise SSO windows that are displayed tousers on Microsoft Windows workstations.DescriptionBy using the data-input capabilities of HTML and CSS, you can change the design and layoutof E-SSO windows.The windows are the ones which allow users to:lllRegister a user name and a password for a managed application: new accountwindow, see ’New Account’ Window.Change a user name or password that has been rejected by an application: badaccount window, see ’Bad Account’ Window.Change the password registered for an application: change password window, see’Change Password’ Window.When this feature is activated, customized window definitions replace the standard windowdefinitions for these three interactions: see Activating the Customization.Default definitions can be created for each of the interaction types. Individualized windowdefinitions can also be created for interactions related to particular applications.Each customized window is defined by the contents of an HTML file on the hard disk of theuser's workstation: see Managing the HTML Files.Examples of SSO Window customization are available in Customizing the Windows.SSO Window/Interaction Types’New Account’ WindowEnterprise SSO opens the new account window when it detects a login window of anapplication for which the user has no registered account.The window can also be opened directly by the user from the Enterprise SSO window.EAM 9.0.2 Customization GuideCustomizing EAM Windows6
The window prompts the user to select an account, a login name and a password for theapplication. The login and password must match those that are already recorded in theapplication itself.Enterprise SSO can set an initial value for one or more of these elements and can preventthe user from changing one or more of the values.’Bad Account’ WindowEnterprise SSO opens the bad account window when it detects that an application hasrejected a registered login or password.The window prompts the user to register a new login and/or password for the application.These must match the values already recorded in the application.’Change Password’ WindowEnterprise SSO opens the change password window when it detects that anapplication has requested a password change. This request can be triggered by one ofthe following actors:EAM 9.0.2 Customization GuideCustomizing EAM Windows7
lThe application itself.lThe user.lEnterprise SSO.The window prompts the user to register a new password for the application.Activating the CustomizationSubjectWhen this feature is activated, Enterprise SSO looks for definitions of supported windowtypes in HTML files.When, during an interaction with the user, Enterprise SSO cannot find or cannot read theappropriate file, or if the contents of the file do not meet Enterprise SSO requirements (seeOrganizing the Content of the files), Enterprise SSO uses the appropriate standard windowinstead, as if the customization feature were not activated.Procedure1. Place the UseHtmlSSODialogs DWORD value:llWith GPO under the HKEY LOCAL nfig Windows registry key.Manually under the HKEY LOCAL MACHINE\SOFTWARE\Enatel\SSOWatch\CommonConfig key.2. Set the value to 1.The customization is activated.NOTE: To deactivate customization, set the value to 0.EAM 9.0.2 Customization GuideCustomizing EAM Windows8
Managing the HTML FilesPlacing the FilesWhen the customization feature is activated, Enterprise SSO tries to load window definitionfiles from a directory on the local hard disk.By default, Enterprise SSO tries to load files from its current working directory, i.e. thedirectory in which Enterprise SSO is installed. However the directory can be specifiedexplicitly by creating a new string value, called HtmlDialogDirectory, in the WindowsRegistry. This value can be set under the same keys as the UseHtmlSSODialogs value:see the Procedure in Activating the Customization.If you set this value, it must be the full path name of a directory on the workstation'slocal hard disk.Naming the FilesThe default file names used by Enterprise SSO for the three interactions described in SSOWindow/Interaction Types are the assword.htmlHowever, each time one of these interactions occurs, it occurs in the context of a particularmanaged application.If a file exists and its name starts with the name of the E-SSO application object, continueswith a '-' character and ends with the default file name; this file is used to define thewindow for the interaction. That is, if Enterprise SSO manages a user's access to anapplication called Supply Management, it tries to load a file calledSupply Management-NewAccount.html when collecting the user name and passwordfrom the user.If this file does not exist, Enterprise SSO tries to load a file called NewAccount.html. Thismeans that it is possible, for example, to have two files for password-change interactions:a file calledSupply Management-ChangePassword.html to be used to change passwords in theSupply Management application and the ChangePassword.html file to be used tochange passwords in all other applications.Organizing the Content of the filesThe window definition files are normal HTML files that contain the information EnterpriseSSO needs to display each window.EAM 9.0.2 Customization GuideCustomizing EAM Windows9
Enterprise SSO identifies HTML elements in the document using pre-defined values of theHTML id attribute and exchanges data with the user through these elements. For eachwindow type, certain elements must be defined while others are optional.The files also specify the window size and title. Windows are not resizable by the user anddo not have scroll bars.For full details of these requirements, see the example window definition files which can befound in the Enterprise SSO installation directory. These define windows for a fictitiousapplication called Example.Customizing the WindowsSubjectThe following examples illustrate the customization of SSO Windows.PrerequisiteIf the customization feature is not already activated, activate it as explained in Activatingthe Customization.RestrictionIf a collection window is customized, then the parameters are taken into account in asecond collection window displayed after the first one.Removing the "Confirm password" Field from the"New account" WindowDescriptionThe SSO dialog window customization feature supports the presence and the absence of aConfirm password field.If the field is present, Enterprise SSO checks that the user has typed the same value intothe Password and Confirm password fields when validating the new account data. If itis absent, the user only has to type the password once but there is a higher chance oftyping the wrong password.Procedure1. In the Enterprise SSO installation directory, make a copy of the ExampleNewAccount.html file and name the new file NewAccount.html.2. Open the new file with a text or HTML editor.3. Find and delete the following HTML elements with the:EAM 9.0.2 Customization GuideCustomizing EAM Windows10
lsso-pass-confirm id.lConfirm password text.4. Save the modified file.If there are no other new account window definition files for individual applications,all new account interactions now use the new window definition file that has noConfirm password field.Informing Users of Password Constraints in the"Change Password"Window for the "Ticket Reservation Manager"ApplicationDescriptionThis informs users of Ticket Reservation Manager that passwords must contain at leastthree numeric characters.Procedure1. In the Enterprise SSO installation directory, make a copy of the ExampleChangePassword.html file and name the new file Ticket Reservation ManagerChangePassword.html.2. Open the new file with a text or HTML editor.3. Find the div element containing the sso-app-name element.4. After this element, insert a new div or p element containing the following text: Thepassword must contain at least three numeric characters.5. Find the CSS style rule that specifies the height property for the body element andincrease the height value to accommodate the new text.6. Save the modified file.This new window definition is now used when the user changes the password forTicket Reservation Manager.EAM 9.0.2 Customization GuideCustomizing EAM Windows11
2Customizing Error MessagesSubjectYou can customize error messages thanks to a file containing these messages.DescriptionThe file is filled-in by the E-SSO administrator with one message per line, such as: message number Tab message text .Example: 0x82002015 tab this is the customized text!However, you can associate one message with several error codes, such as: first message number - last message number Tab message text .Moreover, you can write a message text on several lines in the file (this will make thefile easier to build and read rather than using \n in the text message). In that case, thesyntax of the first line does not change. The next lines must follow this syntax: \ restof the text .Example:0x82002001-0x8200208F Authentication error!\ --Access is denied.For more information on error codes, refer to One Identity EAM Console - Guide del'administrateur.Pre-requisitesThe following conditions are mandatory:lThe customized message files cannot contain message numbers that areunknown to EAM.lThe customized messages files must be encoded with ANSI characters.lThe text of the message is separated from its number by a tab character.lEach line that does not correspond to this format is ignored.lEach line starting with // is considered as a comment.lThe text of the message can contain \t (tabulation) and \n (carriage return)characters for the display.EAM 9.0.2 Customization GuideCustomizing Error Messages12
NOTE: If the customized text of the message number cannot be retrieved from thefile, the default message corresponding to the resource is used.Localizing and Naming the Message FileSubjectTo define the message file, you must set:lRegistry values in one of the following registry keys:lllWith GPO: HKEY LOCAL onfigLocally: HKEY LOCAL amework\\ConfigThe MessageFileUsed value to 1 to activate the customized message file.DescriptionThere are two cases to localize and name the message file. When you have:llNo predefined language: set the EssoMessageFilePath value containing the fullpathname of the message file such as C:\folder\file.txt.One file per language: the message file is created by the administrator in the E-SSOinstallation directory. The file must be located in the folder set in one of the followingregistry keys:llInstallDirectory. OREssoMessage file PathThe search order of a message file is as follows (. le is the language extension):1. An ESSOMessageFile. le file in the directory indicated byFrameWork\Config\InstallDirectory2. The file indicated by FrameWork\Config\ESSOMessageFilePath3. An ESSOMessageFile. le file in the repository indicated byFrameWork\Config\ESSOMessageFileInstallDir4. An ESSOMessageFile. le file in the application’s current directory.The language extension is the Windows number (two-digit hexadecimal value:09, 0C, 01.) corresponding to the E-SSO installation language.The following language extension list is supported:l01: Arabicl07: Germanl09: EnglishEAM 9.0.2 Customization GuideCustomizing Error Messages13
l0A: Spanishl0B: Finnishl0C: Frenchl10: Italianl11: Japanesel13: Dutchl19: Russianl1D: SwedishEncoding the Messages FileThe customized messages files must be encoded with ANSI characters. However, you canuse files encoded with UTF-8 characters by setting the following registry value:FrameWork\Config\EssoMessageFileUTF8 (REG DWORD)The possible values you can set are:l0 (default): the message files contain ANSI text strings.l1: the message files are UTF-8 encoded.Managing a CacheSubjectTo display an error message, E-SSO performs a sequential search until it finds thecustomized message associated with the provided error code. If no customized message isset, the default message is used.DescriptionTo speed up the search and display of an error message, you can activate the errormessage caching. When the message caching is activated, E-SSO:lLoads the contents of the customized message file into the memory.lPerforms an indexed memory search to retrieve a customized message.lUpdates the memory cache when the customized message file is modified.ProcedureTo activate the message caching, set the REG DWORD EssoMessageCacheUsed registryvalue to 1 under the E-SSO configuration registry keys.EAM 9.0.2 Customization GuideCustomizing Error Messages14
EAM 9.0.2 Customization GuideCustomizing Error Messages15
3Customizing the Data Displayed onthe Desktop (Cluster and MultiUser Desktop)You can customize the data that appears at the foreground of the user’s desktop onworkstations configured to run the Cluster feature or the Multi-User Desktop mode.For details, see one of the following manuals:lCluster feature: Authentication Manager Cluster Administrator’s Guide.lMulti-User Desktop: One Identity EAM Console - Guide de l'administrateur.EAM 9.0.2 Customization GuideCustomizing the Data Displayed on the Desktop (Cluster and MultiUser Desktop)16
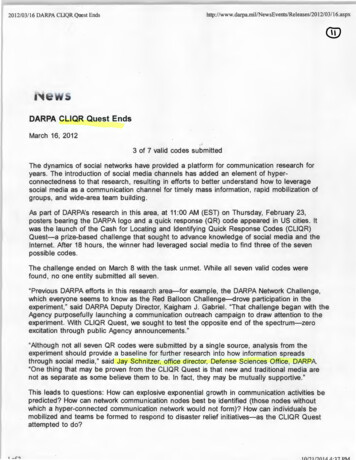
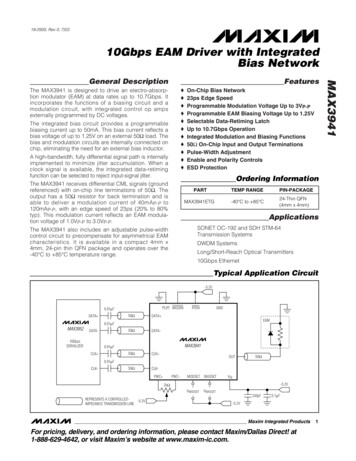
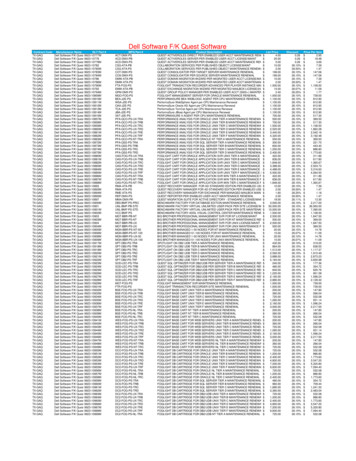
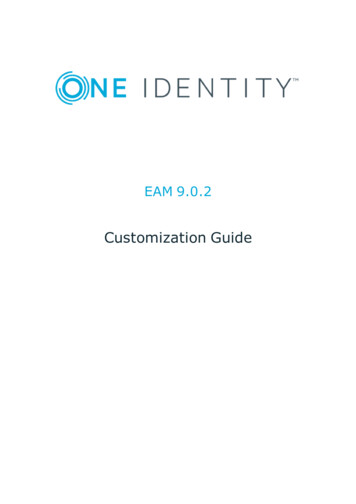
4Customizing the Question Displayfor the SSPRSubjectYou can customize the way the questions are displayed in the SSPR windows, starting fromWindows 7/2008 and onwards.DescriptionBy default, the questions are displayed in the text fields as follows:EAM 9.0.2 Customization GuideCustomizing the Question Display for the SSPR17
By setting a registry key, you can display the questions above the text fields as follows:EAM 9.0.2 Customization GuideCustomizing the Question Display for the SSPR18
Procedure1. Place the DisplayQuestionsSeparately DWORD value under one of the followingregistry ogin(to configure with GPOs).2. Set the value to 1.The customization is activated.EAM 9.0.2 Customization GuideCustomizing the Question Display for the SSPR19
5Customizing the PDF ReportGraphic StyleSubjectIn the EAM console, you can create PDF reports (for more information, refer to the OneIdentity EAM Console - Guide de l'administrateur). If you want to, you can customize thelayout of these reports by modifying their graphic style.DescriptionYou can customize the following elements:llLogo: to integrate the logo of your enterprise to the PDF reports, copy it in thefollowing directory:C:\Program Files\Common Files\One Identity\IAR\images\logocompany.pngThe size of the logo must be 100(W)x80(H)pixels.Styles:llChart themes: edit the C:\Program Files\Common tx file.Colors and font sizes: edit the C:\Program Files\Common Files\OneIdentity\IAR\styles\DefaultStyle.jrtx file.To modify the:llcolors of a style, enter the code corresponding to the desired color in the forecolor,backcolor or linecolor attributes.size of the font used by the style, enter the desired size in the fontSize attribute.Example style name "base" isDefault "true" forecolor "#1577B4"fontName "DefaultFont" fontSize "10" box topPadding "0" leftPadding "0" bottomPadding "0" rightPadding "0"/ /style EAM 9.0.2 Customization GuideCustomizing the PDF Report Graphic Style20
style name "title" mode "Opaque" forecolor "#FFFFFF" backcolor "#1577B4"fill "Solid" hAlign "Right" vAlign "Middle" fontName "DefaultFont"fontSize "18" isBold "true" box topPadding "2" leftPadding "8" bottomPadding "2" rightPadding "8" pen lineColor "#1577B4"/ topPen lineColor "#1577B4"/ leftPen lineColor "#1577B4"/ bottomPen lineColor "#1577B4"/ rightPen lineColor "#1577B4"/ /box /style FontsThe font used by the different styles is referenced in each style under DefaultFont. Thisdefault font is DéjàVu Sans Serif.The languages supported by this font hBelarusian lacinka lianSlovakChamorroFaroeseLatvianSlovenianChichewa sySwedishIf you want to change the default font or if you need to support more languages, youcan change it by creating a new JAVA archive (JAR) similar to the one provided bydefault: DefaultFont.jar located in C:\Program Files\Common e content of this file is as reports extension.properties./manifest.txtEAM 9.0.2 Customization GuideCustomizing the PDF Report Graphic Style21
Place the new font in TrueType format (TTF) in the fonts directory of the archiveand modify the ./fonts/fontsfamilyDefaultFont.xml file without changing thefamily font name.ExampleTo support japanese, you can do as follows:1. Extract the delivered JAVA archive in a temporary directory:jar xvf DefaultFont.jar2. Download a free font supporting this language, or use one for which you have thelicense. In this example, a free Meiryo TrueType font was downloaded and therelated TTF files we set in the extracted fonts directory of the Java archive, such t.xml./jasperreports extension.properties./manifest.txt3. Edit the fontsfamilyDefaultFont.xml file as follows: ?xml version "1.0" encoding "UTF-8"? fontFamilies fontFamily name "DefaultFont" normal ns.ttf]] /normal bold ns-Bold.ttf]] /bold italic ns-Oblique.ttf]] /italic boldItalic ns-BoldOblique.ttf]] /boldItalic pdfEncoding ![CDATA[Identity-H]] /pdfEncoding pdfEmbedded ![CDATA[true]] /pdfEmbedded exportFonts export key "net.sf.jasperreports.rtf" ![CDATA[Serif]] /export export key "net.sf.jasperreports.xhtml" ![CDATA[Serif]] /export export key "net.sf.jasperreports.html" ![CDATA[Serif]] /export /exportFonts /fontFamily /fontFamilies EAM 9.0.2 Customization GuideCustomizing the PDF Report Graphic Style22
4. Replace the DefaultFont fontFamily with the following fontFamily definition. Keepthe same fontFamily name and replace the location of the TTF font faces files. If youhave specific font faces for bold or italic, replace the corresponding lines, or removethem otherwise, as in the default font family above: fontFamily name "DefaultFont" normal ![CDATA[fonts/Meiryo.ttf]] /normal pdfEncoding ![CDATA[Identity-H]] /pdfEncoding pdfEmbedded ![CDATA[true]] /pdfEmbedded exportFonts export key "net.sf.jasperreports.rtf" ![CDATA[Serif]] /export export key "net.sf.jasperreports.xhtml" ![CDATA[Serif]] /export export key "net.sf.jasperreports.html" ![CDATA[Serif]] /export /exportFonts /fontFamily 5. Rebuild the new JAVA archive including the new f
EAM Customization Guide Updated - December 2017 Version - 9.0.2. Contents Preface 5 Customizing EAM Windows 1 Customizing EAM Bitmaps 1 Changing Banners of EAM Authentication Windows 1 Changing the Banner of the Enterprise SSO "Security Data Collect" Window 2 Customizing the Authentication Screen Tiles (Windows 7/2008 only) 3 .