Transcription
MYOB Exo PayrollUser Guide2019.01
Table of ContentsMYOB Exo Payroll - Australian Edition . 1Getting Started with MYOB Exo Payroll. 1The Menus . 3The Toolbar .9Adding a Payroll Company . 11Migrating Data from Other Payroll Systems . 13Setting up MYOB Exo Payroll . 20Step One: Payroll Setup. 21Step Two: Add Allowances . 57Step Three: Add Non-Cash Benefits . 64Step Four: Add Deductions . 71Step Five: Add Departments .77Step Six: Add Cost Centres . 78Step Seven: Add/Edit Employees . 81Other Optional Setup Functions . 118How to Run a Pay . 119Step One: Add/Edit Employees . 120Step Two: Current Pay . 120Step Three: Print Reports .156Step Four: Direct Credit Transfer.158Step Five: Update Pay . 160Step Six: Single Touch Payroll . 161Other Pay Activities . 166Upgrading . 181Reporting . 184Maintenance . 231PAYG Calculator. 245Leave Planner . 247Awards and Pay Classes . 252Leave Entitlement Adjustment . 255Editing Tax Scales for Working Holiday Makers. 256Delete Old Information . 257i
Table of ContentsPaid Parental Leave. 259Superannuation Guarantee GL Journals .261Payment Summaries . 268Time Transaction Import Format . 271Single Touch Payroll. 276ii
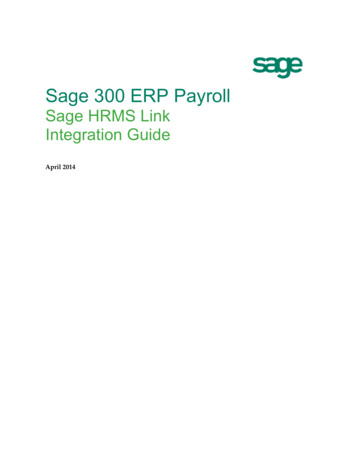
MYOB Exo Payroll - Australian EditionAs a leading supplier of computerised Payroll Systems, MYOB talks to businesses of every size andtype, every day of the week about payroll management.With on-going tax and legislation changes there is an increased burden in preparing pays, trackingannual leave and sick leave, and keeping all the necessary records required by the government.MYOB Exo Payroll is capable of handling a wide variety of types and sizes of payroll from a singlepayroll company to several payrolls for multiple companies, all within the same program.MYOB Exo Payroll has been designed with people in mind. We know from experience gained inhelping over 4500 companies implement payroll management systems, that people who preparepayrolls aren t necessarily computer literate, but they are used to, and skilled in, preparing payrollsby other methods.With MYOB Exo Payroll, the processing of pays each week is quick and simple, freeing you or yourstaff up to do more.Getting Started with MYOB Exo PayrollBefore you get underway with setting up your MYOB Exo Payroll, we suggest that you take thetime to familiarise yourself with the general structure and philosophies of the system.This is best handled by working your way around the Demonstration Company that is installedwith the package. This will help you learn how to move through the windows and understandbetter, the information needed to set up your own Payroll Company.Start the Payroll Software by double-clicking on the Exo Employer Services icon on your desktopor click the Windows Start button and choose the program from Programs MYOB Exo EmployerServices.The first thing you will see is the MYOB Login Screen with the Demonstration Company in the listof payrolls. Exo Payroll is a multi-company system (you can have unlimited additional payrollcompanies). Once you add your own Payroll Company, its name will appear in this list.1
IntroductionThe Demonstration Company line will be highlighted. To open a company, either select acompany and press enter or double-click on it. You must enter the logon details of a user accountthat has been set up in the Exo Payroll system.NOTE: The Demonstration Company has a default user called Admin. This user has the UserCode A and the Password AdminAfter logging in, you are presented with the main window:The main window includes the following interface features: All functions are available from the main menus (see page 2). Important functions can be accessed by clicking on the icons on the main Toolbar (seepage 9). Hovering the mouse pointer over these icons (without clicking) will display tooltips, which indicate what part of the payroll they access. Keyboard shortcuts are available for common operations.Once you are familiar with the interface, you can begin to perform the main functions of the ExoPayroll system: Setting up the details of your company (see page 19) Running a pay (see page 119) Printing reports (see page 184) Maintenance functions2
MYOB EXO PayrollThe MenusThe following menus are available in the main Exo Payroll interface:File MenuMenu ItemDescriptionNew EmployeeThis is used to add a new employee (see page 81) to the Payroll.Open EmployeeThis is used to access an existing employee (see page 81) to perform anymasterfile changes.Employee ListOpens a filterable list of all employee records (see page 213). You canadd, view and edit employees, and access other employee-relatedfunctions.Employee NotesThis takes you to the selected employee s personnel notes (see page 97)window. This window can also be accessed by pressing the F12 key.Change PayrollCompanyAllows you to log out of the Payroll you are in and access anotherPayroll Company if you are running multiple Payrolls.New TestCompanyCreate a test company based on this company. Test companies haverestricted functionality, but do not count towards your licensing limits, soyou can use them to test out configuration changes without affectingthe original company.Refresh TestCompanyLoad the latest data from the original company into the test company,overwriting any changes you have made to the test company.Archive CompanyArchive this company. Archived companies are read-only for all users,but do not count towards your licensing limits.UnarchiveCompanyRestore an archived company to Live status (which means it will onceagain count towards your licensing limits.)ExitTakes you out of the application and returns you to the desktop.Edit Menu3Menu ItemDescriptionUndoCancel the last operation and revert back to the previous status.RedoReapply the last operation at the current cursor position.CutMove the currently selected text into the Windows clipboard.CopyCopy the currently selected text into the Windows clipboard.PasteCopy the contents of the Windows clipboard to the cursor position.
IntroductionClearDelete the contents of the entire field, at the cursor position.Select AllSelect the contents of the entire field, at the cursor position.Pay MenuMenu ItemDescriptionCurrent PayThis is where the pay is processed each pay period (see page120) as part of the Pay Cycle. This is an alternative path to thePay Cycle for accessing the Payroll function.One-Off PayAllows you to run manual pays (see page 166) at any timeoutside the normal pay cycle. This can be used for corrections,terminations, special pays etc.Pay ListOpens a filterable list of all pays recorded in the system (seepage 213). You can view individual pays, and access reports andfunctions relating to pays.Direct Credit TransferFrom here you can create Direct Credit files (see page 158), inorder to initiate the electronic banking of your employees paycomponents. For example, wages, allowance, leave, anddeductions.Superannuation TransferAllows you to create Direct Credit files (see page 169), in order toinitiate the electronic banking of payments to superannuationproviders. For example, Employer Contributions, and salarysacrificed into superannuation funds.Single Touch PayrollSub-menu containing the following items that relate to sendingpay information to the ATO via Single Touch Payroll:Pay Superannuation Submissions - Allows you to submit pay data to the ATO(see page 161), view the details of submissions and checkon their statuses. Update - Allows you to update the STP data for allemployees outside of the Pay Cycle (see page 280). Finalisation - Allows you to send year-end finalisationdeclarations for one or all employees (see page 279). Zero Year to Date - Allows you to zero employees yearto-date totals (see page 280) when transitioning fromExo Payroll to a new payroll system during the financialyear. Validation Check - Runs a check on the STP data andconfiguration settings and reports any validation errorsfound.Allows you to pay superannuation contributions to asuperannuation clearing house service (see page 171).4
MYOB EXO PayrollImport Time TransactionsThis menu item is only enabled if you are importing times (seepage 174) from an outside source or Add-on such as MYOB ExoTime and Attendance.Rapid Load PayThis menu item is only enabled if the Rapid Load Pay option hasbeen enabled (see page 35) in the Payroll Setup. It allows you toload hours, leave and allowances in batch form (see page 176)for quick entry.Exo RemoteIf you have the Exo Remote add-on, this will allow you to sendemployee data to a different computer (see page 180) forremote data entry.MystaffinfoThis add-on application is used to enhance and modernise yourpayroll operation (see page 180) by publishing and retrievingcontent online.UpdateThis is where the pay is updated (see page 160) each pay periodas part of the Pay Cycle. This is an alternative path to the PayCycle for accessing the Payroll function.Reports Menu5Menu ItemDescriptionPrint ReportThis opens the list of available reports (see page 187).Report RunsThis is where you are able to set up groups of reports (see page 209) forprinting in batches.Report ViewsThis provides access to the Employee List (see page 213), Pay List (seepage 213) and Leave Balance List (see page 216) windows.ConsolidatedReportsThis is useful if you want total amounts over more than one Payrollcompany (see page 217).Clarity ReportWriterThis utility enables you to create your own customised reports.Export GeneralLedgerThis is for exporting journalised pay amount (see page 217)s for thecurrent/one off pay to your accounting software.Post to ExoBusinessThis function allows you to integrate with the MYOB Exo Businessproduct by posting pay runs to EXO Business (see page 230).
IntroductionMaintenance MenuTIP: The Maintenance menu can be accessed in three different ways: via the menu, byclicking the toolbar icon (see page 9), or by pressing F2 at any time.Menu ItemDescriptionAllowancesAllows you to make additional payments to employees (seepage 57) that are not hourly or salary payments. Examples of anallowance would be Meal Money, Shift Allowance etc.DeductionsAllows you to deduct money from an employee s pay (see page71). Examples of deductions would be Child Support, Union Feesetc.DepartmentsAllow you to allocate your employees to different departments(see page 77) thereby giving you the ability to analyse yourpayroll costs over those departments.CostingSub-menu containing the following items: Cost Centre Structure Names - Allows you to enternames (see page 231) for the various parts of the costcentre structure. Cost Centres - Allows you to allocate Payroll costs (seepage 78) to different areas of your business.Non-Cash BenefitsAllows to you add extra items to an Employee s salary package(see page 68) such as fringe benefits, salary sacrifice andemployer super contributions, without affecting the employee sgross paySuperannuationsAllows you to set up superannuation calculations (see page 232)for Employer Contributions, Salary Sacrifice Contributions andEmployee Contributions.General LedgerAllows you to create the necessary codes (see page 236) toeither produce a Payroll general ledger listing or even interfacedirectly to your general ledger.Note TypesAllows you to set up personnel notes (see page 236) that can becategorised by codes and then printed in report format.GroupsSub-menu containing the following items: Annual Leave Groups - Allows you to set up group rulesfor handling Annual Leave conditions based on theawards and state legislation applicable to your business. Personal Leave Groups - Allows you to set up grouprules for handling Personal Leave conditions based onthe awards and state legislation applicable to yourbusiness.6
MYOB EXO Payroll Long Service Leave Groups - Allows you to set up grouprules for handling Long Service Leave conditions basedon the awards and state legislation applicable to yourbusiness.Superannuation ProvidersAllows you to add and edit contact details for all of thesuperannuation providers (see page 64) and funds that are usedby your employees. For any given fund you can specify thebank to account to which all related superannuationcontributions will be direct credited.Single Touch PayrollSub-menu containing the following items relating to SingleTouch Payroll (see page 276): Allowance Categories - Allows you to create and editthe categories (see page 243) that must be assigned toAllowances for STP.Utilities Menu7Menu ItemDescriptionPAYG CalculatorThis is a powerful utility that allows you to calculate PAYG (seepage 245) on any amount at any time. While the Payrollcalculates PAYG as part of the pay process, there are timeswhen you may need to do a one-off calculation.Leave PlannerThis is for forward planning of annual leave, shifts and rosters(see page 246) and is contained within a calendar interface.Awards and Pay ClassesThis utility lets you set up awards and pay classes (see page251), and then apply them to employees, updating theirStandard Pays.Leave EntitlementAdjustmentThis utility allows you to enter adjustments to employeesyear-to-date leave entitlements (see page 255).Edit Tax Scale for WorkingHoliday MakersThis utility lets you update historic pays for users on theWorking Holiday Makers tax scale (see page 256).BackupAllows you to backup your data at any time to either floppydisks or your hard drive.RestoreThis is used when you need to restore a backup due tohardware failure or corruption.File ReindexThis is a file repair utility.Recalculate Standard PaysRecalculates all employees Standard Pays, which may beuseful when the new financial year s tax tables come intoeffect on 1 July. Run this utility if incorrect PAYG amounts areappearing when reporting on Standard Pays.
IntroductionSetup Exo PayrollThis contains the company s details and several controlsettings, such as your hourly rate structure etc. This option isalso available from the Payroll Setup Cycle (see page 21).User SecurityThis is where you would set up the various users who willhave access to the Payroll and allocates what rights they have.MYOB Exo Payroll is a multi-user system.Delete Old InformationThis is where you can clear out old pay and costing data (seepage 257) to conserve disk space and memory. This also hasthe added benefit of speeding up access times on oldercomputers.Backup OptionsThis allows you to configure settings that affect backups ofyour data.Help MenuMenu ItemDescriptionHelpOpens the online Help. Help can also be accessed anywhere inthe program by pressing F1.MYOB Education CentreOpens a web browser to the MYOB Exo Employer ServicesEducation Centre, which contains Release Notes, User Guides,Help videos and other product information.What s New in thisReleaseOpens a window showing the major features in the latestrelease, with a short overview video and links to PDF ReleaseNotes.Online KnowledgebaseOpens a web browser to the MYOB Enterprise Knowledgebaseweb site.ATO Employer EssentialsOpens a web browser to the Employer essentials section of theATO website. This portal provides useful links to assistemployers in meeting their Commonwealth tax andsuperannuation obligations.ATO ETP GuidelinesOpens a web browser to the ATO website, showing guidelineson calculating Employment Termination Payments.Fair Work WebsiteOpens a web browser to the Fair Work Ombudsman website,which provides information and advice about your workplacerights and obligations.Setup CycleThis is used to access the Setup Cycle (see page 19) wheninitially setting up a company.Pay CycleThis is used to access the Pay Cycle (see page 119) whenrunning a pay.8
MYOB EXO PayrollShow RemindersDisplays all employee notes (see page 97) with Reminder datesup to today s date that have not yet been marked as completed.Upgrade SoftwareThis is a tool with which you can upgrade your current versionof MYOB software (see page 181), providing you have the mostrecently available MYOB CD.Upgrade Software OnlineThis function accesses the Internet to upgrade your currentversion of MYOB software online (see page 183).Migration ToolStarts a wizard that lets you migrate data into Exo Payroll (seepage 12) from MYOB PowerPay or MYOB AccountRightPremier.AboutThis window contains support information such as the currentversion, install location and licence holder. Press F11 at any timeto view the About window independently of the menu.Special MenuIf any additional modules have been added to the Exo Payroll system, a Special menu becomesavailable. This menu has one option: Special Applications. Selecting this option opens a windowthat lets you open any available special modules.The ToolbarThe following icons are available in the toolbar of the main Exo Payroll interface:Icon9FunctionDescriptionEmployee ListOpens a filterable list of all employee records (see page 213).You can add, view and edit employees, and access otheremployee-related functions.Pay ListOpens a filterable list of all pays recorded in the system (seepage 213). You can view individual pays, and access reportsand functions relating to pays.Single Touch PayrollOpens a list of Single Touch Payroll submissions (see page161), where you can submit data to the ATO, check thestatus of submissions or view their details.New EmployeeThis is used to add a new employee (see page 81) to thepayroll.Edit EmployeeThis is used to access an existing employee (see page 81) toperform any masterfile changes.NotesWill take you to the selected employee s personnel noteswindow (see page 97). This window can also be accessedvia the F12 key.
IntroductionCurrent PayThis is where the pay is processed (see page 120) each payperiod, as part of the Pay Cycle.Print ReportsTakes you to the list of available reports (see page 187).Direct CreditTransferAllows you to create Direct Credit files (see page 158) forelectronic banking.Update PayThis is where the pay is updated (see page 160) each payperiod, as part of the Pay Cycle.BackupThis is a facility to archive a copy of your data files, in thecase of needing to Restore/Rollback to them at some point.MaintenanceThis is the menu where you set up your Allowances,Deductions, Non Cash Benefits, Superannuations,Departments, Cost Centres, General Ledger Codes, AnnualLeave Groups and Note Types. This menu can be accessedthree ways: via the drop down menu, toolbar icon or bypressing F2 at any time.The PAYG CalculatorThis is a small utility (see page 245) that allows you tocalculate PAYG and/or Student Loan on any amount at anytime. While the Payroll calculates PAYG as part of the payprocess, there are times when you may need to do a oneoff calculation.The Pay CycleThis is used to access the Pay Cycle (see page 119) whenrunning a pay. The Pay Cycle can be selected from theToolbar or the Help Menu.HelpOpens the Online Help.DiaryOpens the Diary, which is a form of a daily planner, givingyou a place to enter comments on any given day, for Payrollcompany-related tasks, appointments and reminders.Show ItemsOpens a window showing all available toolbar icons, whereyou can choose which icons to display and which to hide.ExitTakes you out of Exo Payroll and returns you to theWindows desktop. You will be asked if you want to back upthe database before exiting.10
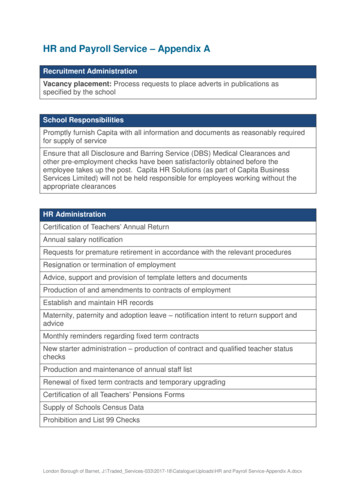
Adding a Payroll CompanyMYOB Exo Payroll can have unlimited live payrolls in the same program, in addition to theDemonstration Company.After opening Exo Payroll, the first thing you see is the MYOB Login Screen.To add a company, click the Add button or press F4. The following window appears:11
Setting up MYOB Exo PayrollCompany Name Enter the name for the new company. This is the name that will appear in the listof payrolls. You may want to add Wages or Salaries or the name, to show who the new payrollis for.Directory The default directory name is automatically generated, based on the first few charactersof the company name you enter.Copy information from an existing company This option allows you to copy the basic setup datafrom another company. This is useful where you have split the Wages and Salaries payrolls intotwo payrolls, both of which follow similar payroll practices. Tick the box and select the closestmatching company from the Copy Information From list. If in doubt, choose the DemonstrationCompany. You will then be able to specify which areas of the other payroll you want to copy byticking the appropriate boxes below.Once the procedure is complete, click Save or press F10 and you will be taken to your newcompany.Once in the new company you will be presented with the Payroll Setup Cycle window (see page19). This window steps you through the process of configuring the various essential settings.Deleting Payroll CompaniesIf you want to delete a company for any reason, select the company on the Login Screen and clickDelete or press F6. You are then asked to confirm that you want to delete this company. Click Noto cancel, or click Yes to proceed. You must enter the administrator password for the company,then take a backup of the company before it is deleted.12
MYOB EXO PayrollMigrating Data from Other Payroll SystemsPayroll data can be migrated to MYOB Exo Payroll from the MYOB PowerPay and MYOBAccountRight Premier systems. Migration is a two-step process:1.The data is exported from the source system2. The data is imported into Exo Payroll using the Migration Wizard.Exporting Data for MigrationMYOB PowerPayExo Payroll supports migration from MYOB PowerPay version 8.5 and later. To export data fromPowerPay:1.Select Export Data. from the File menu. This opens the Export Parameters window.2. Select Employees for the Type of Export.3. Select Comma-separated for the Export File Format.4. Select Header Record for the First Record.13
Setting up MYOB Exo Payroll5. Use the fields on the bottom half of the window to specify which employees you want toexport, then click Continue.6. On the Export Employees window, click Match All. Click Continue.7. Enter a name for the export file then click Save.The export file is saved to the location you selected.MYOB AccountRight PremierExo Payroll supports migration from MYOB AccountRight Premier versions 10 and later. To exportdata from AccountRight:1.Select Export Data Cards Employee Cards from the File menu. This opens the ExportFile window.14
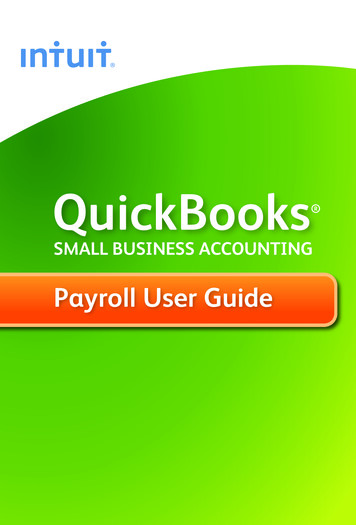
MYOB EXO Payroll2. Select Comma-separated for the Export File Format.3. Select Header Record for the First Record.4. Use the fields on the bottom half of the window to specify which employees you want toexport (or leave them blank), then click Continue.5. On the Export Data window, click Match All. Click Export.6. Enter a name for the export file then click Save.The export file is saved to the location you selected.Importing Data into Exo PayrollOpen the Migration Wizard by selecting Migration Tool from the Help menu.1.15Click Next on the Welcome window.
Setting up MYOB Exo Payroll2. Click Browse to specify the location of the file you exported, then click Next.3. If you are migrating data from MYOB PowerPay, you must map the PowerPay PayFrequencies in the export file to Exo Payroll Pay Frequencies. For each frequency Codelisted, select a Pay Frequency (Weekly, Fortnightly, Bi-monthly, 4 weekly or Monthly). ClickNext once all Pay Frequencies have been mapped.4. At this point you must back up your company file before proceeding.16
MYOB EXO Payroll5. The Migration Tool checks that it can read the file successfully. If the checks all succeed,click Next to continue.6. Tick the I accept full responsibility. box, then click Migrate to begin the migrationoperation.17
Setting up MYOB Exo Payroll7. The progress of the migration is displayed.8. The results of the migration are displayed. Click Print to print a copy of the migration log. Ifany fatal errors were encountered, exit the Migration Tool and correct the problems thatcaused them. If the migration succeeded, click Next to continue.18
MYOB EXO Payroll9. The migration is now complete. Click Finish to exit the Migration Wizard and return to ExoPayroll.19
Setting up MYOB Exo PayrollSetting up MYOB Exo PayrollBefore you can enter any employee information and commence the preparation of your payroll, itis necessary to set up the payroll to handle your company s unique requirements. This requires notonly setting the structure for your payroll(s), but also entering historical information, such as GrossYear to Date totals, annual leave entitlements etc.Although some of this preparation may be handled by MYOB in the course of the installation andtraining, it is necessary for you, the user, to have an overview so that you may be better equippedto successfully understand your payroll system.The Exo Payroll Setup CycleThe Setup Cycle steps you through the process of setting up the various masterfiles that will becalled on when pays are run. These masterfiles define the types of payments your staff may beeligible for during a pay.The Setup Cycle opens automatically the first time you open a newly created company. From thenon, the cycle can be accessed by selecting Setup Cycle from the Help menu.Click on each of the steps in turn to perform all of the necessary operations for setting up yourcompany. Step One: Payroll Setup (see page 21)Step Two: Add Allowances (see page 57)Step Three: Add Non Cash Benefits (see page 64)Step Four: Add Deductions (see page 71)Step Five: Add Departments (see page 77)Step Six: Add Cost Centres (see page 78)Step Seven: Add/Edit Employees (see page 81)TIP: The steps covered in this Cycle can also be performed by selecting the appropriateoption from the Maintenance menu.20
MYOB EXO PayrollStep One: Payroll SetupThe Payroll Setup window contains the main compa
Keyboard shortcuts are available for common operations. Once you are familiar with the interface, you can begin to perform the main functions of the Exo Payroll system: Setting up the details of your company (see page 19) Running a pay (see page 119) Printing reports (see page 184) Maintenance functions
![Myob Accounting Software Free Crack Windows [BEST]](/img/57/myob-accounting-software-free-download-crack-windows-best.jpg)