Transcription
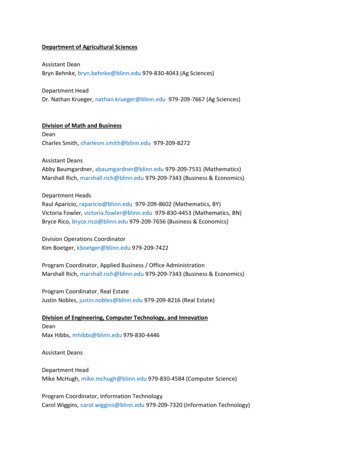
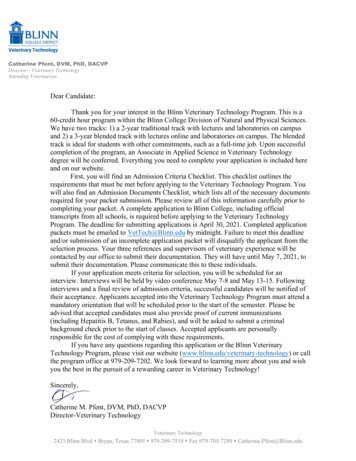
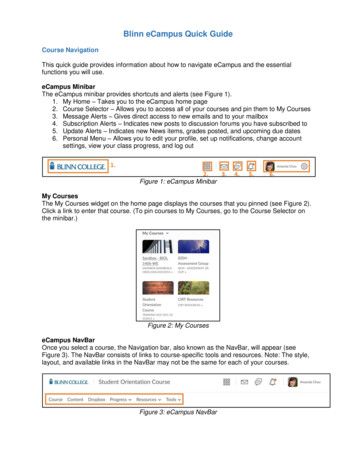
Blinn eCampus Quick GuideCourse NavigationThis quick guide provides information about how to navigate eCampus and the essentialfunctions you will use.eCampus MinibarThe eCampus minibar provides shortcuts and alerts (see Figure 1).1. My Home – Takes you to the eCampus home page2. Course Selector – Allows you to access all of your courses and pin them to My Courses3. Message Alerts – Gives direct access to new emails and to your mailbox4. Subscription Alerts – Indicates new posts to discussion forums you have subscribed to5. Update Alerts – Indicates new News items, grades posted, and upcoming due dates6. Personal Menu – Allows you to edit your profile, set up notifications, change accountsettings, view your class progress, and log outFigure 1: eCampus MinibarMy CoursesThe My Courses widget on the home page displays the courses that you pinned (see Figure 2).Click a link to enter that course. (To pin courses to My Courses, go to the Course Selector onthe minibar.)Figure 2: My CourseseCampus NavBarOnce you select a course, the Navigation bar, also known as the NavBar, will appear (seeFigure 3). The NavBar consists of links to course-specific tools and resources. Note: The style,layout, and available links in the NavBar may not be the same for each of your courses.Figure 3: eCampus NavBar
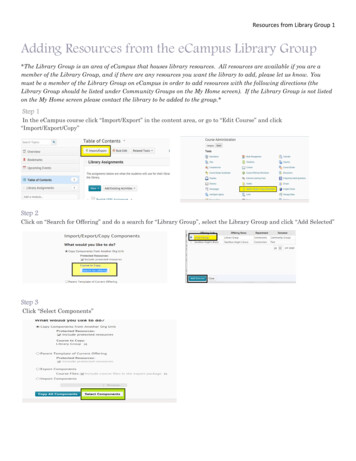
ContentCourse materials, such as lecture notes and assignments, are located in Content (see Figure 4).1. Bookmarks – Access topics that you have bookmarked2. Course Schedule – View upcoming due dates, a schedule of events, and overdue items3. Modules – View the modules and topics associated with the course4. Number of Incomplete Items – The number next to each module heading indicates thenumber of incomplete items within that module. A checkmark means that all items withina module are completed.5. Course Topics – Click the course topic to view its contents6. Content – Click individual links to complete the tasks7. Completion Tracking – Shows an overview of your progress for the selected module8. Completion Indicator – A dot next to a topic indicates that you have not completed it yet.A checkmark indicates that you have completed it.Figure 4: Content ToolDiscussionsDiscussions are organized into forums and topics. You will access Discussions directlythrough links under Content. Click on a topic to view and reply to messages.Creating New Threads1. To make a new post, click Start New Thread (see Figure 5 on page 3).2. Enter a subject and a message for your post. You can also add attachments (filesand audio) and subscribe to a thread. See the next page for more information.3. When you are finished, click Post.4. Your post will appear in the topic.2
Figure 5: Starting a New ThreadReplying to Threads1. To read and reply to the message, click on the message subject.2. Click Reply to Thread.3. Enter your message to reply.4. When you are finished, click Post.5. Click the checkbox next to “Subscribe to this thread” to receive notifications whensomeone replies to this thread. You can subscribe to threads or entire forums or topics.Adding Attachments to a New Thread and Replies1. If you need to add an attachment, click Add attachments (see Figure 6).2. If you want to add a file, click Upload.3. If you want to add audio, click Record Audio.Figure 6: Uploading a File, Adding Audio, and Subscribing to a ThreadOther OptionsAfter posting, you can click the upsidedown triangle to see editing options. You can edit yourown thread. You can flag a thread to find topics later. You can also copy or print the thread.3
DropboxDropbox, which is organized into folders (see Figure 7), is a place to submit assignments forgrading. Note: You may not see this page if you access the folder through a Content item.Figure 7: List of Dropbox FoldersSubmitting an AssignmentClick on the dropbox assignment. You will open a summary page that may include specificinstructions, a rubric, and/or attachments for you to view.1. To submit an assignment, click Add a File (see Figure 8). Note: The following filetypes do NOT work with eCampus dropboxes: .gdoc, .zip, .wpx, .wps, a link to aOneDrive/SharePoint file, and any files from Apple’s iWork, including .pages.Figure 8: Add a File Button2. Select the place where the file is located, typically My Computer.3. Find the file you wish to upload, either by dragging and dropping it into the Add aFile dialog box or by clicking the Upload button.A. Be sure the document is saved as an appropriate file type.B. If you need to submit multiple files, drag and drop or upload all files here.4. After you have selected your file, click the Add button at the bottom of the Add a Filedialog box. The uploaded file will now be listed under the Add a File button.5. Type any comments in the Comments box.6. Click the blue Submit button at the bottom of the page.7. A confirmation screen lets you know the file has been submitted successfully.4
EmailTo access eCampus email, click the Message Alert icon and select Email (see Figure 8).Figure 8: eCampus MinibarClicking Email will take you to your inbox (see Figure 9). From your inbox, you can read emailsor write new messages.1. Compose – Compose a new outgoing message2. Filter By – Select a different course to view3. Subject – Click on a subject to read the messageFigure 9: Email InboxSending an EmailOption 1: To email people in your class, go to Progress, and click on Classlist. There are threeways to use the Classlist to send an email (see Figure 10).1. Email Classlist – Compose a message to send to everyone in your class.2. Name – Use the dropdown menu next to the name of the recipient. Select Send Email.3. Email – Click the checkbox to select those whom want to email, and click Email.Figure 10: Email from Classlist5
Option 2: To email anyone, including people not in your class, use the email Address Book.1. From your inbox, start a new message by clicking the Compose button.2. If you know the recipient’s email address, type the email address in the To field.3. If you do not know the recipient’s email address, click Address Book in the upper righthand corner to open a list of contacts (see Figure 11), and follow these steps:A. Click the checkbox next to the recipient’s name.B. Click To to add the person’s email address to the To field. If applicable, you canalso click Cc (copy) or Bcc (blind copy) to add the person’s address in therespective field.C. After selecting all recipients, click Add Recipients at the bottom of the page.Figure 11: eCampus Address BookQuizzesIn eCampus, all practice exercises, quizzes, and exams are called Quizzes. To take a quiz,follow these steps:1. Click on the link for quiz you want to take. You will open a Summary page that providesthe Quiz Details. Read these instructions carefully.2. To begin the quiz, click the blue Start Quiz button at the bottom of the Summary page.3. At the top of the Quiz screen, you will see a timer (see Figure 12). Be sure to keep aneye on the timer if your quiz or exam has a strict time limit.Figure 12: Quiz Timer4. The quiz questions will appear in the middle frame of your browser window. Questiontypes in the eCampus quiz interface include multiple choice, written response (essay),short answer, matching, and others. Click to select or to type your answers.6
5. After you answer each question, click the Save button beneath it to ensure you do notlose any work. The disk icon for the corresponding question number will change to blackto show that a question has been saved (see Figure 13).Figure 13: Example Quiz Question and Save Button6. When you have answered all of the questions, click the gray Go to Submit Quiz buttonat the bottom of the page.7. Read the Quiz Submission Confirmation page. Then click the blue Submit Quiz button.Note: Once you click Submit Quiz, you will not be able to return to the quiz.8. After you submit the assignment, you will see a summary of your submission. Theinformation on this page depends on your instructor’s quiz settings and the types ofquestions in the quiz.9. Click Return to Content in the upper right corner to resume the class!User ProgressUser Progress is a tool that provides progress reports and instructor feedback to thestudent. Access your progress reports by clicking Progress in the Navigation bar and thenselecting Class Progress. This will open a Progress Summary report, which includes yourgrades, and other information as determined by your instructor. Below is an overview oftwo useful progress reports.Content ProgressThe Content progress provides an overview of your progress in the class, specifically focusingon the Content items that you have viewed and completed. Click the dropdown arrows next toeach Content item to get more information about your progress.The report also includes the number of times you visited Content, the total time spent viewingContent, and the number of content items visited. There is also a visualization showing the totalpercentage of topics viewed and progress towards the total of all available content for the user.Grades ProgressThe Grades summary area shows the current value of the final grade. Depending on instructorsettings, it may also show your maximum possible grade and minimum possible grade. Thisarea also includes a graph of the current final grade along with scores of the last 15 items.7
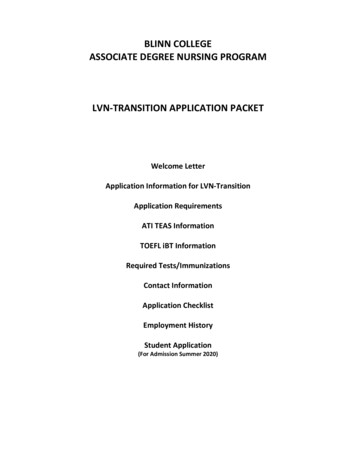
Most importantly, the Grades report lists the grade earned on each completed assignment, andincludes any feedback your instructor has provided, for example, written comments or rubrics(see Figure 14).Figure 14: Accessing Feedback through Class Progress8
Figure 2: My Courses eCampus NavBar Once you select a course, the Navigation bar, also known as the NavBar, will appear (see Figure 3). The NavBar consists of links to course-specific tools and resources. Note: The style, layout, and available links in the NavBar may not be the same for each of your courses. Figure 3: eCampus NavBar