Transcription
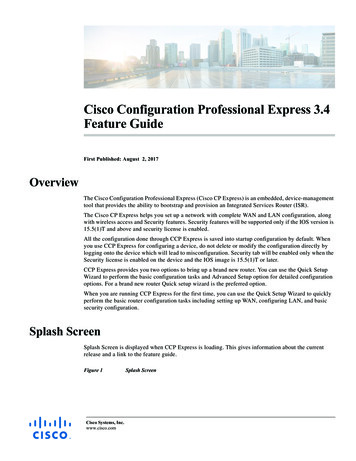
Cisco Configuration Professional Express 3.4Feature GuideFirst Published: August 2, 2017OverviewThe Cisco Configuration Professional Express (Cisco CP Express) is an embedded, device-managementtool that provides the ability to bootstrap and provision an Integrated Services Router (ISR).The Cisco CP Express helps you set up a network with complete WAN and LAN configuration, alongwith wireless access and Security features. Security features will be supported only if the IOS version is15.5(1)T and above and security license is enabled.All the configuration done through CCP Express is saved into startup configuration by default. Whenyou use CCP Express for configuring a device, do not delete or modify the configuration directly bylogging onto the device which will lead to misconfiguration. Security tab will be enabled only when theSecurity license is enabled on the device and the IOS image is 15.5(1)T or later.CCP Express provides you two options to bring up a brand new router. You can use the Quick SetupWizard to perform the basic configuration tasks and Advanced Setup option for detailed configurationoptions. For a brand new router Quick setup wizard is the preferred option.When you are running CCP Express for the first time, you can use the Quick Setup Wizard to quicklyperform the basic router configuration tasks including setting up WAN, configuring LAN, and basicsecurity configuration.Splash ScreenSplash Screen is displayed when CCP Express is loading. This gives information about the currentrelease and a link to the feature guide.Figure 1Cisco Systems, Inc.www.cisco.comSplash Screen
Cisco Configuration Professional Express 3.4 Feature GuideUsing Quick Setup WizardUsing Quick Setup WizardQuick Setup Wizard helps you to quickly perform the basic router configuration when you are runningthe Cisco CP Express for the first time.Perform the following steps to configure the router using quick setup wizard.Step 12Connect the PC to the Router using Ethernet cable as shown in Figure 2
Cisco Configuration Professional Express 3.4 Feature GuideUsing Quick Setup WizardFigure 2Connecting PC to the RouterCisco 861WFE 4Step 2272098WANVerify if the Cisco CP Express is installed correctly by performing the following steps:a.Launch the browser.b.In the address bar, type the IP address of the router where Cisco CP Express is installed.For example, type http://10.10.10.1 or https://10.10.10.1Step 3c.Provide the one-time-user-credentials. When router prompts for specifying new username and thepassword, please do the same.d.Click Log In.e.Create a new user account and login with the new user credentials. Cisco CP Express Installationscreen launches.Click Quick Setup Wizard from the Cisco CP Express Installation screen to run the Quick SetupWizard.3
Cisco Configuration Professional Express 3.4 Feature GuideUsing Quick Setup WizardFigure 3Step 4Go through the configuration pre-requisites in the Quick Setup Wizard welcome screen and then clickGet Started option.Figure 4Step 54Cisco CP Express InstallationQuick Setup Wizard Welcome ScreenConfigure basic settings by entering Router Name, Domain Name and selecting the appropriate TimeZone.
Cisco Configuration Professional Express 3.4 Feature GuideUsing Quick Setup WizardFigure 5Step 6Basic Router Settings ConfigurationSelect the primary WAN type for configuring the primary WAN connection. You con configure Serial,3G/4G, Ethernet, or Broadband (xDSL) as primary WAN depending on the WAN types supported by therouter.Figure 6Primary WAN ConfigurationSee the following subtasks for each WAN option for configuring the required WAN: Cellular WAN Configuration for GSM Cellular WAN Configuration for CDMA Ethernet WAN Configuration xDSL WAN Configuration5
Cisco Configuration Professional Express 3.4 Feature GuideUsing Quick Setup WizardCellular WAN Configuration for GSMPerform the following steps to configure GSM cellular WAN:Note6a.Select the connected cellular WAN interface for configuring primary WAN.b.Select enable persistence if you want to establish a persistent connection to your service providerfrom the dialer interface.c.Get DNS server information directly from ISP is selected by default. If this option is enabled youcannot assign IP addresses statically.d.There is an option to enable NAT and it is recommended to enable NAT.e.Modem firmware is activated by default. Activate the corresponding modem firmware if you wantto change the default modem firmware.f.Enter the Access Point Name (APN) provided by the service provider for GSM profileconfiguration.This step is applicable only for GSM configuration. GSM configuration options are available only if theselected firmware is UMTS.g.Select the option Configure username and password if provided by service provider.h.Select the SIM for activation. If you enable the auto firmware switch option to automatically switchover the firmware when you switch the SIM cards.NoteYou should know the SIM type you have inserted on the Router.NoteSIM activation and auto firmware switch option is not available on some of the Cisco ISR routers.i.Select Global System for Mobile Communications (GSM) as 3G/4G WAN technology.j.Click Next.
Cisco Configuration Professional Express 3.4 Feature GuideUsing Quick Setup WizardFigure 7Cellular WAN Configuration for GSMCellular WAN Configuration for CDMAPerform the following steps to configure CDMA cellular WAN:a.Select the connected cellular WAN interface for configuring primary WAN.b.Select enable persistence if you want to establish a persistent connection to your service providerfrom the dialer interface.c.Get DNS server information directly from ISP is selected by default. If this option is enabled youcannot assign IP addresses statically.d.There is an option to enable NAT and it is recommended to enable NAT.e.Modem firmware is activated by default. Activate the corresponding modem firmware if you wantto change the default modem firmware.f.Select the SIM for activation. If you enable the auto firmware switch option to automatically switchover the firmware when you switch the SIM cards.NoteYou should know the SIM type you have inserted on the Router.NoteSIM activation and auto firmware switch option is not available on some of the Cisco ISR routers.g.Select Code Division Multiple Access (CDMA) as 3G/4G WAN technology.h.Click Next7
Cisco Configuration Professional Express 3.4 Feature GuideUsing Quick Setup WizardFigure 8Cellular WAN Configuration for CDMASerial WAN ConfigurationPerform the following steps to configure serial WAN:8a.Select the serial interface for configuring Serial WAN.b.Select the appropriate IP address configuration information based on whether you are configuringan IPv4 or IPv6 address. Specify the details for the IP address depending on whether the IP addressis dynamically or statically assigned. There is an option to enable NAT configuration and it isrecommended to enable NAT for WAN interfaces. The IPv6 address can be either AutoConfig, UsePrefix from Provider, or Static IP Address. If you have selected AutoConfig, enable Act as an IPv6DHCP client option. If you have selected Prefix from Provider or Static IP Address option, enterPrefix and Prefix Mask details.c.Select the required serial communication mode. You have synchronous and asynchronous options.d.Select the required serial encapsulation type. You have HDLC and PPP options for synchronousmode and SLIP and PPP options for asynchronous mode. For PPP you have PAP and CHAP options.e.Click Next.
Cisco Configuration Professional Express 3.4 Feature GuideUsing Quick Setup WizardFigure 9Serial WAN ConfigurationEthernet WAN ConfigurationPerform the following steps to configure Ethernet WAN:a.Select the Ethernet interface for configuring Ethernet WAN.b.Select the appropriate IP address configuration information based on whether you are configuringan IPv4 or IPv6 address. Specify the details for the IP address depending on whether the IP addressis dynamically or statically assigned. There is an option to enable NAT configuration and it isrecommended to enable NAT for WAN interfaces. The IPv6 address can be either AutoConfig, UsePrefix from Provider, or Static IP Address. If you have selected AutoConfig, enable Act as an IPv6DHCP client option. If you have selected Prefix from Provider or Static IP Address option, enterPrefix and Prefix Mask details.c.If you have enabled PPPoE, select the required authentication mode. You have PAP and CHAPoptions.d.Enter the user name and password provided by the service provider.e.Click Next.9
Cisco Configuration Professional Express 3.4 Feature GuideUsing Quick Setup WizardFigure 10Ethernet WAN ConfigurationxDSL WAN ConfigurationPerform the following steps to configure xDSL WAN:a.Note10Select the controller (VDSL, SHDSL or ADSL), appropriate mode and interface.Mode information can be obtained from the service provider. If the mode is not exactly known, thenselect mode as Auto.b.Select the appropriate IP address configuration information based on whether you are configuringan IPv4 or IPv6 address. Specify the details for the IP address depending on whether the IP addressis dynamically or statically assigned. There is an option to enable NAT configuration and it isrecommended to enable NAT for WAN interfaces. The IPv6 address can be either AutoConfig, UsePrefix from Provider, or Static IP Address. If you have selected AutoConfig, enable Act as an IPv6DHCP client option. If you have selected Prefix from Provider or Static IP Address option, enterPrefix and Prefix Mask details.c.Under connection and authentication, provide the encapsulation key for Ethernet Interface. For ATMinterface provide VPI and VCI information. If enable PPPoE is selected, select PAP or CHAP as theauthentication method and enter the user name and password provided by the service provider.d.Click Next.
Cisco Configuration Professional Express 3.4 Feature GuideUsing Quick Setup WizardFigure 11Step 7Select Enable Backup WAN option if you want to configure Back Up WAN. Follow the configurationsub tasks in step 4 to configure the desired Back Up WAN type and then click Next.Figure 12Step 8xDSL WAN ConfigurationBackup WAN ConfigurationClick Next to complete the LAN configuration since DHCP pool will be automatically configured andyou can use the same DHCP pool for LAN network.LAN ConfigurationStep 9To perform LAN configuration, follow below steps:e.Select Change LAN network to edit the existing network. LAN Configuration.11
Cisco Configuration Professional Express 3.4 Feature GuideUsing Quick Setup WizardFigure 13f.You will be getting a confirmation alert message before changing the existing network and click OKto proceed.Figure 1412LAN Configuration PageAlert Pageg.If you want to add a new LAN network, select add a new LAN network option.h.Configure new network with Pool name, Pool network, Subnet Mask and IP address.
Cisco Configuration Professional Express 3.4 Feature GuideUsing Quick Setup WizardFigure 15Step 10Click Next to configure security.i.Select Enable firewall features and then select create policy which allows basic traffic option toconfigure the security features and then click Next.Figure 16Step 11Configuration with LAN NetworkSecurity ConfigurationClick Submit to confirm the configuration changes in the summary screen.13
Cisco Configuration Professional Express 3.4 Feature GuideUsing Quick Setup WizardFigure 17Step 12A message appears saying configuration may take some time to configure and whether you want tocontinue the configuration. Click Yes to continue the configuration changes.Step 13Configuration using the Quick Setup Wizard is complete and a completion message appears.Figure 18Step 1414Confirmation ScreenConfiguration Completion using Quick Setup Wizard(Optional) If you want to check the status of your WAN connection click Test WAN Connection.
Cisco Configuration Professional Express 3.4 Feature GuideFigure 19NoteTest WAN ConnectionFor Cisco IR8x9 Series routers, the configuration wizard screens are different.Cellular WAN Configuration for Cisco IR8x9 Devicesa.Select the connected cellular WAN interface for configuring the primary WAN.b.Select enable persistence if you want to establish a persistent connection to your service providerfrom the dialer interface.c.The Get DNS server information directly from ISP option is selected by default. If this option isenabled, you cannot assign IP addresses statically.d.The modem settings section allows you to configure the SIMs.NoteEnsure that the profile information is retrieved from the Service Provider in advance. The dualLTE version of the Cisco IR829 have 2 SIMs and you have to configure both the SIMs. The CiscoIR829 and Cisco IR809 single LTE have only one SIM.15
Cisco Configuration Professional Express 3.4 Feature GuideFigure 20Cellular WAN Interface for IR829 Dual LTEIOX Configuration for IR Devicesa.In the IOX tab, slide the button towards the left to enable IOX access.Figure 21b.16IOX WizardIf NAT is not enabled, a message is displayed about the status of the NAT.
Cisco Configuration Professional Express 3.4 Feature GuideFigure 22c.Click OK to proceed with the IOX configuration. Default configuration details are displayed.Figure 23d.NAT MessageIOX Default ConfigurationYou have the options to change the configuration as required.17
Cisco Configuration Professional Express 3.4 Feature GuideFigure 24Modify Default IOX configurationWIFI Configuration for Cisco IR829a.In the IOX tab, slide the button towards the left to turn on the WIFI connection.Figure 25b.18WIFI WizardEnter the Network Name, Security Type, and Password for WPA and WPA2 to be configure SSIDon the Access Point The default value that is set for the BVI Interface IP Address is loaded.
Cisco Configuration Professional Express 3.4 Feature GuideConfiguration Using CCP Express Advanced ModeNoteYou can change the IP Address of BVI Interface.Figure 26WIFI Configurationc.Click Next to proceed with the WIFI configuration.d.You have the options to change the configuration as required.Configuration Using CCP Express Advanced ModeThis section explains how to configure Cisco ISR G2 routers using CCP Express advanced mode. Thescreens and configuration steps may slightly vary depending on the WAN configuration options and thesoftware features supported by the Cisco ISR G2 router.NoteFor Cisco 800M series routers, the configuration screens for WAN configuration is slightly different. ForWAN configuration steps for the Cisco 800M series routers, see the “Configuring WAN for Cisco 800MSeries Routers” section on page 66CCP Express Landing Page, Navigation, and OptionsFigure 27 shows CCP Express landing page where you can navigate to all the features.19
Cisco Configuration Professional Express 3.4 Feature GuideConfiguration Using CCP Express Advanced ModeFigure 27CCP Express Landing PageFigure 28 shows the various features at the top menu which will be available in all the advanced mode.Figure 28Features in Advanced ModeFigure 29 User Options allows you to navigate, and Upgrade CCP Express, Upgrade IOS, Factory Reset,Preferences, Feedback, Help, Quick Setup Wizard.20
Cisco Configuration Professional Express 3.4 Feature GuideConfiguration Using CCP Express Advanced ModeFigure 29OptionsSetting Up Ethernet Primary WAN UplinkThis section explains how to set up an Ethernet primary WAN uplink and enable wired or wirelessInternet access for clients in an IPv4 or IPv6 networks. To set up an Ethernet primary WAN uplink andenable wired or wireless Internet access, perform these steps:Step 1Click Interfaces to open the Interfaces page.Step 2From the list of interfaces, select the interface to which WAN is connected, and click Edit. The EditInterface page is displayed.– In Edit Interface Primary Secondary Interface, check Primary WAN Interface option and thiswill ensure that default route created for this WAN Interface– If the device supports Security then “Move to WAN Zone” option will appear and user canenable this to make the WAN interface part of WAN Zone. Having the WAN interface part ofWAN Zone is the mandatory requirement for many security features.Step 3From Edit Interface Connection page, check Enable PPPoE check box, and enter the description inthe Description field.Step 4From the Edit Interface page, specify the details for IP address depending on whether the IP address isdynamically or statically assigned. There is an option to enable NAT configuration and therecommendation is to enable NAT for WAN interfaces. This will create NAT overloading configurationhence all LAN IPs are translated to public IP before being sent to WAN up link.21
Cisco Configuration Professional Express 3.4 Feature GuideConfiguration Using CCP Express Advanced Mode22Figure 30Edit Interface PageFigure 31Edit Interface PageStep 5(Optional) Configure wired or wireless LAN by executing Steps 2 to 14 of the section Setting Up xDSLWAN Uplink for Wired/Wireless Internet Access in IPv4 Network.Step 6From Edit Interface Authentication page, check CHAP or PAP check box and specify the usernameand password given by Service providerStep 7Click OK.
Cisco Configuration Professional Express 3.4 Feature GuideConfiguration Using CCP Express Advanced ModeSetting Up Ethernet Primary WAN Uplink with 3G/4G as BackupThis section explains how to set up an Ethernet primary WAN uplink with 3G or 4G as a backup. To setup an Ethernet primary WAN up link with 3G or 4G as a backup, perform these steps:Step 1Click Interfaces to open the Interfaces page.Step 2From the list of interfaces, select the interface to which your WAN is connected, and click Edit.The Edit Interface page is displayed.Step 3From the Edit Interface page, specify the details for the IP address depending on whether the IP addressis dynamically or statically assigned.Step 4Check the Enable NAT check box to ensure that DHCP client IP addresses are translated before beingsent to the WAN uplink.Step 5(Optional) Configure your wired or wireless LAN by executing Steps 2 to 14 of the section Setting UpxDSL WAN Uplink for Wired/Wireless Internet Access in IPv4 Network, page 23.Step 6Click Interfaces to open the Interfaces page.Step 7From the Interfaces page, select the 3G Interface and click Edit to edit the configuration.Step 8Based on your 3G modem account, specify the modem account or modem activation information.For more information, see sections Setting Up 3G CDMA WAN Primary Uplink, page 27 and SettingUp 3G GSM WAN Primary Uplink, page 28 sections.Step 9From the WAN interface, select Backup WAN Interface and select your primary WAN interface. This isthe Ethernet interface you configured in Step 2.Step 10Specify the IP address of a reliable network on which the connectivity can be verified.Step 11If you want to establish a persistent connection to your service provider, from the Dialer interface, selectYES.By default, this is set to NO to disable persistent connection.Step 12Click OK to set up an Ethernet primary WAN uplink with 3G or 4G as backup.Setting Up xDSL WAN Uplink for Wired/Wireless Internet Access in IPv4NetworkThis section explains how to set up an xDSL WAN uplink and enable Wired/Wireless Internet access forclients in an IPv4 network. To set up a WAN uplink and enable Wired/Wireless Internet access, performthese steps:Step 1After you complete configuring your xDSL as described in Setting Up xDSL Primary WAN Uplink,page 25, create a new DHCP pool.Step 2Click Basic Settings to open the Basic Settings page (Figure 35).Step 3From the DHCP interface, click Add to create a new DHCP pool by specifying: Pool Name: the name of the DHCP pool Pool Network: the IP address of the subnet that represents all IP addresses allocated to the wired orwireless clients23
Cisco Configuration Professional Express 3.4 Feature GuideConfiguration Using CCP Express Advanced Mode Import all DHCP options in to the DHCP server database: Check this check box to import allDHCP options into the DHCP server database. This ensures that the DNS is read from your serviceprovider and is propagated to all DHCP clients. Enable Trunk on wlan-gigabitEthernet0: Uncheck this check box if you want to allow onlyVLAN1 for wired or wireless access. By default, this check box is enabled, and allows multipleVLANs (including VLAN1) to access wired or wireless Internet.Step 4Click OK to create the DHCP pool.Step 5Click Interfaces to open the Interfaces page (Figure 32).Figure 32Step 6Click Add VLAN to open the Add VLAN dialog box and specify a unique ID for the VLAN beingcreated.Step 7From the IPv4 address tab, choose Select from DHCP, and then select the DHCP pool (created in Step 3)from the drop-down list.This enables you to assign the IP addresses from the DHCP pool that is created.Step 8Click OK.Step 9Click Wi-Fi to open the Wireless page.Step 10Specify an SSID that will be used to uniquely identify your wireless device.The SSID can contain up to 32 alphanumeric characters.Step 11To broadcast the SSID in the access point beacon, check the Broadcast SSID in Beacon check box.When you broadcast the SSID, devices that do not specify an SSID can associate with the access point.This is a useful option for an SSID used by guests or by client devices in a public space. If you do notbroadcast the SSID, client devices cannot associate to the access point unless their SSID matches thisSSID. Only one SSID can be included in the access point beacon.Step 12Select the Enable VLAN ID and specify the ID of the VLAN created in Step 6.This will enable the clients that connect to the SSID (specified in Step 10) to use the IP addresses fromthe DHCP pool associated with this VLAN.Step 13Select the security setting for the SSID. 24The Interfaces pageStatic WEP Key: choose the WEP key index and key size, and enter the static WEP encryption key.The key index can be between 1 and 4. The key size can be either 40 bits or 128 bits.
Cisco Configuration Professional Express 3.4 Feature GuideConfiguration Using CCP Express Advanced Mode Step 14WPA2: specify the WPA2 encryption key and select the key type. The Key type can be either ASCIIor Hexadecimal.Click Apply.The SSID appears in the SSID table on the bottom of the page.Setting Up xDSL Primary WAN Uplink in IPv6 NetworkYou can use Cisco CP Express to configure both DHCPv6 (Dynamic Host Configuration Protocol forIPv6) server and client. Cisco CP Express supports only the Prefix Delegation method for configuringIPv6 addresses. For more information, ogies configuration example09186a0080b8a116.shtml.To set up an xDSL primary WAN uplink in an IPv6 network using Prefix Delegation method, performthese steps:Step 1Click Interfaces to open the Interfaces page.Step 2Select the DSL Interface where the configuration is to be done whether it is main interface orsub-interface (ATM0 or Ethernet0) and click on Edit to edit the interface configuration.NoteBased on your DSL uplink, select the appropriate layer 2 interface. For an ADSL uplink, select ATM0as your layer 2 interface, and for a VDSL uplink, select Ethernet0 as your layer 2 interface.Step 3From the Connection tab, enable PPoE, provide a description, the VPI, and the VCI values for yourconnection.Step 4From the IPv4 Address tab, select No IP Address.Step 5From the IPv6 Address tab, select Autoconfig and check the Act as an IPv6 DHCP Client check box.Step 6From the Authentication tab, select the authentication method and specify the username and passwordprovided by your service provider for authentication.Step 7Click OK to complete the configuration.You must now edit your VLAN to configure it for IPv6 support.Step 8From the Interfaces page, select a VLAN interface and click Edit to edit the configuration.Step 9Specify the VLAN ID and associate the ports to the VLAN.Step 10From the IPv4 Address tab, select No IP Address.Step 11From the IPv6 Address tab, select Use Prefix from Provider as the type, and specify the prefix and theprefix mask.Step 12Click OK.Setting Up xDSL Primary WAN UplinkTo set up an xDSL primary WAN uplink, perform these steps:25
Cisco Configuration Professional Express 3.4 Feature GuideConfiguration Using CCP Express Advanced ModeStep 1Click Interfaces to open the Interfaces page.Step 2Select the controller (may be VDSL, SHDSL, ADSL etc) and select the mode and click on ConfigureInterface and that will show the appropriate interfaces for the selected mode. Choose the right interface(either ATM or Ethernet).NoteStep 3Note: Mode info can be obtained from the service provider. If the mode is not exactly known,then select mode option as Auto and click on OK button. Also ensure that WAN interface isconnected. Check the controller after few minutes by executing show controller controller andsee which interface is trained by the service provider. Then select the trained interface by editingthe interface and complete the configuration.In Primary Secondary Interface section select interface as Primary and this will configure the defaultroute. If it is marked as “None” then default route will not be configured.If the device supports Security then “Move to WAN Zone” option will appear and user can enable thisto make the WAN interface part of WAN Zone. Having the WAN interface part of WAN Zone is themandatory requirement for many security features.Step 4In Connection section, select Enable PPPoE check box, and enter the description in the Description field.For Ethernet Interface provide encapsulation and for ATM provide VPI and VCI. This will create aspecific sub interface and configure them accordingly. If the encapsulation is not given thenconfiguration will be done under main interface.Step 5Based on whether you are configuring an IPv4 or IPv6 address, select the appropriate tab. Specify thedetails for the IP address depending on whether the IP address is dynamically or statically assigned.This can be either Easy IP (IP Negotiated), Static IP Address, or No IP Address. By default, the IPv4address is IP negotiated.There is an option to enable NAT configuration and the recommendation is to enable NAT for WANinterfaces. This will create NAT overloading configuration hence all LAN IPs are translated to public IPbefore being sent to WAN uplink.For configuring an IPv6 address:– Select the IPv6 address type.The IPv6 address can be either AutoConfig, Use Prefix from Provider, Static IP Address, or No IPAddress.NoteTo edit the configuration you can select controller, or directly select the interface or sub interface basedon the configuration done.NoteTo edit the configuration you can select controller, or directly select the interface or sub interface basedon the configuration done.NoteStep 626Cisco CP Express supports only the Prefix from Provider approach for IPv6 address configuration.From the Authentication tab, select the authentication method (PAP or CHAP) and specify the usernameand password provided by your service provider.
Cisco Configuration Professional Express 3.4 Feature GuideConfiguration Using CCP Express Advanced ModeStep 7Click OK to create the DSL uplink.Setting Up 3G/4G WAN Primary UplinkThis section explains how to set up a 3G WAN primary uplink (for CDMA and GSM) with Wired orWireless LAN access. Setting Up 3G CDMA WAN Primary Uplink, page 27 Setting Up 3G GSM WAN Primary Uplink, page 28 Setting Up 4G WAN Primary Uplink, page 30Setting Up 3G CDMA WAN Primary UplinkPrerequisiteBased on the type of 3G modem, the activation method can either be OMA-DM, OTASP, or Manual(Fallback). You must collect this account information from your service provider: If your 3G interface uses Manual (Fallback) as the activation method, obtain the Mobile DirectoryNumber (MDN), Mobile Subscriber Identification Number (MSID), and the Mobile SubscriberLock (MSL) No. from your service provider and specify these in the Account Information tab. If your 3G interface uses OTASP as the activation method, obtain the Phone No. for activation fromyour service provider and specify it in the Account Information tab.To set up a 3G CDMA WAN primary uplink, perform these steps:Step 1Click Interfaces to open the Interfaces page.Step 2Select the 3G Interface you want to configure and click Edit.The Edit Cellular Configuration page is displayed (Figure 29).27
Cisco Configuration Professional Express 3.4 Feature GuideConfiguration Using CCP Express Advanced ModeFigure 33The Edit Cellular Configuration pageStep 3From the Modem Activation tab, check the Activate Modem checkbox to activate your modem, selectthe activation method and provide the necessary information. The modem activation method can eitherbe OMA-DM, OTASP, or Manual (Fallback).Step 4From the WAN tab, select Primary WAN Interface. If the device supports Security then “Move to WANZone” will appear and user can make the WAN interface part of WAN Zone. Having the WAN interfacepart of WAN Zone is mandatory requirement for many security features.Step 5If you want to establish a persistent connection to your service provider, from the Dialer interface, selectYES.By default, this is set to NO to disable persistent connection.NoteA persistent connection is an always “ON” connection. It sends keep alive packets to keep the connectionlive.A non-persistent connection is an on-demand connection, in which the modem dials out only when thedata tries to go in or out of that interface. If no data ID is flown for 60 seconds, the connection is droppedand the modem dials out again when the data tries to go in or out.Step 6Click OK.Setting Up 3G GSM WAN Primary UplinkPrerequisiteBefore you begin setting up your 3G GSM WAN primary uplink, make sure your obtain the Access PointName (APN), the PDP type, authentication method, and the username and password from your serviceprovider.28
Cisco Configuration Professional Express 3.4 Feature GuideConfiguration Using CCP Express Advanced ModeTo set up a 3G G
The Cisco Configuration Professional Express (Cisco CP Express) is an embedded, device-management tool that provides the ability to bootstrap and provision an Integrated Services Router (ISR). The Cisco CP Express helps you set up a network with complete WAN and LAN configuration, along with wireless access and Security features.