Transcription
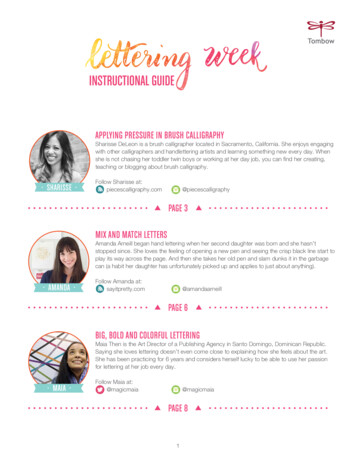
INSTRUCTIONAL GUIDEAPPLYING PRESSURE IN BRUSH CALLIGRAPHYSharisse DeLeon is a brush calligrapher located in Sacramento, California. She enjoys engagingwith other calligraphers and handlettering artists and learning something new every day. Whenshe is not chasing her toddler twin boys or working at her day job, you can find her creating,teaching or blogging about brush calligraphy. SHARISSE Follow Sharisse at:piecescalligraphy.com@piecescalligraphyPAGE 3MIX AND MATCH LETTERSAmanda Arneill began hand lettering when her second daughter was born and she hasn’tstopped since. She loves the feeling of opening a new pen and seeing the crisp black line start toplay its way across the page. And then she takes her old pen and slam dunks it in the garbagecan (a habit her daughter has unfortunately picked up and applies to just about anything). AMANDA Follow Amanda at:sayitpretty.com@amandaarneillPAGE 6BIG, BOLD AND COLORFUL LETTERINGMaia Then is the Art Director of a Publishing Agency in Santo Domingo, Dominican Republic.Saying she loves lettering doesn’t even come close to explaining how she feels about the art.She has been practicing for 6 years and considers herself lucky to be able to use her passionfor lettering at her job every day. MAIA Follow Maia at:@magicmaia@magicmaiaPAGE 81
INSTRUCTIONAL GUIDESPACING, COLORS AND GLUE PEN FUNAbby Guempel is a full-time Art Director for a crafting company in Dallas, TX by day, and anillustrator and hand letterer by night. She has been in the industry since she was 8 years old,but her relationship with hand lettering began in 2014. She views hand lettering like Tetris orsolving a puzzle - you need to figure out what to do next while continuing to write non-stop. ABBY Follow Abby at:asyeraguempel.com@abbyguempelPAGE 9TOMBOW LIKE A LEFTYLauren Fitzmaurice is a left-handed calligrapher from Owensboro, Kentucky. She is also a fulltime teacher, wife, and mommy to two sweet boys. Lauren enjoys a good doodle and workingon lettering projects in her spare time. She believes that lettering makes life more fun and alsoloves to encourage and learn from other creatives. LAUREN Follow Lauren at:renmadecalligraphy.com@renmadecalligraphyPAGE 13CONFETTI LETTERINGMarie Browning is a best-selling author and Tombow’s Signature Designer. With more than 32books in print and over 2 million copies sold, Marie has been sharing her knowledge on craftingand lettering for years. When she isn’t happily crafting at her home in Canada, she is spendingtime with her family. MARIE Follow Marie at:mariebrowning.comyoutube.com/tombowusaPAGE 172
APPLYING PRESSURE IN BRUSH CALLIGRAPHYWhen creating brush calligraphy, it is important to understand when to apply pressure. SHARISSE The amount of pressure you apply to your brush pen directly affects the width of each of yourstrokes. The more pressure you apply, the thicker your strokes will be. And the less pressureyou apply, the thinner your strokes will be.But what exactly is pressure? How do you create and control pressure? When do you apply pressure?WHAT IS PRESSURE?Pressure is the act of exerting force of an object(such as a brush pen) onto something else (suchas a piece of paper).Pressure can be heavy and forceful, or it can belight and gentle. The amount of pressure you needdepends on the writing style and effect you desire.When creating brush calligraphy in particular,you want to apply heavy pressure to create thickdownstrokes and light pressure to create thinupstrokes. The variation of thick and thin strokes iswhat defines calligraphy. Therefore, knowing whento apply pressure is crucial for creating brushcalligraphy.HOW DO YOU CREATE & CONTROLPRESSURE?As mentioned above, you create pressure bypressing your brush pen down onto the paper withforce.Before you begin writing, be sure you are holding your pen correctly and at the proper angle. Every brush pen is different insize and flexibility, which means you must spend time getting familiar with your pen.Hold your pen at an angle to avoid fraying the tip of your pen and to also optimize the flexibility of the tip. It may take sometime getting used to the brush pen, as it is very different from a regular marker or writing tool. (If you are left-handed, you canachieve the proper angle, too! Hold the brush pen using an overwriter grip, which will allow you to hold the pen at the sameangle as a right-hander.)When exerting pressure, you must maintain control over the brush pen and continue holding the pen at the proper angle.Your angle may adjust slightly with each stroke. Over time, you will find yourself adapting your own unique grip and hand/finger position around your brush pen to adjust for your own writing style.3
APPLYING PRESSURE IN BRUSH CALLIGRAPHYUSING PRESSURE TO CREATE THIN AND THICK LINES SHARISSE Once you are holding your pen with a comfortable grip and at the proper angle, bring the pento the page and begin by barely touching the tip of the paper. When creating thin strokes, youdo not need to apply much pressure, if any at all. Once the tip of your pen touches the paper,slowly and carefully draw a line at an angle, and do not exert much force with the pen.To create a thicker stroke, apply morepressure to the pen. Press your brush penonto the page (maintaining the proper angle)and watch as the tip flexes or slightly bends,allowing more of the tip to touch the page.Keep this pressure, or amount of force,on the pen, and draw a stroke. If you areholding your pen at the right angle, you’ll seethat the stroke is significantly thicker thanyour previous upstroke. You can experimentwith different amounts of pressure andobserve the varying stroke widths eachamount of pressure creates.HOW DO YOU CONTROL PRESSURE?Controlling the pressure can be tricky when you are first learning brush calligraphy. A huge part of gaining control is knowingyour pen. Be sure to get familiar with your pen and learn how to hold it correctly.To control the pressure you exert, practice varying amounts of pressure for long periods of time. In other words, PRACTICE!The biggest advice that has helped me develop a good sense of control is to break down my words and letters and goslow. If you get too much ahead of yourself and try to write long paragraphs before you master basic strokes, you will findit difficult and frustrating to master controlover your pen. Do not rush or else you riskcompromising quality and the ability toimprove your strokes based on the pressureyou exert.For starters, begin with the lightest amountof pressure you can exert, one in whichyou are barely touching the page. Createstrokes with this amount of pressure onlyand fill an entire page with that stroke. Then,increase the amount of pressure slightly,and fill a new page with that stroke. Drills,or practice sessions, in which you work oncreating thin and thick lines will best helpyou develop control over pressure.Here are some example strokes to practice 4
APPLYING PRESSURE IN BRUSH CALLIGRAPHYUSING PRESSURE TO CREATE THIN AND THICK LINESTry these simple drills to get familiar with your brush pen, experiment applying various amounts ofpressure, and identify the areas in which you need further practice. SHARISSE Left: The lowercase “i” repeated over and over and connected tothe next.Below: Lowercase letters containing more advanced strokes.Remember to hold your pen at the proper angle as you write theentire letter.View a short video on how to apply light pressure for achieving thin strokes, and heavy pressure for downstrokes for achievingthick strokes here: https://youtu.be/A17OOx8egYg.These strokes are great for practicing control over the brush pen, which in turn contributes to better control of your brushcalligraphy.5
MIX AND MATCH LETTERS AMANDA One of the lettering styles that I really enjoy using is a mixed script and print style that uses theletter styles interchangeably. I get lots of people asking if it is a font but, nope, it’s just somethingthat flows out of my pen. I don’t have a special alphabet that I practice to write this, I just use theletters that I know and mix and match them together, rather than only using one style at a time. Ithought I would give you a few tips on how make your own mix and match lettering.I find the mix and match style is fantastic for letting letters cuddle.That’s a weird way to think about it but I always try to have my lettersinteracting somehow, like fitting together gently as if they are pieces of apuzzle. This is easy with single words but gets more complicated whenthere are multiple lines of text and they have to fit together top to bottomas well.I think the best way to explain how to use this lettering style is to workthrough a piece together. I’m creating a poster for a friend that saysPatience, Perspective, Prayer. Because she is awesome and has greattaste, she wants them to be written in the playful mixed script style that Ilove so much.THERE ARE A FEW THINGS THAT I KEEP IN MIND WHEN I’MWRITING THE LETTERS OUT:1. Most of the letters should be approximately the same size as eachother. The only letters that should be smaller are usually vowels.2. If there are two of the same letter (or more), they should each bewritten in a different style.3. There should be a random mix of script and printed style letters in roughly equal numbers.4. But most importantly, I approach each piece knowing that there are no hard and fast rules to follow.When I start on a piece, I always scribble my words out in pencil at thetop of my page and go from there. For pieces with multiple words, Itypically start with the middle word and letter out from there. In this case,that means that I’ll be starting with the word Perspective. Still working inpencil, I usually write my first word out a few times and see which versionI like the best.Since this piece has a plethora of P’s, I don’t want them all to look thesame which means that I’ll have to get creative with them. That meansI need to use flourishes and changes in size and shape. I don’t want tochange the angle of the letters too much because that will make themlook like they aren’t all a part of a cohesive piece.Once I’ve picked my starting word, I build off of that, by completing theword (or words) that come before. When I write them in, I make thebaselines (or bottoms) of the letters go down into the spaces left in thetop of the middle word, while creating a consistent upper limit to theletters. This helps the words look like they are naturally nesting togetherand creates a pleasing border at the top of the piece.6
MIX AND MATCH LETTERS AMANDA When I add the word (or words) below what I’ve already done, I make some of the letters floathigher to fill in the spaces or I stretch them taller than normal like little letter giraffes. Just likewhen I did the word above, I’m always trying to create a straight baseline with the bottom wordso that it gives a generally straight border.After coming up with a composition that I like, I pull out my tracingpaper and my Tombow Fudenosuke and use my brush pen to write thewords out.I find that sometimes the composition looks different once I do themwith a Tombow Dual Brush Pen and, before I move onto a final product,I want to make sure that I like the way that it looks in ink. Using my penonce my sketching phase is finished also helps to conserve my ink. Withthe number of pieces that I do, anytime I can save some ink is fantastic!With just a few tweaks, the inked sketch is ready to go! When I scalesomething up for a poster, I always sketch out my design with a pencilagain first. Then I grab my Tombow Dual Brush Pen, which is great forlarge scale pieces, and go over my lightly penciled letters (make surethe pencil is light so that it is not noticeable underneath the marker).If the edges of my letters aren’t as crisp as I want them to be, I flip thepen over and use the fine tip to touch up any edges that I’m not happywith.This is perfect for me since I do most of my large scale work sprawledover the floor and getting up to grab another pen simply reeks ofeffort.The final product on acid free, archival quality paperwith an acid free Tombow pen is something that Iknow that my friend will cherish for years to comeand it will look just as great then as it does now.7
BIG, BOLD AND COLORFUL LETTERINGSTART WITH A SKETCH MAIA Sketching your lettering before you get started is always a good idea. A good sketching kit caninclude: Tombow MONO Drawing Pencil, Tombow MONO NP Eraser, Tombow MONO SandEraser and of course if you want to add some color to the mix you can use Tombow RecycledColored Pencils.I love using the Black Tombow Dual Brush Pen and the FudenosukePens to make my lettering and scan it to make it digital.TIPS FOR WORKING WITH THE DUAL BRUSH PENSUse the fine tip of the Tombow Dual Brush Pen to make little flourishesaround your word.Make your letters bold by writing over them a few times using lightershades of one color. Refer to the Tombow Dual Brush Pen ColorSelector to find which colors are in the same families.If complicated flourishing is hard for you, try making simple linesaround the letters rather than making flourishes out of letters.To give different tones to a word, write it in the lightest color, write overthem using more colors using the darkest last. You can also use aTombow Blender Pen to blend the colors a little bit more.8
SPACING, COLORS AND GLUE PEN FUNGETTING PERFECT SPACINGHere you’ll see how to achieve perfect spacing by analyzing the word you’re lettering. ABBY Below is how I analyze my word. I underline and upper line a few letters that have “tails” or canbe potential flourished objects. Then, I pink-circle the empty space that can be filled out.Once you figure everything out Let’s do the fun part! Let’s hand-letter this word using theTombow Fudenosuke Brush Pen soft nib.Once we figure out the basic lettering. It’s time to figure outwhat to do to fill out our “empty” spaces. What I see here, wecan def
One of the lettering styles that I really enjoy using is a mixed script and print style that uses the letter styles interchangeably. I get lots of people asking if it is a font but, nope, it’s just something that flows out of my pen. I don’t have a special alphabet that I practice to write this, I just use the letters that I know and mix and match them together, rather than only using one .