Transcription
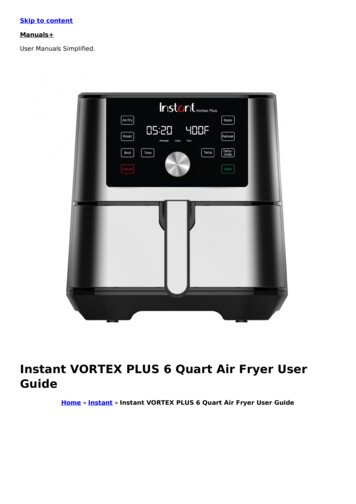
AIR FRYER LID6 QuartUser ManualWelcomeImportant SafeguardsInitial SetupProduct, Parts and AccessoriesControl PanelCleaning Before First UseCooking with the Air Fryer LidSmart ProgramsCooking Time ChartCare and CleaningTroubleshootingWarrantyContact Information
Welcome to the world of Instant cooking.Thank you for welcoming us into your kitchen.Having families ourselves, we developed the Instant Pot Air Fryer Lid toallow busy families and professionals alike to easily cook healthy, deliciousmeals in less time.We have partnered with chefs, authors and bloggers to compile a collectionof recipes that we hope you enjoy!Happy cooking,Robert J. WangFounder and Chief Innovation OfficerDownload the Instant Pot App Original Recipes New User Tips Getting Started VideosFind helpful how-to videos, download the app, or visit our recipe site.2
Table of ContentsIMPORTANT SAFEGUARDS. 4Special Cord Set Instructions. 8Product Specifications.8Compatibility.9Find Your Model Number.9Initial Setup.10Product, Parts and Accessories. 11Control Panel. 13Status Messages. 14Smart Program Settings. 16Cleaning Before First Use. 17Cooking with the Air Fryer Lid.18Smart Programs.18Cooking Time Chart.22Care, Cleaning and Storage .23Troubleshooting.24Warranty.25Contact Information. 273
IMPORTANT SAFEGUARDSWhen using your appliance, basic safety precautions should be followed,including the following:1.READ THE GETTING STARTED GUIDE AND ALL INSTRUCTIONS,SAFEGUARDS, AND WARNINGS BEFORE OPERATING THE APPLIANCE.FAILURE TO FOLLOW THESE SAFEGUARDS AND INSTRUCTIONS MAYRESULT IN INJURY AND/OR PROPERTY DAMAGE.2.Only use the appliance with a compatible Instant Pot multi-use pressurecooker base. See page 9 for a list of compatible products.3. WARNING Overloading electrical circuits can lead to fire, burns andinjury. DO NOT plug in the Air Fryer Lid and the Instant Pot multi-use pressurecooker base at the same time. Always unplug the Instant Pot cooker baseBEFORE plugging in the Air Fryer Lid.4.Unplug the appliance when not in use and before cleaning. To do so safely,press Cancel to return to Standby mode (OFF), then grasp the plug andremove it from the wall outlet. Never pull from the power cord.5.DO NOT use this appliance with the Instant Pot ceramic coated inner pot. Useonly with the Instant Pot stainless-steel inner pot.6.DO NOT attempt to use a Smart Program on the Instant Pot pressure cookerbase for any function when the Air Fryer Lid is placed on top of base cooker.7.Always check the cooker base for foreign objects before use.8.Overfilling the inner pot may cause damage, fire and/or personal injury. When using the pressure cooking lid,– DO NOT fill the inner pot and/or air fryer basket above the PC MAX —2/3line, or over the —1/2 line when cooking foods that expand.– DO NOT use the broil/dehydrating tray.9. When using the Air Fryer Lid,– DO NOT allow food to touch the element cover on the Air Fryer Lid.Oversized foods must not be inserted into the stainless-steel inner pot or theair fryer basket as they may create a fire or risk of electric shock.10. For household countertop use only. Do not use outdoors. Not for commercial use.11. Always operate the appliance on a stable, non-combustible, level surface.12.4 CAUTION Spilled food can cause serious burns. Keep the appliance andcord away from children. DO NOT let the power cord contact hot surfaces or open flame, includingthe stovetop. DO NOT let the power cord hang over the edge of tables or counters. DO NOT use power outlets below counters. DO NOT use the appliance with an extension cord.
IMPORTANT SAFEGUARDS13. CAUTION To protect against the risk of electrical shock, do not immersethe Air Fryer Lid, power cord or plug in water or other liquid. Do not rinse theappliance under a tap.14. Regularly inspect the appliance and power cord. Do not operate theappliance if: The power cord or plug show signs of damage. The appliance malfunctions. The appliance is dropped or damaged in any manner. For assistance,contact Customer Care at support@instantpot.com,www.instantpot.com/#Chat, or by phone at 1-800-828-7280.15. Do not use the appliance in electric systems other than 120 V 60 Hz. Do notuse with power converters or adapters.16. Heat from an external source will damage the appliance. DO NOT place the appliance on any kind of stovetop or in a heated oven. DO NOT rest the appliance on the power cord.17. CAUTIONThe appliance’s outer surfaces may become hot during use. Do not touch hot surfaces or try to reach through the elementcover to touch the heating element or the fan. Extreme caution must be used when moving the appliance.Only use the lid handle to lift and carry the Air Fryer Lid. Only place the Air Fryer Lid on the protective pad provided;do not place on countertop.18. Do not cover the air vents while the appliance is in operation. Doing so willprevent even cooking and may cause damage to the appliance throughoverheating.19. CAUTION When cooking, improper use may result in personal injury: DO NOT attempt to use the appliance for deep frying with oil. Do not use the appliance without the removable stainless-steel inner potin place, to reduce the risk of damaging the cooker base, causing fire andpersonal injury.20. DO NOT heat the empty stainless-steel inner pot with the Air Fryer Lid formore than 10 minutes, as doing so may damage the cooking surface.WARNINGRead this manual carefully and completely, and retain for future reference.Failure to adhere to safety instructions may result in serious injury or damage.5
IMPORTANT SAFEGUARDS DO NOT move the Instant Pot cooker base if the stainless-steel inner potcontains hot oil, hot food or hot liquids. DO NOT move the Air Fryer Lid if a Smart Program is running. DO NOT place the appliance against a wall or against other appliances.Leave 5" / 13 cm of space around and above the appliance. DO NOT operate the appliance on or near combustible materials such astablecloths and curtains. DO NOT cover or place objects on top of the appliance.21. CAUTION While cooking, the stainless-steel inner pot and accessoriesbecome extremely hot. To avoid personal injury, DO NOT touch the inner pot or accessories during or immediatelyafter cooking. Always use proper hand protection when removing accessories andwhen handling the hot stainless-steel inner pot. Always place hot accessories on a heat-resistant surface or cooking plate. Use extreme caution when disposing of hot grease.22. CAUTION When the Air Fryer Lid is in operation hot air is releasedthrough the air vents, which may result in personal injury. Keep your hands andface at a safe distance from the air vents. DO NOT place your face or handsover the appliance when removing the Air Fryer Lid.23. If the Air Fryer Lid emits black smoke, press Cancel and unplug it immediately.Wait for smoking to stop before removing the Air Fryer Lid, then allow it tocool to room temperature and clean the lid and inner pot thoroughly.24. DO NOT leave the appliance unattended while in use.25. DO NOT connect the appliance to an external timer switch or separateremote-control system.26. This appliance is NOT to be used by children or by persons with reducedphysical, sensory or mental capabilities. Close supervision is necessary whenany appliance is used near children and these individuals. Children should notplay with this appliance.27. Proper maintenance is recommended after each use. Let the appliance cooldown to room temperature before cleaning or storing or when adding orremoving parts and accessories. Refer to Care, Cleaning and Storage.28. Avoid contact with moving parts.29. Do not place flammable material in the inner pot, such as paper, cardboard orWARNING6Read this manual carefully and completely, and retain for future reference.Failure to adhere to safety instructions may result in serious injury or damage.
IMPORTANT SAFEGUARDSplastic.30. The included accessories are not to be used in a microwave, toaster oven,convection or conventional oven, or on a ceramic, electric, induction or gascooktop, or an outdoor grill.31. Do not clean with metal scouring pads. Pieces can break off the pad andtouch electrical parts involving a risk of electric shock.32. Do not use any accessories or attachments not authorized by Instant BrandsInc. The use of attachments not recommended by the manufacturer may causea risk of injury, fire or electric shock.33. Do not attempt to repair, replace, alter or modify components of theappliance, as this may cause electric shock, fire or injury, and will void thewarranty.34. Do not tamper with any of the safety mechanisms.35. Do not use the appliance for other than its intended use.SAVE THESE INSTRUCTIONSWARNINGRead this manual carefully and completely, and retain for future reference.Failure to adhere to safety instructions may result in serious injury or damage.7
IMPORTANT SAFEGUARDSWARNINGTo avoid injury, before using this appliance read this User Manual (or the Getting Started Guide and Safety,Maintenance and Warranty booklet) carefully and completely.WARNINGFAILURE TO FOLLOW ANY OF THE IMPORTANT SAFEGUARDS OR THE INSTRUCTIONS FOR SAFEUSE IS A MISUSE OF YOUR APPLIANCE THAT CAN VOID YOUR WARRANTY AND CREATE THE RISK OFSERIOUS INJURY.WARNINGElectrical shock hazard. Use grounded outlet only. DO NOT remove ground. DO NOT use an adapter. DO NOT usean extension cord. Failure to follow instructions can cause electrical shock or death.Special Cord Set InstructionsAs per safety requirements, a short power supply cord (0.6 m to 0.9 m / 23 in to35 in) is provided to reduce the hazards resulting from grabbing, entanglementand tripping.This appliance has a 3-prong grounding plug. To reduce the risk of electricshock, plug the power cord into a grounded (earthed) electrical outlet that iseasily accessible.Product SpecificationsModel:AIR FRYER LID 6WARNING81500 W120 V 60 Hz5.95 lbs2.7 kg10.7L x 11.61W x 6.14H in27.2L x 29.5W x 15.6H cmRead this manual carefully and completely, and retain for future reference.Failure to adhere to safety instructions may result in serious injury or damage.
IMPORTANT SAFEGUARDSCompatibilityFor use with Instant Pot 6 Quart Multi-Use Pressure Cookers.For use with Instant Pot stainless-steel inner pots. To avoid property damage,never use with ceramic-coated inner pots.Model: Duo 60 (IP-DUO60, IP-DUO60 V2, IP-DUO60 V2.1, IP-DUO60-ENW,IP-DUO60 V3, Duo 60 V3, Duo Frontier Rose 60, Duo Dazzling Dahlia 60, DuoWhite 60, Duo Teal 60, Duo Red 60, Duo Black SS 60, Duo Red SS 60, Duo NovaBlack SS 60). Lux 60 (IP-LUX60, Lux Blue 60, Lux Red 60, IP-LUX60 V2, IP-LUX60ENW, IP-LUX60-ENW-MM, IP-LUX60 V3, Lux Breezy Blossoms 60, Lux VintageFloral 60, Lux Black SS 60, Lux Red SS 60, Lux 60 V3). Duo Plus 60 (Duo Plus 60,Duo Plus Cinnamon SS 60, Duo Plus Blue SS 60, Duo Plus Copper SS 60,Duo Plus Black SS 60). Ultra 60 (Ultra 60). Viva 60 (Viva, Viva 60, Viva Cinnamon60, Viva Cobalt 60, Viva Eggplant 60, Viva Red SS 60, Viva Black SS 60). NovaPlus 60 (Nova Plus 60). Duo Nova 60 (Duo Nova 60).Air Fryer Lid is NOT compatible with (model) Smart WiFi 60, Duo Evo Plus 6, DuoEvo Plus 60, Duo SV 60 or Max 60.Find Your Model NumberThe model number is listed on the rating label at the back of your pressure cooker.If you are unsure of your model, contact customer service bysupport@instantpot.com, www.instantpot.com/#Chat, orby phone at 1-800-828-7280WARNINGRead this manual carefully and completely, and retain for future reference.Failure to adhere to safety instructions may result in serious injury or damage.9
Initial Setup Read all the Important Safeguards in this User Manual before using the AirFryer Lid. Failure to do so may result in property damage and/or personalinjury. ONLY use Air Fryer Lid with a compatible Instant Pot multi-use pressurecooker. See page 9 for a list of compatible products. Always use an Instant Pot stainless-steel inner pot when air frying. Never use aceramic coated inner pot. Remove all packaging from the appliance and ensure all parts and accessoriesare accounted for. Do not remove identification or safety warning stickers from the appliance. Follow Cleaning Before First Use instructions to clean the appliance beforefirst use.WARNINGOverloading electrical circuits can lead to fire, burns and injury.DO NOT plug in the Air Fryer Lid and the cooker base at the same time. Always unplug the cooker base BEFOREplugging in the Air Fryer Lid.CAUTIONTo avoid personal injury and/or property damage, place theappliance only on the protective padprovided or on a compatible InstantPot cooker base.10When in use, leave at least 5” / 13 cm Do not place the appliance on aof space around the appliance. Dostovetop. Heat from an externalnot cover the Air Fryer Lid, and do not source may damage the appliance.block the air vents.
Product, Parts and AccessoriesAir Fryer Lid 6 QuartFrontHandleContol PanelBackAir IntakeAir VentPower CordIllustrations are for reference only and may differ from the actual product.11
Product, Parts and AccessoriesInteriorElement CoverHeating Element(beneath element cover)AccessoriesBroil/Dehydrating TrayMulti-Level Air Fryer BasketProtective Pad andStorage CoverAir Fryer Basket BaseIllustrations are for reference only and may differ from the actual product.12
Control Panel12354761DisplayIndicates the cooking time, temperature and status messages.2CancelPress to stop a Smart Program at any time. The Air Fryer Lid will go to Standby mode.3StartPress to start a Smart Program.4Time /—Increase or decrease the cooking time.5Temp /—Increase or decrease the cooking temperature.6Smart ProgramsAir Fry, Broil, Bake, Roast, Reheat and Dehydrate.Press to select. Refer to Smart Programs for details.7LED IndicatorsIlluminate to indicate the active Smart Program.13
Control PanelStatus MessagesIndicates that the Air Fryer Lid is in Standby mode.Indicates that the Air Fryer Lid has begun preheating.Indicates: The lid is not seated properly. The inner pot is not present in the cooker base.Indicates that food in the cooking chamber shouldbe turned, flipped or rotated.Indicates that the fan is blowing to cool the appliance.Indicates that the Smart Program has finished.Indicates overheating in the inner pot. Refer toTroubleshooting.14
Control PanelSmart Program SettingsChange Temperature Scale ( F or C)When in Standby mode, press and hold the button over Temp until Fahrenheit( F) appears on the display.When in Standby mode, press and hold the button over Temp until Celsius ( C)appears on the display.Turn Sounds On / OffSound On: When in Standby mode, press and hold the button over Time untilS On appears on the display.Sound Off: When in Standby mode, press the — button beneath Time until SOFFappears on the display.Note: Error alerts cannot be silenced.Smart Program MemorySmart Programs are preset with optimal time and temperature settings.Once a Smart Program has been selected, the time and temperature can beadjusted to suit individual preferences. The new adjusted time and/or temperatureis saved when you press Start.Reset Individual Smart ProgramsWhen the Air Fryer Lid is in Standby mode, press and hold the desired SmartProgram button until the appliance beeps. The Smart Program has been restoredto the factory default setting.Reset All Smart ProgramsWhen the Air Fryer Lid is in Standby mode, press and hold Cancel until theappliance beeps. All Smart Programs have been restored to the factory defaultsettings.15
Cleaning Before First UseAir Fryer LidWipe the Air Fryer Lid with a soft, damp cloth or sponge to remove any residuefrom packing materials. Never rinse the lid under the tap.AccessoriesWash the accessories in your dishwasher or with hot water and dish soap beforeusing them for the first time. Rinse with warm, clear water and use a soft cloth todry the accessories.To assemble the multi-level air fryer basket:1. Place the air fryer basket base on a stable surface.2. Position the multi-level air fryer basket over the base and press down firmly. Theteeth on the base should pop into the groove on the outside of the basket.3. To easily lift and position the broil/dehydrating tray, hold the large holes in themiddle of the tray with 2 fingers.4. Insert the broil/dehydrating tray into the multi-level air fryer basket, ensuringthat the raised rim is facing down.3241162
Cooking with the Air Fryer LidYou can use the Air Fryer Lid to cook your dish from start to finish or to crispup food that has been cooked another way, such as by pressure cooking, slowcooking or sous vide.1. If plugged in, unplug the Instant Pot cooker base.2. Place your food in the multi-level air fryer basket (with or without the broil/dehydration tray), in an oven-safe baking dish or directly in the inner pot,according to food type or your recipe.Note: Use only an Instant Pot stainless-steel inner pot when using the Air Fryer Lid.Do not use a ceramic-coated inner pot.3. Insert the inner pot into a compatible Instant Pot cooker base.4. Place the Air Fryer Lid on the Instant Pot cooker base and plug in.Ensure you have unplugged your pressure cooker.5. Select a Smart Program: Air Fry, Broil, Bake, Roast, Reheat or Dehydrate.6. Use the Temp and Time / buttons to adjust the temperature and cooking timeas needed.Note: The Air Fryer Lid saves any customization made to the time or temperature afterpressing Start.7. Press Start. The display indicates On as the Air Fryer Lid preheats.8. Part way through the cooking cycle the lid beeps and the display indicatesturn Food.9. Lift the Air Fryer Lid to pause cooking. If you need to put it down, place it onthe protective pad.10. Turn, flip or rotate your food, then place the Air Fryer Lid back on the InstantPot cooker base to resume cooking.Note: If the lid is left off for longer than 3 minutes, it will revert to Standby modeand display OFF.Note: Some food does not require turning. If the lid is not removed after the turn Foodindicator appears, cooking will proceed after 10 seconds.11. When the Smart Program completes, the lid beeps and the display indicates End.Note: Except with the Reheat and Dehydrate Smart Programs, the display also indicatesCool and the fan blows for up to 5 minutes or until you lift the lid.17
Cooking with the Air Fryer Lid12. Lift the Air Fryer Lid off the Instant Pot cooker base and place it on theprotective pad, or let the Air Fryer Lid keep your food warm for up to 1 hour.Note: The Air Fryer Lid beeps after 5 minutes, 20 minutes and 60 minutes to remindyou that cooking has completed.13. Carefully remove your food, serve and enjoy!To store your Air Fryer Lid:1. Flip the protective padover so the grooved sideis up.2. Lower the Air Fryer Lidonto the protective padas indicated in the imageon the right.3. Turn the Air Fryer Lidclockwise until theprotective pad locks intoplace.CAUTIONDo not overfill the inner pot or accessories. To prevent risk of fire, damage and/orpersonal injury, ensure that food contents do not contact the heating element or theelement cover.CAUTIONThe inner pot, accessories and heating element area of the Air Fryer Lid will be hot.Use proper hand protection when adding, removing and turning food.WARNING18Overloading electrical circuits can lead to fire, burns and injury. DO NOT plug in theAir Fryer Lid and the Instant Pot cooker base at the same time. Always unplug theInstant Pot cooker base BEFORE plugging in the Air Fryer Lid.
Smart ProgramsThe Air Fryer Lid provides rapid air circulation to cook food and give your mealsall the rich, crispy golden flavor of deep frying with little to no oil. Smart Programsuse preset times and temperatures for optimal cooking results, but are fullyadjustable to suit your preferences.Depending on your recipe, food may be placed in the multi-level air fryer basket,in an oven-safe baking dish or directly in the inner pot. Always use the stainlesssteel inner pot, with or without the accessories.Do not crowd the multi-level air fryer basket or the broil/dehydrating tray. Air mustbe able to circulate freely around food items.SmartProgramAir FryTimeDefault*TimeRangeTempDefault*20 mins1 min to 1 hr400ºF / 204ºCTempRange300 to 400ºF149 to 204ºCRecommendedAccessoryAir Fryer BasketAir frying is an amazing way to bring out a lot of flavor using only a little oil.Crisp up previously cooked dishes or use the Air Fryer Lid to cook a dish from start tofinish.Ideal for fresh or frozen fries, chicken wings, shrimp and more.10 minsBroil1 min to20 mins400ºF / 204ºCNo rangeAir fryer basket, onbroil/dehydration trayBroiling involves direct top-down heating, and broiled foods benefit from being placedclose to the element.Perfect for melting cheese on French onion soup.30 minsBake1 min to 1 hr365ºF / 185ºC180 to 380ºF82 to 193ºCAir fryer basket,beneath broil/dehydration tray /oven-safe baking dishLike a tiny oven, the Bake Smart Program can be used to create decadent brownies, fluffycakes, pastries, buns and much more.Bake with the provided multi-level air fryer basket or any oven-safe baking dish, such as aspringform pan. Unless specified in your recipe, do not cover your batter when baking. If baking in the air fryer basket, refer to Cleaning Before First Use for details onassembly. Line the interior of the air fry basket with aluminum foil or parchment paper,then pour in loose batter. If using a baking dish, ensure to elevate the dish with a steam rack when cooking.19
Smart Default*40 mins1 min to45 mins380ºF / 193ºCTempRangeRecommendedAccessory250 to 380ºFAir Fryer Basket121 to 193ºCThe Roast Smart Program is perfect for beef, lamb, pork, poultry, vegetables and more.Give your roast a beautiful crust, crisp up poultry skins or give your vegetables a goldenexterior.Reheat15 mins1 min to1 hr280ºF / 138ºC120 to 360ºF49 to 182ºCAir fryer basket,beneath broil/dehydration tray /oven-safe baking dishWarm up meals without overcooking or drying them out.6 hours1 hour to72 hours125ºF105 to 165ºF52ºC41 to 74ºCAir fryer basket, onand beneath broil/dehydration trayDehydrate The Dehydrate Smart Program applies low heat over a long period of time to safely dryout food items.Make fruit leather, dehydrated vegetable chips and all kinds of jerky.Always follow a trusted recipe when dehydrating meat.*Smart Program times and temperatures are recommendations only. Always follow atrusted recipe, as time and temperature will vary based on food type and quantity.20
Cooking Time ChartFoodSmartProgramsFries (frozen)Air FryShrimpQuantityCooking Time*CookingTemperature*450 g (1 lb)18 to 20 minutes400ºF / 204ºC680 g (1.5 lb)22 to 24 minutes400ºF / 204ºCAir Fry250 to 300 g7 to 9 minutes400 F / 204 CBeef SteakAir Fry350 to 400 g13 to 15 minutes400 F / 204 CPorkAir Fry280 to 300 g17 to 19 minutes375 F / 190 CQuater ChickenAir Fry350 to 450 g37 to 39 minutes400 F / 204 CCauliflowerAir Fry150 to 200 g11 to 13 minutes400 F / 204 CCarrotsAir Fry0.5 lb (227 g)8 to 10 minutes400 F / 204 CGreen BeansAir Fry0.5 lb (227 g)9 to 11 minutes400 F / 204 CAsparagusAir Fry16 to 20 pieces3 to 5 minutes400 F / 204 CChicken WingsAir Fry6 to 8 pieces19 minutes385 F / 196 C*Cooking times and temperatures are recommendations only.Always follow a trusted recipe.For a complete list of cooking times, visit our website.CAUTIONAlways use a meat thermometer to ensure the internal temperature reaches a safeminimum temperature. Refer to the USDA’s Safe Minimum Internal TemperatureChart for more information.21
Care, Cleaning and StorageUnplug the Instant Pot Air Fryer Lid and let it cool to room temperature beforecleaning or storage.Never use harsh chemical detergents, scouring pads or powders on any of theparts or components.Clean after each use, and allow the appliance to dry completely before furtheruse or storage.PartCleaningMethodInstructionMulti-Level Air Fryer Disassemble before cleaning.Basket Optionally, spray the cooking tray and/or air fryer basketwith non-stick cooking spray before adding food. Broil/Dehydration Tray To make cleaning easier, line the bottom of the air fryer Basebasket with aluminum foil or parchment paper.Protective Pad andStorage CoverDishwasherSafe* andHandWashable Clean after each use. Once the appliance is cool, clean the heating element coverand surrounding area with a soft, damp cloth or sponge.Ensure it is free of food debris and/or grease splatter.Air Fryer Lid Do not remove the element cover. Wipe the exterior clean with a soft, damp cloth orsponge. Do not rinse—wipe dry with a soft cloth.Power CordDamp ClothOnly Wipe visible particles off power cord as needed. Do not fold the power cord when storing.*Some discoloration may occur after machine washing, but this will not affect the cooker’s safety orperformance.WARNINGDo not immerse the appliancein water or any liquid.Do not rinse the applianceunder a tap.22Without proper cleaning, foodand grease splatter may buildup around the heating element,causing the risk of smoke, fireand personal injury.If you smell or see black smoke,press Cancel and unplug theappliance. Once cool, clean foodsplatter or grease with a soft clothand mild detergent.
TroubleshootingRegister your product today.Contact Customer t.com/#ChatProblemPossible ReasonThe appliance is not plugged in.Air Fryer Lid isplugged in but Bad power connection orno power.will not turnon, or turns offduring cookingSolutionPlug the power cord firmly into a grounded 120 Voutlet.Plug the power cord firmly into a grounded 120 Voutlet.Inspect power cord for damage. If damage isnoticed, contact Customer Care.Check the outlet to ensure it is powered.Electrical fuse has blown.Contact Customer Care.Microswitch is damaged.Contact Customer Care.WARNINGStop cooking immediately. Press Cancel, then unplug theappliance. When smoking stops, place the Air Fryer Lid on theprotective pad provided.Black smoke is Food is burning.coming fromthe Air Fryer Lid Using an oil with a lowsmoke point.Faulty circuit or heatingelement.Cooking foods with excessfat, such as bacon, sausageand burgers may result inwhite smoke.Allow it to cool to room temperature before cleaning.Remove food and clean affected area thoroughly.Choose a neutral oil with a high smoke point, suchas canola, avocado, soybean, safflower or rice bran.Contact Customer Care.Avoid air frying foods with a high fat content.Check drip pan for excess oil or fat, and carefullyremove as needed after cooking.White smokePat dry moist food ingredients before air frying. Dois coming from Water is vaporizing, producingnot add water or other liquid to the inner pot whenthe Air Fryer Lid thick steam.air frying.Seasoning on food has blowninto element.Be mindful when seasoning food. Spray vegetablesand meats before adding seasoning so it betteradheres to the ingredientsAny other servicing should be performed by an authorized service representative.23
WarrantyLimited WarrantyThis Limited Warranty is effective for one year from the date of original consumer purchase. Proof of original purchasedate and, if requested by an authorized representative of Instant Brands Inc. (“Instant Brands”), return of your appliance,is required to obtain service under this Limited Warranty. Provided that this appliance is operated and maintained inaccordance with written instructions attached to or furnished with the appliance, Instant Brands will, in its sole andexclusive discretion, either: (i) repair defects in materials or workmanship; or (ii) replace the appliance. In the event thatyour appliance is replaced, the Limited Warranty on the replacement appliance will expire 12 months from the date oforiginal consumer purchase.This Limited Warranty extends only to the original purchaser and use of the appliance inthe United States of America and Canada. This warranty does not cover units that are usedoutside of the United States of America and Canada.Any modification or attem
cover to touch the heating element or the fan. Extreme caution must be used when moving the appliance. Only use the lid handle to lift and carry the Air Fryer Lid. Only place the Air Fryer Lid on the protective pad provided; do not place on countertop. 18. Do not cover the air vents while the appliance is in operation. Doing so will
