Transcription
Pinnacle StudioVersion 17Including Pinnacle Studio Plusand Pinnacle Studio UltimateYour Life in Movies
Copyright 2013 Corel Corporation. All rights reserved.Please respect the Rights of Artists and Creators. Content such as music,photos, video and celebrity images are protected by the laws of manycountries. You may not use other people’s content unless you own the rightsor have the permission of the owner.This product or portions thereof are protected in the United States by one ormore of the following United States Patents: 5,495,291; 6,469,711; 6,532,043;6,901,211; 7,124,366; 7,165,219; 7,286,132; 7,301,092 and 7,500,176; and inEurope by one or more of the following European Patents: 0695094 and0916136. Other patents are pending.Mpegable DS 2.2 2004 Dicas Digital Image Coding GmbH. Portions ofthis product were created using LEADTOOLS 1991-2006, LEADTechnologies, Inc. All rights reserved. Portions utilize Windows MediaTechnologies 1999-2005 Microsoft Corporation MPEG Layer II Audioby QDesign Corp. This product is based in part on the work of theIndependent JPEG Group.No part of this manual may be copied or distributed, transmitted, transcribed,stored in a retrieval system, or translated into any human or computerlanguage, in any form by any means, electronic, mechanical, magnetic,manual, or otherwise, without the express written permission of CorelCorporation.Corel Corporation4400 Bohannon DriveMenlo Park, CA 94025, USA2Pinnacle Studio
Table of contentsBEFORE YOU STARTIXAbbreviations and conventions . ixHelp and on-line help . xiCHAPTER 1: USING PINNACLE STUDIO1The Library . 3The Movie Editor and the Disc Editor . 6The media editors . 7The Player . 8Pinnacle Studio Projects . 9CHAPTER 2: THE LIBRARY11Understanding the Library . 14Location tabs . 16The Asset Tree . 17Collections . 19Managing Library assets . 21The Browser . 24Thumbnails and details . 25Optional indicators and controls . 28The Library preview . 31Using the Library . 35Choosing what to display . 35Tags . 38Correcting media . 41Video scene detection . 42SmartSlide and SmartMovie . 44SmartSlide . 44SmartMovie . 47Table of contents3
CHAPTER 3: THE MOVIE EDITOR51The project timeline . 55Timeline fundamentals . 55The timeline toolbar . 60The timeline track header . 67Timeline audio functions . 69Editing movies . 69Adding clips to the timeline . 71Title Editor, ScoreFitter, voice-over . 75Deleting clips . 76Clip operations . 76Using the Clipboard . 88Speed . 89Movies within movies . 91Transitions . 92Clip effects . 98Clip context menus . 99CHAPTER 4: MEDIA EDITING: CORRECTIONS101Media editing overview . 103Correcting photos . 108Photo editing tools . 109Photo corrections . 110Correcting video . 115Video tools . 116Video corrections . 119Correcting audio . 122CHAPTER 5: MEDIA EDITING: EFFECTS123Effects in the media editors . 125Effects on the timeline . 129The Settings panel . 131Working with keyframes . 133Video and photo effects . 135Working with transitions . 1404Pinnacle Studio
Pan-and-zoom . 141CHAPTER 6: MONTAGE145The Montage section of the Library . 147Using Montage templates . 148Montage clips on the timeline . 149Anatomy of a template . 151Montage Editing . 154Using the Montage Editor . 155CHAPTER 7: THE TITLE EDITOR157Launching (and leaving) the Title Editor . 159The Library . 160The Presets Selector . 162Preset Looks . 163Preset Motions . 164Creating and editing titles . 166Background settings . 168Look settings . 169The Edit window . 173Text and text settings . 175Titles and stereoscopic 3D . 180The Layer List . 181Working with the Layer List . 182Working with layer groups . 186CHAPTER 8: SOUND AND MUSIC191The Audio Editor . 193Audio corrections . 197Audio effects . 201Audio on the timeline . 204Timeline audio functions . 204Audio creation tools . 211Table of contents5
ScoreFitter . 213The Voice-over tool . 214CHAPTER 9: DISC PROJECTS217Disc menus . 218Adding disc menus . 221Previewing disc menus . 223Menu editing on the timeline . 225Timeline menu markers225Authoring tools226The Chapter Wizard . 229The Menu Editor . 232Menu buttons . 233The Disc Simulator . 235CHAPTER 10: THE IMPORTER237Using the Importer . 238Importer panels . 240The Import From panel . 240The Import To panel . 243The Mode panel . 246The Compression Options window . 248The Scene Detection Options window . 249The Metadata panel . 251The Filename panel . 251Selecting assets for import . 253Import from file . 253Selecting files for Import . 254Import from Cloud . 259Scan for assets . 260Import from DV or HDV camera . 261Import from analog sources . 265Import from DVD or Blu-ray Disc . 266Import from digital cameras . 267Stop motion . 267Snapshot . 2696Pinnacle Studio
CHAPTER 11: THE EXPORTER273Output to disc or memory card . 276Output to file . 280Output to cloud . 289Output to a device . 293CHAPTER 12: SETUP297Watchfolders . 298Audio device . 298Event logging . 298Import . 298Keyboard . 300Preview . 301Project settings . 303Storage locations . 304APPENDIX A: TROUBLESHOOTING . 305Contacting support . 306Top support issues . 307Compatibility with past content . 307Capture hardware compatibility . 310Serial number information . 311Error or crash while installing . 312Hangs or crashes while launching . 314Troubleshooting software crashes . 315Export problems . 320Disc playback problems . 321Resources, tutorials and training . 323APPENDIX B: VIDEOGRAPHY325Creating a shooting plan . 325Editing . 326Rules of thumb for video editing . 329Soundtrack production . 331Title . 332Table of contents7
APPENDIX C: GLOSSARY333APPENDIX D: KEYBOARD SHORTCUTS347APPENDIX E: THE INSTALLATION MANAGER353The Welcome Screen . 355Plugs-ins and bonus content . 357Equipment requirements . 358INDEX8361Pinnacle Studio
Before you start*Not all features described in the Help are included in all versions ofPinnacle Studio. For more information, please visitwww.pinnaclesys.com.Thank you for purchasing Pinnacle Studio. We hope you enjoy usingthe software.If you are new to Pinnacle Studio, we recommend that you keep themanual handy for reference even if you don’t actually read it all theway through.In order to ensure that your movie-making experience gets off on theright foot, please review the topics below before continuing toChapter 1: Using Pinnacle Studio. We alsorecommendconsideration of the product’s equipment requirements, which aregiven on page 358 in Appendix E: The Installation Manager.Abbreviations and conventionsThis guide uses the following conventions to help organize thematerial.Common termsAVCHD: A video data format used by some high-definitioncamcorders, and for creating DVD discs that can be read on Blu-rayplayers. Successful editing of AVCHD files requires morecomputing power than other formats supported by Pinnacle Studio.DV: This term refers to DV and Digital8 camcorders, VCRs andtapes.HDV: A ‘high-definition video’ format that allows video in framesizes of 1280x720 or 1440x1080 to be recorded in MPEG-2 formaton DV media.Before you start9
1394: The term ‘1394’ applies to OHCI-compliant IEEE-1394,FireWire, DV or i.LINK interfaces, ports and cables.Analog: The term ‘analog’ applies to 8mm, Hi8, VHS, SVHS, VHSC or SVHS-C camcorders, VCRs and tapes, and to Composite/RCAand S-Video cables and connectors.Buttons, menus, dialog boxes and windowsNames of buttons, menus and related items are written in italics todistinguish them from the surrounding text, whereas window anddialog names are written with initial capital letters. For example:Click the Edit menu button to open your menu in the Menu Editor.Choosing menu commandsThe right arrowhead symbol ( ) denotes the path for hierarchicalmenu items. For example:Select File Burn Disc Image.Context menusA ‘context menu’ is a pop-up list of commands that appears whenyou click with the right mouse-button on certain areas of theapplication interface. Depending where you click, a context menumay pertain either to an editable object (like a clip on an editingtimeline), to a window, or to a zone such as a control panel. Onceopen, context menus behave just like the ones on the main menu bar.Context menus are available in most parts of the Pinnacle Studiointerface. Our documentation generally takes for granted that youknow how to open and use them.Mouse clicksWhen a mouse click is required, the default is always a left-clickunless otherwise specified, or unless the click is to open a contextmenu:Right-click and select Title Editor. (Or, one might say, “SelectTitle Editor from the context menu.”)xPinnacle Studio
Key namesKey names are spelled with an initial capital and are underlined. Aplus sign denotes a key combination. For example:Press Ctrl A to select all the clips on the timeline.Please refer to Appendix D: Keyboard shortcuts for a comprehensivetable of available shortcuts.Online manual and Tool TipsImmediate help is available while you are working in PinnacleStudio, via the User Manual and Tool Tips.User Manual:Click Help - User ManualTool tips: To find out what a button or other Studio control does,pause your mouse pointer over it. A ‘tool tip’ pops up to explainthe control’s function.Before you start11
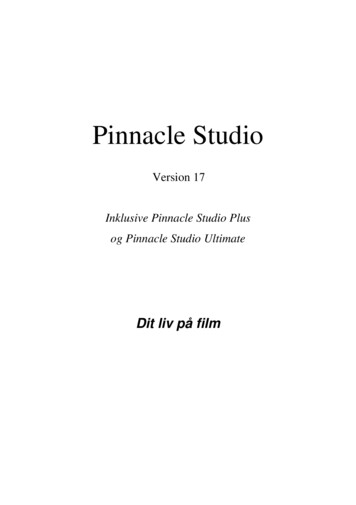
CHAPTER 1:Using Pinnacle StudioFor a simple outline of the digital movie-making process, you don’thave to look any further than the central tab group of PinnacleStudio’s main window. The same steps apply to any type ofproduction, from an unpretentious slideshow with dissolves betweeneach frame to a 3D extravaganza containing hundreds of carefullyarranged clips and effects.Pinnacle Studio’s main control barsummarizes the movie-making process.The ImporterImport, on the left, is a preparatory step. It involves procedures like‘capturing’ video from your analog or DV camcorder, bringing inphotos from a digital camera, and copying media files to your localhard drive from a network location.The Pinnacle Studio Importer provides tools for these tasks, alongwith a Snapshot feature for grabbing frames from video files, and aStop motion tool for building up video frame-by-frame. See Chapter10: The Importer for details.File menu import commands: Choosing Import from the file menuhas the same effect as clicking the Import tab: it opens the Importer.The menu provides three other import-related choices as well. EachChapter 1: Using Pinnacle Studio1
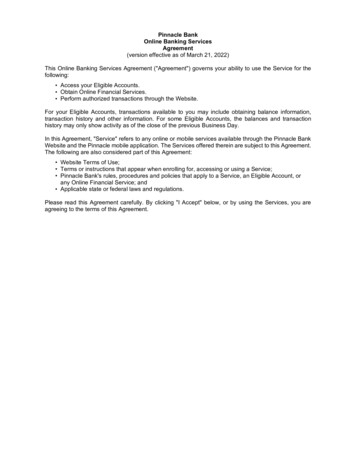
of these opens a Windows file dialog to permit import of files from ahard drive or other local storage. Import previous Pinnacle Studio Projects lets you load movieprojects created with earlier versions of Studio. Import Studio for iPad App Projects lets you bring in projectsexported from Studio’s companion app for the iPad. Quick Import lets you directly select ordinary media files – photo,video, audio and project – for import.Principal controls in the Importer’s Snapshot tool.The ExporterAt the other end of the movie-making process is Export. By the timeyou get to this stage, the hard part of the task is behind you. Thecreative energy that went into making your movie has paid off in aproduction that now lacks only one ingredient – an audience.The Pinnacle Studio Exporter helps you over that last hurdle withtools for taking your movie to its viewers, whoever and whereverthey might be. Create a digital movie file in the format of yourchoice, burn a DVD, or upload directly to destinations in the Cloudlike YouTube and Vimeo, or to your personal Cloud-based storagearea in Box.2Pinnacle Studio
Like the Importer, the Exporter opens in a separate window, andreturns to the main window after its work is done. Turn to Chapter11: The Exporter to learn more.Preparing to create a video file in the Exporter.The central tabsThe three central tabs, Library, Movie and Disc, are where most ofyour work in Pinnacle Studio takes place. The first of these opensthe main view of the Library, where you can ‘curate’ your mediacollections.The other tabs open the two project editors, one for digital movies,and the other for disc projects, which are digital movies enhancedwith interactivity in the form of DVD menus.The LibraryThe Library is a cataloguing and management tool for all the filebased resources – or assets – that you can draw on when authoring.Almost all of the materials of your movie – video footage, music andaudio files, and many specialized resources such as transitions andeffects – originate as assets in the Library. Many Library assets areChapter 1: Using Pinnacle Studio3
supplied with Pinnacle Studio, and are available for royalty-free use.These include professionally-designed titles, DVD menus, andMontages in both 2D and stereoscopic 3D.The Library uses watchfolders for keeping up automatically with thechanging population of media files on your system. On thewatchfolders page of the Pinnacle Studio Setup control panel, enterthe names of your media directories, especially those that you updatefrequently. Thereafter the Library will scan those directoriesregularly for changes, and update itself as needed. See“Watchfolders” on page 298 for details.Main view: When you click the Library tab, the Library takes overthe main window. This ‘main view’ gives you spacious access to anumber of cataloguing and search tools, including those forcategorizing assets by means of ratings and tags, and those forcreating user-defined asset collections.Compact view: The ‘compact view’ of the Library squeezesvirtually the whole functionality of the main view into a panelembedded within certain other windows, such as the Movie Editorand the Disc Editor. The primary purpose of the compact view is toallow assets to be brought into a movie or disc project from theLibrary by drag-and-drop.The main view of the Library consists of navigation controls forexploring the catalog structure (left) and a browser for examiningand selecting assets (right).4Pinnacle Studio
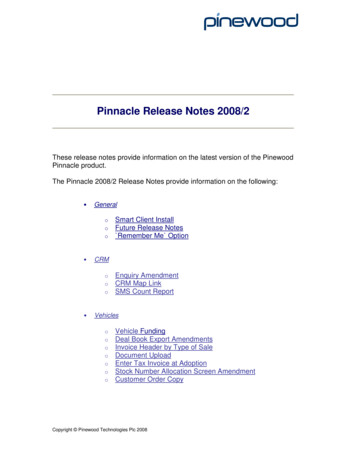
Player: The tools available from within the Library include thePlayer, a viewer that works for all media types handled by theapplication. When used from the main view of the Library, thePlayer opens in a separate window. When the compact Library isused, an embedded version of the Player appears in the samewindow. See “The Player” on page 8 for further information.Previewing a Library video asset in the resizable Player window,with full transport controls including a shuttle wheel. You canwork in the main window while the pop-up Player is open.For comprehensive coverage of the Library and its uses, please seeChapter 2: The Library.The next stepThe next step, once you know your way around the Library and havemade any changes needed to the default set-up, is to start creating amovie. There are two ways to go about this.The usual way: If you want to exert detailed control over the waymedia assets are used in your production, you will usually startbuilding your movie or disc project from scratch in one of the twoproject editors. These are described below.The easiest way: For ultra-quick results, the Library offers anotherway. Clicking the SmartSlide or SmartMovie tools at the bottom ofthe Library main view opens an extra tray of controls. With either ofChapter 1: Using Pinnacle Studio5
these you select some visual media assets to serve as the basis of theproject, choose music for a soundtrack, and make a handful of othercustomizations. Then the software takes over, automaticallygenerating a full-scale Pinnacle Studio project containing the mediaand options requested. You can export the project immediately, oredit it further by hand as you choose. For details, please see“SmartSlide” on page 44 and “SmartMovie” on page 47.The Movie Editor and the Disc EditorOnce you have gathered your materials together and organized themto your satisfaction in the Library, it’s time to get to work on a videoor a slideshow. If you are working on a disc production specifically,you can immediately start work in the Disc Editor, which is just likethe Movie Editor but has extra tools for creating and setting up DVDmenus. The Disc Editor is described in Chapter 9: Disc projects.If you aren’t planning on creating a disc, or aren’t sure, or if disc isonly one of the output media you are targeting, the Movie Editor isthe right place to start. Once your movie is completed, you canexport it to the Disc Editor and add the menus.The Movie Editor and the Disc Editor exist side-by-side, but apartfrom the export feature just mentioned, they do not interact. If youwant, you can have a regular movie project and a disc project loadedsimultaneously, and switch from one to another at will.In both the Movie Editor and the Disc Editor, a multitracktimeline occupies the lower part of the display. Most of the ‘clips’on the timeline come from the Library; a few types, like automaticbackground music, are generated with special tools.6Pinnacle Studio
Both project editors include embedded versions of the Library andthe Player in addition to the timeline display. To build a project, dragassets from the Compact Library onto the timeline tracks orStoryboard area of the project editor, where they are known as‘clips’. Both the Movie Editor and the Disc Editor can be used withstereoscopic 3D as well as 2D material.The preview type control above the Player lets you switch betweenviewing the current Library asset (‘source’) and the current timelineclip. In the Disc Editor, an additional preview type (‘menu’) lets youuse the Player as an editor for linking disc menus to points on thetimeline.Timeline editing, a central activity in project authoring, is covered indetail in Chapter 3: The Movie Editor.The media editorsAdditional windows are often needed for working with particulartypes of media. In general, you can open an editor windowappropriate to any asset or clip by double-clicking the item.Corrections from the Library: The editors for the standard mediatypes of video, photo and audio are particularly important. Wheninvoked from the Library (by double-clicking an asset), each of theseeditors provides a suite of correction tools appropriate to its mediatype. These tools can be applied directly to Library assets in order toremove camera shake from video, trim unwanted material from aphoto, or suppress audio hiss, to give just a few examples.When a correction is applied to a Library asset, the media file is notmodified. Instead the correction parameters are saved in the Librarydatabase. They can be altered at any time, or removed, as your needsdictate. The corrections you make in the Library are brought with theasset when you add it to your timeline as a clip.Corrections from the timeline: When you open one of the standardmedia editors by double-clicking a timeline clip, the correction toolsChapter 1: Using Pinnacle Studio7
are again available, but in this context they apply only to the clip inthe project, not to the underlying Library asset.Transitions and Effects: When they are invoked from a project’stimeline, the media editors also offer a wide-range of enhancementsfor all three media types in the transition in, transition out, andeffects groups.Transitions let you punctuate the passage of one clip to the next withanything from a barely perceptible dissolve to an audienceawakening flare.Effects range from the practical (Brightness and contrast) to thetheatrical (Fractal fire). They can be animated with keyframedparameters to any degree of complexity, providing innumerableways to add creative interest to your productions. Some effects areparticularly designed for 3D material, and it is even possible to givea 3D appearance to 2D footage (using the S3D depth control).Pan-and-zoom: The Photo Editor provides one more tool, pan-andzoom, of its own. Like the effects just discussed, pan-and-zo
the software. If you are new to Pinnacle Studio, we recommend that you keep the manual handy for reference even if you don't actually read it all the way through. In order to ensure that your movie-making experience gets off on the right foot, please review the topics below before continuing to Chapte 1: Ur sing Pinnacle Studio. We also recommend