Transcription
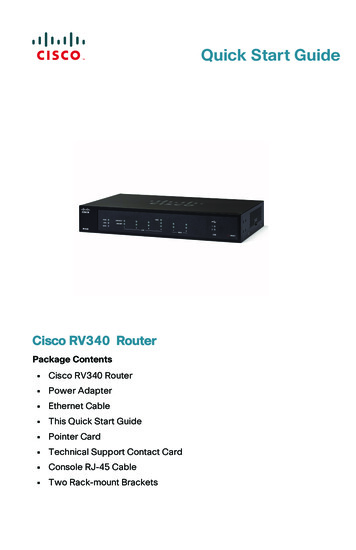
Quick Start GuideCisco RV340 RouterPackage Contents Cisco RV340 Router Power Adapter Ethernet Cable This Quick Start Guide Pointer Card Technical Support Contact Card Console RJ-45 Cable Two Rack-mount Brackets
WelcomeThe Cisco RV340 series of routers provide reliable internet accessconnectivity for small businesses. All of the Cisco RV340 series modelssupports two connections to one internet service provider, delivering highperformance by using load balancing, or to two different providers todeliver business continuity. Dual Gigabit Ethernet WAN ports allow load balancing and businesscontinuity. Affordable, high-performance Gigabit Ethernet ports enable rapidtransfer of large files, supporting multiple users. Dual USB ports support a 3G/4G modem or flash drive. The WAN canalso fail over to the 3G/4G modem connected to the USB port. SSL VPN and site-to-site VPN enable highly secure connectivity. Stateful packet inspection (SPI) firewall and hardware encryptionprovide strong security.This guide describes how to install your Cisco RV340 and launch the webbased Device Manager.1Installing the Cisco RV340To prevent the device from overheating or being damaged: Ambient Temperature—Do not operate it in an area that exceeds anambient temperature of 104 F (40 C). Air Flow—Be sure that there is adequate airflow around the device. Ifwall mounting the firewall, make sure that the heat dissipation holes areto the side. Circuit Overloading—Adding the device to the power outlet must notoverload that circuit. Mechanical Loading—Be sure that the device is level and stable toavoid any hazardous conditions and that it is secure to prevent it fromsliding or shifting out of position. Do not place anything on top of thefirewall, as excessive weight may damage it.2Cisco RV340 Router Quick Start Guide
WARNING This equipment must be grounded. Never defeat the groundconductor or operate the equipment in the absence of asuitably installed ground conductor. Contact the appropriateelectrical inspection authority or an electrician if you areuncertain that suitable grounding is available. Statement 1024.Desktop MountingFor desktop mounting, place the device on a flat surface so that it sits on itsfour rubber feet.Wall MountingThe router has two wall-mount slots on the bottom panel. To mount therouter on a wall, you will need the mounting hardware (not included).Please refer to the following note for the additional screw size required forinstallation instructions.NOTE Use two use two M3.5*16.0L (K) W-NI #2 screws.STEP 1 Drill two pilot holes, approximately 109 mm apart, into the surface.STEP 2 Insert a screw into each hole, leaving a gap between the surfaceand the base of the screw head of 1 mm to 1.2 mm.STEP 3 Place the router wall-mount slots over the screws and slide therouter down until the screws fit snugly into the wall-mount slots.WARNING Insecure mounting may damage the router or cause injury.Cisco is not responsible for damages incurred by insecure wallmounting.WARNING For safety, ensure that the heat dissipation holes are facingsideways.Rack MountingYour Cisco RV340 device includes a rack-mount kit that contains: Two rack-mount brackets Eight M4*6L (F) B-ZN #2 screwsCisco RV340 Router Quick Start Guide3
2Cisco RV340 FeaturesFront PanelPWROff when the device is powered offSolid green when the device is powered on andbooted.Flashing green when the device is booting up.DIAGOff when the system is on track to bootup.Slow blinking red (1Hz) when the firmwareupgrade is in progress.Fast blinking red (3Hz) when the firmwareupgrade is failing.Solid red when the system failed to boot-up withboth active and inactive images or in rescuemode.LINK/ACT ofWAN1, WAN2 andLAN1-4Off when there is no Ethernet connection.GIGABIT of WAN1,WAN2 and LAN1-4Solid green when at 1000M speed.DMZSolid green when the DMZ is enabled.Solid green when the GE Ethernet link is on.Flashing green when the GE is sending orreceiving data.Off when at non-1000M speed.Off when the DMZ is disabled.VPNOff when no VPN tunnel is defined, or all definedVPN tunnels have been disabled.Solid green when at least one VPN tunnel is up.Flashing green when sending or receiving dataover VPN tunnel.Solid amber when no enabled VPN tunnel is up.4Cisco RV340 Router Quick Start Guide
USB1 and USB2Off when no USB device is connected, or isinserted but not recognized.Solid green when the USB dongle is connectedto the ISP successfully. USB storage isrecognized.Flashing green when sending or receiving data.Solid amber when the USB dongle is recognizedbut fails to connect to ISP (no IP address isassigned). The USB storage access has errors.RESET To reboot the router, press the reset buttonwith a paper clip or pen tip for less than 10seconds. To reset the router to factory default settings,press and hold the reset button for 10seconds.Back PanelPOWER—Toggles power to the device on or off.12VDC (2.5A)—Power port that connects the device to the provided12VDC, 2.5 amp power adapter.USB 1—Type A USB port that supports flash drives and 3G/4G/LTE USBdongles. Caution: Use only the power supply provided with the device;using another power supply may cause the USB dongle to fail.Console Port—The router console port is designed for a serial cableconnection to a terminal or a computer that is running a terminal emulationprogram.Side PanelUSB 2—Type A USB port that supports flash drives and 3G/4G/LTE USBdongles. Caution: Use only the power supply provided with the device;using another power supply may cause the USB dongle to fail.Kensington Lock Slot - Lock slot on the right side to secure the devicephysically, using the Kensington lock-down equipment.Cisco RV340 Router Quick Start Guide5
Connecting the Equipment3Connect a configuration terminal (PC) to the device by using a LAN port.The terminal must be in the same wired subnetwork as the device toperform the initial configuration. As part of the initial configuration, thedevice can be configured to allow remote management.To connect a computer to the device:STEP 1 Power off all equipment, including the cable or DSL modem, thecomputer, and this device.STEP 2 Use an Ethernet cable to connect your cable or DSL modem to theWAN port on this device.STEP 3 Connect another Ethernet cable from one of the LAN (Ethernet)ports to the Ethernet port on the computer.STEP 4 Power on the WAN device and wait until the connection is active.STEP 5 Connect the power adapter to the 12VDC port of this device.CAUTIONUse only the power adapter that is supplied with the device.Using a different power adapter could damage the device orcause the USB dongles to fail.The power switch is on by default. The power light on the frontpanel is solid green when the power adapter is connectedproperly and the device is finished booting.STEP 6 Plug the other end of the adapter into an electrical outlet. Use theplug (supplied) specific to your country.STEP 7 Continue with the instructions in the Using the Setup Wizard toconfigure the device.6Cisco RV340 Router Quick Start Guide
4Using the Setup WizardThe Setup Wizard and Device Manager are supported on MicrosoftInternet Explorer, Mozilla Firefox, Apple Safari, and Google Chrome.To configure the device using the Setup Wizard, follow these steps:STEP 1 Power on the PC that you connected to the LAN1 port in Step 3 ofthe Connecting Equipment section. Your PC becomes a DHCPclient of the device and receives an IP address in the 192.168.1.xxxrange.STEP 2 Launch a web browser.STEP 3 In the address bar, enter the default IP address of the device,https://192.168.1.1. A site security certificate message isdisplayed. The Cisco RV340 uses a self-signed securitycertificate. This message appears because the device is notknown to your computer.STEP 4 Click Continue to this website to continue. The sign-in pageappears.STEP 5 Enter the username and password. The default username is cisco.The default password is cisco. Passwords are case-sensitive.STEP 6 Click Log In. The Router Setup Wizard is launched.STEP 7 Follow the on-screen instructions to set up your device. The RouterSetup Wizard should detect and configure your connection. If it isunable to do so, it asks you for information about your Internetconnection. Contact your ISP for this information.STEP 8 Change the password as instructed by the Router Setup Wizard orfollow the instructions in the Changing the Administrator Usernameand Password section. Log in to the device with the new usernameand password.NOTE We recommend that you change the password. You arerequired to change the password before enabling features such asremote management.The Device Manager Getting Started page appears. It displays themost common configuration tasks.STEP 9 Click one of the tasks listed in the navigation bar to complete theconfiguration.Cisco RV340 Router Quick Start Guide7
STEP10 Save any additional configuration changes and log out of thedevice manager.Changing the Administrator Username and PasswordTo change the Administrator username and password on the device:STEP 1 From the Getting Started page, select Change AdministratorPassword or select System Configuration User Accounts fromthe navigation bar.STEP 2 Check a username from the Local User Membership list and clickEdit.STEP 3 Enter the Username.STEP 4 Enter the Password.STEP 5 Confirm the Password.STEP 6 Check Group (admin, oper, test-group) in the Password StrengthMeter.STEP 7 Click Save.Troubleshoot Your ConnectionIf you cannot access your device by using the Setup Wizard, the devicemay not be reachable from your computer. You can test networkconnections by using ping on a computer running Windows:STEP 1 Open a command window by using Start Run and enter cmd.STEP 2 At the Command window prompt, enter ping and the device IPaddress. For example, ping 192.168.1.1 (the default static IPaddress of the device).If you can reach the device, you should get a reply similar to thefollowing:Pinging 192.168.1.1 with 32 bytes of data:Reply from 192.168.1.1: bytes 32 time 1ms TTL 128If you cannot reach the device, you should get a reply similar to thefollowing:Pinging 192.168.1.1 with 32 bytes of data:Request timed out.8Cisco RV340 Router Quick Start Guide
Possible Causes and ResolutionsBad Ethernet connection:Check the LEDs for the proper indications. Check the connectors of theEthernet cable to ensure that they are firmly plugged into the deviceand your computer.Wrong or conflicting IP address:Verify that you are using the correct IP address of the device.Verify that no other device is using the same IP address as this device.No IP route:If the device and your computer are in different IP subnetworks,remote access must be enabled and you need at least one router onthe network to route the packets between the two subnetworks.Unusually long access time:Adding new connections may take 30–60 seconds for the affectedinterfaces and LAN to become operational.Cisco RV340 Router Quick Start Guide9
5Where to Go From HereSupportCisco sco Support andResourceswww.cisco.com/go/smallbizhelpCisco Cisco Open SourceRequestwww.cisco.com/go/smallbiz opensource requestCisco Partner Central(Partner Login Required)www.cisco.com/web/partners/sell/smbSelect a link to download firmware for Ciscoproducts. No login is required.Product DocumentationCisco RV340www.cisco.com/go/RV340For EU Lot 26 related test results, see www.cisco.com/go/eu-lot26-results10Cisco RV340 Router Quick Start Guide
Cisco RV340 Router Quick Start Guide11
Americas HeadquartersCisco Systems, Inc.www.cisco.comCisco has more than 200 offices worldwide.Addresses, phone numbers, and fax numbersare listed on the Cisco website atwww.cisco.com/go/offices.78-100841-01Cisco and the Cisco logo are trademarks or registered trademarks of Cisco and/or its affiliatesin the U.S. and other countries. To view a list of Cisco trademarks, go to this URL:www.cisco.com/go/trademarks. Third-party trademarks mentioned are the property of theirrespective owners. The use of the word partner does not imply a partnership relationshipbetween Cisco and any other company. (1721R) 2020 Cisco Systems, Inc. All rights reserved.
Cisco RV340 Router Quick Start Guide 7 Using the Setup Wizard The Setup Wizard and Device Manager are supported on Microsoft Internet Explorer, Mozilla Firefox, Apple Safari, and Google Chrome. To configure the device using the Setup Wizard, follow these steps: STEP 1 Power on the PC that you connected to the LAN1 port in Step 3 of