Transcription
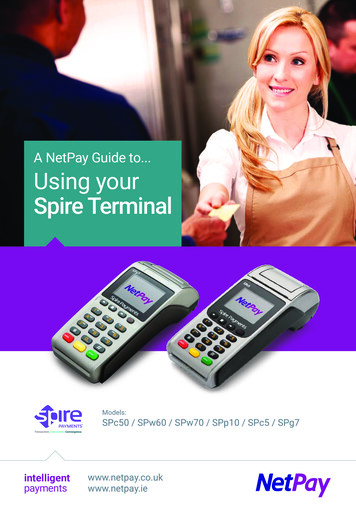
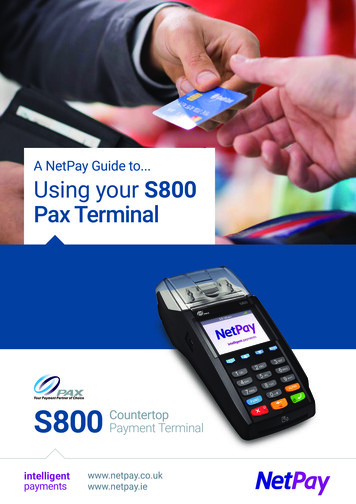
A NetPay Guide to.Using your S800Pax TerminalS800intelligentpaymentsCountertopPayment Terminalwww.netpay.co.ukwww.netpay.ie
2CONTENTS1Initial Setup . 41.1Terminal Overview . 51.2Screen Overview . 6Screen Icons Overview . 61.3Initial Terminal Setup . 71.4Connecting to the Network . 82Logging On . 93Processing a Sale (Chip and PIN) . 114Processing a Sale (Contactless) . 16Contact Details . 20
3WelcomeThank you for choosing your S800 terminal from NetPay.The S800 is designed to process transactions as quickly as possible whilstproviding valuable reporting and a full range of functionality.This user guide is designed to provide users of S800 with everything needed toset-up, register and process transactions.Should you have any queries on anything in this guide, please do not hesitate tocontact the customer support team using the details on page 20.
41INITIAL SETUPBefore starting to use the S800, please take a few moments to check the contents of the box; you should have receivedthe following:S800 TerminalExternal AC Power AdapterExternal AC Power CableThermal Paper RollEthernet CableQuick Start Guide (This Document)IMPORTANTPLEASE CONFIRM THAT THE TAMPER BAG AND TERMINAL SERIALNUMBER MATCHES EMAIL NOTIFICATION(S).If anything is missing or damaged or you experience issues during theinstallation/activation, please contact NetPay on0333 311 0200 or via email: customer.services@netpay.co.uk
51.1 Terminal OverviewAn overview of the S800 terminal.
61.2 Screen OverviewAn overview of the S800 screen.Screen Icons OverviewDescriptions of the S800 screen icons.IconDescriptionInternet connection presentNo internet connection presentTransaction data stored on the terminal (not displayed once data uploaded)In cases where the icon remains on the screen for more than a minute after a paymentcompletes, please select option ‘5: Menu’ from the Main menu, then option ‘3: Upload StoredData’ to clear the stored data – Please see the Full Terminal Use Guide for further informationTerminal configuration download requiredConfirmation optionCancel optionReady for card (Chip and PIN, Contactless or Swipe)Green contactless LED (blinks when idle, incrementally lights up if card is being read)Contactless LED (unable to read card)
71.3 Initial Terminal Setup01Insert the thermal paper roll into the S800 terminal. 02Pull lever on the terminal to open the lid (as highlighted)Insert paper roll leaving at least 1cm exposedClose LidTurn the S800 over so the connections on the underside are visible.Connect the power supply into the socket labelled ‘Power’ (ashighlighted).Connect the Ethernet cable (providing internet connectivity) to the portlabelled ‘LAN/RS232B’ (as highlighted).03Once connected, run the cables through the cable management sectionsof the S800 (as shown left).This ensures that the cables are protected and the S800 terminal will sitflat on the desk/counter.
81.4 Connecting to the NetworkBefore starting the activation process, please ensure that you have the installation/activation details sent byOptomany. If you do not have this information, please contact Optomany’s Customer Service Team.Power on the S800 by pressing and holding thekey on the keypad for a few seconds until the terminal screenlights up (the start-up process may take a few minutes).01Once the loading process is complete, the Network Configuration menuwill appear.Highlight ‘ETHERNET’ using theand press theandkeys on the keypadkey on the keypad to continue.02S800 supports Dynamic Host Configuration Protocol (DHCP) whichautomatically obtains all network settings.To use this service, press thekey on the keypad to continue.03S800 validates the network connection and communicates with the DHCPserver to obtain an IP address and other network settings.04A confirmation screen will briefly be displayed once all network settingshave been successfully configured.An icon will be displayed on the status bar afterwards to show S800 isconnected via Ethernet.
9INFO2Please refer to the S800 User Guide for more information on manually configuring Ethernet settings if youdo not wish to use DHCP.LOGGING ONNow set-up and activation are complete, S800 is ready for the first logon.01If your account has been setup with multiple departments, select the oneyou wish to use using the navigation keys (and press theand) on the keypadkey on the keypad to continue.(Please note this screen will only be displayed if you have multipledepartments setup)02Enter the User ID sent to you in an email by Optomany using the keypadand press thekey on the keypad to continue.03Enter the password sent to you in an email by Optomany using thekeypad and press thekey on the keypad to continue.04Please wait whilst S800 processes the log on details.
1005Once the log on has been completed, the main menu will be displayed.INFOThe terminal includes a “Check for Updates” feature which necessitates a check every 7 days formandatory updates.If a terminal has not performed the check for updates after 7 days, the user will automatically be loggedout of the terminal. The check for updates will then be initiated when the user logs in again. To avoid thisscenario, a user can regularly perform a check for update, for example, at the end of each day.For more information on updating the software on a terminal, please refer to the Full Terminal User Guide.
113PROCESSING A SALE (CHIP AND PIN)Once the logging on process has been completed, S800 is ready to process transactions. The following describes theend-to-end operation of a Chip & PIN sale:01From the main menu, select option 1: Sale(Press thekey on the keypad).Alternatively, ask the cardholder to insert their card (with the Chip of thecard on top, facing towards you) into the Chip and PIN card slot at thebase of the terminal.02Enter the amount of the sale using the keypad.(S800 will automatically enter the decimal place for you).Press theINFOkey on the keypad to continue.Press thekey to change to a different currency if required - The option to select differentcurrencies is only available if specified on the order form and setup with the Acquirer.Use the navigation keys (andrequired currency and press the) on the keypad to highlight thekey on the keypad to confirm.(* denotes the current default currency, press thekeypad to change the default to the selected currency)key on the
1203If required, enter the reference for the transaction. If a reference is notneeded, press thekey on the keypad to skip. Please note thisscreen is only shown if configured to do so.To use alpha characters, press the numeric key containing the alphacharacter required multiple times until it is displayed.Press thekey on the keypad to continue.04If the card holder’s card has been previously inserted, skip to Step 06,otherwise S800 will prompt for the card to be presented.05Insert the card (with the Chip of the card on top, facing towards you) intothe Chip and PIN card slot at the base of the terminal.06Once the card is inserted, S800 will process the card.Please wait and do not remove the card whilst this is in progress.07Press thethekey on the keypad to confirm cashback is required orkey on the keypad to skip.Only Merchants offering cashback and have this option setup will havethe cashback facility.Skip to step 10 if cashback is not required.
1308If cashback is required, enter the cashback amount using the keypad.(S800 will automatically enter the decimal place for you).Press thekey on the keypad to continue.09The total amount of the sale and cashback will be displayed. Press thekey on the keypad to confirm the amount is correct or press thekey on the keypad to cancel.10On the Enter PIN screen, pass the S800 terminal to the cardholder andask them to enter their PIN.After the PIN has been keyed in, the cardholder will then need to pressthekey on the keypad to continue.11S800 will provide a PIN OK confirmation if the PIN has been correctlyentered.12S800 will attempt to authorise the transaction with your chosen acquirer.
1413S800 will confirm that the payment is complete if authorisation issuccessful.14Once the payment is complete, S800 will prompt for the card to beremoved.15Once the card is removed, the Merchant Receipt will begin printing.16Tear off the receipt from the S800 terminal and press thethe keypad to continue.key on17The cardholder receipt will then begin printing and can be torn off onceprinting has completed.
1518The payment processing procedure is now complete and S800 will returnto the main menu.
164PROCESSING A SALE (CONTACTLESS)S800 supports contactless payments (including technologies such as Android Pay, Apple Pay etc.) and can be usedwhere a cardholder has the contactless feature enabled on their card or device. The following describes the end-toend operation of a contactless payment sale:01From the main menu, select option 1: Sale(Press thekey on the keypad).02Enter the amount of the sale using the keypad.(S800 will automatically enter the decimal place for you).Press theINFOkey on the keypad to continue.Press thekey to change to a different currency if required - The option to select differentcurrencies is only available if specified on the order form and setup with the Acquirer.Use the navigation keys (andrequired currency and press the) on the keypad to highlight thekey on the keypad to confirm.(* denotes the current default currency, press thekeypad to change the default to the selected currency)03key on theIf required, enter the reference for the transaction. If a reference is notneeded, press thekey on the keypad to skip. Please note thisscreen is only shown if configured to do so.To use alpha characters, press the numeric key containing the alphacharacter required multiple times until it is displayed.Press thekey on the keypad to continue.
1704S800 will prompt for the card or device to be presented.05Position the (contactless enabled) card or device around the screen areaof the terminal for a few seconds until a ‘beep’ sound confirms the cardhas been read (the green contactless LEDs will incrementally light up asthe card is being read).06The ‘Card Read OK’ message will be displayed momentarily to confirmthe card has been successfully read.07S800 will attempt to authorise the transaction with your chosen acquirer.08S800 will confirm that the payment is complete if authorisation issuccessful.
1809The Merchant Receipt will begin printing.10Tear off the receipt (after printing has completed) from the S800 terminaland press thekey on the keypad to continue.11The payment processing procedure is now complete and S800 will returnto the main menu.
19INFOA customer/cardholder copy of the receipt is not automatically printed for contactless transactions as it isnot a mandatory requirement. However, S800 provides a facility to print a customer/cardholder copy of thereceipt if required.The following steps describe the process for printing a customer/cardholder copy of the receipt for contactlesstransactions.01From the main menu, select option 4: Reprint(Press thekey on the keypad).02From the Reprint menu, select option 2: Customer Copy(Press thekey on the keypad).03The cardholder receipt will then begin printing and can be torn off onceprinting has completed and S800 will return to the main menu.
20CONTACT DETAILS FOR TECHNICAL ISSUESIf you have any questions or require support, please get in touch using the details below:Optomany Customer SupportPhone: 44 (0) 20 8102 8102Email:customersupport@optomany.comCustomer Support Hours are:DaysMonday - SaturdaySunday and Bank Holidays (excluding Christmas Day)Hours Covered08:00 – 23:0010:00 – 17:00E-mails will be actioned within the business hours of Monday to Friday 9:00 am to 5:00 pm. Upon receipt,an Optomany helpdesk ticket is used to track and record the request detail. A ticket is automaticallygenerated on receipt of an email to customersupport@optomany.comA unique reference number is allocated to each ticket - this is automatically notified to the email sender by returnemail. This unique reference should then be quoted in all further emails within the email subject line.
NetPay Merchant ServicesUKT 44 (0)333 311 0200E getintouch@netpay.co.ukW www.netpay.co.ukIrelandT 353 (0)1 447 5299E getintouch@netpay.ieW www.netpay.ieNetPay are the first payment processor in the UK and Ireland to offer ‘green payments’ and offset the carbon emissions of our payments network.My MID:My Terminal Model:My Terminal ID:intelligentpayments
If the card holder's card has been previously inserted, skip to Step 06, otherwise S800 will prompt for the card to be presented. 05 Insert the card (with the Chip of the card on top, facing towards you) into the Chip and PIN card slot at the base of the terminal. 06 Once the card is inserted, S800 will process the card.