Transcription
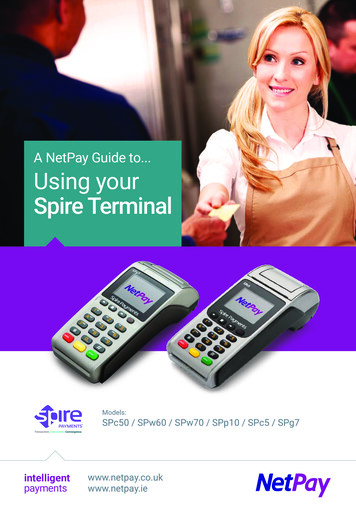
A NetPay Guide to.Using yourSpire TerminalModels:SPc50 / SPw60 / SPw70 / SPp10 / SPc5 / ie
A guide to using your Spire terminalThis booklet will explain how to setup and use your NetPay Terminal.Page 4WelcomePage 5PIN-Pad – SPp10Page 6Corded Terminal - SPc5Page7GPRS Terminal - SPg7Page 8Installing your Spire Wi-Fi Access PointPage 10Using your Spire TerminalPage 12Configuring your Wi-Fi ConnectionPage 13Configuring Basic Terminal SecurityPage 14CHIP & PIN TransactionPage 15Contactless TransactionPage 16ReferralsPage 17Refunds and ReversalsPage 18Totalling and End of Day BankingPage 19Re-Initialising your Battery (Wireless Models)Page 20Changing GPRS Network ProviderPage 21NetPay Shop / ReportingPage 22Connectivity TroubleshootingPage 23Powering Down and Restarting the TerminalPage 24Inserting your SIM / NotesPage 25My MID / Important NumbersIf there is anything else you’d like to know, please call our customer service team(see useful numbers opposite). We are more than happy to help.intelligent paymentswww.netpay.co.uk www.netpay.ie
WelcomeWelcome to the NetPay terminal guide, this document will take you through setting up yournew NetPay terminal step by step, processing your first transactions and troubleshootingyour device.Before setting up your terminal it is important to identify the model number and follow thecorrect set up instructions.The model numbers are as follows*:SPp10PIN-padSPw60 Wi-Fi TerminalSPc5Countertop TerminalSPw70 GPRS TerminalSPg7GPRS TerminalSPc50Countertop TerminalThe model number of your terminal will be printed on a sticker on the underside of theterminal keypad. *Models may be subject to change depending on Country.Important NumbersKeep these numbers to hand should you need to speak to the team.If you want to query any orders, change aspects of your service or enable additionalservices call our customer service team between 9:00am and 5.30pm Monday to Friday.UK Customer Services - 0333 311 0200 (option 2)Ireland Customer Services - 01 447 5299If you need technical assistance setting up or using your service call our technical supportteam 24 hours a day, 7 days a week.UK Technical Support - 0843 455 5555Ireland Technical Support - 01 686 9428If you have chosen the card acquiring service and have issues with the banking elementof the service, perhaps a query with a specific transaction then call your acquiring bankavailable 24 hours a day, 7 days a week.UK Merchant Service Support (First Data Merchant Services) - 0845 964 5055UK Merchant Service Support (Global Payments) - 0845 702 3344Ireland Merchant Services Support - 44 (0) 345 761 6263If you have any accounts or billing queries call our accounts team between9:00am and 5.30pm Monday to FridayNetPay Accounts Team - 44 (0) 333 311 0200 (option 4)4 Welcomeintelligent payments
PIN-Pad - Spire SPp10QUICK SETUP GUIDE1. nsure the terminal is in its idle stateEand unplugged from the electrical socket.2.Remove the cable tidy from the terminal.3.Remove the new SPp10 PIN-Pad from its packaging.4. Push the new SPp10 PIN-Pad’s plug into the socket on the rear of the terminalidentified by a PIN PAD label. Once it is correctly located you will heara soft click.5.Plug in the terminal into the power socket.6. Neatly route all the cables over the top of the terminal so they do not overlapone another.7. Ensure the cable tidy is orientated with the notches on either side sliding in firstto the slots on the side of the terminal’s feet and slide home until you hear a click.Ensure both sides of the cable tidy are correctly located.8.Turn the terminal over and, if required, switch the electrical outlet on.9. Turn on the terminal by pressing on the power key located on the left hand sideof the terminal.10. Please proceed to page 12 – Using your terminal.www.netpay.co.uk www.netpay.iePIN-Pad - SPp10 5
Corded Terminal - Spire SPc5What’s in the box? The SPc5 terminal Paper Roll The Power Supply Unit (PSU) Telephone (PSTN) Cable Ethernet CableQUICK SETUP GUIDE1. Install the paper roll by opening the printer door using the lever located in the middleof the printer door and removing any packaging from the printer compartment.Fit the paper roll as shown below leaving 10cm of paper protruding from the top of theterminal and close the printer door. Please Note: The paper must feed from underneaththe roll. The correct orientation of the paper is critical (if you experience blank receipts,the paper may be incorrectly inserted or of the wrong specification).2. Turn over the terminal and plug the telephone cable into the socket identified with theLINE label and connect to a working telephone socket. If a PIN Pad has been supplied,plug its black curly cable into the socket identified with the PIN PAD label. If you areconnecting the terminal to a routing device, connect the black or yellow Ethernet cableto the socket identified with a LAN label, then plug into your router.3. Insert the power supply plug directly into underside of the terminal and route the cablesinto the cable tidy to keep all of the cables secure. Plug the power supply into a liveelectrical socket4. Please proceed to page 12 – Using your terminal.6 Corded Terminal - SPc5intelligent payments
GPRS Terminal - Spire SPg7What’s in the box? The SPg7 terminal Battery Paper Roll The Power Supply Unit (PSU) Your SIM Card will be sent seperatelyQUICK SETUP GUIDE1. I nstall the paper roll by opening the printer door using the lever located in the middleof the printer door and removing any packaging from the printer compartment.Fit the paper roll as shown below leaving 10cm of paper protruding from the top of theterminal and close the printer door. Please Note: The paper must feed from underneaththe roll. The correct orientation of the paper is critical (if you experience blank receipts,the paper may be incorrectly inserted or of the wrong specification).2. W ith the terminal face down remove the battery cover and battery. Remove the batterypackaging. Insert your SIM (sent seperately) into the slot marked SIM1 SLOT. Insert thebattery in to the terminal and replace the cover.3. I nsert the power supply plug directly into the rear of the terminal and plug the powersupply into the electrical socket. Charging of the battery will take between 2 and 4hours. The battery condition is indicated in the top left hand corner of the display whenthe terminal is switched on. When not in use keep connected to the power supply tomaintain charge.4. T urn on the terminal by pressing on the power key which is on the front right of theterminal, signified by the power symbol.5. Please proceed to page 12 – Using your terminal.Your terminal will require charging for at least 4 hours prior to‘Performing First Time Setup’ (p12)www.netpay.co.uk www.netpay.ieGPRS Terminal - SPg7 7
Installing your Spire Wi-Fi Access PointWhat’s in the box? Wi-Fi Access Point An Ethernet Cable The Power Supply Unit (PSU)QUICK SETUP GUIDE1. Plug the network cable into the blue socket located atthe rear of the access point. Connect the other end ofthe network cable to your broadband router or a networkwallsocket. (fig.1)fig.12. Insert the power supply plug into the side of the accesspoint. Plug the power supply into the mains power socketand switch on. The lights on the front of the access pointwill flash. The bottom light indicates that the power is on.The WAN light will flash until it has made a connection.Once both lights have stabilised (and remain on) you canswitch on your Spire Wi-Fi terminal. (fig.2)fig.23. Turn the terminal on by pressing the power button untilthe screen lights up. The terminal will automatically scrollthrough several screens of information until the Welcome screenis displayed.4.Ensure the terminal is displaying the Welcome screen.5.Press the MAIN MENU key to display the Reports and Terminal Menu.6.Press the RIGHT ARROW key to show the additional menu items.7.Press 3 for FUNCTION (or 4 if Mobile Top-Up installed).8.Enter function 3 and press the ENTER key.9.Enter the supervisor password (0000 by default) and press the ENTER key.10. Press 2 for EXIT.11. The menu will load, please wait for 2 minutes before continuing.12. Press 1 for TERMINAL.8 Installing your Spire Wi-Fi Access Pointintelligent payments
13. Press 5 for WI-FI SETTINGS. The terminal will display a list of available Wi-Fi networks.14. Press the number next to the Wi-Fi network you would like to connect to.15. Enter your password, by default the keyboard will be set for numbers, to cycle throughdifferent characters, press the HASH (#) key, the terminal will cycle in the following order:Numbers - Uppercase letters - Lowercase letters - Symbols16. Once the password has been entered press the ENTER key.17. To connect to the network, press the ENTER key to say yes.Should the Wi-Fi connection fail at this point displaying ERROR 44 the screen will return tothe Wi-Fi list and perform the following:18. Your Wi-Fi network should be displayed as option 1.19. Press 1 then 1 again to CONNECT.Should the Wi-Fi connection fail again at this point displaying ERROR 44.20. Press CANCEL twice.21. Exit the application by pressing 1 for Yes.22. The terminal will restart. Your Wi-Fi network should now be connected with a greenWi-Fi symbol displayed in the top right hand corner of the screen.If you see a red cross that means the access point cannot be found – please call theNetPay Customer Services team.Wi-Fi Access Point PlacementThe design of the Wi-Fi access point allows it to be placed on a counter or shelf. Pleasebear the following in mind when choosing an installation location: Select a location close to an electrical power outlet Select a location close to a broadband router or a network wall socket elect a location where there will be minimal physical obstructions between the Wi-FiSaccess point and the Spire Wi-Fi terminal o maximise your Wi-Fi range, placement away from brick and block walls and metalTsurfaces is recommended e recommend you avoid installing your device in close proximity to cordless phones,WBluetooth devices, microwaves and any other mobile devicePlease proceed to page 14 – Configuring Wi-Fi Connectionswww.netpay.co.uk www.netpay.ie9
Using Your Spire Terminal urn the terminal on by pressing the power button until the screen lights up. You will needTto enter your full merchant ID on first installation and you will also need to create a 5 digitsecurity code. This code cannot be sequential (i.e. 12345). The terminal will automaticallyscroll through several screens of information until the Welcome screenis displayed.To turn the terminal off press the power button for three seconds, ensure SHUTDOWNis highlighted and press the green ENTER key.PLEASE NOTE: Highlighting RE-START will re-start the payment application.Changing and replacing the battery on SPw60 and SPg7 terminalsIf you have a portable terminal it will use a removable, rechargeable lithium ion batterymodule. The battery module will need to be charged when you receive a new terminal,a replacement battery, and during day-to-day use.Battery Module Installation and Replacement1. Place the terminal face down on the counter and remove the battery cover by applyingpressure and sliding it backwards as shown below.2. I f a battery module is already fitted, place your thumb nail into the recess at the baseand pull upwards. The battery module will lift out of the compartment. See section‘Safety Information and Battery Guarantee’ in the introduction for battery moduledisposal instructions.3. R emove the packaging from the new battery module and ensure the connections arealigned with those in the battery compartment. The Spire Payments logo should befacing upwards.4. W ith the contacts aligned, insert the module into the battery compartment by pushingdownwards.5. Slide the battery compartment cover back into position.10 Using Your Spire Terminalintelligent payments
Battery MaintenanceThe standby time for the battery fitted to the SPw60/70 and SPg7 is approximately 120hours depending on settings and operational environment. It is recommended to alwaysreturn the terminal to the charging base or connect to the power supply when not in use,to maintain maximum charge. While handling the battery module ensure you do not shortthe connections with metallic objects.The Terminal Screen Models SPc50, SPw60, SPw70, SPc5 and SPg7 all share a common screen layout anddo not have touch screensThe Terminal Keypad The MAIN MENU, key represented by a square and positioned above the 2 key, togglesbetween menus. The ‘ARROW’ keys either side of MAIN MENU key are used to move to the next andprevious menu screens. When activated, an arrow will also be seen on the displayabove the appropriate key. The numeric keys.The ‘#’ key allows the cycling of character selection on the numeric keys during text entry.For example pressing 1 and then #, #, # will cycle through 1, Q , Z , 1.The star key is used to cycle through the following nine characters: , / @ * # ( ) –during text entryThe action of the green ENTER key will be displayed in a green box at the bottomof the display.The action of the red CANCEL key will be displayed in a red box at the bottomof the display.The action of the yellow CLEAR key will be displayed in a yellow box at the bottomof the display.The green ENTER key will select YES.The yellow CLEAR key will select NO.www.netpay.co.uk www.netpay.ie11
Configuring your Wi-Fi Connection1.Ensure the terminal is displaying the Welcome screen.2.Press the MAIN MENU key to display the Reports and Terminal Menu.3.Press the RIGHT ARROW key to show the additional menu items.4.Press 3 for FUNCTION (or 4 if Mobile Top-Up installed).5.Enter function 3 and press the ENTER key.6.Enter the supervisor password (0000 by default) and press the ENTER key.7.Press 2 for EXIT.8.The menu will load, please wait for 2 minutes before continuing.9.Press 1 for TERMINAL.10. Press 5 for WI-FI SETTINGS. The terminal will display a list of available Wi-Fi networks.11. Press the number next to the Wi-Fi network you would like to connect to.12. Enter your password, by default the keyboard will be set for numbers, to cycle throughdifferent characters, press the HASH (#) key, the terminal will cycle in the following order:Numbers - Uppercase letters - Lowercase letters - Symbols13. Once the password has been entered press the ENTER key.14. To connect to the network, press the ENTER key to say yes.Should the Wi-Fi connection fail at this point displaying ERROR 44 the screen will return tothe Wi-Fi list and perform the following:15. Your Wi-Fi network should be displayed as option 1.16. Press 1 then 1 again to CONNECT.Should the Wi-Fi connection fail again at this point displaying ERROR 44.17. Press CANCEL twice.18. Exit the application by pressing 1 for Yes.19. The terminal will restart. Your Wi-Fi network should now be connected with a greenWi-Fi symbol displayed in the top right hand corner of the screen.12 Configuring your Wi-Fi Connectionintelligent payments
Configuring Basic Terminal SecurityYou may be required on certain functions to enter a password. It is best to change thesefrom the factory default to protect against potential fraudulent usage of the terminal.Merchant PasswordThe merchant password is used to protect certain terminal functions. This passwordcomprises of four digits and has a factory default of 0000. If you forget this password,please contact our technical support team (see page 3).Changing your merchant password1.Ensure the terminal is displaying the Welcome screen.2.Press the MAIN MENU key to display the Reports and Terminal Menu.3.Press the RIGHT ARROW key to show the additional menu items.4.Select SETUP from the menu.5.Select PASSWORD from the menu.6.Select CHANGE from the menu.7.Type in the old password and press the green ENTER key.8.Type in the new local password (default is 0000) and press the green ENTER key.9.Repeat the previous step.10. The terminal will beep and display TRANSACTION ACCEPTED.11. Your merchant password is now set up.Supervisor (Maintenance) PasswordThis password is used to protect supervisory functions including changing some optionsand, most commonly, authorising refunds.You will need to call our technical support team to obtain this password (see page 3).www.netpay.co.uk www.netpay.ieConfiguring Basic Terminal Security 13
CHIP & PIN TransactionTo process a standard CHIP & PIN transaction on an Spire TerminalOption 11. E nter the sale amount and press and press the green ENTER key PLEASE NOTE:If a mistake is made entering data, the last digit can be deleted by pressing the yellowCLEAR key.2. When prompted, pass the terminal to the customer to insert their card and entertheir PIN.Option 21. Insert the Chip Card into the terminals Chip Card reader or PIN Pad (if fitted). A Saletransaction will be initiated. Type in the Sale amount and press the green ENTER key.PLEASE NOTE: If a mistake is made entering data, the entire field can be deleted bypressing the yellow CLEAR key once.2. When prompted, pass the terminal to the customer to insert their card and enter theirPIN.Then continue3. T ake the terminal back from the customer and follow the onscreen prompts tocomplete the transaction.4. Tear off the receipt, retaining the MERCHANT copy yourself and passing the customerversion to the customer.5. The terminal will then return to the idle screen.If the cardholder enters an incorrect PIN 3 times the card will lock and the transaction willbe cancelled.If a card has a faulty chip it will need to be swiped through the magnetic card reader; thestrip should face the body of the terminal and be swiped from one end of the track to theother in one smooth motion, top to bottom.In the event that the card still fails to read, it is possible to process the card by manuallyentering the card details. This is done by entering the long card number from the “Insertor Swipe Card” prompt and then following the onscreen instructions.Please be aware that using the magnetic stripe or entering the details manually may incuradditional fees.14 CHIP & PIN Transactionintelligent payments
Contactless TransactionTo process a contactless transaction under 30/ 30 on a Spire TerminalFor security reasons, Contactless enabled cards do occasionally require PIN entry.If the terminal prompts for this, process the transaction as a normal CHIP & PINtransaction. If gratuities are added, the total must still be under 30/ 30.Cashback cannot be added to a contactless transaction.1. From the Idle screen (Welcome), key in the sale amount.2. The customer should present the card holding it across the screen of the terminaldevice. The 4 LEDS will turn green when the transaction is completed.2.1. A contactless card may prompt for PIN entry – process this as a normalCHIP & PIN transaction.3. Take the terminal back from the customer and follow the onscreen prompts.4. If receipts are printed (this is optional for contactless transactions) retain theMERCHANT copy for yourself and pass the customer version to the customer.5. Terminal will return to the idle screen.www.netpay.co.uk www.netpay.ieContactless Transaction 15
ReferralsOccasionally when performing transactions, you will be required to perform a referral.These are rare, but a key part of preventing card fraud.1. The cardholder will attempt to pay for their purchase. The terminal will display awarning message (the exact text depends on the terminal model) informing you thata referral is needed. Call the displayed number. Do not return the card until the referralis completed.2. Follow all directions from the Authorisation Centre and any on-screen prompts on theterminal – you may need to enter your Referral Password at some point during theprocess.3. D uring the call, you may need to quote business details such as your Merchant ID numberand be required to pass the phone to the customer. When the details are confirmed and thephone returned to you, the Authorisation Centre will issue you an authorisation codeif successful – do not accept an authorisation code from the customer.4. I n the event that the transaction is declined, you may also be asked to retain the card.If this occurs, do not return the card to the customer. The Authorisation Centre willadvise you on what to do with the card. If you feel that retaining the card presents a threat to yourself or others, safety is yourprimary concern – return the card without hesitation. There are many reasons why a card might fail this authentication and it is not alwaysthe customers fault – if they have questions as to why they were declined, refer themto their card issuer.5. D o not allow the customer to try again using the same card, or split the transaction.to avoid an authorisation call.16 Referralsintelligent payments
Refunds and ReversalsRefundsCard refunds cannot be performed contactlessly.Refunds should only be processed on the card which made the original purchase(check that the last 4 digits match their receipt).Do not give cash refunds for card purchases – this is a common fraud technique.1. Select REFUND from the TRANSACTION MENU.2. Key in the amount to be refunded.3. Enter the Supervisor Code or swipe the Supervisor Card.4. The cardholder inserts their card.5. The refund is then transferred back to your customers account.ReversalsIf a transaction is processed incorrectly, it is possible to reverse it, so long as it has notbeen more than thirty seconds since the transaction was processed and it is the nexttransaction from that terminal device.1. Select REVERSAL from TRANSACTION MENU2. The cardholder inserts the card used on the transaction into the reader.3. A receipt will print detailing whether or not the Reversal was successful.4. It is always possible to perform a Refund if the Reversal did not go through in time.www.netpay.co.uk www.netpay.ieRefunds and Reversals 17
Totalling and End of Day BankingAt the end of a business day, the settlement procedure must be performed on the terminalunless set to automatically settle at a particular time of day (if you are unsure whether yourterminal settles automatically, please contact your helpdesk). Automatic Settlement is notusually permitted.For the totals to display correctly, this must be done during the Banking Window time setby your acquirer. During a settlement, the terminal will connect to your acquirer and ensurethat all transactions processed have been received.The terminal may contain stored transactions for a number of reasons such as low-riskand contactless transactions. If any transactions are stored in the terminal, a successfulsettlement will automatically send them to your acquirer(s)1. From the Welcome screen press the MAIN MENU key to display the Reports andTerminal Menu. Select BATCH and then select SETTLE.2. You may be requested to enter the Merchant Password.3. Select the acquirer you want to settle if you have multiple acquirers we wouldrecommend you select ALL HOSTS. The terminal will connect to the selectedacquirer(s) and print out the settlement report. The settlement totals will be reset tozero once this process is complete.3.1 The Terminal will dial out and return one of three results;Totals Agreed: The totals between your acquiring bank and the terminal match. Totals Not Agreed: The totals do not match. The most common cause of this isthat the terminal has offline transactions stored. These transactions will haveuploaded during the banking window, so performing the end of day banking againshould resolve the issue. If they still do not match, you will need to contact theMerchant Services Support at your acquiring bank (see Page 3). Cannot Confirm Totals: The terminal was unable to contact your acquiring bankand so End of Day banking will need to be performed again. If you do not complete this procedure, it may result in your terminal failing toautomatically update and may expose you to the risk of charge-backs.3.2 -Total shows the total value of the transactions passed through the terminalXsince the last End of Day banking or Z-Total. It does not reset the totals.3.3 Z-Total shows the same data as an X-Total but also resets the totals for bothfunctions. It does not affect the End of Day banking total.18 Totalling and End of Day Bankingintelligent payments
Re-Initialising your Battery (Wireless Models)1.Ensure the terminal is displaying the Welcome screen.2.Press the MAIN MENU key to display the Reports and Terminal Menu.3.Press the RIGHT ARROW key to show the additional menu items.4.Press 3 for FUNCTION (Assuming Mobile Top-Up is not installed).5. Enter function 63 and press the green ENTER key. The screen will now display;1. DOWNLOAD2. APACS6.(In quick succession) Press CLEAR, *, 8, 17.When the menu appears select 8. BATTERY.8.Unplug the terminal (and base if applicable) from the mains power.9.Now Press 1 to begin the re-initialisation process.10. If the re-initialisation is successful, the terminal will display INIT OK, PLEASE REBOOTTHE POS. If this message does not display please revert back to step one.11. Press and hold the power button on the left hand side of the terminal until the terminaldisplays SHUT DOWN, RESTART, CANCEL.12. Select SHUTDOWN from the menu13. Press and hold the POWER button on the left hand side of the terminal until the screenlights up14 . The BATTERY ICON should then display its battery level in the top left hand cornerof the screenRe-Initialising your Battery (Wireless Models) 19
Changing GPRS Network Provider1.Ensure the terminal is displaying the welcome screen.2. Press the MAIN MENU key to display the Reports and Terminal Menu.3.Press the RIGHT ARROW key to show the additional menu items.4.Press 3 for FUNCTION (Assuming Mobile Top-Up is not installed).5. Enter function; 11 and press the green ENTER key.6. Press the green ENTER key again.7. Press CLEAR to select NO to AUTOMATIC REGISTRATION.8. The terminal will then scan for networks and display the list of found networks9. Select a network to connect to.10. When connected the terminal will display:COMMAND SUCCESSFUL, CURRENT STATUS NETWORK: ‘network selected in step 9’11. A successful GPRS connection is indicated by a G in the top right hand cornerof the screen20 Changing GPRS Network Providerintelligent payments
NetPay ShopVisit the NetPay shopfor all of your cardterminal suppliesVisit UK: shop.netpay.co.uk IE: shop.netpay.co.uk1. Till Rolls4.2. Printer Roller Bars3. Supervisor Cards4. In Car ChargerFREE Delivery3.FAST, SECURE checkout1.2.Transaction and Management ReportingOur Online Platform Revolution provides businesses with high level commercial andtransactional information enabling them to make informed decisions based on what ishappening in their business.The platform gives merchants access to: ulti-channel reporting combining in-store and online performance to view statisticsMacross both aspects of a merchants business through one-consolidated platformsegmented by location Reports consisting of the following:- C ard sales performance, you can break down by county, region, sub-region, postcodearea etc.- Monitor best performing hours, days, weeks, months and years- Card type usage- Best performing reports showing, best performing counties, regions, postcodes etc.- Trend analysis incorporating, average transaction values, comparisons against earliertrading periods etc.- Geo-mapping of service orders showing the location of merchants- Geo-mapping providing a live insight into online payment sales as they happenwww.netpay.co.uk www.netpay.ieNetPay Shop / Reporting 21
Connectivity TroubleshootingThe errors that are most likely to occur are communication errors where the terminalcannot contact the acquiring bank. For Bluetooth handsets, this can be caused by movingout of range of the assigned base; this can be resolved by either moving back in range orassigning the handset to a nearer base.Terminalscreenis blankCountertop models (SPc50 and SPc5)Check that the power supply or mains cable is plugged intoa working electrical wall socket and that any switch is on.If an extension cable is being used, check the fuse.Check that the power supply is connected to the socketon the base of the terminal.Mobile models (SPw60, SPw70 and SPg7)Ensure a battery module is fitted.Press the power button until the screen lights up.If the terminal does not beep and turn on:Connect the power supply into the power socket on the rearof the terminal or place on a powered charging stand. Hold downthe power button until the screen illuminates.If the terminal still does not beep and turn on:Check the power supply or mains cable is plugged into a workingelectrical wall socket and that any switch is on. If an extensioncable is being used check the fuse.Press the power button until the screen lights up.If the problem persists please contact our technical support team(see page 3).22 Connectivity Troubleshootingintelligent payments
Screenappears frozenor Terminaldoes not reactto insertinga cardIf the screen appears frozen and doesn’t react to key pressesor inserting a card:ProblemsconnectingThe terminal has detected the presence of a line and attemptedto dial but is experiencing a problem connecting:Switch off the power by unplugging at the wall electrical socket.Leave the terminal off for ten seconds.Restore the electrical supply and wait for the terminal to completerebooting and return to the idle screen. The line may require a prefix number to dial out on,for example a 9. The number the terminal dials may not be working on yourphone line. The terminal may be connected to a broadband line withouta DSL filter. A third party call service may be in use on the line.Line Busy, WaitThe terminal is not detecting a normal dial tone on thetelephone line.Powering Down and Restarting the TerminalTo power down your Spire TerminalTo tu
correct set up instructions. The model numbers are as follows*: SPc50. Countertop Terminal SPp10 PIN-pad SPw60 Wi-Fi Terminal SPc5. Countertop Terminal SPw70 GPRS Terminal SPg7. . If you have chosen the card acquiring service and have issues with the banking element of the service, perhaps a query with a specific transaction then call your .
