Transcription
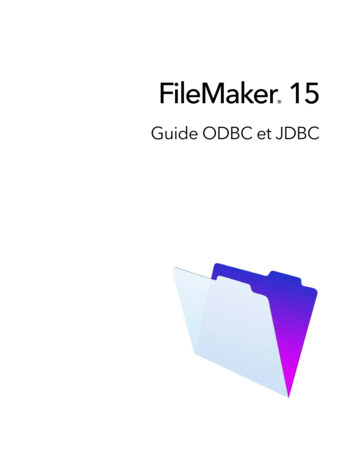
ODBC INSTALLATIONOperating System: Windows 10 64-BitThis is documentation that will guide you through installing ODBC on a Windows 10 64-BitOperating System. It is also VERY IMPORTANT that no one is in VIP or running reports atthe time of the installation.Installation requires LOCAL ADMIN rights on both PC and VIP Folder.Step 1: Local Administrative RightsNB! Please confirm with your IT department that you are a local administrator on the PCand the VIP directory.If you are a domain administrator, this will need to be changed. Please restart PC beforeproceeding to Step 2Step 2: Checking User Account Control1. Click on Start control Panel User Accounts Change User Account Control Settings2. Change to NEVER NOTIFY (if not) and restart the machineCopyright: Special SolutionsPage 1 of 10
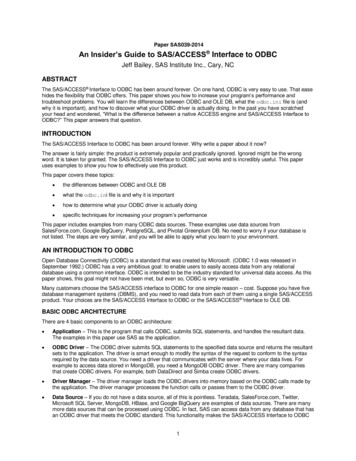
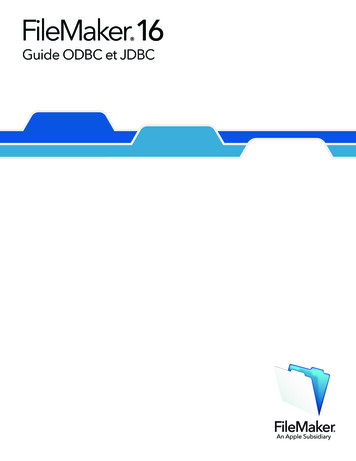
Step 3: Changing the Data Sources1. Click on Start control panel Administrative Tools Right click on Data sources(ODBC) Properties. Make sure the Target and start in is changed to match theprint screen below:2. Click on Security Users (bottom) Edit Click on Users again Tick Full control ApplyCopyright: Special SolutionsPage 2 of 10
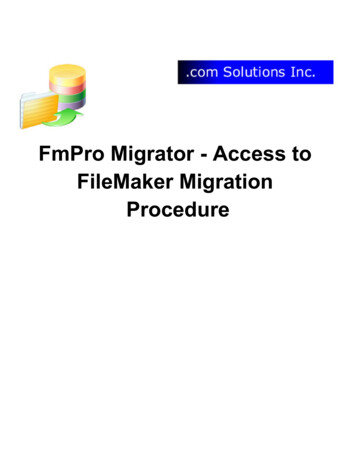
Step 4: Full Control - Workstation1. Open Computer2. Right Click on C:\ Properties Security click on users (bottom) Edit Users(again) Full Control apply. (Continue though all messages that appear)3. Right Click on VIP Drive (e.g. V:\) Properties Security click on users (bottom) Edit Users (again) Full Control applyStep 5: Installation ODBC1. Right Click on the Desktop New Folder Name it TEST2. Right Click on the VIP Icon on the desktop Open file location3. Locate the ODBC folder and openCopyright: Special SolutionsPage 3 of 10
4. Right Click in the folder Arrange Icons by Type5. Copy all the .dll files (there will be a minimum of 8) & the licence.ini file – close thescreen6. Paste the files in the folder on the desktop (TEST)7. Copy only the .dll files from the TEST folder Click on Start Computer C Drive Windows System32 Paste the files – overwrite if asked8. Click one window back on the screen (Windows) and open the folder SysWow64 paste the .dll files inside – overwrite if asked Close the screen9. Open the TEST folder on the desktop copy the licence.ini file Click on Start Computer C Drive Windows Paste the File (overwrite if asked)10. Close all Screens Click on Start Computer C Drive check if there is a tempfolder (if not – right click new Folder rename: TEMPCopyright: Special SolutionsPage 4 of 10
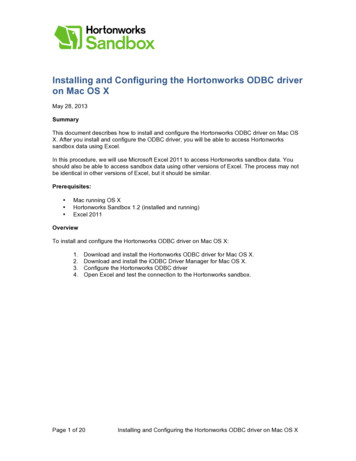
Step 6: Setting up the ODBC Username & Password(IF YOU RECEIVED A NEW/UPGRADED PC AND ALREADY HAVE AN ODBCUSERNAME & PASSWORD PROCEED TO STEP 7)1.2.3.4.5.Right Click on the VIP Icon on your desktopClick on Properties Advanced Tick Run as Administrator OK Apply CloseOpen VIP and log in to a companyClick on Utilities VIP ODBC ConfigurationSend us a print screen of the message block (either authorisation code orpassword) that appears with the ODBC super user or apply changes document(step 6) to odbc.vip@sage.com and keep the block open6. Go to www.sagevip.co.za Click on Login Customer zone Knowledge base ODBC Super user document Search download and have your manager signoff the documenta.If you are the VIP Super User you can access the configuration tool with yourpasswordb. If you are a normal ODBC user, please ask your ODBC Super User to assistwith applying changes or have the manager complete the Apply changesdocument and send it with the code below (step 5)7. Insert the code sent by the ODBC Support DeskCopyright: Special SolutionsPage 5 of 10
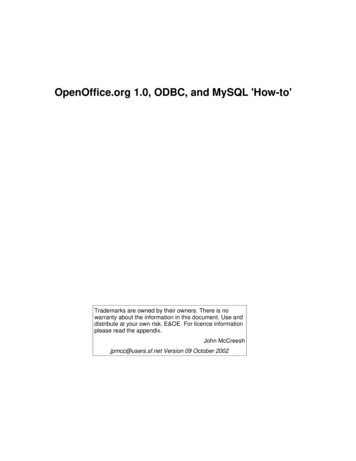
8. A list of all the companies should appear now. You would need to tick all thecompanies that the user needs access to. Please remember that the client may notbe the only ODBC user and if there are companies that are already ticked this shouldbe left alone9. The next step is setting up the User on Each Company that was tickeda. Click Add user; a block will appear on the company dropdown you can start byselecting the first company from the dropdown you will need access tob. Username: please insert your name in lowercasec. Password: no alphanumeric password, minimum 5 characters, lowercase eg.12345d. Confirm Password: Retype the password added in step c.e. Redo step a-d for the companies’ access is needed to before proceedingCopyright: Special SolutionsPage 6 of 10
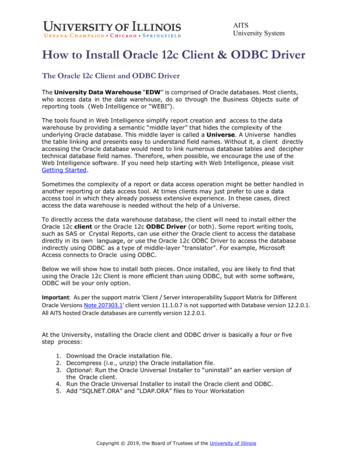
f.After the user has been added you now have to add the permissions for eachcompany. Click on the Permission tab and then go to the first company tab theuser was added ong. You will then need to click on the new user’s name that was created and thentick all boxes on the right-hand side. This process needs to be repeated foreach company that the user needs to be setup forh. After the user has been added to all the companies and all the permissionshave been added please confirm that Excel and VIP is closed on all VIP users’workstations before proceedingCopyright: Special SolutionsPage 7 of 10
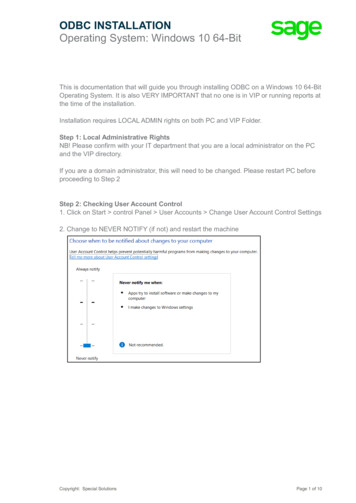
i.You can now click on the APPLY CHANGES button. A progress button willappear and the following message on to which you just click OKj.The “Apply Changes” might run for a while depending on how many companiesthere are and the amount of users in ODBCk. The Following message should appear when ODBC Setup has beencompletedSTEP 7: Applying Changes (ODBC User already)1. Go to www.sagevip.co.za Click on Login Customer zone Knowledge base ODBC Super user document Search download and have your manager signoff the documenta. If you are the VIP Super User you can access the configuration tool with yourpasswordb. If you are a normal ODBC user, please ask your ODBC Super User to assistwith applying changes or have the manager complete the Apply changesdocument and send it with the code below (step 4)2. Open VIP and log into a companyCopyright: Special SolutionsPage 8 of 10
3. Click on Utilities VIP ODBC Configuration4. Send us a print screen of the message that appears with the correctdocumentation to odbc.vip@sage.com and keep the block open5. Insert the code sent by the ODBCSupport Desk6. No companies need to be added as you already use ODBC, you can now click onthe APPLY CHANGES button. A progress button will appear and the followingmessage on to which you just click OK7. The “Apply Changes” might run for a while depending on how many companiesthere are and the amount of users in ODBC. Make sure that there are no users inVIP or ODBC8. The Following message should appear when ODBC Setup has been completedCopyright: Special SolutionsPage 9 of 10
Post installation: Local administrative rights are needed to run reports on ODBC.Please do not remove the local admin rights on the pc and the VIP directory for theusers once installation is done, as this was part of the system requirements whenthe software was purchased and if removed, we can’t be held responsible for thesoftware functioning correctlyFor further support, contact the Special Solutions Desk:Tel: 27 (0)12 420 7000Email: odbc.vip@sage.com with the subject ODBC Installation – Win 10 64-bitCopyright: Special SolutionsPage 10 of 10
3. Click on Utilities VIP ODBC Configuration 4. Send us a print screen of the message that appears with the correct documentation to odbc.vip@sage.com and keep the block open 5. Insert the code sent by the ODBC Support Desk 6. No companies need to be added as you already use ODBC, you can now click on the APPLY CHANGES button.