Transcription
AITSUniversity SystemHow to Install Oracle 12c Client & ODBC DriverThe Oracle 12c Client and ODBC DriverThe University Data Warehouse “EDW” is comprised of Oracle databases. Most clients,who access data in the data warehouse, do so through the Business Objects suite ofreporting tools (Web Intelligence or “WEBI”).The tools found in Web Intelligence simplify report creation and access to the datawarehouse by providing a semantic “middle layer” that hides the complexity of theunderlying Oracle database. This middle layer is called a Universe. A Universe handlesthe table linking and presents easy to understand field names. Without it, a client directlyaccessing the Oracle database would need to link numerous database tables and deciphertechnical database field names. Therefore, when possible, we encourage the use of theWeb Intelligence software. If you need help starting with Web Intelligence, please visitGetting Started.Sometimes the complexity of a report or data access operation might be better handled inanother reporting or data access tool. At times clients may just prefer to use a dataaccess tool in which they already possess extensive experience. In these cases, directaccess the data warehouse is needed without the help of a Universe.To directly access the data warehouse database, the client will need to install either theOracle 12c client or the Oracle 12c ODBC Driver (or both). Some report writing tools,such as SAS or Crystal Reports, can use either the Oracle client to access the databasedirectly in its own language, or use the Oracle 12c ODBC Driver to access the databaseindirectly using ODBC as a type of middle-layer “translator”. For example, MicrosoftAccess connects to Oracle using ODBC.Below we will show how to install both pieces. Once installed, you are likely to find thatusing the Oracle 12c Client is more efficient than using ODBC, but with some software,ODBC will be your only option.Important: As per the support matrix 'Client / Server Interoperability Support Matrix for DifferentOracle Versions Note 207303.1' client version 11.1.0.7 is not supported with Database version 12.2.0.1.All AITS hosted Oracle databases are currently version 12.2.0.1.At the University, installing the Oracle client and ODBC driver is basically a four or fivestep process:1. Download the Oracle installation file.2. Decompress (i.e., unzip) the Oracle installation file.3. Optional: Run the Oracle Universal Installer to “uninstall” an earlier version ofthe Oracle client.4. Run the Oracle Universal Installer to install the Oracle client and ODBC.5. Add “SQLNET.ORA” and “LDAP.ORA” files to Your WorkstationCopyright 2019, the Board of Trustees of the University of Illinois
AITSUniversity SystemWindows ODBC Data Connections: 64 bit vs 32 bitMany Windows applications are 32-bit architecture. If you use these applications on asystem with 64-bit Windows, you will need to create 32-bit ODBC dataset connections.Microsoft Windows has independent utilities and drivers for 32-bit and 64-bit ODBCconnections. You will find the 32-bit ODBC Administration utility atC:\Windows\SysWOW64\odbcad32.exe. Confirm with your application whether the 32-bit orthe 64-bit Oracle client is required.Copyright 2019, the Board of Trustees of the University of Illinois
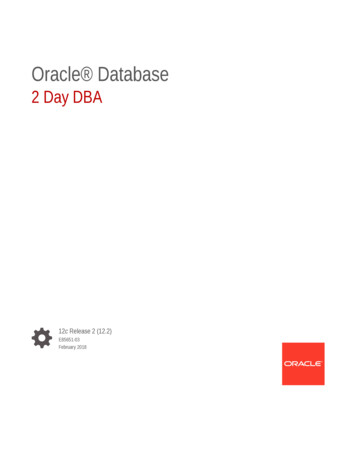
AITSUniversity SystemDownloading and Installing the Oracle Client and ODBC DriverThe files to install the Oracle client and ODBC driver are located on the U of I Box online file sharingservice.1.To download the Oracle Client files, click on one of the following links (or copy theURL into your browser): 32-bit Oracle 12c gt0eeixjbwv5 64-bit Oracle 12c hi9levyhuw0k2. Click on the Download button3. A File Download dialog box will appear (your image may vary depending uponwhich internet browser you are using).4. Select “Save”.5. The download will start. The file is large, so it may require some time to complete.Copyright 2019, the Board of Trustees of the University of Illinois
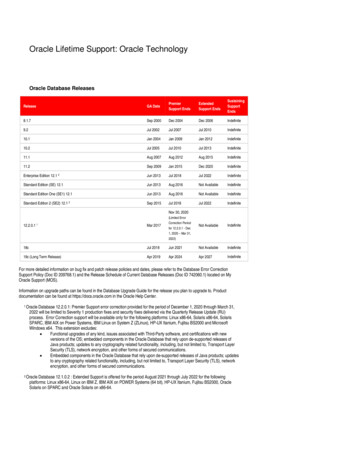
AITS – Decision SupportUniversity AdministrationWhen the download completes, the Zip file should appear in the designated downloaddirectory:Click the zippedinstallation file tohighlight the folder.Decompress or Unzip the Installation FileNote: The following description of unzipping the Oracle client zipped file is based onthe software utility named “Windows Explorer”. The screens you see and the actionsyou must take to unzip a file may differ from the process described below becausedifferences exist between all unzip utilities. The general process, though, will likelyresemble the following “unzipping” description.The downloaded file is compressed (or “zipped”). It is a file that actually contains manyfiles. These files are compressed in order to speed up and simplify the download processover the network.The downloaded file is in the form of a zipped file, which will need to be unzipped(i.e., a compressed file needs to be restored to its normal decompressed format).Zipped files are represented by an icon displaying a Zipper on the folder. By clickingthe zipped file, the program specified by the Windows operating system for unzippingor decompressing files will probably begin.Copyright 2019, the Board of Trustees of the University of Illinois
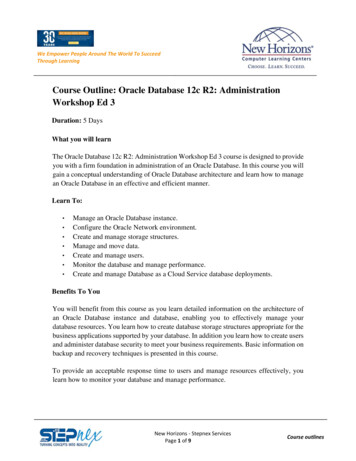
AITS – Decision SupportUniversity Administration1. Double-click the downloaded .zip file and then click the “Extract all Files”option to begin decompressing the file.Click the “Extractall files” option forthe installation file.2. The Extraction Wizard begins and asks you to select where to place thedecompressed files by entering a location in the “Files will be extracted to thisfolder:” text entry box. You may use the “Browse” button to select a folderlocation or create a new folder location for the extracted files to be placed. This canbe any folder. (The Extraction Wizard will supply a default location in the samefolder where the zipped folder resides – “Oracle install” in our example.) Using thedefault location is fine if that is what you choose.NOTE: The location where the resulting Oracle client will reside can be different fromthe location where you extract the files. You will be prompted for a separate filelocation for the Oracle client during the actual Oracle client installation routine.Copyright 2019, the Board of Trustees of the University of Illinois
AITS – Decision SupportUniversity AdministrationEnter the destination folderlocation of the extract filesor select an existing /newfolder location using thebrowse button.Click “Extract”3. When the “Extract” button is clicked, the extraction process will begin,as demonstrated below.The extraction processis decompressing thezipped installation file.4. After the extraction process is complete, the files will be viewable in the folderpreviously specified (“Oracle install\win32 11gR2 client\” in our example). Openthat folder if you did not select the “Show extracted files when complete” checkboxearlier. (If the checkbox was selected, the folder is automatically displayed.)Copyright 2019, the Board of Trustees of the University of Illinois
AITS – Decision SupportUniversity AdministrationThis concludes the unzipping (i.e., decompressing) process.Copyright 2019, the Board of Trustees of the University of Illinois
AITS – Decision SupportUniversity AdministrationInstalling Oracle Version 12cOnce the installation files have been unzipped, you can proceed with installing OracleVersion 12c.1. Go to “\location of installfiles\win32 12201 client\client32” and doubleclick on the “setup.exe” file located there.(In our example, the location is “C:\Install\win32 12201 client\client32”. If youdownloaded the 64-bit version the folder name after the Install folder will start withwinx64 instead of win32.)Copyright 2019, the Board of Trustees of the University of Illinois
AITS – Decision SupportUniversity AdministrationOnce launched, the following screen will appear. Please wait.Copyright 2019, the Board of Trustees of the University of Illinois
AITS – Decision SupportUniversity AdministrationThen the Oracle 12c Client Installer screen will appear.1. Select the Runtime (not InstantClient) install and click Next.Copyright 2019, the Board of Trustees of the University of Illinois
AITS – Decision SupportUniversity Administration2. Select Use Windows Built-in Account.Copyright 2019, the Board of Trustees of the University of Illinois
AITS – Decision SupportUniversity Administration3. Change the Oracle Base to C:\Oracle and the Software Location willautomatically change. We recommend renaming the Software Location so thefolder name is client 32 or client 64, depending upon if you are installing the32-bit or 64-bit client. Click Next.Copyright 2019, the Board of Trustees of the University of Illinois
AITS – Decision SupportUniversity Administration4. Wait as the installer performs prerequisite checks.Copyright 2019, the Board of Trustees of the University of Illinois
AITS – Decision SupportUniversity Administration5. Click Install in the Summary window.Copyright 2019, the Board of Trustees of the University of Illinois
AITS – Decision SupportUniversity AdministrationThe following screen will be displayed.Copyright 2019, the Board of Trustees of the University of Illinois
AITS – Decision SupportUniversity AdministrationAs the installation proceeds, you may see the following window:6. Make sure both Domain and Private networks are checked, then click Allow access.7. Click Close.Copyright 2019, the Board of Trustees of the University of Illinois
AITS – Decision SupportUniversity Administration8. Add “SQLNET.ORA” and “LDAP.ORA” files to your workstation.After you have installed the Oracle client, you will need to add two additionalfiles: “SQLNET.ORA” and “LDAP.ORA”. These files help Oracle locate thedatabase server and directory information.a. Download these files at:i. SQLNET.ORAii. LDAP.ORAb. Place the files in the �directory location (the “\client\” portion of the path may differslightly).9. Test Oracle:a. Opening a command prompt.b. Type sqlplus username @dsprod01 and replace username with yourusername. Then hit Enter.c. A connection should be established.d. Type “exit” at the prompt to quit.10. To verify you can connect to the university data warehouse:a. Opening a command promptb. Type tnsping dsprod01 and hit Enter. You should see a response similar to this:This completes the Oracle 12c installation instructions.Copyright 2019, the Board of Trustees of the University of Illinois
Oracle 12c client or the Oracle 12c ODBC Driver (or both). Some report writing tools, such as SAS or Crystal Reports, can use either the Oracle client to access the database directly in its own language, or use the Oracle 12c ODBC Driver to access the database indirectly using ODBC as a