Transcription
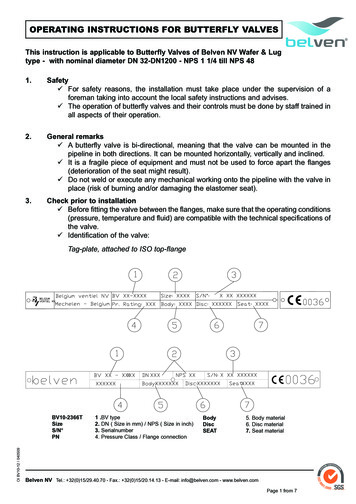
OPERATING INSTRUCTIONS FOR BUTTERFLY VALVESThis instruction is applicable to Butterfly Valves of Belven NV Wafer & Lugtype - with nominal diameter DN 32-DN1200 - NPS 1 1/4 till NPS 481.Safety For safety reasons, the installation must take place under the supervision of aforeman taking into account the local safety instructions and advises. The operation of butterfly valves and their controls must be done by staff trained inall aspects of their operation.2.General remarks A butterfly valve is bi-directional, meaning that the valve can be mounted in thepipeline in both directions. It can be mounted horizontally, vertically and inclined. It is a fragile piece of equipment and must not be used to force apart the flanges(deterioration of the seat might result). Do not weld or execute any mechanical working onto the pipeline with the valve inplace (risk of burning and/or damaging the elastomer seat).3.Check prior to installation Before fitting the valve between the flanges, make sure that the operating conditions(pressure, temperature and fluid) are compatible with the technical specifications ofthe valve. Identification of the valve:Tag-plate, attached to ISO top-flangeOI BV10-12 / 040509BV10-2366TSizeS/N PN1 .BV type2. DN ( Size in mm) / NPS ( Size in inch)3. Serialnumber4. Pressure Class / Flange connectionBodyDiscSEAT5. Body material6. Disc material7. Seat materialBelven NV Tel.: 32(0)15/29.40.70 - Fax.: 32(0)15/20.14.13 - E-mail: info@belven.com - www.belven.comPage 1 from 7
OPERATING INSTRUCTIONS FOR BUTTERFLY VALVESCasted in the valve’s bodyDN 150PN 166"ANSI150CE0036GG25HEAT N DN150 Size (mm)PN 16GG25HEAT N Pressure Class Body material SerialnumberBV6”ANSI 150CE0036 ManufacturerSize (inch)Pressure ClassCE label (or tagplate) Before installation make sure that the main is depressurised and purged inorder to avoid any danger to the operator.4.Installation Check and clean the butterfly valve before mounting it in the pipeline. To ensure that all the moving parts are functioning correctly, the valve should firstundergo a functional test (open/close). Check if the pipeline is free of welding splashes and slivers of metal. Move the disc of the valve so that it is 5 to 10 mm inside the casting. Check if the flange connections of the pipeline are parallel with each other. Check that the bolt-hole-connections are in axial direction of each other. Make sure that the valve fits between the flanges without difficulty. Force apart theflanges with a suitable tool if the fit is too tight. Insert the valve between the flanges, centre and tighten all screws by hand. Open the valve completely. Keep the valve well aligned with the flanges while removing the flange separatorsand tighten the screws with a torque wrench to assure correct sealing (opposingbolts sequentially). After mounting and inspecting the butterfly valve in the pipeline, the valve has to beoperated 3 to 5 times to assure proper functioning before using the pipeline.OI BV10-12 / 040509Remark : Also with lug-type valves, always make sure to intall a counter-flange.Belven NV Tel.: 32(0)15/29.40.70 - Fax.: 32(0)15/20.14.13 - E-mail: info@belven.com - www.belven.comPage 2 from 7
OI BV10-12 / 040509OPERATING INSTRUCTIONS FOR BUTTERFLY VALVES5.Storage Do not remove the original packaging. Do not store in fully closed position. Store the valve inside, in a clean dry place away from UV light.6.Maintenance No particular maintenance or greasing is required. All components are available as spare parts. Make sure that the butterfly valve is manoeuvred at least once a month.7.Changing the valve’s seat, sizes DN32-DN300, NPS 1 1/4 - NPS 12 Remove the operation unit (lever, gearbox, actuator). For backup seat : Remove consecutively following parts : screws (13), retainer plate(14), circlip (15), upper stem (7), bottom screw (1), bottom stem (2), disc (5), seat(6). Remove carefully all O-rings and bushings towards centre of the valve, avoidany damage during disassembly and assembly.For soft seat : Remove consecutively following parts :screws (10), retainer plate (9),circlip (8), stem (5), disc (4), seat (3). Before changing the seat clean the valve punctually. Apply a small amount of silicon grease inside and outside the seat, the O-rings,bushings and stems. Reassemble the valve in the opposite sequence as mentioned above.Belven NV Tel.: 32(0)15/29.40.70 - Fax.: 32(0)15/20.14.13 - E-mail: info@belven.com - www.belven.comPage 3 from 7
OPERATING INSTRUCTIONS FOR BUTTERFLY VALVESSoft SeatBackup SeatOI BV10-12 / 0405091.2.3.4.5.6.7.8.Bottom screwBottom stemBushing (2 pcs)O-ringDiscSeatUpper stemBody valve9. O-ring10. Bushing (2 pcs)11. Bushing (2 pcs)12. O-ring13. Screw (2 pcs)14. Retainer plate15. Circlip1.2.3.4.5.BodyBottom bushingSeatDiscStem6. O-Ring7. Top Bushing8. Circlip9. Retainer Plate10. Screw (2pcs)Belven NV Tel.: 32(0)15/29.40.70 - Fax.: 32(0)15/20.14.13 - E-mail: info@belven.com - www.belven.comPage 4 from 7
OPERATING INSTRUCTIONS FOR BUTTERFLY VALVES8.Changing the valve’s seat, sizes DN350, NPS 14 Remove the operation unit (lever, gearbox, actuator). Remove consecutively following parts : both taper pins (4), stem (10), disc (3),seat (5). Remove carefully all O-rings and bushings towards centre of the valve,avoid any damage during disassembly and assembly. Before changing the seat clean the valve punctually. Apply a small amount of silicon grease inside and outside the seat, the O-rings,bushings and stem. Reassemble the valve in the opposite sequence as mentionedabove.OI BV10-12 / 0405091.2.3.4.5.6.BushingBodyDiscTaper pin (2 pcs)SeatBushings (2 pcs)7. O-ring8. Bushing (2 pcs)9. O-ring10. Stem11. KeyBelven NV Tel.: 32(0)15/29.40.70 - Fax.: 32(0)15/20.14.13 - E-mail: info@belven.com - www.belven.comPage 5 from 7
OPERATING INSTRUCTIONS FOR BUTTERFLY VALVES9.Changing the valve’s seat, sizes DN400-DN600, NPS 16 - NPS 24 Remove the operation unit (lever, gearbox, actuator). Remove consecutively following parts : Bolt (1), end cover (3), O-ring (2), both taperpins (7). The stem (11) is pulled out on the top part of the valve. Remove the disc(6) and seat (8). Remove carefully all O-rings and bushings towards centre of thevalve, avoid any damage during disassembly and assembly. Before changing the seat clean the valve punctually. Apply a small amount of silicon grease inside and outside the seat, the O-rings,bushings and stem. Reassemble the valve in the opposite sequence as mentionedabove.OI BV10-12 / 0405091.2.3.4.5.6.7.BoltO-ringEnd coverBodyBushingDiscTaper pin (2 pcs)8. Seat9. Bushing (2 pcs)10. O-ring11. Stem12. Bushing (2 pcs)13. O-ring14. KeyBelven NV Tel.: 32(0)15/29.40.70 - Fax.: 32(0)15/20.14.13 - E-mail: info@belven.com - www.belven.comPage 6 from 7
OPERATING INSTRUCTIONS FOR BUTTERFLY VALVES10.Changing the valve’s seat, sizes DN700-DN1200, NPS 28 - NPS 48 Remove the operation unit (lever, gearbox, actuator). Remove consecutively following parts : Bolts (1), end cover (2), O-ring (3), balltrust bearing (4), taper pins (10). The stem (11) is pulled out on the top part of thevalve. Remove the disc (9) and seat (8). Remove carefully all O-rings and bushingstowards centre of the valve, avoid any damage during disassembly and assembly. Before changing the seat clean the valve punctually. Apply a small amount of silicon grease inside and outside the seat, the O-rings,bushings and stem. Reassemble the valve in the opposite sequence as mentionedabove.OI BV10-12 / 0405091.2.3.4.5.6.7.8.Bolts (2 pcs)End coverO-ringBall trust bearingBodyO-ringBushing (2 pcs)Seat9. Disc10. Taper pin (2 pcs)11. Stem12. Bushing (2 pcs)13. O-ring14. Bushing (2 pcs)15. O-ringBelven NV Tel.: 32(0)15/29.40.70 - Fax.: 32(0)15/20.14.13 - E-mail: info@belven.com - www.belven.comPage 7 from 7
This instruction is applicable to Butterfly Valves of Belven NV Wafer & Lug type - with nominal diameter DN 32-DN1200 - NPS 1 1/4 till NPS 48 1. Safety For safety reasons, the installation must take place under the supervision of a foreman taking into account the local safety instructions and advises. The operation of butterfly valves and their controls must be done by staff trained in all .