Transcription
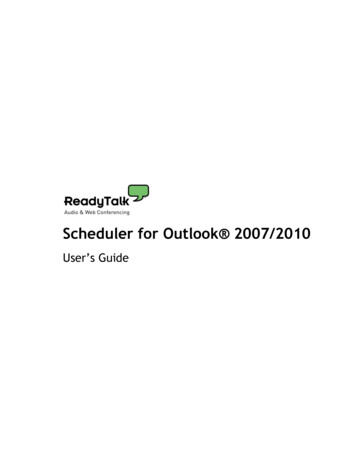
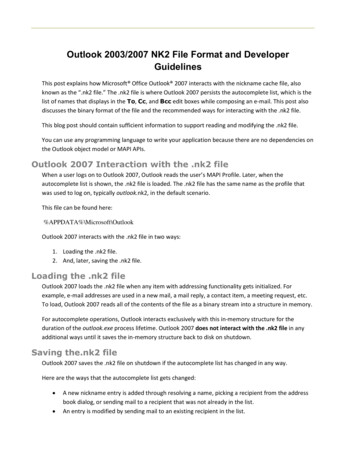
Training & Technology SolutionsOutlook 2010Email NavigationReading PaneNavigationPane InboxNavigation Pane – Access your mail folders, view your calendar(s), and more.Inbox – Browse through emails and meeting invites that have not yet been sorted intofolders.Reading Pane – Read emails from your inbox or any other folder without opening a newwindow.Queens College Office of Information Technology Training & Technology Solutions718-997-4875 training@qc.cuny.edu I-Bldg 214
Training & Technology SolutionsCreating a New E-Mail1. Make sure you are in the Mail Module.2. On the Home tab, in the New group, click New E-Mail.Note: Keyboard shortcut, press CTRL SHIFT M3. In the Subject Box, type the subject of the message.4. Enter the recipients’ email address or names in the To, Cc, or Bcc box.To select recipients’ names from the Address Book, click on the To, Cc or Bcc, then clickon the desired names.Note: If you do not see the Bcc field, click the Options tab, then Select 'Bcc'.5. After you have composed the message, click Send.Queens College Office of Information Technology Training & Technology Solutions718-997-4875 training@qc.cuny.edu I-Bldg 214
Training & Technology SolutionsAttaching a File or Outlook Item File – Any type of fileOutlook item – other email messages, tasks, contacts or calendar itemsReplying to or Forwarding an EmailIn the Message tab, click on Reply, Reply All, or Forward.Queens College Office of Information Technology Training & Technology Solutions718-997-4875 training@qc.cuny.edu I-Bldg 214
Training & Technology SolutionsAddress Book/Contact ListCreating a New Contact1 In the Contacts module on the Home tab, click NewContact.2 Fill in any information that you want to include for thecontact.3 When done, click Save & Close.To create a contact based on the sender of an email while you are viewing the email message thatcontains the name that you want to add, right-click the name of the person and then click Add toContacts.Queens College Office of Information Technology Training & Technology Solutions718-997-4875 training@qc.cuny.edu I-Bldg 214
Training & Technology SolutionsCalendarThe Calendar module helps you keep track of meetings, appointments, and special events.1. From the Navigation Pane, click the Calendar module button. The default view inCalendar is the Day view. This view displays the current date.2. In the Arrange group, you can choose to display your calendar in Work Week, Week, andMonth mode.3. From the Arrange group, click the Scheduleview button. This is where you would see anyappointments or meetings on your calendar.4. From the Arrange group, click the Day button toreturn to today’s date.5. Click the right and left arrows to advance to thenext and previous monthsQueens College Office of Information Technology Training & Technology Solutions718-997-4875 training@qc.cuny.edu I-Bldg 214
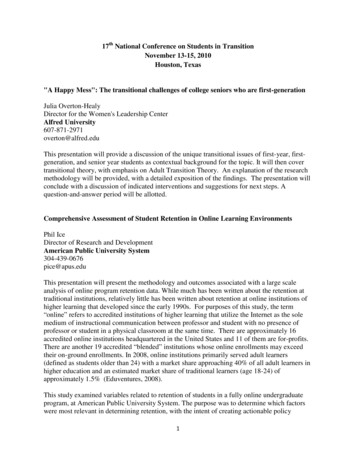
Training & Technology SolutionsMeetingsA meeting is an appointment that includes other people and can include resources such asconference rooms. Responses to your meeting requests appear in your Inbox. When you create ameeting, you can check peoples’ schedules to find the best time for everyone to get together.1. On the Home tab, click New Meeting.2. In the Subject box, type a description.3. In the Location box, type a description or location. You can also click Rooms if you haveset up conference rooms as resources.4. In the Start Time and End Time lists, click the start and end time for the meeting. If youselect the All Day event check box, the event shows as a full 24-hour even, lasting frommidnight to midnight.5. In the meeting request body, type any information that you want to share with therecipients. You can also attach files.6. On the Meeting tab, click Scheduling Assistant.The Scheduling Assistant helps you find the best time for your meeting.7. Click Add Other, and then click Add from Address Book.8. In the Select Attendees and Resources dialog box, in the Search box, enter the name ofthe person or resource to include at the meeting.Queens College Office of Information Technology Training & Technology Solutions718-997-4875 training@qc.cuny.edu I-Bldg 214
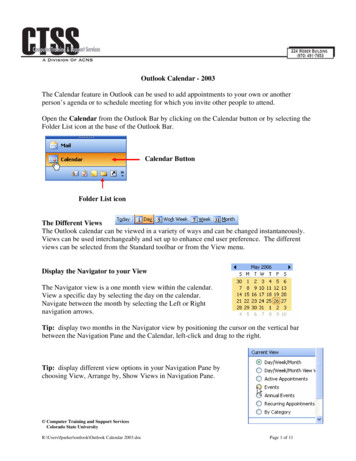
Training & Technology Solutions9. Click the name from the results list, then click Required, Optional, or Resources, and thenclick OK.Required and Optional attendees appear in the To box on the Meeting tab, and Resourcesappear in the Location box.The Free/Busy Grid shows theavailability of attendees. A greenvertical line represents the start ofthe meeting. A red vertical linerepresents the end of the meeting.The Room Finder pane contains suggested times forthe best time for your meeting (when most attendeesare available). To select a meeting time, click a timesuggestion in the Room Finder pane in theSuggested Times section, or pick a time on theFree/Busy Grid.10. To setup a recurring meeting, click on Recurrence in the Options group. Choose theoptions for the recurrence pattern you want, and then click OK.When you add a recurrence pattern to the meeting request, the meeting tab changes toRecurring Meeting.Queens College Office of Information Technology Training & Technology Solutions718-997-4875 training@qc.cuny.edu I-Bldg 214
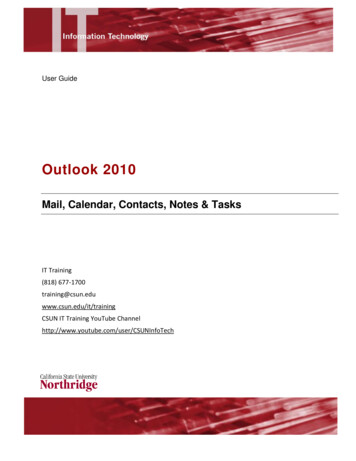
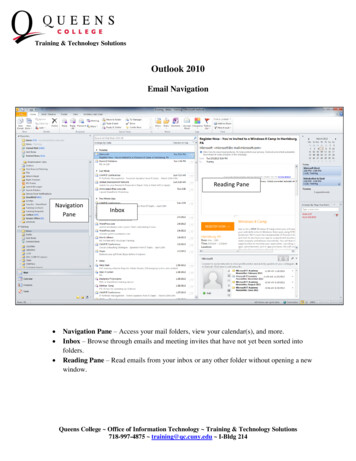
Training & Technology SolutionsAppointmentsAn appointment is an activity that involves only you. Use an appointment when you want toshow that you are busy but no one else in your organization is involved. You might enter anappointment to block out time in your Calendar when you need to meet with a client, visit thedentist, or research a project you are working on.The appoint portion is similar to the meeting portion. The only difference is you cannot invitepeople to your appointment.Meeting InvitesAs a meeting attendee, you can Accept, Tentatively Accept, Decline and Propose a New Time.However, the meeting organizer must accept the new time.Note: Meeting organizers can send meeting requests that restrict the ability to propose alternatemeeting times. If the meeting organizer has restricted meeting proposals, the Propose New Timecommand is not available.To Propose a New Time1. In the open meeting request, on the Meeting tab, click Propose New Time.2. By default, when you propose a newtime, you tentatively accept themeeting. However, you have theadditional options to click Tentativeand Propose New Time or Decline andPropose New Time.3. Click a time when all invitees are available.4. Click Propose Time.5. Click Send.Queens College Office of Information Technology Training & Technology Solutions718-997-4875 training@qc.cuny.edu I-Bldg 214
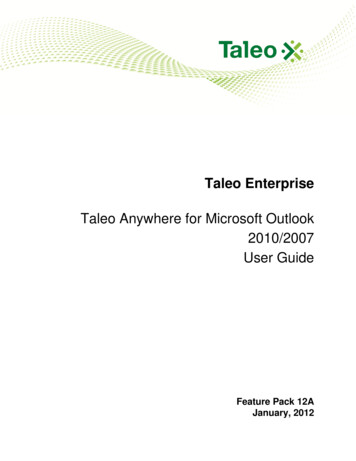
Training & Technology SolutionsChange the Default ResponseWhen you propose a new meeting time, an email message is sent to the meeting organizer. Thismessage includes your meeting request response — accept, tentative, or decline.By default, when you propose a new time, your meeting request response is tentative. However,you can change the default response for all meetings requests that you reply with proposed newtime.1. Click the File tab.2. Click Options.3. Click Calendar.Under Calendar options, click Accept, Tentative, or Decline.Queens College Office of Information Technology Training & Technology Solutions718-997-4875 training@qc.cuny.edu I-Bldg 214
Training & Technology SolutionsCreating a Signature1. Open a new message. On the Message tab, clickSignature, and then click Signatures .2. On the E-mail Signature tab, click New.3. Type a name for the signature, and then click OK.4. In the Edit Signature box, type the text that you want to include in the signature.To format the text, select the text, and then use the style and formatting buttons to select theoptions that you want.To add elements besides text, click where you want the element to appear, and then do any of thefollowing:OptionsTo add an electronic business cardTo add a hyperlinkTo add a pictureHow ToClick on Business Card, and then click on acontact in the Filed As list. Click OK.Click Insert Hyperlink, then type in theinformation or browse to a hyperlink andclick to select it. Then, click OK.Click Picture. Then, browse to a picture file,select it, and then click OK.To finish creating the signature, click OK.Note: The signature that you just created or modified won't appear in the open message. It mustbe inserted into the message.Queens College Office of Information Technology Training & Technology Solutions718-997-4875 training@qc.cuny.edu I-Bldg 214
Training & Technology SolutionsAdd a Signature to All MessagesSignatures can be added automatically to all outgoing messages, or you can choose whichmessages include a signature.Note: Each message can contain only one signature.1. On the Message tab, in the Include group, click Signature, and then click Signatures.2. Under Choose default signature, in the E-mail account list, click an email account withwhich you want to associate the signature.3. In the New messages list, select the signature that you want to include.4. If you want a signature to be included when you reply to or forward messages, in theReplies/forwards list, select the signature. Otherwise, click (none).Queens College Office of Information Technology Training & Technology Solutions718-997-4875 training@qc.cuny.edu I-Bldg 214
Outlook 2010 Email Navigation Navigation Pane - Access your mail folders, view your calendar(s), and more. Inbox - Browse through emails and meeting invites that have not yet been sorted into folders. Reading Pane - Read emails from your inbox or any other folder without opening a new window. Navigation Pane Inbox Reading Pane