Transcription
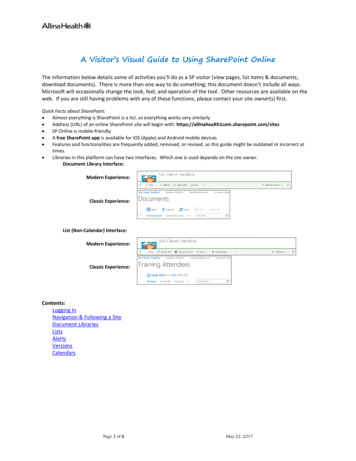
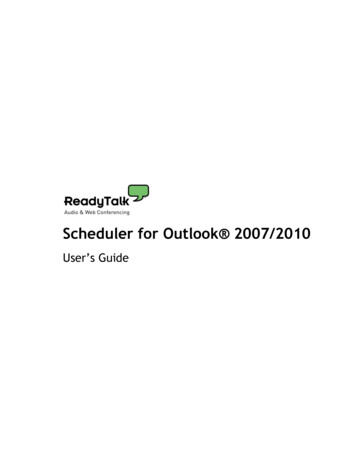
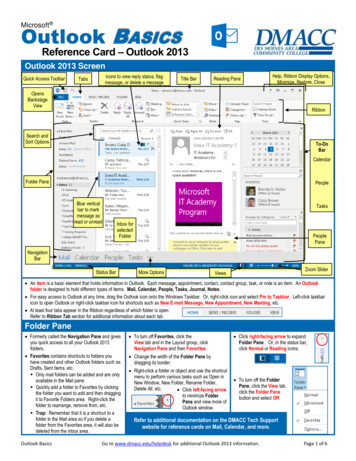
Outlook Calendar - 2003The Calendar feature in Outlook can be used to add appointments to your own or anotherperson’s agenda or to schedule meeting for which you invite other people to attend.Open the Calendar from the Outlook Bar by clicking on the Calendar button or by selecting theFolder List icon at the base of the Outlook Bar.Calendar ButtonFolder List iconThe Different ViewsThe Outlook calendar can be viewed in a variety of ways and can be changed instantaneously.Views can be used interchangeably and set up to enhance end user preference. The differentviews can be selected from the Standard toolbar or from the View menu.Display the Navigator to your ViewThe Navigator view is a one month view within the calendar.View a specific day by selecting the day on the calendar.Navigate between the month by selecting the Left or Rightnavigation arrows.Tip: display two months in the Navigator view by positioning the cursor on the vertical barbetween the Navigation Pane and the Calendar, left-click and drag to the right.Tip: display different view options in your Navigation Pane bychoosing View, Arrange by, Show Views in Navigation Pane. Computer Training and Support ServicesColorado State UniversityR:\Users\fparker\outlook\Outlook Calendar 2003.docPage 1 of 11
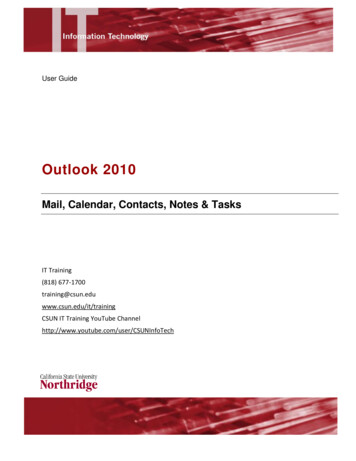
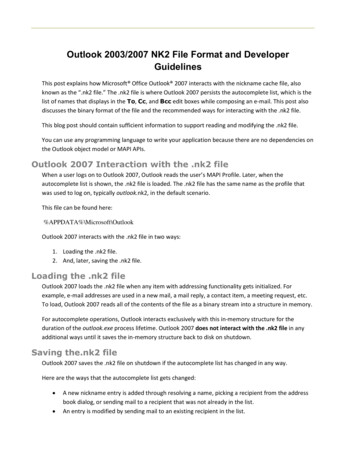
View Options: The Today view displays current dayThe Day view displays one day at a timeThe Work Week displays one week, Monday – Friday, by defaulto The work week can be custom definedThe Week view displays one calendar weekThe Month View displays one month at a timeTip: Display a different Reading Pane for your calendar view by selection the View menu,Reading Pane, and selecting Left, Right, or Off.Go to a DateTo quickly go to a specific date, press the Ctrl-G keyson the keyboard. From here you may select the dateyou want and also the view (Day, Week, Month, WorkWeek).Defining the Work WeekDefine the Work Week by selecting Tools, Options,Calendar Options. Select the check boxes next to the days of theweek that you want included in your work week. In the First day of week box, clickthe day that you want. Computer Training and Support ServicesColorado State UniversityR:\Users\fparker\outlook\Outlook Calendar 2003.docPage 2 of 11
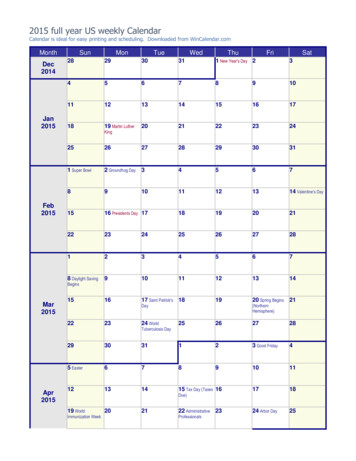
Tip: customize the background color of your calendar by selecting Tools, Options, CalendarOption and selecting the Background color of your choice.Scheduling Appointments and EventsUse the Outlook Calendar to schedule single or recurring appointments and/or events. Anexample of an Appointment can be a dentist appointment, hockey practice, soccer game,grooming time for your pet, and several other things. An example of an Event would be an allday seminar, an all day retreat, and so forth.Reminders can be set up for each Appointment and/or Event. All reminders display in a dialogbox . Note: Outlook must be open in order to receive reminders.An Appointment is a calendar item that is to be added only to your own agenda. No otherparticipants can be added to an Appointment. To create a new appointment item on youragenda (or someone else’s for which you are a Designate) choose New, Appointment.Tip: Easily mark an existingAppointment on the Calendaras Private by right-clickingwith the mouse on theAppointment and choosingPrivate from the menu.Marking something as Privatewill mask an appointment sothat details can’t be seen byother Outlook users. Computer Training and Support ServicesColorado State UniversityR:\Users\fparker\outlook\Outlook Calendar 2003.docPage 3 of 11
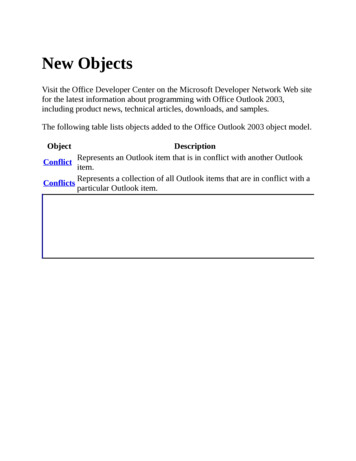
Tip: By default, Outlook will schedule typical holidays for your Country as Calendar Events.Add other Country Holidays by choosing Tools, Options, select the Preference tab, click on theAdd Holiday button located in the Calendar Options section of the dialog box. Computer Training and Support ServicesColorado State UniversityR:\Users\fparker\outlook\Outlook Calendar 2003.docPage 4 of 11
Scheduling MeetingsThere are several ways to create a new meeting in which you may invite other attendees. Theeasiest way to start the process is to select the new button.Alternate ways to create new meetings: Choose File, New, Meeting Request Select an option from the Actions menuTip: Easily mark an existingAppointment on the Calendaras Private by right-clickingwith the mouse on theAppointment and choosingPrivate from the menu.Marking something as Privatewill mask an appointment sothat details can’t be seen byother Outlook users.In the To section, you may add persons from any of the Address Books available in Outlook,including the Global Address List.Tip: Create a Group ViewEasily see free or busy time for more than one person by creating a group view of the invitees.Once a group view has been created, it can be used repeatedly until removed. Create a GroupView by selecting Actions, View Group Schedule. Select the New button to create a list,provide a unique group name, and add the invitees to the group. Use the group in a meetingrequest by opening the group view from the Actions menu, View Group Schedule dialog box andchoose the Make a Meeting button. Computer Training and Support ServicesColorado State UniversityR:\Users\fparker\outlook\Outlook Calendar 2003.docPage 5 of 11
Scheduling: Identifying the IconsMeeting OrganizerRequired AttendeeOptional AttendeeResource iconTo Grant Calendar Permissions to Another PersonThere are two different options when assigning permissions to your calendar account. Oneoption is to assign a specific user with specific permissions such as create and review forscheduling items and/or folders/subfolders within the Preferences tab. The second option is todelegate specific users for full permission on your account within Exchange using the Delegatestab.Preferences tab: Calendar Permissions for aSpecific UserSelect the Calendar Options button from thePreferences tab to display the Calendar options. Computer Training and Support ServicesColorado State UniversityR:\Users\fparker\outlook\Outlook Calendar 2003.docPage 6 of 11
From the Advanced Options section of the dialog box, select the Resource Scheduling button.Next, select the Set Permissions button from Resource Scheduling dialog box.From the Calendar Properties dialog box, select thePermission tab. Add users by selecting the Addbutton. Computer Training and Support ServicesColorado State UniversityR:\Users\fparker\outlook\Outlook Calendar 2003.docPage 7 of 11
Outlook will give you the option to search for a user within the Global Address List or otheravailable list.Assign a permission level for each user that you add yourCalendar Options dialog box. Make sure the user is selected inthe list and then choose a permission level from the drop-downmenu.Press the OK button when finished. Computer Training and Support ServicesColorado State UniversityR:\Users\fparker\outlook\Outlook Calendar 2003.docPage 8 of 11
A Different way to Share your CalendarYour calendar can be shared with others as long as the proper permissions are set.From the Navigation Pane within Outlook select Share My Calendar.Add a user and assignthe appropriatepermission level.Open Another Person’s FolderOnce the owner of the Calendar folder has granted you the appropriate permissions, then youmay modify/schedule meetings on another’s agenda.To open another’s folder, from the File menu, point to Openand click Other User’s Folder. In the Name box, enter thename of the person who has granted you delegate permissionor click Name to select from the list. In the Folder box, clickthe folder you want to open. Computer Training and Support ServicesColorado State UniversityR:\Users\fparker\outlook\Outlook Calendar 2003.docPage 9 of 11
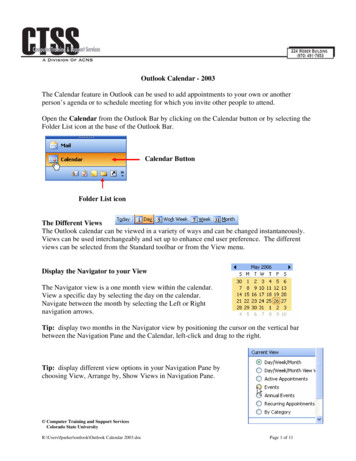
Schedule A Meeting/Appointment For Another PersonWith the other person’s calendar open, choose File, New, and choose either Appointment orMeeting Request. Fill in the appropriate items such as Subject, Location, Start and End times,etc.Delegate1. The person who wishes to grant thepermissions must log into his/her account inOutlook and choose Tools, Options.2. Click on the Delegates tab.3. Click on the Add button and find theperson’s name in the Address Book that isdisplayed. (The Address Book will displayall CSU faculty and staff members.) Clickon Add, then click on OK.4. From the Delegate Permissions window,click on the drop-down arrow next toCalendar.5. Choose the desired permission.a. Reviewer – can read items only. AReviewer may not add or delete itemsfrom the calendar.b. Author – can read and create items. An Author may modify or delete only theitems which he/she added to the calendar.c. Editor – can read, create, and modify items.Permissions can be set for every item listed inthe Delegate Permissions dialog box per user.Press OK when finished. Computer Training and Support ServicesColorado State UniversityR:\Users\fparker\outlook\Outlook Calendar 2003.docPage 10 of 11
Printing Your CalendarOutlook Calendar has several Print styles to choose from when printing. Select and Preview thedifferent styles by choosing File, Print, and selecting a style from the Print Style section of thedialog box. Daily StyleWeeklyMonthlyTri-foldCalendar DetailCAUTION: Printing Errors That Can OccurWhen printing a calendar that belongs to someone else, you may encounter a printer errordue to permission levels tied at the Task level. By default, when granting delegatepermissions on a calendar, the Tasks permissions are set to None. If you don’t havepermission to view Tasks, then you will not be able to print. The Print Page Setup dialogbox is set up to print Tasks by default and it will not work if you don’t have “permission”.Modify the Page Setup from the File, Print menu:Make sure you deselect the Note options.Click the OK button when finished.HelpFor Help on any of the above or other items in MS Outlook, press the F1 key on the keyboard. Computer Training and Support ServicesColorado State UniversityR:\Users\fparker\outlook\Outlook Calendar 2003.docPage 11 of 11
R:\Users\fparker\outlook\Outlook Calendar 2003.doc Page 1 of 11 Outlook Calendar - 2003 The Calendar feature in Outlook can be used to add appointments to your own or another person's agenda or to schedule meeting for which you invite other people to attend. Open the Calendar from the Outlook Bar by clicking on the Calendar button or by .