Transcription
Wealth and InvestmentManagementIntermediariesOnline BankingBulk PaymentsUser guide
ContentsContents1.Introduction32.Log in steps43.Make BACS payments53.1 Select BACS ‘from’ account63.2 Add payment details and beneficiaries73.3 Enter payment references and amounts113.4 Confirm a BACS payment13View BACS payments154.1 Amend or delete a saved BACS payment164.2 View a submitted BACS payment174.4.3 Cancel an ‘Execution Pending’ BACS payment 195.6.7.8.2Verify/Authorise BACS payments205.1 Verify a BACS payment215.2 Authorise BACS payments245.3 Reject a BACS payment26Import payments276.1 Import a BACS payment file296.2 Import MT103 payment files316.3 View imported files326.4 Submit an imported file33Verify/Authorise MT103 files357.1Verify an MT103 file367.2 Authorise an MT103 file397.3 Reject an MT103 file42Payment file conversion tool438.1 MT103/BACS file upload448.2 Validating the payments file468.3 Payments file template creation488.4 Exporting the payment file49
1. IntroductionThe Bulk Payments functionality on Wealth Online BankingThe Bulk Payments functionality enables users to:enables users to make bulk payments to beneficiaries. Import inter-account transfers, UK same-day paymentsand international payments from an MT103 format fileIt is expected that a user of Bulk Payments is familiar withthe way in which Wealth Online Banking works and has readthe documentation regarding the use of online banking. Import a list of BACS beneficiaries to create a BACSpayment Make a BACS paymentWealth Online Banking user and your organisation mustBACS payments are managed entirely within the Bulkbe registered to use the module. In addition, both the userPayments extension, while inter-account transfers, UKand organisation must have the privileges necessary to usesame-day payments and international payments arethe application.managed as usual in Wealth Online Banking once the1. IntroductionTo use the Bulk Payments module you must be a registeredpayments have been submitted.3
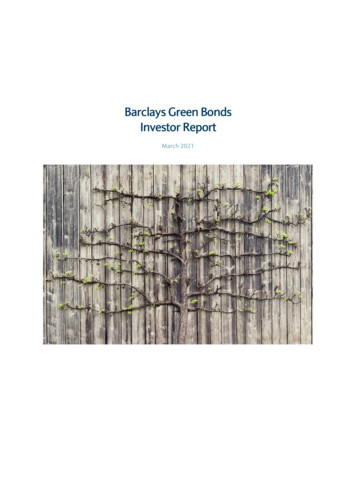
2. Log in steps (all users)1.Open your web browser2.Ensure you have an Online Banking card, PIN and thesoftware installed on your desktop/laptop3.Copy and paste the url below in your web browseraddress bar4.Click on ‘Login’ and enter your PIN2. Log in stepsURL : unauthenticated/corporate/loginSigningGemplus4. Click on ‘Login’ and enteryour PIN4
3. Make BACS paymentsTo make a BACS payment to one or more beneficiariesIn each of the steps that follow you will be asked to enternavigate to the ‘Banking’ tab and select ‘Make BACSthe details for the BACS payment. If you make a mistake atpayment’ from the Payments option menu. You will thenany point, an error will be displayed on the page when yoube directed to a page where you may select the account toattempt to continue.3. Make BACS paymentsmake the payment from.Once the payment has been completed, it may need to be verified and/or approved by another user or users from yourorganisation before it’s finally executed.5
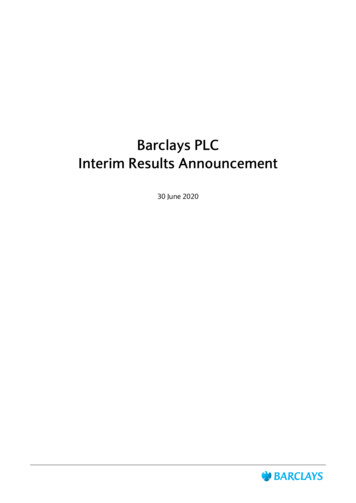
3.1 Select BACS ‘from’ accountThe ‘Make BACS payment – step 1’ page will be displayed.2.The ‘Select account set’ selection box will appear withThis page is used for specifying the ‘from account’ – thethe account sets belonging to the selected group.account from which the funds will be paid.Select an account set and click the ‘Go’ button to theright of it.Two options are available for selecting the ‘from account’.You may either enter the sort code and account number3.appear in the ‘Select account’ selection box. Selectof the account to be debited, or you may select thethe required account.account using the ‘Select group’ and ‘Select account set’selection boxes.The accounts belonging to the account sets will4.Once you have selected or entered an account, clickthe ‘Continue’ button at the bottom of the page toTo select an account using the ‘Select group’ and ‘Selectaccount set’selection boxes:1.Select a group from the first selection box and clickIf you click ‘Cancel’ on this page you will be asked to confirmthe action, and all the data entered will be cleared from thepage so that you can start again.3.1 Select BACS ‘from’accountthe ‘Go’ button to the right of it.continue to the next step.1. Select a group from the first selection box and click the ‘Go’ button to the right ofit your PIN2. The ‘Select account set’ selection box will appear with the account sets belonging4. Once you have selectedto the selected group.Select an account set and click the ‘Go’ button to the rightor entered an account,of itclick the ‘Continue’3. The accounts belonging to the account sets will appear in the ‘Select account’selection box. Select the required accountbutton at the bottom ofthe page to continue tothe next step6
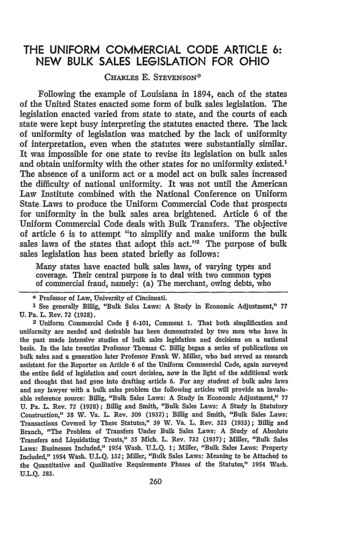
3.2 Add payment details and beneficiariesThe next page is ‘Make BACS payment – step 2’ where youOn this page, the following payment details may be added:may enter further payment details and add beneficiaries.1.‘Payment Name’ (required) – the name given to thispayment which will later be displayed in the ‘ViewNote: Several of the fields on this page require you to enterBACS Payments’ screen. This must only contain validtext using the valid BACS character set – this includes onlyBACS characters.upper case):2.‘Value Date’ (required) – the date when thebeneficiary payment amounts should reach the Capital letters (A-Z)beneficiary’s accounts. The value date must be at Digits (0-9)least two working days in the future – the list only Characters (/, -, ., &)includes valid dates for the payment. Space3.‘Notes’ (optional) – information about the paymentwhich is not sent to BACS.4.‘Debit Charges From’ – indicates whether chargesfor making the BACS payment will be debited fromthe ‘Payment From’ account or the ‘Default BillingAccount’ for your organisation.3.2 Add payment detailsand beneficiariesthe following characters (lower case letters are converted to7
1. ‘ Payment Name’ (required) – the name given to this payment which will later be displayed in the ‘View BACSPayments’ screen. This must only contain valid BACS characters2. ‘Value Date’ (required) – the date when the beneficiary payment amounts should reach the beneficiary’saccounts. The value date must be at least two working days in the future – the list only includes valid dates for3.2 Add payment detailsand beneficiariesthe payment3. ‘Notes’ (optional) –4. ‘Debit Charges From’ – indicates whether charges for making the8information about theBACS payment will be debited from the ‘Payment From’ accountpayment which is notor the ‘Default Billing Account’ for your organisationsent to BACS
Beneficiaries may be added by either selecting a previouslyTo add a pre-defined beneficiary:entered beneficiary reference or by typing in a beneficiary1.Select a beneficiary set from the selection box, eithername, sort code and account number. The beneficiarya named beneficiary set configured in Online Bankingamounts and references may be added on the next screen.or an ‘Unallocated’ beneficiary. Click the ‘Go’ button tothe right of it.You must enter at least one beneficiary. The screen shows2.A list of pre-defined beneficiaries will appear inup to 50 most recently added beneficiaries in two columns,the ‘Beneficiary’ selection box. Select the requiredwith the last added beneficiary at the top left of the list.beneficiary from the selection box and click the ‘Add’This is to help you keep track of where you are up to whenbutton to the right of it.adding large lists of beneficiaries. In all other screens thebeneficiaries are shown in the order they are added (or3.The beneficiary will be added to the list (appearing atthe top left).imported from a BACS file).4.To add all beneficiaries in a set, select ‘add all’ andclick ‘go’1. Select a beneficiary set from the selection box, either a named beneficiary set configured in Online Banking oran ‘Unallocated’ beneficiary. Click the ‘Go’ button to the right of it2. A list of pre-defined beneficiaries will appear in the ‘Beneficiary’ selection box. Select the required beneficiary3.2 Add payment detailsand beneficiariesfrom the selection box and click the ‘Add’ button to the right of it.3. The beneficiary will be added to the list(appearing at the top left)9
To add a new beneficiary:will perform a simple validation on the information you1.Enter the beneficiary name (using valid BACShave entered. For instance, if the beneficiary’s account ischaracters).with Barclays, then a valid Barclays sort code and account2.Enter the sort code and account number of thebeneficiary account.3.If you want to save this beneficiary for use in futurenumber must have been entered.Alternatively, you may choose to click: ‘Back’ to return to the previous screen if, for example, youpayments, tick the ‘Save this Beneficiary’ box andrealise you have selected the wrong ‘from’ account forenter a unique Beneficiary Reference (using validthe payment.BACS characters).4.Click the ‘Add’ button.5.The beneficiary will be added to the list (appearing atthe top left). ‘Cancel’ to cancel the creation of the payment. You willbe asked to confirm the cancellation and then returnedto the ‘Step 1’ page and all the data entered so far willbe cleared. ‘Save’ to save the payment in its current state so that it3.2 Add payment detailsand beneficiariesmay be amended (or deleted) later. The information you10Once you have completed all of the payment details andhave entered will be validated as for ‘Continue’, then theadded the beneficiaries, you may click the ‘Continue’‘View BACS Payments’ page will be displayed includingbutton to move to the next step in the process. The systemthe payment with a status of ‘Saved’.
3.3 Enter payment references and amountsIf the data passes validation, the next page in the BACSOn this page, the following details should be supplied forpayments process is ‘Make BACS payment – step 3’ whereeach beneficiary:you will be asked to provide a reference and payment1.amount for each of the beneficiaries.‘Payment Reference’ (required) – the reference for thepayment to appear in the beneficiary account. Mustonly contain valid BACS characters.The page shows the calculated headroom available forthe payment. The headroom is the difference betweenthe settlement risk configured for your organisation and2.‘Payment Amount’ (required) – the amount (in GBP)of the payment to the beneficiary.the BACS payments already in progress (with a status of‘Execution Pending’ or ‘Completed’) between the two dates.Once you have completed all of the beneficiary details, clickthe ‘Continue’ button to move on to the ‘Confirmation’It also shows the total value of the payments added soscreen, the final step in the process. If there are anyfar (updated each time you refresh the page) and thevalidation errors in the beneficiary details, you will berequested and available value dates for the payment.returned to the same page with explanatory error messagesOccasionally, the available value date may be different toat the top and highlighting any invalid beneficiaries.the requested value date if, for example, there has beena significant delay between selecting the value date andAlternatively, you may choose to click:arriving at this screen. ‘Back’ to return to the previous screen. ‘Cancel’ to cancel the creation of the payment. You willbe asked to confirm the cancellation and then returnedto the ‘Step 1’ page and all the data entered so far will becleared. ‘Save’ to save the payment in its current state so that itmay be amended (or deleted) later. The information youhave entered will be validated as for ‘Continue’, then the‘View BACS Payments’ page will be displayed including3.3 Enter payment referencesand amountsthe payment with a status of ‘Saved’.11
3.3 Enter payment referencesand amounts1. ‘Payment Reference’ (required) – the2. ‘Payment Amount’reference for the payment to appear(required) – thein the beneficiary account. Must onlyamount (in GBP) ofcontain valid BACS characters.the payment to thebeneficiary.Note: To remove a beneficiary from the payment, simply leave or set the payment amount to blank or zero. Thebeneficiary will not be included when the payment is completed in the next step.12
3.4 Confirm a BACS payment3.the details necessary to make a BACS payment. BulkPayments will display the ‘Make BACS payment – step 4 –confirmation’ screen for you to confirm these details.This screen shows the payment details you have entered‘Number of beneficiaries to be paid’ – the number ofbeneficiaries with amounts greater than zero.4.Click the ‘Display’ button to see the individualbeneficiary details.5.‘Execution Date’ – the calculated execution date forand provides the following details calculated for thethe payment, usually two working days before thepayment:available value date.1.‘Payment total’ – the amount of the paymentcalculated by adding all of the individual6.the payment (this will normally be the same as thebeneficiary accounts.2.‘Headroom available’ – the amount of headroom(described in Section 3.3) available to make thepayment on the requested value date.‘Available Value Date’ – the calculated value date forrequested value date).7.‘Authorisation Required’ – indicates whetherverification and/or authorisation will be needed forthis payment.3.4 Confirm a BACSpaymentOnce you reach this step, you have completed all of13
To see the individual beneficiaries that will be includedis executed. If there is no requirement for the payment toin the payment, click the ‘Display’ button. This will showbe verified or authorised you will need to digitally sign theanother screen with a full list of all the beneficiaries. Clickpayment; this is described in Section 5 - ‘Verify/authorise/the ‘Back’ button to return to the ‘Make BACS payment –reject BACS payments’.Step 4 – confirmation’ screen.Alternatively, you may choose to click:If the payment total is greater than the headroom availableor is greater than the maximum authorisation limitconfigured for your organisation, one or more errors will be1.‘Back’ to return to the previous screen.2.‘Cancel’ to cancel the creation of the payment. Youwill be asked to confirm the cancellation and thendisplayed and you will not be able to submit the payment.returned to the ‘Make BACS payment – step 1’ pageand all the data entered so far will be cleared.Once you are satisfied that the payment details are allcorrect – and that there are no errors – you may click3.‘Save’ to save the payment in its current state so thatthe ‘Submit’ button to complete the payment. The ‘Viewit may be amended (or deleted) later. The informationBACS payments’ page will then be displayed, including theyou have entered will be validated as for ‘Submit’,payment you have just submitted.then the ‘View BACS payments’ page will be displayedshowing the payment with a status of ‘Saved’.The payment may then need to be verified and/or3.4 Confirm a BACSpaymentauthorised by other users in your organisation before it14
4. View a BACS paymentTo view the BACS payments entered for your organisation,navigate to the ‘Banking’ tab and select the ‘View BACSpayments’ option on the left hand menu. ‘Verification Pending’ for payments that have beensubmitted and are awaiting verification. ‘Authorisation Pending’ for submitted payments awaitingtheir first or only authorisation.This will take you to the ‘View BACS payments’ pageshowing a list of BACS payments for your organisation. Thepayments are shown in order of execution date, starting ‘2nd Authorisation Pending’ for submitted and authorisedpayments awaiting second authorisation. ‘Execution Pending’ for payments that have beenwith saved payments with no execution date, followed bysubmitted and fully verified and/or authorised, and aresubmitted payments in ascending execution date order.now ready to be executed on the date indicated. ‘Completed’ for payments that have been executed onThe status of each payment in the list will be one of:the execution date. These will remain in the list for up to ‘Saved’ for payments that were saved during the makesix months.BACS payment process or saved at the end of the ‘ImportPlease note: Payments executed more than three months in the past will be removed from the list. Saved paymentswill remain until they are either deleted or submitted. Additionally, some payments may briefly disappear while they arebeing processed for BACS, usually late at night. Saved payments may be amended and submitted, or deleted, by clickingon the ‘Payment Name’ link. You may view details of submitted payments by clicking the ‘Payment Name’ link. This willtake you to the ‘Amend BACS payment – step 2’. Payments that are ‘Execution Pending’ may also be viewed, and, if theexecution date is in the future, you may cancel them.154. View a BACS paymentpayments’ process (Section 6).
4.1 Amend or delete a saved BACS paymentDuring the process for making a BACS payment, a user2.If you click the ‘Cancel’ button on the Step 2, 3 andmay save a payment and resume it later. Payments may4 pages, you will be asked for confirmation thenalso be imported into the ‘Saved’ status during the BACSreturned to the ‘View BACS payments’ page withoutimport process.saving any changes.When you click on the ‘Payment Name’ link of a saved BACSIn addition, if you are amending an imported payment, anypayment in the ‘View BACS Payments’ page, the ‘Amendinvalid beneficiaries (for example, those with an unknownBACS payment – step 2’ screen will be displayed.sort code or invalid account number) will be highlighted.This page is similar to the ‘Make BACS payment – step 2’Clicking on the ‘Continue’ button will lead through to Stepsscreen with the following differences:3 and 4 as before so that you may submit the payment1.You may click the ‘Delete’ button here to delete theonce all the details are complete, or save it again topayment. You will be asked to confirm that you wishresume later.to delete the payment and, on confirmation, it willbe deleted and the ‘View BACS payments’ page will4.1 Amend or delete a savedBACS paymentbe displayed.1. You may click the ‘Delete’ button here to delete the payment. You will be asked to confirm that you wish to16delete the payment and, on confirmation, it will be deleted and the ‘View BACS payments’ page will be displayed
4.2 View a submitted BACS paymentOnce a payment has been submitted for execution viaYou may click one of the following buttons:verification and/or authorisation, it cannot be amended,1.‘Print’ to print the displayed payment details.2.‘Display’ to view the beneficiaries of the payment. Thisexcept for the notes, unless it is firstly rejected (duringverification/authorisation) or cancelled (when it haswill take you to the ‘View BACS beneficiaries’ page.‘Execution Pending’ status).3.‘Submit’ to save any changes you have made to theClick the ‘Payment Name’ link of a BACS payment on thepayment ‘Notes’ field and return to the ‘View BACS‘View BACS payments’ page. On this page you may add orPayments’ page.modify the notes associated with the payment.4.‘Back’ to return to the ‘View BACS payments’ pagewithout saving the notes.1. ‘Print’ to print thedisplayed paymentdetails2. ‘Display’ to view thebeneficiaries of thepayment. This will takeyou to the ‘View BACS4. ‘ Back’ to return to the ‘View BACSpayments’ page without savingthe notes4.2 View a submittedBACS paymentbeneficiaries’ page3. ‘Submit’ to save any changes you have made tothe payment ‘Notes’ field and return to the ‘ViewBACS Payments’ page17
4.2 View a submittedBACS payment18On clicking on the ‘Display’ button the ‘View BACS‘Back’ button to return to the ‘View BACS payments’ page.beneficiaries’ page will be displayed, showing all theYou may also click the ‘Print’ button to print the displayedbeneficiaries of the BACS payment. On this page, click thebeneficiary details.
4.3 Cancel an ‘Execution Pending’ BACS paymentIt is possible to cancel a fully verified and authorisedWhen you click the ‘Confirm’ button you will be askedpayment (in the ‘Execution Pending’ state) at any time upto digitally sign the cancellation of the payment (see theto the day before the execution date of the payment.description of digital signatures in Section 5).On the ‘View Bacs payments’ page, click the ‘PaymentOnce you have digitally signed the cancellation of theName’ for the payment you wish to cancel and click thepayment, the payment status is set to ‘Saved’ and the‘Delete’ button.‘View BACS payments’ page is displayed. The payment maythen be amended or deleted. If you wish to re-submit thepayment it will need to be verified and/or authorised againas before.194.3 Cancel an ‘ExecutionPending’ BACS paymentThe ‘Delete payment – confirmation’ page will be displayed.
5. Verify/authorise/rejectBACS payments5. Verify/authorise/reject BACS paymentsMost payments will need to be verified, authorised or bothWhen verifying, authorising or rejecting payments you– some payments will need to be authorised by two people.will be asked to provide a secure digital signature. YouThe requirements for each payment will depend on thewill also be asked to provide a secure digital signatureconfiguration for your organisation and the total amount ofwhen you delete a payment with a status of ‘Executionthe payment.Pending’ (which is possible any time up to the day beforethe execution date), or if you submit a payment with noYou must have the appropriate privileges to verify orrequirement for verification or authorisation.authorise payments and these options will only be availableon the menu if you have the privileges. A user may have‘Verify’ and/or ‘Authorise’ privileges at level ‘A’ or ‘B’. Therequirement for ‘A’ or ‘B’ authorisation (by one or two users)depends on the value of the payment.A single user for an organisation may only perform one of ‘Submit’, ‘Verify’ or ‘Authorise’ on an individual payment.Therefore, a payment which requires verification and two authorisations will require actions from four people before itcan be executed.Payments awaiting verification or authorisation may be rejected, returning them to the ‘Saved’ state so that they may beamended or deleted. If you wish to re-submit the payment it will need to be verified and/or authorised again as before.20
5.1 Verify a BACS payment5.1 Verify a BACS paymentTo verify or reject BACS payments with the ‘Verification2.Pending’ status, navigate to the ‘Approvals’ tab and click onthe ‘Verify BACS payments’ menu option. This option willonly be available if you have the verification privilege.The ‘Verify BACS payments’ page will be displayed showing‘Payment From’ – the name of the account that thepayment amount will be taken from.3.‘Status’ – the status of the payment (this should be‘Verification Pending’).4.‘Payment Name’ – the name given to the paymentall BACS payments that you may verify; that is, those withwhen it was created. Click the name to view details ofthe ‘Verification Pending’ status and that were submitted bythe payment and beneficiaries.another user.For each BACS payment, the following details will be5.‘Amount’ – the total amount of the payment in GBP.6.‘Number Of Beneficiaries’ – the total number ofdisplayed:1.‘Verify by’ – the date by which the payment needsto be verified (the execution date). If this date haspassed, the date will be highlighted. You will need toreject the payment, and either delete or re-submitbeneficiaries who will be paid by this payment.7.‘Select’ – tick this box to select the payment tobe verified or rejected. You may select up to 100payments to reject or verify at the same time.it with a new value date so that Bulk Payments cancalculate a new execution date.21
5.1 Verify a BACS paymentThe page also includes the following buttons:The payment details will then be checked, in particular, ‘Verify’ to verify up to 100 selected payments.there must be enough headroom available within your ‘Reject’ to reject up to 100 selected payments.agreed BACS limit to make the payments. If there is ‘Print’ to print the page.insufficient headroom to allow the payments, or if you have ‘Show All’ or ‘Show Mine’ to switch between showingselected no payments or too many payments or expiredonly payments from your primary accounts or showingpayments, an error will be displayed.payments from all accounts.You may still be able to continue by changing the paymentsTo verify one or more BACS payments, select them byselected.ticking their select boxes (up to 100 payments) and click the‘Verify’ button.If there are no errors, the digital signature page will bedisplayed and the ‘eSigner’ window will pop up, showing fulldetails of the payments you have selected.22
select the ‘View BACS payments’ menu option to see theto check that they are correct. Once you are satisfied,payments. If the payments require authorisation, they willcomplete the verification process by clicking the ‘Sign’need to be authorised by another user and, if you have thebutton, ensuring that your Smart Card is in the reader. Youprivilege to authorise payments, they will not appear in thewill be asked to enter your PIN. Once you have enteredlist of payments you may authorise.5.1 Verify a BACS paymentYou should inspect the contents of the ‘eSigner’ windowyour PIN correctly and clicked ‘OK’, the payments will bemarked as ‘Verified’ and the ‘Verify BACS payments’ pageIf, when the digital signature window appears, you do notwill be displayed again without the payments you have justwish to complete the verification of the payments displayedverified.in the window (for example, if some detail is incorrect oryou cannot find your card) then click the ‘Cancel’ button.Once the payments have been verified, their status willThis will return you to the ‘Verify BACS payments’ pageeither be ‘Authorisation Pending’ if authorisation is alsowithout verifying the selected payments.required, or ‘Execution Pending’ if it is not required. You may23
5.2 Authorise BACSpayments5.2 Authorise BACS paymentsThe process for the authorisation of BACS payments iswhen you click the verify button. You will need tosimilar to verification. To authorise BACS payments with thereject the payment, and either delete it or re-submit‘Authorisation Pending’ status, navigate to the ‘Approvals’it with a new value date so that a new execution datetab and click on the ‘Authorise BACS payments’ menucan be calculated.option. This option will only be available if you have one ofthe authorisation privileges (‘A’ or ‘B’).The ‘Authorise BACS payments’ page will be displayed2.‘Payment From’ – the name of the account that thepayment amount will be taken from.3.‘Status’ – the status of the payment, eithershowing all BACS payments that you may authorise. These‘Authorisation Pending’ or ‘2nd Authorisationare payments whose status is either ‘Authorisation Pending’Pending’.or ‘2nd Authorisation Pending’.4.when it was created. Click the name to view details ofSome payments will require authorisation by a user with thethe payment and beneficiaries.‘A’ authorisation privilege while others may be authorizedby a user with either ‘A’ or ‘B’ privileges. Also, each paymentmay only be authorised by a user who has not alreadysubmitted, verified or authorised the payment. The page5.‘Amount’ – the total amount of the payment in GBP.6.‘Number of Beneficiaries’ – the total number ofbeneficiaries who will be paid by this payment.will only include payments that you are able to authorizewithin these rules.‘Payment Name’ – the name given to the payment7.‘Select’ – tick this box to select the payment to beauthorised or rejected. You may select up to 100For each BACS payment, the following details will bedisplayed:1.‘Authorise by’ – the date by which the payment needsto be authorised (the execution date). If this datehas passed, there will be an error message displayed24payments at the same time.
You should inspect the contents of the ‘eSigner’ window ‘Authorise’ to authorise up to 100 selected payments.before you approve the payments. Once you are satisfied, ‘Reject’ to reject up to 100 selected payments.complete the authorisation process by clicking the ‘Sign’ ‘Print’ to print the page.button, ensuring that your Smart Card is in the reader. You ‘Show All’ or ‘Show Mine’ to switch between showingwill be asked to enter your PIN. Once you have enteredonly payments from your primary accounts or showingyour PIN correctly and clicked ‘OK’, the payments will bepayments from all accounts.authorised by you and the ‘Authorise BACS Payments’ page5.2 Authorise BACSpaymentsThe page also includes the following buttons:will be displayed again without the payments you have justTo authorise payments click the box next to each of theauthorised.payments you want to authorise and click the ‘Authorise’button. You may select up to 100 payments to authorise atOnce the payments have been authorised, their statusthe same time.will either be ‘2nd Authorisation Pending’ if this was thefirst of two required authorisations, or ‘Execution Pending’.The payment details will then be checked in particular, thereYou may select the ‘View BACS Payments’ menu optionmust be enough headroom available within your agreedto see the payments. If the payments require a secondBACS limit to make the payments. If there is insufficientauthorisation, they will need to be authorised by anotherheadroom to allow the payments, or if you have selected nouser and they will not appear in the list of payments for youpayments or too many payments or expired payments, anto authorise.error will be displayed. You may still be able to continue bychanging the payments selected.If, when the digital signature window appears, you do notwish to complete the authorisation (for example, if someIf there are no errors, the digital signature page will bedetail is incorrect) then click the ‘Cancel’ button. This willdisplayed and the ‘eSigner’ window will pop up, showing fullreturn you to
The Bulk Payments functionality on Wealth Online Banking enables users to make bulk payments to beneficiaries. It is expected that a user of Bulk Payments is familiar with the way in which Wealth Online Banking works and has read the documentation regarding the use of online banking. To use the Bulk Payments module you must be a registered