Transcription
Integrate Akamai Web ApplicationFirewallEventTracker v8.x and abovePublication Date: May 29, 2017
Integrate Akamai Web Application FirewallAbstractThis guide helps you in configuring Akamai WAF and EventTracker to receive events. In this guide, you willfind the detailed procedures required for monitoring Akamai WAF logs.AudienceAdministrators who are assigned the task to monitor Akamai WAF events using EventTracker.The information contained in this document represents the current view of EventTracker. on theissues discussed as of the date of publication. Because EventTracker must respond to changingmarket conditions, it should not be interpreted to be a commitment on the part of EventTracker,and EventTracker cannot guarantee the accuracy of any information presented after the date ofpublication.This document is for informational purposes only. EventTracker MAKES NO WARRANTIES,EXPRESS OR IMPLIED, AS TO THE INFORMATION IN THIS DOCUMENT.Complying with all applicable copyright laws is the responsibility of the user. Without limiting therights under copyright, this paper may be freely distributed without permission fromEventTracker, if its content is unaltered, nothing is added to the content and credit toEventTracker is provided.EventTracker may have patents, patent applications, trademarks, copyrights, or other intellectualproperty rights covering subject matter in this document. Except as expressly provided in anywritten license agreement from EventTracker, the furnishing of this document does not give youany license to these patents, trademarks, copyrights, or other intellectual property.The example companies, organizations, products, people and events depicted herein are fictitious.No association with any real company, organization, product, person or event is intended orshould be inferred. 2017 EventTracker Security LLC. All rights reserved. The names of actual companies andproducts mentioned herein may be the trademarks of their respective owners.1
Integrate Akamai Web Application FirewallTable of ContentsAbstract . 1Audience . 1Overview . 3Prerequisites . 3Integration of Akamai WAF to EventTracker manager . 3Configuring Log Delivery . 3EventTracker Knowledge Pack. 6Flex Reports . 7Knowledge Object . 8Import Akamai WAF knowledge pack into EventTracker . 8Knowledge Objects . 9Flex Reports . 10Verify Akamai WAF knowledge pack in EventTracker . 11Knowledge Objects . 11Flex Reports . 11Create Flex Dashboards in EventTracker . 12Schedule Reports . 12Create Dashlets . 14Sample Flex Dashboards . 182
Integrate Akamai Web Application FirewallOverviewKona Web Application Firewall from Akamai offers effective protection against web application attacks.Globally-distributed across the Akamai Intelligent Platform , Kona WAF can easily scale to defend againstmassive application attacks. Kona WAF can identify and mitigate suspicious traffic without affectingperformance or availability of the origin server. Security rules for Kona WAF are continuously refined byAkamai’s Threat Intelligence Team to protect against known attacks and respond to emerging threats.EventTracker helps you to monitor event activities in Akamai WAF. Its knowledge object will help you makethe log search easier and informative. And it can generate flex reports, flex dashboards for Akamai WAF.Prerequisites EventTracker v8.x should be installed.Kona Web Application Firewall.Integration of Akamai WAF to EventTracker managerConfiguring Log Delivery1.2.3.4.5.6.Log Delivery Service can be configured through the Akamai Luna Control Center.Click the Configure tab.Select Log Delivery.On the Select Product page, click the radio button next to the Akamai WAF.Click Continue to view the Log Delivery Service page.The Log Delivery Service page shows the CP codes that are associated with the Akamai service that youselected.7. Find the CP code/service pair on the Log Delivery Service page.8. Click the Begin Log Delivery link for a service that lacks a current LDS configuration. The Begin Log Deliverypage appears.9. Select the Create a new configuration tab.10. Define the options for your log delivery configuration, including: Time Frame: start (required) and end (optional) dates. Type of Delivery: FTP Type of aggregation: log arrival time Log identifier string: [Identifier String]3
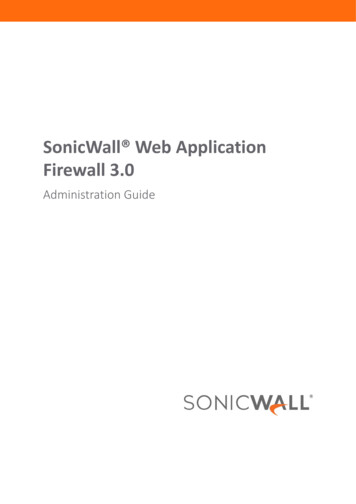
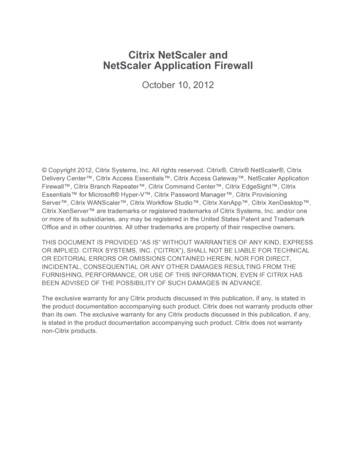
Integrate Akamai Web Application Firewall11. You will click Next three times before completing all options.12. On the Verify Configuration page, review the details of the configuration you created for accuracy,clicking Edit if it’s necessary to make further changes.13. Click Save to retain this Log Delivery Service configuration. Because it is difficult to time the LDSprovisioning process, a best practice is to set the start date to two days before you need the serviceenabled.14. For FTP login, you will need the FTP server name, the login, the password, and the directory path (if theaccount used for LDS does not automatically default to this directory) for FTP login. Before accepting anew configuration, Akamai Luna Control Center runs a series of tests against your FTP server. It can beused in conjunction with Akamai's Net Storage product.15. Once FTP has conjunction with Akamai's Net Storage product, collect the Akamai integrator from thesupport team.16. Extract the Akamai integrator.zip in any folder.17. Run Akamai Integrator.bat with admin privileges.Figure 14
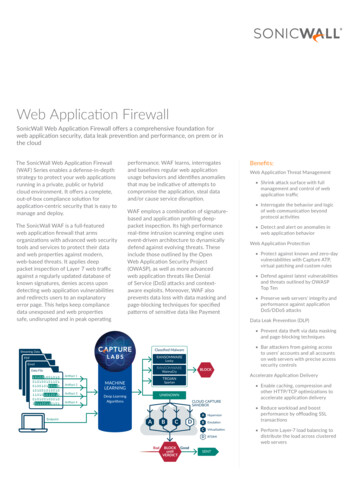
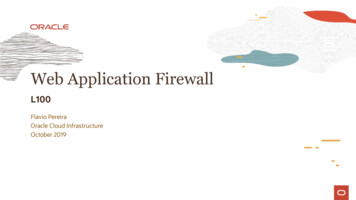
Integrate Akamai Web Application Firewall18. Enter the following details in the form.Client ID: usernameClient Secret: User password (if any)Host link: Link to cloud storage “prefix with‘@’ “SSH Host key: SSH Public host keySSH Private key: Private key file .ppkformatSource folder: source folder location incloud storage.Figure 219. Now a task scheduler trigger pop-up window appears as shown in below imageFigure 320. In this task scheduler window, you need to choose how you want to schedule the Akamai WAF reports ona Daily, Weekly or Monthly basis.21. Once Clicked on OK, an authentication pop up window will appear asking for Username and password asshown below:5
Integrate Akamai Web Application FirewallFigure 422. Please enter your System Username and Password to proceed with the Task Scheduling.23. Click on OK to continue.24. Click on OK once the scheduling period is chosen.Figure 525. Click on OK.EventTracker Knowledge PackOnce logs are received into EventTracker, reports and knowledge object can be configured into EventTracker.The following Knowledge Packs are available in EventTracker Enterprise to support Akamai WAF.6
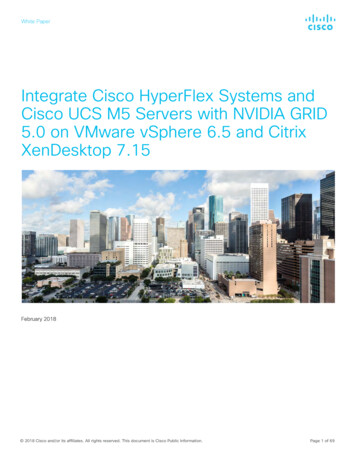
Integrate Akamai Web Application FirewallFlex Reports Akamai WAF-Traffic report – This report provides information about the web traffic on Akamai WAF.Sample logs: Akamai WAF – Web Traffic Errors – This report provides the failures and errors in Web traffic.7
Integrate Akamai Web Application FirewallSample logs:Knowledge Object Akamai WAF Web traffic errors – This knowledge object will help us to analyze the log related withAkamai WAF’s web traffic errors.Akamai WAF Traffic Details – This knowledge object will help us to analyze the log related to AkamaiWAF’s Traffic.Import Akamai WAF knowledge pack into EventTracker1. Launch EventTracker Control Panel.2. Double click Export Import Utility.Figure 68
Integrate Akamai Web Application Firewall3. Click the Import tab.Knowledge Objects1. Click Knowledge objects under Admin option in the EventTracker manager page.2. Locate the Akamai WAF Knowledge Object, and then click Import buttonFigure 73. Choose the Knowledge objects that needs to be imported and click on upload.Figure 8Knowledge objects are now imported successfully.Figure 99
Integrate Akamai Web Application FirewallFlex Reports1. Click Reports option, and select New from the option.Figure 102. Locate the Akamai WAF Reports.etcrx file, and then click the Open button.Figure 1110
Integrate Akamai Web Application Firewall3. Click the Import button to import the reports. EventTracker displays success message.Figure 12Verify Akamai WAF knowledge pack in EventTrackerKnowledge Objects1. In the EventTracker web interface, click the Admin dropdown, and then click Knowledge ObjectsIn the Knowledge Object tree, expand Akamai WAF group folder to see the imported Knowledge objectsFigure 13Flex Reports1. In the EventTracker web interface, click the Reports menu, and then select Configuration.11
Integrate Akamai Web Application Firewall2. In Reports Configuration pane, select Defined option.3. In search box enter Akamai WAF and then click the Search button.EventTracker displays Flex reports of ‘Akamai WAFFigure 14Create Flex Dashboards in EventTrackerNOTE: To configure the flex dashboards, schedule and generate the reports. Flex dashboard feature isavailable from EventTracker Enterprise v8.0.Schedule Reports1. Open EventTracker in browser and logon.Figure 152. Navigate to Reports Configuration.3. Select Akamai WAF in report groups. Check Defined dialog box.12
Integrate Akamai Web Application FirewallFigure 164. Click on ‘schedule’to plan a report for later execution.5. Click Next button to proceed.6. In review page, check Persist data in EventVault Explorer option.Figure 1713
Integrate Akamai Web Application Firewall7. In next page, check column names to persist using PERSIST checkboxes beside them. Choose suitableRetention period.Figure 188. Proceed to next step and click Schedule button.9. Wait till the reports get generated.Create Dashlets1. Open EventTracker Enterprise in browser and logon.14
Integrate Akamai Web Application FirewallFigure 192. Navigate to Dashboard Flex.Flex Dashboard pane is shown.Figure 203. Fill suitable title and description and click Save button.4. Click15to configure a new flex dashlet. Widget configuration pane is shown.
Integrate Akamai Web Application FirewallFigure 215. Locate earlier scheduled report in Data Source dropdown.6. Select Chart Type from dropdown.7. Select extent of data to be displayed in Duration dropdown.8. Select computation type in Value Field Setting dropdown.9. Select evaluation duration in As Of dropdown.10. Select comparable values in X Axis with suitable label.11. Select numeric values in Y Axis with suitable label.12. Select comparable sequence in Legend.13. Click Test button to evaluate. Evaluated chart is shown.16
Integrate Akamai Web Application FirewallFigure 2214. If satisfied, click Configure button.Figure 2315. Click ‘customize’16. Click17to locate and choose created dashlet.to add dashlet to earlier created dashboard.
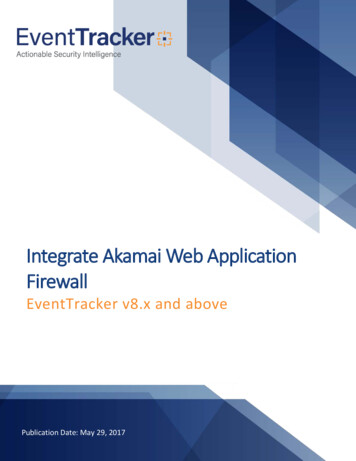
Integrate Akamai Web Application FirewallSample Flex Dashboards1. WIDGET TITLE: Akamai WAF Web Response codesDATA SOURCE: Akamai WAF-Traffic reportCHART TYPE: DonutAXIS LABELS [X-AXIS]: Akamai Response CodeFigure 2418
Integrate Akamai Web Application Firewall2. WIDGET TITLE: Akamai HTTP errorsDATA SOURCE: Akamai WAF-Web Traffic errorsCHART TYPE: ColumnAXIS LABELS [X-AXIS]: Status CodeLEGEND: URL Request MethodFigure 2519
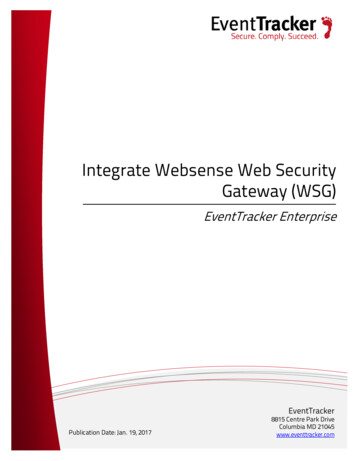
Integrate Akamai Web Application Firewall3. WIDGET TITLE: Akamai WAF – 404 ErrorsDATA SOURCE: Akamai WAF-Web Traffic errorsCHART TYPE: DonutAXIS LABELS [X-AXIS]: Client IP AddressFILTER: status CodeFILETER VALUES: 404Figure 2620
Integration of Akamai WAF to EventTracker manager Configuring Log Delivery 1. Log Delivery Service can be configured through the Akamai Luna Control Center. 2. Click the Configure tab. 3. Select Log Delivery. 4. On the Select Product page, click the radio button next to the Akamai WAF . 5. Click Continue to view the Log Delivery Service page. 6.