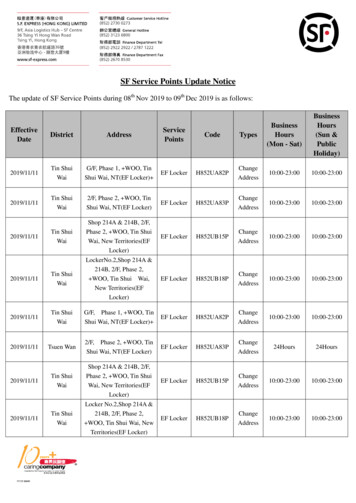
Transcription
Maintenance ManualMetal Outdoor Parcel LockerType I1590 Serieswww.auth-florence.com93427 Rev -1
This page intentionally left blank.2www.auth-florence.com93427 Rev -
Table of ContentsDESCRIPTIONPAGEOPL InformationSecurity Tool RequirementsReplacement of Master Loading Door Hold Open DeviceRemoval of Insert AssemblyReplacement of Master Loading DoorReplacement of Hinge RodReplacement of Arrow Lock DoorReplacement of Parcel DoorReplacement of Arrow LockReplacement of Arrow Lock Latch / Release HandleReplacement of Parcel Lock AssemblyReplacement of Parcel Door SpringReplacement of Master Loading Door Slide MechanismReplacement of PedestalNumber Placard 22426283093427 Rev -3
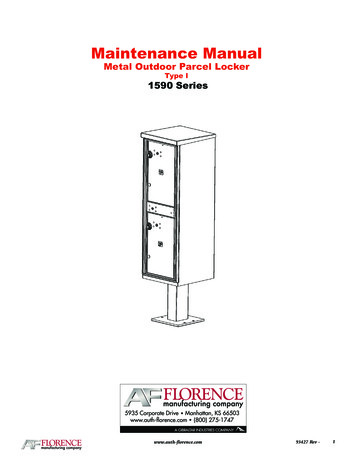
OPL InformationMetal OPL Type I1590 Series1590T1AF1590T1AF62”Installed Height4Depth17-7/8”Width15-7/8”Weight (without Pedestal)83 LBSWeight (with Pedestal)100 LBSQuantity of Standard Compartments0Quantity of Parcel Compartments2Parcel Compartment Height19.8”Parcel Compartment Width12.3”www.auth-florence.com93427 Rev -
Security Tool RequirementsMetal OPL Type I1590 SeriesIMPORTANT NOTICE FOR U.S.P.S. INSTALLERSInstaller must order McGard screw driver(U.S.P.S. - MAIL EQUIPMENT SHOP PART NUMBER 110050)to install and service the parcel door arrow lock coveron the Florence OPL.If theMcGARD SCREW DRIVER MES NO. 110050needs to be orderedIt may be ordered by faxing an “off catalog” eBuy request to:U.S.P.S. MAIL EQUIPMENT SHOPFAX NO. (202) 281-2643Questions? Call the U.S.P.S. Mail Equipment Shop at (202) 281-2620.www.auth-florence.com93427 Rev -5
Replacement of Master Loading Door Hold Open DeviceMetal OPL Type I1590 SeriesNote: This will require opening the masterloading door. The local U.S.P.S. will needto be contacted to have unit opened.1.2.3.4.Open master loading door.To disengage hold open device:Remove one (1) 86231 #6-32 x .187” Torxhead shoulder screw.6.Place Reattach hold open arm with 86231#6-32 x .187” Torx head shoulder screw.7.Close master loading door.To replace hold open device:Using an 1/8” drill bit, drill out seven (7)86098 1/8” dia x .328 SS pop rivets thatsecure the guard and bracket and removethe 86279 hold open guard and the 86265latch hold open bracket.Remove/replace 91067 hold open arm.REQUIRED TOOLSCordless drillPortable pop rivet gun1/8” Drill bitTorx 15 screwdriver / bit65.Replace hold open guard and hold openbracket - replace seven (7) 86098 1/8” dia x.328 SS pop rivets.PART CRIPTION1/8” Dia x .328” SS pop rivet#6-32 X .187” Torx head shoulder screwLatch hold open bracketHold open guardHold open arm93427 Rev -
Replacement of Master Loading Door Hold Open orence.com93427 Rev -7
Removal of Insert AssemblyMetal OPL Type I1590 SeriesNote: This will require opening the masterloading door. The local U.S.P.S. will needto be contacted to have unit opened.1.Open master loading door.3.Remove twelve (12) 91123 #8-32 x .5” Torxbutton head screws from insert assembly.4.Slide insert assembly out to make repairs tomaster loading door and lay flat on back onnon-abrasive surface.Portable drillTorx 15 screwdriver / bit86.Replace twelve (12) 91123 #8-32 x .5” Torxbutton head screws from insert assembly.7.2.Disengage hold open device (seeinstructions page 6).REQUIRED TOOLS5.Replace with new or repaired insertassembly.Put master loading door at a 90 angle andreplace hold open device and close masterloading door (see instructions page 6).PART #DESCRIPTION93200P Cabinet assembly OPLPH93201 Insert assembly OPL91123#8-32 X .5” Torx button head screwwww.auth-florence.com93427 Rev -
Removal of Insert ce.com93427 Rev -9
Replacement of Master Loading DoorMetal OPL Type I1590 SeriesNote: This will require opening the masterloading door. The local U.S.P.S. will needto be contacted to have unit opened.1.2.Open master loading door.Disengage hold open mechanism from topof master loading door (see instructionspage 6).3.Remove insert assembly (see instructionspage 8).4.Remove four (4) 86229 #8-32 x .75” panhead machine screws from top of unit.5.Remove one (1) 93409P top brace from thetop of unit, exposing master loading doorhinge.6.Slide master loading door up through topof insert assembly and replace with newmaster loading door.REQUIRED TOOLSTorx 15 screwdriver / bitPortable drillPliers107.Close master loading door and replace one(1) 93409P top brace from the top of unit,concealing master loading door hinges.Replace four (4) 86229 #8-32 x .75” panhead machine screws.8.Replace insert assembly (see instructionspage 8).9.Put master loading door at a 90 angle andreplace hold open device and close masterloading door (see instructions page 6).PART #DESCRIPTION86229 #8-32 x .75” Pan head screw93409P Top bracePH93202 Insert assembly w/o hardwarewww.auth-florence.com93427 Rev -
Replacement of Master Loading 593427 Rev -11
Replacement of Hinge RodMetal OPL Type I1590 SeriesNote: This will require opening the masterloading door. The local U.S.P.S. will needto be contacted to have unit opened.1.Warning: Once the hinge rodis removed, the Arrow Lockand parcel doors can fall out,potentially causing injury.Open master loading door.2.Disengage hold open device from top ofmaster loading door (see instructions page6).3.Completely remove insert assembly (seeinstructions page 8).4.5.6.Tap the hinge rod up and pull out withpliers from the top.Remove one (1) 86455 #10-32 hex lock nut.7.8.9.Replace hinge rod by reversing steps 4-6.Replace insert assembly (see instructionspage 8).Put master loading door at a 90 angle andreplace hold open device and close masterloading door (see instructions page 6).With a hammer and 1/8” rod, from thetop, tap the hinge rod down to dislodgethe 91260 threaded insert at the bottom ofthe unit. Remove threaded insert from thebottom of hinge rod.REQUIRED TOOLS1/8” RodPlastic MalletPliers3/8” Socket wrenchTorx 15 screwdriver / bit12PART 0-32 Hex lock nutHinge rod OPLThreaded insert93427 Rev -
Replacement of Hinge 427 Rev -13
Replacement of Arrow Lock DoorMetal OPL Type I1590 Series1.2.3.Note: This will require opening the masterloading door. The local U.S.P.S. will needto be contacted to have unit opened.5.Open master loading door.6.Replace hinge rod (see instructions page12).7.Put master loading door at a 90 angle andreplace hold open device and close masterloading door (see instructions page 6).8.Install Arrow Lock (see instructions page18).Disengage hold open device from top ofmaster loading door (see instructions page6).Completely remove insert assembly (seeinstructions page 8).Replace K91118SP 3” Arrow Lock door.Warning: Once the hinge rod isremoved, the Arrow Lock andparcel doors fall out, potentiallycausing injury.4.Remove hinge rod only as far as necessaryto remove the Arrow Lock door (seeinstructions page 12).REQUIRED TOOLS1/8” RodPortable drillHammerTorx 15 screwdriver / bit14PART #DESCRIPTIONK91118SP 3” Arrow Lock doorwww.auth-florence.com93427 Rev -
Replacement of Arrow Lock Door2&7314&6K91118SP5www.auth-florence.com93427 Rev -15
Replacement of Parcel DoorMetal OPL Type I1590 Series1.2.3.Note: This will require opening the masterloading door. The local U.S.P.S. will needto be contacted to have unit opened.5.Open master loading door.6.Disengage hold open device from top ofmaster loading door (see instructions page6).Completely remove insert assembly (seeinstructions page 8).Warning: Once the hinge rod isremoved, the Arrow Lock andparcel doors fall out, potentiallycausing injury.4.Remove hinge rod only as far as necessaryto remove the effected parcel door (seeinstructions page 12).Remove parcel door spring (seeinstructions page 24).Replace parcel door K93208SP.7.Replace parcel door spring (seeinstructions page 24).8.Replace hinge rod (see instructions page12).9.Put master loading door at a 90 angleand replace hold open device (seeinstructions page 6).10.Install lock mechanism (if necessary - seepage 22).REQUIRED TOOLS1/8” RodPortable drillHammerPliersTorx 15 screwdriver / bit16PART #DESCRIPTIONK93208SP Parcel door assembly w/lockwww.auth-florence.com93427 Rev -
Replacement of Parcel Door2&935&781K93208SP6www.auth-florence.com93427 Rev -17
Replacement of Arrow LockMetal OPL Type I1590 SeriesNote: This will require opening the masterloading door. The local U.S.P.S. will needto be contacted to have unit opened.1.2.3.4.5.Open master loading door.Remove five (5) 86091 #10-32 lock nuts, aswell as 92303 lock support plate.Place arrow lock into position.Install 92303 lock support plate as shown.Replace five (5) 86091 #10-32 lock nuts.Part #8609192303PH92300-FREQUIRED TOOLS3/8” Socket on#10-32 Lock nutLock support plateArrow Lock security bracketArrow lockKit Arrow Lock Security Bracket(Includes lock nuts, lock supportplate & security bracket)93427 Rev -
Replacement of Arrow LockPH92300-F12ARROW LOCK(PROVIDED BY U.S.P.S.)860913592303www.auth-florence.com493427 Rev -19
Replacement of Arrow Lock Latch / Release HandleMetal OPL Type I1590 SeriesNote: This will require opening the masterloading door. The local U.S.P.S. will needto be contacted to have unit opened.1.2.3.To replace Arrow Lock Latch:A. Drill out two (2) 91057 3/16” dia x .55”SS pop rivets with 3/16” Drill bit.B. Replace 91063 lock bracket - replace two(2) 91057 3/16” dia x .55” SS pop rivets.Open master loading door.C. Check for fit/function.To replace Release Handle:A. Remove two (2) 64247 #8-32 x .75”button head screws with Torx wrench.B. Remove 64246 master loading doorrelease handle - replace with new masterloading door release handle.C. Replace two (2) 64253 spacers.D. Align with mounting holes and replacetwo (2) #8-32 x .75” button head screws.E. Check for fit/function.REQUIRED TOOLSTorx 15 bit / wrenchPortable drill3/16” Drill bitPortable pop rivet gun20PART CRIPTION#8-32 X .75” button head screwMaster loading door release handleSpacer3/16” Dia x .55” SS pop rivetLock bracket93427 Rev -
Replacement of Arrow Lock Latch / Release th-florence.com93427 Rev -21
Replacement of Parcel Lock AssemblyMetal OPL Type I1.2.1590 SeriesOpen parcel door.To remove/replace latching assemblycover:A. Remove or replace 64215-SS latchingassembly cover using three (3) 84995 #1032 x .25” tamper proof screws using OneWay Screw Removal Tool.B. Replace 64215-SS latching assemblycover using three (3) 84995 #10-32 x .25”tamper proof screws.3.5.6.A. Remove or replace 64216-SS Arrow Lockcover using two (2) 84993 #10-32 x .312”McGard screws using McGard screw driver.A. Remove one (1) 1/4-20 lock nut.B. Remove one (1) 91620 3/8-24 hex nutand one (1) 91601 washer.C. Replace one (1) 1/4-20 lock nut(included in K91910).D. Replace one (1) 91620 3/8-24 hex nutand one (1) 91601 washer.REQUIRED TOOLSFlat head screwdriver/bitMcGard screw driver3/8” Socket wrench1/2” Socket wrench9/16” Socket wrench7/8” Socket wrenchOne-Way Screw Removal Tool22To remove/replace Customer lock:A. Remove one (1) 1/4-20 nut and one (1)clip (included in K91910), remove lock.B. Replace lock - replace one (1) 1/4-20lock nut and one (1) clip (included inK91910).Note: The parcel door bearing, nut andArrow Lock bolts and parcel door bolsterare supplied with the parcel door.B. Replace 64216-SS Arrow Lock coverusing two (2) 84993 #10-32 x .312”McGard screws.4.A. Remove four (4) 86455 10-32 lock nutsand remove Arrow Lock.B. Replace Arrow Lock securing with four(4) 86455 10-32 lock nuts.To remove/replace Arrow Lock cover:To remove/replace cam assembly:To remove/replace Arrow Lock:PART #64215-SS84995864551/4-20 comDESCRIPTIONLatching assembly cover#8-32 X .25” SS tamper proof screw#10-32 Lock nut1/4-20 Lock nut (included in K91910)3/8-24 Hex nutWasherParcel lock cam kitCustomer door lock kitClip (included in K91910)Arrow lock cover#10-32 X .312” McGard screwParcel door bearingParcel door bearing nutDoor bolsterArrow lock stiffener plateParcel lock cover kit with hardwareParcel lock kit with lock kit, cam kitand cover kit93427 Rev -
Replacement of Parcel Lock 455K91910CLIP5A&B1/4-20 h-florence.com9109993427 Rev -23
Replacement of Parcel Door SpringMetal OPL Type I1.1590 SeriesOpen parcel door.2.Remove one (1) 86092 #8-32 lock nut fromtop back of parcel door.3.Remove one (1) 91128 #8-32 x .375” Torxhead screw from vertical frame member andremove spring.4.Replace 86431 parcel door spring withstraight end of spring toward the verticalframe member.5.Place one (1) 91128 #8-32 x .375” Torxhead screw through spring and into thevertical frame member.6.Place spring over stud on top back of parceldoor and fasten down with one (1) 86092#8-32 lock nut.REQUIRED TOOLSTorx 15 bit / wrench3/8” Socket wrench24PART -32 Lock nutParcel door spring#8-32 X .375” Torx head screw93427 Rev -
Replacement of Parcel Door 93427 Rev -25
Replacement of Master Loading Door Slide MechanismMetal OPL Type I1590 Series1.Note: This will require opening the masterloading door. The local U.S.P.S. will needto be contacted to have unit opened.6.Removed slide from the top of the insertassembly.Open master loading door.7.Replace slide mechanism and reverse steps1-6.2.Remove insert from cabinet (seeinstructions page 8).3.Disengage hold open device from top ofmaster loading door (see instructions page6).4.5.Using an 1/8” drill bit, drill out four (4)86098 1/8” dia x .328” SS pop rivets downthe slide mechanism and remove four (4)64245 wear plates.Remove master loading door releaseHandle (see instructions page 20).REQUIRED TOOLSCordless drillPortable pop rivet gun1/8” Drill bitTorx 15 screwdriver / bit26PART PTION1/8” Dia x .328” SS pop rivetWear plateSlide mechanism for OPLComplete slide mechanism withhousing, slide, handle and wear plates93427 Rev -
Replacement of Master Loading Door Slide th-florence.com93427 Rev -27
Replacement of the PedestalMetal OPL Type I1590 SeriesWarning: Unit is top-heavy. Careshould be taken to properlysupport unit when removingmounting nuts and bolts to avoidpossible serious injury.Note: This will require opening the masterloading door. The local U.S.P.S. will need tobe contacted to have unit opened.1.2.3.4.6.To replace OPL assembly, reverse steps 1-5.Torque pedestal-to-cabinet nuts to 22 FTLBs.Open master loading door.Remove 91079 floating shelf by pulling outfrom lip of shelf, exposing mounting holes.From inside parcel compartments, removefour (4) 86089B 3/8-16 hex nuts andremove four (4) 86097 3/8” x .688” ODlock washer.From underneath unit, remove four (4)86101 3/8-16 x 1.25” carriage bolts.REQUIRED TOOLS9/16” Socket wrench285.Place OPL on a safe and secure surface andunbolt pedestal from ground.PART ce.comDESCRIPTIONFloating shelfPedestal3/8-16 X 1.25” Carriage bolt3/8” X .688” OD lock washer3/8-16 Hex nutKit hardware pedestal to unitmounting (includes carriage bolts,lock washers and hex nuts)93427 Rev -
Replacement of the e.com93427 Rev -29
Number Placard InstallationMetal OPL Type I1590 SeriesNote: If you desire to use placards otherthan provided ‘1P’ and / or ‘2P’, you canorder different numbers from your localauthorized Florence Dealer. The optionsrange from ‘1P’ to ‘99P’.1.Remove existing placard from door andclean the surface of remaining adhesive.3.4.For each of the (3) three 86159 key tags perdoor clearly print the door placard numberin space indicated on tag.Check key operation for door and place86159 marked key tags in each of thecorresponding 86160-3 plastic key rings asindicated.Note: Florence recommends the cleaning ofthe parcel door with a soft cloth dampenedwith any mild detergent or properly dilutedbiodegradable, water-based cleaner, such asSimple Green .The use of petroleum-based solvents,ammonia, harsh abrasive cleaners, orscrubbing sponges in NOT recommended,as this may damage the door surface.2.Remove adhesive cover on back of newplacard and place appropriate numberplacard in door emboss.Note: to adhere to Postal Regulations, placethe lower number placard on the top parceldoor.REQUIRED TOOLSPermanent fine tipped pen30PART lorence.comDESCRIPTIONNumber placard ‘1p’Number placard ‘2p’Individual number placard ‘3p’ - ‘99p’1 Key tag3 Key ringed tag holdersKit tag holders w/ tags(Includes three key ringed tag holdersand three key tags)93427 Rev -
Number Placard nce.com93427 Rev -31
6 www.auth-florence.com 93427 Rev - PART # DESCRIPTION 86098 1/8" Dia x .328" SS pop rivet 86231 #6-32 X .187" Torx head shoulder screw 86265 Latch hold open bracket 86279 Hold open guard 91067 Hold open arm REQUIRED TOOLS Cordless drill Portable pop rivet gun 1/8" Drill bit Torx 15 screwdriver / bit Note: This will require opening the .