Transcription
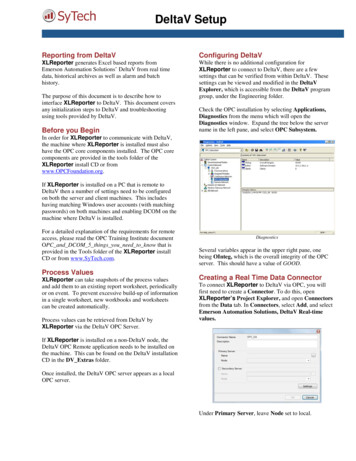
DeltaV SetupReporting from DeltaVConfiguring DeltaVXLReporter generates Excel based reports fromEmerson Automation Solutions’ DeltaV from real timedata, historical archives as well as alarm and batchhistory.While there is no additional configuration forXLReporter to connect to DeltaV, there are a fewsettings that can be verified from within DeltaV. Thesesettings can be viewed and modified in the DeltaVExplorer, which is accessible from the DeltaV programgroup, under the Engineering folder.The purpose of this document is to describe how tointerface XLReporter to DeltaV. This document coversany initialization steps to DeltaV and troubleshootingusing tools provided by DeltaV.Before you BeginCheck the OPC installation by selecting Applications,Diagnostics from the menu which will open theDiagnostics window. Expand the tree below the servername in the left pane, and select OPC Subsystem.In order for XLReporter to communicate with DeltaV,the machine where XLReporter is installed must alsohave the OPC core components installed. The OPC corecomponents are provided in the tools folder of theXLReporter install CD or fromwww.OPCFoundation.org.If XLReporter is installed on a PC that is remote toDeltaV then a number of settings need to be configuredon both the server and client machines. This includeshaving matching Windows user accounts (with matchingpasswords) on both machines and enabling DCOM on themachine where DeltaV is installed.For a detailed explanation of the requirements for remoteaccess, please read the OPC Training Institute documentOPC and DCOM 5 things you need to know that isprovided in the Tools folder of the XLReporter installCD or from www.SyTech.com.Process ValuesXLReporter can take snapshots of the process valuesand add them to an existing report worksheet, periodicallyor on event. To prevent excessive build-up of informationin a single worksheet, new workbooks and worksheetscan be created automatically.Process values can be retrieved from DeltaV byXLReporter via the DeltaV OPC Server.DiagnosticsSeveral variables appear in the upper right pane, onebeing OInteg, which is the overall integrity of the OPCserver. This should have a value of GOOD.Creating a Real Time Data ConnectorTo connect XLReporter to DeltaV via OPC, you willfirst need to create a Connector. To do this, openXLReporter’s Project Explorer, and open Connectorsfrom the Data tab. In Connectors, select Add, and selectEmerson Automation Solutions, DeltaV Real-timevalues.If XLReporter is installed on a non-DeltaV node, theDeltaV OPC Remote application needs to be installed onthe machine. This can be found on the DeltaV installationCD in the DV Extras folder.Once installed, the DeltaV OPC server appears as a localOPC server.Under Primary Server, leave Node set to local.
Verifying the Real Time Data ConnectorTo verify the DeltaV real time interface, openXLReporter’s Project Explorer. From the Tools tabstart the System Check application and select theConnector tab. Select Add, choose your DeltaV realtime Connector from the dropdown list, and click thepushbutton [ ] next to Items to open the Tag Browserwindow.Real Time System CheckSelect one or more tags and verify that they update withthe current value using Start in the System Checkwindow.
Historical DataCreating a Historical Data ConnectorWith process data stored in a historian, the variety ofreports that can be produced by XLReporter increasesmany fold.To connect XLReporter to DeltaV historical data youwill first need to create a Connector. To do this, openXLReporter’s Project Explorer, and open Connectorsfrom the Data tab. In Connectors, select Add, and selectEmerson Automation Solutions, DeltaV ContinuousHistorian or DeltaV Advanced Continuous Historian.In addition to sample values, informative metrics such asrun times and statistics are obtained by simply selectingthe tags and time frame of interest. e.g. hourly average,maximum and minimum for each hour of the day.XLReporter performs time-weighted calculations on thehistorical data retrieved.Under Primary Server, if the server is on a remotemachine, set Node to the name of that machine, otherwiseleave it set to local.XLReporter can connect and retrieve data from both theDeltaV Continuous Historian and the DeltaV AdvancedContinuous Historian via an OPCHDA connection.Verifying the Historical Data ConnectorThe DeltaV Advanced Continuous Historian requires thePI OPC Server to be installed on the Application Station.The PI OPC Server is available from OSIsoft or Emersonretailer.From XLReporter’s Project Explorer, under the Toolstab, select Diagnostics, Connector Groups. Select theDeltaV history connector and click Add.XLReporter accesses process values stored in thehistorian using a connector group.Select the Type of group and click OK.Configuring DeltaVWhile there is no additional configuration forXLReporter to connect to DeltaV, there are a fewsettings that can be verified from within DeltaV. Thesesettings can be viewed and modified in the DeltaVExplorer, which is accessible from the DeltaV programgroup, under the Engineering folder.On the Columns tab, select the tag Name andCalculation for each tag in the group.On the Time Period tab, select the Start Time, EndTime and Interval for the group. By default this is set toone hour intervals over the current day.The Preview menu can be selected to preview the resultof the current configuration.DeltaV ExplorerIf using the Continuous Historian, check that theContinuous Historian is enabled. This can be done byright clicking the Continuous Historian icon in the leftpane, listed below the server name. Select Propertiesand make sure that Enabled is checked.PreviewPreview displays the data exactly the same way it will bewritten into the report
Batch Historian DataEvent Chronicle DataThe DeltaV Batch Historian can be configured to log datato a SQL Server database. XLReporter can retrieve datafrom the database to use within reports.The DeltaV Event Chronicle can be configured to log datato text files (*.evt) on a per batch basis. XLReporter canretrieve data from a specific file to use within reports.Creating a Batch Historian ConnectorCreating an Event Chronicle ConnectorTo connect XLReporter to the DeltaV Batch Historianyou will first need to create a Connector. To do this,open XLReporter’s Project Explorer, and openConnectors from the Data tab. In Connectors, selectAdd, and select Emerson Automation Solutions,DeltaV Batch Historian.To connect XLReporter to the DeltaV Event Chroniclesyou will first need to create a Connector. To do this,open XLReporter’s Project Explorer, and openConnectors from the Data tab. In Connectors, selectAdd, and select Emerson Automation Solutions,DeltaV Event Chronicle.Under Primary Server, click the browse pushbutton [ ]to connect to the database.Select Microsoft SQL Server.Set Server name to the SQL Server instance where theDeltaV Batch Historian is configured.Specify the Logon information and the Database withinthe SQL Server instance where the Batch Historian data islogged.Click Test to verify the settings.Verifying the Batch Historian ConnectorXLReporter accesses Batch Historian data using aconnector group.From XLReporter’s Project Explorer, under the Toolstab, select Diagnostics, Connector Groups. Select theBatch Historian connector and click Add.On the Setup tab, under Database, set Table/View to atable or view in the batch historian from which to retrievealarm data.Under Source, for Folder, click the browse pushbutton[ ] and select the folder where the Event Chronicle filesare stored.Verifying the Event Chronicle ConnectorXLReporter accesses Event Chronicle data using aconnector group.Once the table or view is selected, set Date Column to acolumn with timestamps within the table or view.From XLReporter’s Project Explorer, under the Toolstab, select Diagnostics, Connector Groups. Select theBatch Historian connector and click Add.On the Columns tab, select the Columns for the BatchHistorian data you wish to retrieve.On the Columns tab, select the Columns for the EventChronicle data you wish to retrieve.On the Time Period tab, select the Start Time, EndTime and Interval for the group. By default this is set tothe first 60 values over the current day.On the Filters tab, specify filtering to limit the type oramount of alarms returned. You can filter based on anyavailable column.On the Filters tab, specify filtering to limit the type oramount of alarms returned. You can filter based on anyavailable column in the table or view selected.The Event setting allows you to select one or morespecific events to return from the group. Click the browsepushbutton [ ] and check any that apply. To see everyevent, set every one unchecked.The Preview menu can be selected to preview the resultof the current configuration.The Preview menu can be selected to preview the resultof the current configuration. In the Preview window youare prompted for a file name. Specify one of the .evt filesin the Source Folder specified in the connector.
Event Journal DataThe DeltaV Event Journal can be configured to log data toa SQL Server database. XLReporter can retrieve datafrom the database to use within reports.Creating an Event Journal ConnectorTo connect XLReporter to the DeltaV Event Journal youwill first need to create a Connector. To do this, openXLReporter’s Project Explorer, and open Connectorsfrom the Data tab. In Connectors, select Add, and selectEmerson Automation Solutions, DeltaV EventJournal.Under Primary Server, click the browse pushbutton [ ]to connect to the database.Select Microsoft SQL Server.Set Server name to the SQL Server instance where theDeltaV Event Journal is configured.Specify the Logon information and the Database withinthe SQL Server instance where the Event Journal data islogged.Click Test to verify the settings.Under Table/Column, set the Table to Journal and theDate Column to Date Time.Verifying the Event Journal ConnectorXLReporter accesses Event Journal data using aconnector group.From XLReporter’s Project Explorer, under the Toolstab, select Diagnostics, Connector Groups. Select theEvent Journal connector and click Add.On the Columns tab, select the Columns for the EventJournal data you wish to retrieve.On the Time Period tab, select the Start Time, EndTime and Interval for the group. By default this is set tothe first 60 values over the current day.On the Filters tab, specify filtering to limit the type oramount of alarms returned. You can filter based on anyavailable column in the table or view selected.The Event Type setting allows you to select a specificevent types to retrieve data for. To retrieval all eventtypes, select Any otherwise select a specific type.The Preview menu can be selected to preview the resultof the current configuration.
Analyze DataPopulating the DatabaseDeltaV Analyze can be used to generate Excel basedreports in a fixed format. XLReporter can extract thedata from these reports and export it to a database wheremore sophisticated analysis can be performed producingeven more powerful reports.The database will be populated at the frequency youspecified in the connector. To manually perform this,from the Project Explorer, under the Project tab, selectSchedule, Designer.Creating an Analyze Data ConnectorTo connect XLReporter to the DeltaV Analyze data youwill first need to create a Connector. To do this, openXLReporter’s Project Explorer, and open Connectorsfrom the Data tab. In Connectors, select Add, and selectEmerson Automation Solutions, DeltaV Analyze.Under Consolidate to a Database, for Server, click thebrowse pushbutton [ ] and connect to the databasewhere you would like the Analyze data to be stored.Click Settings.In the Schedule Designer select Tools, Script Editor.The DV export script will be listed. Select it and clickTest. The script will extract data from the files in thefolders configured.Verifying the Analyze ConnectorXLReporter accesses DeltaV Analyze data using adatabase connector group.From XLReporter’s Project Explorer, under the Toolstab, select Diagnostics, Connector Groups. Select theDeltaV Analyze connector and click Add. Set the Typeto Standard and click OK.On the Setup tab, select the Table(s) or View(s) fromwhich to retrieve data.On the Columns tab, select the Columns for the DeltaVAnalyze data you wish to retrieve.On the Filters tab, specify filtering to limit the type oramount of alarms returned. You can filter based on anyavailable column in the table or view selected.Under the Folders tab, define each folder containingDeltaV Analyze report files you wish to extract data from.Under Labels define the Alarm Priority and AlarmRate labels if you have customized them in the DeltaVAnalyze application.Under Schedule, determine the frequency at which data isextracted from the DeltaV Analyze reports and stored inthe database.On OK, the tables for the Analyze data are created in thedatabase specified.The Preview menu can be selected to preview the resultof the current configuration.
Troubleshooting – Real Time DataTroubleshooting – Historical DataIf you are experiencing issues connecting to the DeltaVOPC Server or accessing real time values, DeltaV hasprovided OPCWatchIt, as a diagnostic tool.If you are experiencing issues connecting to the DeltaVOPC-HDA Server or retrieving Historical data, DeltaVhas provided HDAprobe as a diagnostic tool.To run, from a command line, enter opcwatchit.exeTo run, browse to C:\ DeltaV\bin orC:\DeltaV\DVUtilities and double-click HDAprobe.exe.OPC WatchIt WindowIn the OPCWatchIt window, verify Server is set toOPC.DeltaV.1. If it is not, click Change Server to selectit.To choose tags, click BrowsePath. This opens theBrowse Attributes window showing a tree view of alltags configured. Select a tag and click OK.Click Read to display real time value of the selected tag.DeltaV OPC HDA ProbeIn the DeltaV OPC HDA Probe window, click ConnectServer and select DeltaV.OPCHDAsvr.1.Click Add Items. This opens
access, please read the OPC Training Institute document OPC_and_DCOM_5_things_you_need_to_know that is provided in the Tools folder of the XLReporter install CD or from . www.SyTech.com. Process Values . XLReporter can take snapshots of the process values and add them to an existing report worksheet, periodically or on event. To prevent excessive