Transcription
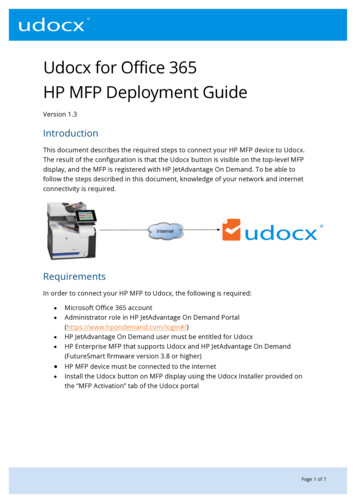
Udocx for Office 365HP MFP Deployment GuideVersion 1.3IntroductionThis document describes the required steps to connect your HP MFP device to Udocx.The result of the configuration is that the Udocx button is visible on the top-level MFPdisplay, and the MFP is registered with HP JetAdvantage On Demand. To be able tofollow the steps described in this document, knowledge of your network and internetconnectivity is required.InternetRequirementsIn order to connect your HP MFP to Udocx, the following is required: Microsoft Office 365 accountAdministrator role in HP JetAdvantage On Demand Portal (https://www.hpondemand.com/login#/)HP JetAdvantage On Demand user must be entitled for UdocxHP Enterprise MFP that supports Udocx and HP JetAdvantage On Demand(FutureSmart firmware version 3.8 or higher) HP MFP device must be connected to the internet Install the Udocx button on MFP display using the Udocx Installer provided onthe “MFP Activation” tab of the Udocx portalPage 1 of 7
Ensure you have a Microsoft Office 365 accountUdocx for Office 365 supports scanning to Office 365 Email, OneDrive and SharePoint.In order to scan and store documents to these locations a Microsoft Office 365 accountis required.1. Open a web browser and go to: http://www.office.com2. Enter your email address and corresponding passwordYou can check your Email, OneDrive or SharePoint environment by clicking on thecorresponding icon;Entitle your account from HP JetAdvantage On Demand forUdocxYour HP JetAdvantage On Demand company user must be entitled for Udocx. To entitlea user to use Udocx:1. Login to the HP JetAdvantage On Demand website(https://www.hpondemand.com/login#/) with your admin account.2. Go to [Dashboard] [App Management] and select “Udocx scan to Office 365”.3. Select [Manage Users] blue button at far right (below right) and choose theoption “Allow Access” for all the users that will be allowed to use Udocx.4. Click [Save] to confirm and apply the changes.Page 2 of 7
Users will receive an activation email from Udocx that their account is now enabled andto confirm permissions within Office 365.NOTE: Users should be sure to check their “junk” folder for this email.Once users have received this email, they can complete the following steps:5. In the email received from HP JetAdvantage On Demand, click the link “Confirmpermission”6. Login with your Office 365 email address and corresponding password.7. The Udocx wizard will now create two Udocx scan destinations for users:a. OneDrive for Business (in Business/Files folder)b. Email/ Draft folder8. Once finished (takes a couple of seconds) the user will see the created Udocxdestinations.Page 3 of 7
Udocx Supported HP MFP’sUdocx supports HP Enterprise MFP’s (e.g. devices with scanners) that have touchscreencontrol panels of size 4.3” and larger. Confirm that your selected HP MFP is running theHP JetAdvantage minimum required FutureSmart firmware version 3.8 or higher. (Clickhere to download the latest firmware version for your HP MFP)Unable to find your device? Please contact your HP Authorized Reseller for moreinformation on your MFP’s compatibility.Ensure that the HP MFP Device is connected to the internetTo be able to access Udocx, the MFP device must be connected to the internet. Checkthe internet connection before proceeding. Do note that Udocx is compatible withfirewalls and Internet proxies.To check connectivity, simply plug the internet cable used by the device into a laptopand browse to http://www.hp.com. If this is successful, the device is internet connected.If your desktop is on the same network, you can also check your internet browsersettings and use them to configure the MFP.Configure your MFP for HP JetAdvantage On DemandTo configure your HP MFP to use Udocx for Office 365:Login to your printer’s EWS (Embedded Web Server) by entering your device IP address into anyweb browser. Login by entering your admin password if it has been setup previously.Confirm Configure Web Service Security1. Click the Security tab, then Web Service Security2. Check to see if you have any domains listed in the “Trusted Sites” list.3. By default, you should have no entries in this Trusted Sites list. If youhave nothing in the list, take no action and continue to the next step(Configure your Proxy Server)Page 4 of 7
4. However, if you do have any domains listed in the Trusted Sites list,please “Add” *.hpbizapps.com in this Trusted Sites list. Click Add.5. Click ApplyConfigure your Proxy Server1. Click the Networking tab, then Advanced2. Enter your proxy server name and port3. Enter your proxy server user name and password if required4. Click ApplyPage 5 of 7
Udocx InstallerNow that your HP MFP proxy and CORS settings are set, it is time to login to HPJetAdvantage On Demand (https://www.hpondemand.com/login#/), launch your Udocxapp (which opens the Udocx portal in a second browser window), navigate to the “MFPActivation” tab in the Udocx portal and download the Udocx Installer:Once you download, install and run the “MFP UdocX installer.exe” file, you will beprompted to enter your HP JetAdvantage On Demand login username and password:Next, enter the IP address/Hostname and EWS password of the MFP you would like toenable with the Udocx top-level button and press [Install].NOTE: If, in the future, you desire to delete Udocx from this MFP, you can download thistool again, enter the IP address/Hostname and EWS password of the MFP and select“Uninstall”Page 6 of 7
The resultThe Udocx button now appears on the HP MFP Control Panel Display When a userpresses the button a connection is made with Udocx.(HP FutureSmart 3.0 display shown)When the “Login to Udocx” window appears on your MFP display you have successfullyconnected your device to Udocx.SupportFor additional questions or assistance, contact support, or please reference the FAQ’s(http://hp.udocx.com?#/faq) or contact your HP Authorized Reseller.Page 7 of 7
6. Login with your Office 365 email address and corresponding password. 7. The Udocx wizard will now create two Udocx scan destinations for users: a. OneDrive for Business (in Business/Files folder) b. Email/ Draft folder 8. Once finished (takes a couple of seconds) the user will see the created Udocx destinations.