Transcription
Proofpoint Secure File TransferUser GuideVersion 7.0Proofpoint, Inc.892 Ross DriveSunnyvale CA 94089www.proofpoint.com
Website: www.proofpoint.comToll-free telephone: 1-877-64POINTTechnical support: https://support.proofpoint.comProofpoint Secure File Transfer User GuideJuly 2008Revision CThe Proofpoint Secure File Transfer is proprietary software licensed to you for your internaluse by Proofpoint Inc. This software is Copyright 2002 - 2008, Proofpoint Inc. The copying,modification or distribution of the Proofpoint Secure File Transfer is subject to the terms of theProofpoint Software License, and any attempt to use this software except under the terms ofthat license is expressly prohibited by U.S. copyright law, the equivalent laws of othercountries, and by international treaty.Proofpoint are trademarks of Proofpoint Inc.PROPRIETARY AND CONFIDENTIAL.SUBJECT TO CHANGE WITHOUT NOTICE. 2008Accellion, Inc. All Rights Reserved.
TABLE OF CONTENTSQUICK START . 4Create an Account. 4Send a file. 4USING PROOFPOINT SECURE FILE TRANSFER . 7LogIn . 8Send File. 10Invite . 17Invite . 18My Settings . 28User Guide . 28Logout. 28RECEIVING FILE(S) . 30Receiving Sub-files . 35Proofpoint Secure File Transfer User Guide3
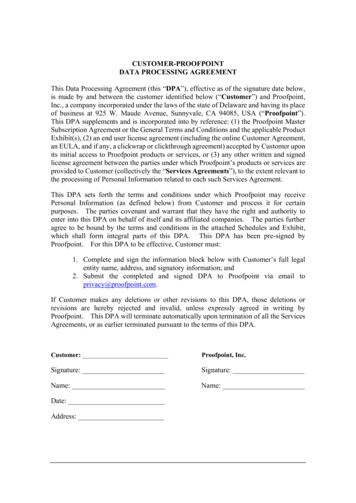
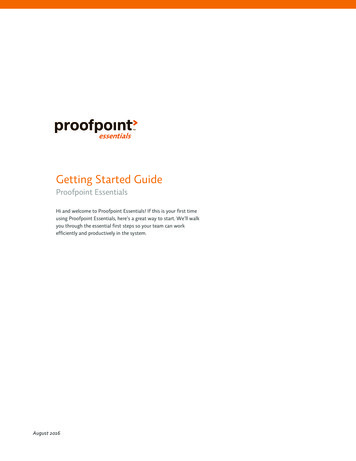
Quick StartQUICK STARTThe intent of this section is to get you started using Proofpoint Secure File Transfer asquickly as possible. For a fuller explanation of the features please refer to the “UsingProofpoint Secure File Transfer” section of this document.CREATE AN ACCOUNTAn account may have been created for you. If so proceed to login. Otherwise, ifavailable, click on “New User” to register for a new account or Click the link in theinvitation email to access the Proofpoint Secure File Transfer web site.SEND A FILEYou may be directly presented the Send File page, otherwise select Send File from themenu tabs.TO: Enter the recipient email address. Use comma or semicolon to separate multiplerecipients and maximum number of recipients should not exceed 40. Use autocomplete feature to send to email addresses that have already been sent files usingAccellion Courier. Click on “Add CC” and/or “Add BCC”, to add CC and/or BCCrecipients.SUBJECT/BODY TEXT: Enter the subject and body text you want for the emailATTACHMENTS: Select the files to send using the steps outlined below:1.Click Browse to open the Choose File dialog box for your local system.2.Highlight the file to attach.3.Click Open to attach.4.Click on Browse again if you wish to upload more files.5.Click on Remove if you wish to remove a file.Proofpoint Secure File Transfer User Guide4
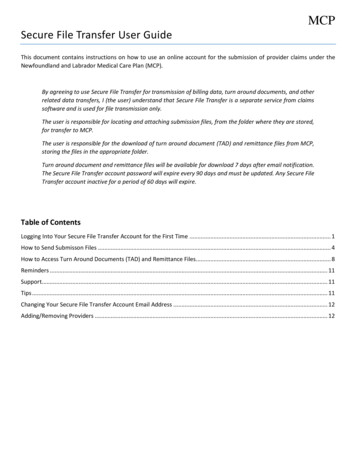
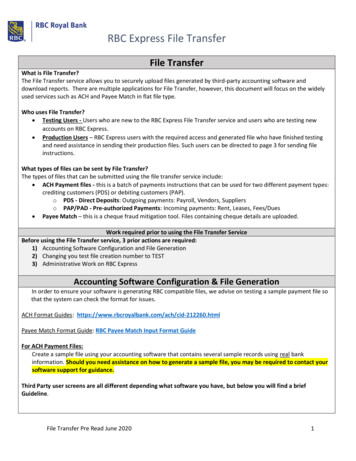
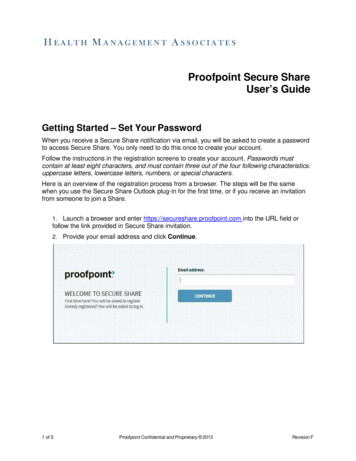
Click Send to send the file(s). A progress bar will show up to show the upload.A Sent Mail confirmation window will appear upon completion of file upload and messagesent.Proofpoint Secure File Transfer User Guide5
Quick StartProofpoint Secure File Transfer User Guide6
USING PROOFPOINT SECURE FILE TRANSFERUsing Proofpoint Secure File Transfer you can send large files securely to recipientsboth inside and outside your organization. Sending a file using Proofpoint Secure FileTransfer is just like sending an email, only simpler.On the following pages we show you how to use the Proofpoint Secure File Transferweb interface. Included in this section are instructions on using the following features: LOG IN SEND FILE INVITE FILE MANAGER MY SETTINGS USER GUIDE LOGOUTProofpoint Secure File Transfer User Guide7
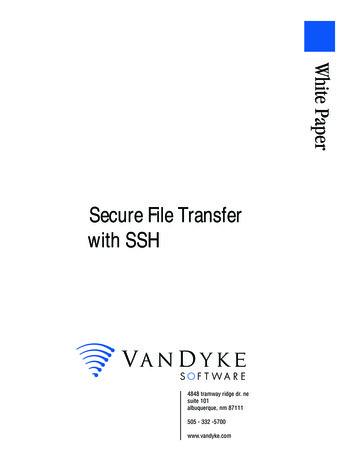
LoginLOGINMake certain that you are connected to the Internet.An account may have been created for you. If so proceed to login. Otherwise click on“New User” to register for a new account or Click the link in the invitation email to accessthe Proofpoint Secure File Transfer web site.Proofpoint Secure File Transfer User Guide8
LoginThe Home page will display. You may also be directly presented the “Send File” page.Proofpoint Secure File Transfer User Guide9
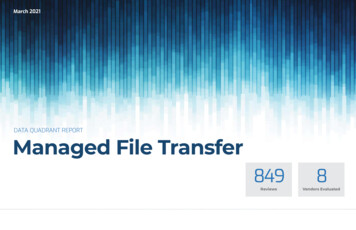
Send FileSEND FILEWith AppletUsing the Folder/Large File applet it is possible to upload very large files and folders andalso pause/resume an upload session. The Folder/Large File applet may be available inthe Send File and Add to Cabinet pages instead of the normal file selection input box(es)depending on the company policy. When the Folder/Large File applet option is available, click on the checkbox next toFolder/Large File Applet to enable or disable the applet. When the Folder/Large File applet is enabled the user is prompted to trust the signedapplet from “Accellion Pte Ltd” as shown below. Click “Always”, “Run” or “Yes” to continue. Note: The window prompt may appeardifferently depending on the version of JRE(Java Runtime Environment) installed onthe computer.Proofpoint Secure File Transfer User Guide10
Send File When the Folder/Large File applet is enabled the user can select a file or a folder forupload. When a folder is selected its contents will be zipped and the resulting zip filewill be uploaded. Note: The 2GB total size limitation does not apply to files uploadedusing the Folder/Large File applet, hence very folders/large files can be uploadedusing the Folder/Large File applet. Click on the Browse button when the applet is loaded, select the file or the folder andclick Open. To explore the contents of a folder for further selection, double-click onthe folder.Proofpoint Secure File Transfer User Guide11
Send FileIf an upload session is aborted by the user during file upload, the user is prompted toresume the previous incomplete session.The Folder/Large File applet will also be available in the ADD TO CABINET section.All other features will be similar and are documented in the WITHOUT APPLET section.Proofpoint Secure File Transfer User Guide12
Send FileWithout AppletSelect Send File from the menu tabs.The Send File form will appear and is completed as follows: EXPERT MODE: In this mode the text “Expert Mode” will be displayed in bold onthe top right side of the window.TO: enter the recipient email address. Use comma or semicolon to separate multiplerecipients and the maximum number of recipients should not exceed 40. Use autocomplete feature to send to email addresses that have already been sent files usingAccellion. Click on “Add Cc” and/or “Add Bcc” to add Cc and/or Bcc recipients.Proofpoint Secure File Transfer User Guide13
SUBJECT/ BODY TEXT: enter the subject and body text you want for the email.ATTACHMENTS: The maximum number of attachments is 10 and can include a mix ofnew uploads and previously sent files. The total size of all new attachments uploadshould be less than 2 GB. (Alternatively you may upload individual large files at the FileManager tab using “Add to Cabinet”, each up to 2 GB, and then send them using “ResendFiles”.)1.Click Browse to open the Choose File dialog box for your local system:2.Highlight the file to attach.3.Click Open to attach.4.Click on Browse again if you wish to upload more files.5.Click on Remove if you wish to remove a file.ATTACHMENT DELIVERY SETTINGS: These settings are only available in expertmode and let you change the default values for Access Control, Link Expiration time,Delivery Notification and Fingerprint.Click on More next to Delivery Notification to enter additional email addresses who willalso be notified on download of the files. You can enter multiple email addresses, eachseparated by comma.Standard Mode:TO: Enter the recipient email address. Use comma or semicolon to separate multiplerecipients and maximum number of recipients should not exceed 40. Use auto completefeature to send to email addresses that have already been sent files using Accellion. Clickon “Add Cc” and/or “Add Bcc” to add Cc and/or Bcc recipients.SUBJECT/BODY TEXT: Enter the subject and body text you want for the email.Proofpoint Secure File Transfer User Guide14
ATTACHMENTS: The maximum number of attachments is 10 and can include a mix ofnew uploads and previously sent files. The total size of all new attachments uploadedshould be less than 2 GB. (Alternatively you may upload individual large files at the FileManager tab using “Add to Cabinet”, each up to 2 GB, and then send them using “ResendFiles”.)1.Click Browse to open the Choose File dialog box for your local system:a.highlight the file to attachb.click Open to attach2. Click on Browse again if you wish to upload more files.3. Click on Remove if you wish to remove a file.Depending on company policy, Send me a copy, Notify on Attachment Delivery andNon Confidential options may be turned on.SEND ME A COPY: A copy of the email will be sent to your email address.Proofpoint Secure File Transfer User Guide15
Send FileNOTIFY ON ATTACHMENT DELIVERY: When the recipient completely downloadsthose files, you will be notified of such. Click on “More” to enter additional emailaddresses who will also be notified on download of the files. You can enter multiple emailaddresses, each separated by comma.NON CONFIDENTIAL: Files sent with this option enabled will allow the recipients todownload files without authentication. Please note that non-confidential transmissions willnot generate return receipts.Click Send to send the file. A progress bar will indicate the progress of the upload.Proofpoint Secure File Transfer User Guide16
Send FileA Sent File confirmation window will appear upon completion of file upload and filesent.Proofpoint Secure File Transfer User Guide17
InviteINVITEIf enabled, you can send an invitation to other users to use the system to send files. Toinvite someone to use the system to send files, click on Invite to send an invitation. Enterthe invitee’s E-mail address (es) and click on the Invite button to send an invitation.Optionally you can add a personal message to the invite.Proofpoint Secure File Transfer User Guide18
InviteThe recipient receives an invitation email with a link.The recipient clicks on the link to complete the registration process.Proofpoint Secure File Transfer User Guide19
File ManagerFile ManagerSelect File Manager from the menu tabs to view your Cabinet, Inbox or Send History.The Cabinet lists files that have been sent to other people as well as files that wereuploaded using the "Add to Cabinet" button. Use the File Name textbox to search for a particular filename.Proofpoint Secure File Transfer User Guide20
File ManagerClick on Add to Cabinet to upload files to Cabinet.1.2.Click Browse to open the Choose File dialog box for your local system: highlight the file(s) to attach click Open to attach themClick on Attach another file if you wish to upload more files.Proofpoint Secure File Transfer User Guide21
File Manager3.Click on Remove file if you wish to remove a file.4.Click on Add when your selection is complete. A progress bar will show up to showthe upload.Proofpoint Secure File Transfer User Guide22
File Manager5.An Upload confirmation window will display.Proofpoint Secure File Transfer User Guide23
File Manager6. Click Ok to return to the File Manager menu.Proofpoint Secure File Transfer User Guide24
File ManagerClick on the Inbox to view or forward the files that were sent to you. Use the File Nametextbox to search for a particular filename.Proofpoint Secure File Transfer User Guide25
File ManagerClick on Send History to view the report of files that have been sent to others. To Resend Files from a particular send event, simply select it and click on ResendFiles. Resend Message allows you to resend the files with exactly the same detailsas the original message. Click on the magnifying glass next to the Send date to bring up the delivery report forthat event.Proofpoint Secure File Transfer User Guide26
File ManagerProofpoint Secure File Transfer User Guide27
My Settings — User Guide — LogoutMY SETTINGSSelect My Settings from the menu tab to change password, signature, add contacts,add contact groups, enable rich text editor or reset your auto completion list.Depending on the company policy, you might also have the option to enable ordisable the loading of the Folder/Large File applet.USER GUIDESelect User Guide to view the user guide.LOGOUTSelect Logout if you wish to end the session.Proofpoint Secure File Transfer User Guide28
Proofpoint Secure File Transfer User Guide29
Receiving File(s)RECEIVING FILE(S)The Recipient receives the email with download link(s) in lieu of attachment(s).The Recipient clicks the link to open it:Proofpoint Secure File Transfer User Guide30
Receiving File(s)The Welcome window will open for you to enter Your Email Address.If the recipient hasn’t registered before or if his/her profile hasn’t been set up, ownershipof the email address needs to be confirmed before registering his/her profile. You wouldneed to fill in the email verification code and select a password to proceed. Check theoption “I’m on a public computer” so that the profile will not be retained locally beyond thissession.Proofpoint Secure File Transfer User Guide31
Receiving File(s)Proofpoint Secure File Transfer User Guide32
Receiving File(s)If you have already registered, you need to only enter Your Password.The download process will then begin.Proofpoint Secure File Transfer User Guide33
Receiving File(s)Once fully downloaded, the file can be opened and/or be saved.For convenience, files that are sent in the same package can also be retrieved by clickingon the appropriate filename to begin the download.Proofpoint Secure File Transfer User Guide34
Receiving File(s) – Receiving Sub-FilesRECEIVING SUB-FILESFiles of size greater than 2GB need to be downloaded as sub-files and concatenated toget the original file sent. For example, in the screen below the original file sent can be recreated from the 8 sub-files listed after downloading them.Click on the appropriate link for instructions to concatenate the various sub-files togetherto a single file. These instructions are provided for Windows and Linux/Macintoshsystems.Proofpoint Secure File Transfer User Guide35
Receiving File(s) – Receiving Sub-FilesProofpoint Secure File Transfer User Guide36
Proofpoint Secure File Transfer" section of this document. CREATE AN ACCOUNT An account may have been created for you. If so proceed to login. Otherwise, if available, click on "New User" to register for a new account or Click the link in the invitation email to access the Proofpoint Secure File Transfer web site. SEND A FILE