Transcription
Sage Abra Suite v9.2Installation GuideApril 2013
This is a publication of Sage Software, Inc.Document version: April 2013Copyright 2013. Sage Software, Inc. All rights reserved. Sage, the Sage logos, and the Sage product andservice names mentioned herein are registered trademarks or trademarks of Sage Software, Inc. or itsaffiliated entities. All other trademarks are the property of their respective owners. Your use of thisdocument and the Sage product(s) described herein is governed by the terms and conditions of the SageEnd User License Agreement ("EULA") or other agreement that is provided with or included in the Sageproduct. Nothing in this document supplements, modifies or amends those terms and conditions. Exceptas expressly stated in those terms and conditions, the information in this document is provided by Sage"AS IS" and Sage disclaims all express, implied or statutory warranties of any kind, including but notlimited to the warranties of merchantability, fitness for a particular purpose or of non-infringement. Noimplied license is granted to you under any Sage intellectual property or trade secret right. Sage reservesthe right to revise, supplement, or remove information in this document at any time without notice to youor others.Sage End User License: http://na.sage.com/sage-na/eula
Table of ContentsOverview . 2Introduction . 2Support and Documentation . 2Install Sage Abra Suite for the First Time. 5Before You Begin . 5Install Sage Abra Suite . 5Step 1 - Install the Server . 5Step 2 - Install the Clients. 9Upgrade from v9.1 to v9.2 . 13Read the following before you begin the upgrade . 13Upgrading Live and Sample data . 13Installation requires installing server and client. 13If you are using Windows Terminal Services . 13Upgrade to Sage Abra Suite v9.2 . 13Step 1 - Install the Server . 13Step 2 - Install the Clients. 16Upgrade from v9.0 to v9.2 . 21Upgrading Live and Sample data . 21Installation requires installing server and client. 21If you are using Windows Terminal Services . 21If you are using Windows Server 2008. 21Upgrade to Sage Abra Suite v9.2 . 22Step 1 - Install the Server . 22Step 2 - Install the Clients. 27Sage Abra Suite Server . 33Sage Abra Suite Client . 34Printers . 34Appendix . 35How to re-register a new module, option, or link . 35How to uninstall Sage Abra Suite v9.2 . 37Installation Guide1
To Uninstall Sage Abra Suite v9.2 . 37How to change servers after v9.2 has been installed . 38Learn about the new product installation . 38OverviewIntroductionThis document includes instructions for installing Sage Abra Suite version 9.2 for the first time, as well asupgrading Sage Abra Suite v9.0 or v9.1 to version 9.2.Make sure you have the following items before you begin a new installation or an upgrade: Version 9.2 Sage Abra Suite installation package Sage Abra Suite 9.2 Installation Guide (this document) Sage Abra Suite 9.2 Release Notes (to learn about the new features, enhancements, andmodifications in version 9.2)Support and DocumentationSage strives to provide you with the very best support in the industry. If you have a question, we providethe following methods for you to get your answer as soon as possible:1.Read the Help menu or clickat the top of the window in Sage Abra Suite to open Help for thefunction you are currently using.2.Log on to the Sage Customer Portal at: ch for solutions to common problemsDownload product updatesRead technical informationOpen a support caseCreate a service requestGrant your channel partner permission to view your support ticketsChat with a support analyst using Sage Live Chat, Monday through Friday from 9:00 A.M. to 5:00P.M. Eastern Time at: http://kb.sagesoftwareonline.com/app/chat/chat launch
4.Call Sage Abra Suite Support, Monday through Friday from 8:00 A.M. to 8:00 P.M. Eastern Time at 1800-829-0170. Please have your Customer ID handy when contacting Support.5.Call Sage Employer Solutions Customer Service, Monday through Friday from 8:30 A.M. to 5:30 P.MEastern Time at 1-800-424-9392, or send an email to ation and Setup Guide 3
Install Sage Abra Suite for the First TimeThis section steps you through installing Sage Abra Suite v9.2 for the first time. To familiarize yourselfwith the installation process, be sure to read through all the steps before you start the installation.Before You Begin There are two required steps in the install process. You must first install the Sage Abra Suite(data) server and then install the Sage Abra Suite clients. If your server is Windows Server 2008, Windows 7, or Windows Vista, you must reset the Viewproperties on the C drive so that you can see the \ProgramData folder where the program fileswill reside after the installation. Open Windows Explorer and do the following:Go to Organize Folder and Search Options.Click the View tab.Select the Show hidden files and folders button and click OK. For security purposes, the server installation does not add an Everyone security group. Thismeans that after the server installation, you must apply the appropriate permissions for the userswho will be running the Sage Abra Suite application as well as accessing the data. Theseinstructions are included in the steps to Install the Server. If you are using Terminal Services in Windows Server 2008 or Windows Server 2003, after theSage Abra Suite data server is installed on the terminal server, each person who will be runningthe Sage Abra Suite application must run the client installation.Install Sage Abra SuiteThe installation of Sage Abra Suite consists of two separate installations: installing on a server andinstalling on a client. Follow the steps below to first install Sage Abra Suite on a server, and then install aclient either on the same server machine or on a separate client machine. If you will be running Sage AbraSuite on a network, each user must do a separate client install.Step 1 - Install the Server1.Close all Microsoft Windows applications.Installation Guide5
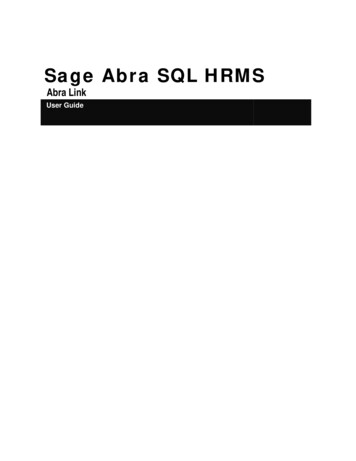
2.At the server machine, open the Sage Abra Suite installation package. Browse with WindowsExplorer to the installation package folder and double-click setup.exe. The Sage AbraInstallShield Wizard dialog box opens.3.Click Install to open the Server Installation Welcome page.4.Click Next to begin the server installation. When the License Agreement dialog box opens, reador print the License Agreement, select I accept the terms in the license agreement, and clickNext.5.Enter your Customer Information and click Next.
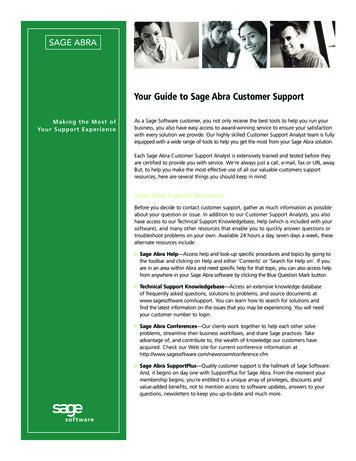
Install Sage Abra Suite6.In the Destination Folder dialog box, click Next to install Sage Abra Suite Server in the defaultfolder. Otherwise, click Change and select a different folder.Note: The following figure shows the default destination folder for Windows XP andWindows Server 2003. The default destination folder for Windows Server 2008, WindowsVista, and Windows 7 is C:\ProgramData\Sage\AbraSuite.7.Click Next to move to the Ready to Install the Program dialog box.8.You can review your settings by clicking Back through the previous screens. When you are sureyour settings are correct, click Install. The progress bar appears during the installation. When theserver installation is complete, click Finish.Installation and Setup Guide 7
9.From Windows Explorer, go to the destination folder where you installed the server: C:\Documents and Settings\All Users\Sage\AbraSuite if you are using Windows XP orWindows Server 2003 C:\ProgramData\Sage\AbraSuite if you are using Windows Server 2008, Windows Vista, orWindows 710. Right-click the AbraSuite folder and select Sharing and Security to open the Abra SuiteProperties dialog box.11. Click the Security tab and set the following permissions for each security group and/or user whowill install the client and use Sage Abra Suite v9.2. Be advised that users who need access only tothe data for reporting purposes also need these same permissions: Modify Read & Execute List Folder contents Read Write12. Click the Advanced button on the Security tab, and for each permission entry, select the checkbox shown below so that the permissions are propagated all the way down to each folder and fileinside the AbraSuite folder.
Install Sage Abra Suite13. Click the Sharing tab and share the folder. Set the permissions for users who access this folderover the network on the shared folder to Full Control. (Right-click the AbraSuite folder, selectProperties, select the Sharing tab, click Permissions, then set Full Control for the appropriategroups or users.)Note: Make sure that the folder’s Share Name does not contain a space. For example, in thisfigure, the default share name AbraSuite does not contain a space.Step 2 - Install the ClientsNote: If you are using Terminal Services in Windows Server 2008 or Windows Server 2003, eachperson who will be running the Sage Abra Suite application must run the client installation.For each client machine that will access Sage Abra Suite, follow the steps below. Note that if you willrun Sage Abra Suite on the server machine, you must also install a client on that server machine.When a new version is installed on the server, the clients will automatically update from the server.For each client machine, verify that there are no instances of a previous version of a Sage Abra Suiteserver or client installation. You can use the Add or Remove Programs control panel function toverify this. Go to the shared folder on the server (either by using a UNC path or by creating a mapped drive) andfrom the Client folder, double-click setup.exe. If you are installing a client on the server machine, youcan start the client installation using the shortcut Sage Abra Suite Client Install that was placed onthe desktop during the server installation.The client installation begins and searches for the required components on your machine.Installation and Setup Guide 9
Note: The first time the client is installed on each client machine, administrative rights arenecessary to install these components and a dialog box will ask for an administrator useraccount and password. Click Install to start installing the required components. When component installation is complete,you may be asked to restart your computer. If this is the case, restart immediately (not later). When computer restart is complete, the client install will automatically continue. Note that the time ittakes for the client install to start again depends on machine configuration and speed. If the clientinstall does not continue after a significant amount of time and you have verified that your computerrestart is complete, you can manually restart the client installation (go to the shared folder on theserver and, from the Client folder, double-click setup.exe).The Application Install dialog boxappears asking for final confirmation to install the client. Click Install to install the Sage Abra Suite Client. The Installing Sage Abra Suite dialog box appearsduring installation.
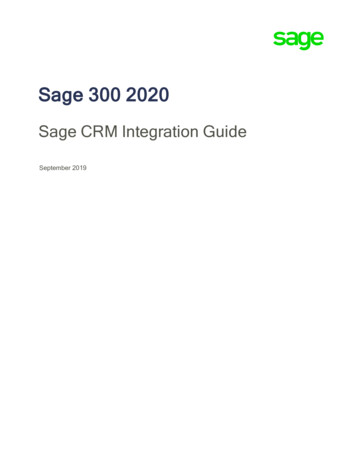
Install Sage Abra Suite When installation is complete, the Register SageAbra Suite dialog box appears. Note that this opensonly on the first client installation. Enter the Serial Number and Installation Code you obtained from Sage Employer Solutions CustomerService. If you want to add a link or interface application, select the associated check box. Click OK.Note: With Sage Abra Suite version 9.2, upon install of an update or upgrade, the systemautomatically updates your system tax tables with all available taxes. This feature appliesstrictly for your Live database. If you use the Sample database you will be required tomanually apply the legislative updates in the System Tax Tables window after installation. When registration is complete, the Sage Abra Suite Logon page opens.Installation and Setup Guide 11
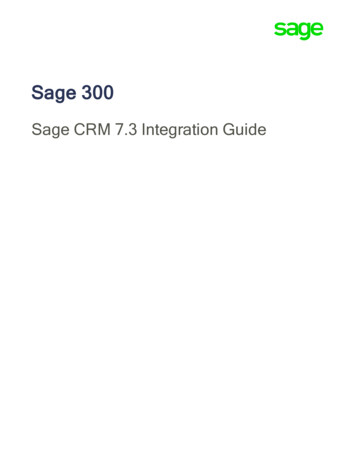
Note: The Use Windows Logon check box enables you to log on with your Windows useraccount. However, this logon method cannot be used until the proper user securityauthentication has been set for the user logging on. Enter MASTER for Username and leave the Password blank. Select one of the following options from the drop-down list: Select Live Data to open Sage Abra Suite and begin setting up your employer’s data. Select Sample Data to open Sage Abra Suite to look at a sample employer’s data. Click Logon to open Sage Abra Suite. Verify your upgrade was successfully installed by selecting Help About Sage Abra Suite.
Upgrade from v9.1 to v9.2Tip: As a maintenance precaution, we recommend you do the following prior to installing yourupgrade to version 9.2. At the Logon Page, press Ctrl U to update the database structures. After the update database structures process completes, at the Logon page, press Ctrl R toreform the indexes.This section steps you through upgrading your Sage Abra Suite v9.1 system to v9.2.Read the following before you begin the upgradeUpgrading Live and Sample dataThe upgrade process always overwrites existing Sample data with new Sample data. If you want topreserve your Sample data from v9.1, you will need to do an external backup before you do anupgrade and restore it after the upgrade. Live data is never overwritten on an upgrade.Installation requires installing server and clientThere are two required steps in the upgrade process. You must first install the v9.2 Sage Abra Suite(data) server and then install the v9.2 Sage Abra Suite clients.If you are using Windows Terminal ServicesIf you are using Terminal Services in Windows Server 2008 or Windows Server 2003, after the v9.2Sage Abra Suite data server is installed on the terminal server, each person who will use the SageAbra Suite application must run the v9.2 client installation.Upgrade to Sage Abra Suite v9.2Step 1 - Install the Server1.At the server machine, open the Sage Abra Suite installation package. Browse with WindowsExplorer to the installation package folder, and then double-click setup.exe.Installation Guide13
Upgrade to Sage Abra Suite v9.2 The InstallShield Wizard confirms two pending items to install.Note: Sage Advisor Update is a new auto update application which allows you to applyfuture Product and Legislative Updates automatically from within Sage Abra Suite. Read theSage Abra Suite v9.2 Release Notes for more information. Select Install to open the Server Installation Welcome page. Click Next to begin the server installation. When the License Agreement dialog box opens, read orprint the License Agreement, select I accept the terms in the license agreement, and click Next.14Sage Abra Suite
Upgrade to Sage Abra Suite v9.2 Enter your Customer Information and click Next. In the Destination Folder dialog box, click Next to install Sage Abra Suite Server in the default folder.Otherwise, click Change and select a different folder.Note: The following figure shows the default destination folder for Windows XP andWindows Server 2003. The default destination folder for Windows Server 2008, WindowsVista, and Windows 7 is C:\ProgramData\Sage\AbraSuite.Installation and Setup Guide 15
Upgrade to Sage Abra Suite v9.2 Wait while the InstallShield Wizard installs Sage Abra Suite Service, click Finish when complete.Step 2 - Install the ClientsNote: If you are using Terminal Services in Windows Server 2008 or Windows Server 2003, eachperson who will be running the Sage Abra Suite application must run the client installation.For each client machine that accesses Sage Abra Suite, follow the steps below. If you will run SageAbra Suite on the server machine you must also install a client on that server machine. Additionally,client installs only need to be done for the first install of a v9.2 client. When a new version is installedon the server, the clients will automatically update from the server.1.For each client machine, verify that there are no instances of a previous version of a Sage AbraSuite server or client installation. You can use the Add or Remove Programs control panelfunction to verify this. Go to the shared folder on the server (either by using a UNC path or by creating a mapped drive) andfrom the Client folder, double-click setup.exe. If you are installing a client on the server machine, youcan start the client installation using the shortcut Sage Abra Suite Client Install that was placed onthe desktop during the server installation.16Sage Abra Suite
Upgrade to Sage Abra Suite v9.2The client installation begins and searches for the required components on your machine.Note: The first time the client is installed on each client machine, administrative rights arenecessary to install these components and a dialog box asks for an administrator user accountand password. Click Install to start installing the required components. When component installation is complete,you may be asked to restart your computer. If this is the case, restart immediately (not later). When your computer restart is complete, the client install will automatically continue. Note that thetime it takes for the client install to start again depends on machine configuration and speed. If theclient install does not continue after a significant amount of time and you have verified that yourcomputer restart is complete, you can manually restart the client installation (go to the shared folderon the server and, from the Client folder, double-click setup.exe).The Application Install dialog boxappears asking for final confirmation to install the client.Installation and Setup Guide 17
Upgrade to Sage Abra Suite v9.2 Click Install to install the Abra Suite Client. The Installing Progress dialog box appears duringinstallation. When client installation is complete, the following dialog box appears. Note that this dialog boxappears only for the first client that is installed. That is, when subsequent clients are installed, thismessage does not appear and you are taken directly to the logon page shown in the next step. Click OK to update files and open the logon page for Sage Abra Suite.18Sage Abra Suite
Upgrade to Sage Abra Suite v9.2Note: The Use Windows Logon check box enables you to log on with your Windows useraccount. However, this logon method cannot be used until the proper user securityauthentication has been set for the user logging on. Enter your user name and password, and select Live Data or Sample Data and click Logon to openAbra Suite.If Abra Link is installed, you can open it directly from the logon page. Select Abra Link from thedrop-down list and click Logon to open the Abra Link logon page.If you obtained a new serial number and installation code to add a new module, option, or link toyour existing Sage Abra Suite system, you can now register from within Sage Abra Suite. Refer topage 35 for registration instructions. Otherwise, continue with the steps below.Installation and Setup Guide 19
Upgrade from v9.0 to v9.2Tip: As a maintenance precaution, we recommend you do the following prior to installing yourupgrade to version 9.2. At the Logon Page, press Ctrl U to update the database structures. After the update database structures process completes, at the Logon page, press Ctrl R toreform the indexes.This section steps you through upgrading your Sage Abra Suite v9.0 to v9.2. To familiarize yourself withthis process, be sure to read through all the steps before you start the upgrade.Important!Before beginning the upgrade from Sage Abra Suite v9.0 to either v9.1 or v9.2, it is imperative that youuninstall your v9.0 clients.Upgrading Live and Sample dataThe upgrade process always overwrites existing Sample data with new Sample data. For subsequentupgrades, if you want to preserve your Sample data you will need to do an external backup beforeperforming an upgrade and restore it after the upgrade. Live data is never overwritten on anupgrade.Installation requires installing server and clientThere are two required steps in the install/upgrade process. You must first install the Sage Abra Suite(data) server and then install the Sage Abra Suite clients.If you are using Windows Terminal ServicesIf you are using Terminal Services in Windows Server 2008 or Windows Server 2003, after the SageAbra Suite data server is installed on the terminal server, each person who will be running the AbraSuite application must run the client installation.If you are using Windows Server 2008If your server is Windows Server 2008, you must reset the View properties on the C drive so that youcan see the \ProgramData folder where the program files will reside after the upgrade. OpenWindows Explorer and do the following:Installation Guide21
Upgrade to Sage Abra Suite v9.21.Go to Organize Folder and Search Options2.Click the View tab.3.Select the Show hidden files and folders button and click OK.Upgrade to Sage Abra Suite v9.2Step 1 - Install the Server1.Uninstall all Abra Suite v9.0 clients. That is, for each client, go to Add/Remove Programs andremove the program Sage Abra Suite. At the server machine, open the Sage Abra Suite installation package. Browse with WindowsExplorer to the installation package folder, and then double-click setup.exe. The InstallShield Wizard confirms two pending items to install.Note: Sage Advisor Update is a new auto update application which allows you to applyProduct and Legislative Updates automatically from within Sage Abra Suite. Read the SageAbra Suite v9.2 Release Notes for more information.22Sage Abra Suite
Upgrade to Sage Abra Suite v9.2 Select Install to open the Server Installation Welcome page. Click Next to begin the server installation. When the License Agreement dialog box opens, read orprint the License Agreement, select I accept the terms in the license agreement, and click Next. Enter your Customer Information and click Next. In the Destination Folder dialog box, click Next to install Sage Abra Suite Server in the default folder.Otherwise, click Change and select a different folder.Note: The following figure shows the default destination folder for Windows XP andWindows Server 2003. The default destination folder for Windows Server 2008, WindowsVista, and Windows 7 is C:\ProgramData\Sage\AbraSuite.Installation and Setup Guide 23
Upgrade to Sage Abra Suite v9.2 Click Next to move to the Ready to Install the Program dialog box. You can review your settings by clicking Back through the previous screens. When you are sure yoursettings are correct, click Install. The progress bar appears during the installation.24Sage Abra Suite
Upgrade to Sage Abra Suite v9.2 When you upgrade from an older version of Sage Abra Suite, the prompt to uninstall the olderversion of Sage Abra Suite appears. Click Yes. The Preparing Setup dialog box opens to prepare the uninstall process. The Abra Suite Setup dialog box opens next. Click Next to open the Add/Remove Components dialog box which provides the ability to uninstallthe older version. Select Uninstall and click Next. The Confirm Uninstall dialog box opens for confirmation.Installation and Setup Guide 25
Upgrade to Sage Abra Suite v9.2Note: It is important to note that the contents of the Data folder have already been migratedto the new Data folder location. This means that when you proceed to uninstall, you will notlose your data. Click Yes to proceed. When uninstall is complete, the following page appears. Click Finish to complete the uninstall. When the server installation and uninstall is complete, the following page appears. Click Finish. From Windows Explorer, go to the destination folder where you installed the server: 26C:\Documents and Settings\All Users\Sage\AbraSuite if you are using Windows XP orWindows Server 2003Sage Abra Suite
Upgrade to Sage Abra Suite v9.2 C:\ProgramData\Sage\AbraSuite if you are using Windows Server 2008, Windows Vista, orWindows 7 Right-click the AbraSuite folder and select Sharing and Security to open the Abra Suite Propertiesdialog box. Click the Security tab and set the following permissions for each security group and/or user who willbe installing the client and using Sage Abra Suite v9.2. Be advised that users who just need access tothe data for reporting purposes need these same permissions. Modify Read & Execute List Folder contents Read Write Click the Advanced button, and for each permission entry, select the check box shown below so thatthe permissions are propagated all the way down to each folder and file inside the AbraSuite folder. Click the Sharing tab and share the folder. Set the permissions for users who access this folder overthe network on the shared folder to Full Control. (Right-click the AbraSuite folder, select Properties,select the Sharing tab, click Permissions, then set Full Control for the appropriate groups or users.)Note: Make sure that the folder’s Share Name does not contain a space. For example, in thisfigure, the default share name AbraSuite does not contain a space.Step 2 - Install the ClientsNote: If you are using Terminal Services in Windows Server 2008 or Windows Server 2003, eachperson who will be running the Sage Abra Suite application must run the client installation.For each client machine that accesses Sage Abra Suite, follow the steps below. If you will run SageAbra Suite on the server machine you must also install a client on that server machine. Additionally,client installs only need to be done for the first install of a v9.2 client. When a new version is installedon the server, the clients will automatically update from the server.Installation and Setup Guide 27
Upgrade to Sage Abra Suite v9.22.For each client machine, verify that there are no instances of a previous version of a Sage AbraSuite server or client installation. You can use the Add or Remove Programs control panelfunction to verify this. Go to the shared folder on the server (either by using a UNC path or by creating a mapped drive) andfrom the Client folder, double-click setup.exe. If you are installing a client on the server machine, youcan start the client installation using the shortcut Sage Abra Suite Client Install that was placed onthe desktop during the server installation.28Sage Abra Suite
Upgrade to Sage Abra Suite v9.2The client installation begins and searches for the required components on your machine.Note: The first time the client i
Version 9.2 Sage Abra Suite installation package Sage Abra Suite 9.2 Installation Guide (this document) Sage Abra Suite 9.2 Release Notes (to learn about the new features, enhancements, and modifications in version 9.2) Support and Documentation Sage strives to provide you with the very best support in the industry.