Transcription
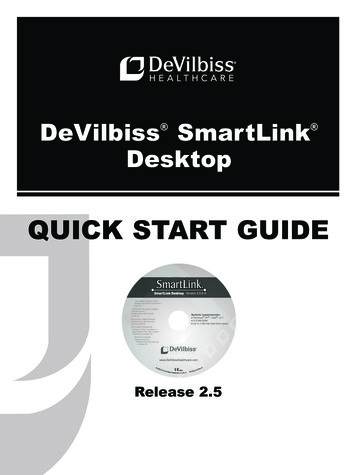
SE-1000 Rev CDRAFTDeVilbiss SmartLink DesktopQUICK START GUIDEVersion 2.5.0.0For complete instructions, refer toSmartLink Quick Start Guide.pdf foundon this CD.Para leer las instrucciones completas,consulte el archivoSmartLink Quick Start Guide.pdfen este CD.System requirements: Windows XP , Vista , or 7 512 MB RAM Up to 2 GB free hard drive spacePer le istruzioni complete, riferimentoa SmartLink Quick Start Guide.pdftrovato su questo CD.Pour accéder à l'ensemble desinstructions, veuillez vous référer auguide SmartLink Quick Start Guide.pdfdisponible sur le présent CD.Sie finden die kompletteBetriebsanleitung alsSmartLink Quick Start Guide.pdfauf dieser CD. 2008-2012DeVilbiss Healthcare LLC 04.12ev G20 RS2-4DV5SRelease 2.5
TABLE OF CONTENTSWelcome.Technical Support.Important Safeguards.Before You Begin.System Requirements.Compatibility.Software Installation.Setting up an Enterprise (Network) Database.Set System Security.Add Patient to Database.Add Device to Database.Download Device Information using Data Card.View Report.SmartLink Navagation.Set Preferences.SmartLink Online Help.2223333444556677WELCOMEThe SmartLink Desktop is a software application that collects data from DeVilbiss’ patient monitoring devices andmanages the data on a standard PC.SmartLink stores patient, physician, and device data, tracks patient compliance, logs user activity, and providesreports. Device parameters can be adjusted accordingly, based on monitoring data.AudienceThe online help information for SmartLink is written for health care providers and clinicians who are responsible formonitoring, evaluating, and tracking patient data.TECHNICAL SUPPORTFor technical support associated with the SmartLink Desktop software, contact DeVilbiss Healthcare:For customers in the United States: Telephone: 1-800-338-1988 Fax: Email:1-800-552-7379cs@DeVilbissHC.comFor international customers: Telephone: 1-814-443-4881 (Europe: 49-621-178-98-230) Fax: omIMPORTANT SAFEGUARD INFORMATIONWhen using electrical products, ensure you follow all basic safety precautions. Important safety information isindicated as follows: CAUTION: Information to prevent damage to the product. NOTE: Information to which you should pay special attention.EN - 2A-DV5SS2
BEFORE YOU BEGINBefore using the DeVilbiss SmartLink Desktop software: CAUTION:Do not use the DeVilbiss SmartLink Desktop software on computers with Operating Systems (OS)that have not been tested by DeVilbiss for compatibility. Only Microsoft Windows 7, Windows Vista orWindows XP operating systems are compatible. Using the software with an incompatible OS may cause thedata to display incorrectly. Refer to System Requirements for additional information. CAUTION: The circular data port connectors located on the back of the DeVilbiss SmartLink module and theDeVilbiss IntelliPAP and SleepCube devices should only be used to attach the module to the CPAPs. Do notattempt to attach other devices to either the module or the CPAPs using these connectors as it may damage themodule, the CPAP, or the device you are attempting to connect. CAUTION: Use DeVilbiss SmartLink Data Cards with the SmartLink Therapy Monitoring System to ensurecorrect data collection and display. Other Secure Digital (SD) cards may not be compatible.SYSTEM REQUIREMENTSTo use the SmartLink System, you will need a PC configured with the following components: Operating System—Microsoft Windows 7, Windows Vista or Windows XP Processor—400 MHz Pentium processor or equivalent (minimum) or 1GHz Pentium processor or equivalent(recommended) RAM—512 MB (minimum), 1 GB (recommended) Hard Disk—Up to 2 GB of available space is recommended Monitor Display—1024 x 768, 256 colors (minimum); 1024 x 768 high color, 32-bit (recommended) Hardware—For data card: SD Memory card reader supporting FAT16 file format or USB port for auxiliary cardreader. For direct connect to CPAP: Serial port or USB port.Microsoft Windows 7, Windows Vista and Windows XP are registered trademarks of the Microsoft Corporation.COMPATIBILITYThe SmartLink System is compatible with the following DeVilbiss CPAPs:IntelliPAP CPAP Systems:SleepCube CPAP Systems: IntelliPAP Standard (DV51 series) SleepCube Standard (DV51 series) IntelliPAP Standard Plus (DV53 series) SleepCube Standard Plus (DV53 series) IntelliPAP AutoAdjust (DV54 series) SleepCube AutoAdjust (DV54 series) IntelliPAP Bilevel S (DV55 series) SleepCube Auto Plus (DV54 series) IntelliPAP Bilevel ST (DV56 series) SleepCube Bilevel S (DV55 series) IntelliPAP AutoBilevel (DV57 series) SleepCube Bilevel ST (DV56 series) SleepCube AutoBilevel (DV57 series)SOFTWARE INSTALLATION1. Ensure you have Administration rights and privileges to the computer.2. Insert SmartLink CD in the computer’s CD-ROM drive.a. Click Next on the welcome screen.b. Click Next and accept the default installation folder.c, Click Install to install the application.d. Click Finish to complete the installation.4. While logged in as Administrator, launch the application from the start menu.5. If prompted to allow the application to pass through the firewall, select ALLOW.All drivers are pre-installed in Microsoft Windows XP , Vista , and 7 operating systems.A-DV5SS2EN - 3
SETTING UP AN ENTERPRISE (NETWORK) DATABASE Note:Setting up a network database should be performed by a qualified IT professionalTo create a network database, the user must connect to a valid SQL Server instance with database administratorprivileges. The application will create the database called SmartLink and the necessary data to run the application.Any users connecting to the database must have an account on the SQL Server with read and write access toSmartLink database.SET SYSTEM SECURITY Note:All users can access the Security tab and turn On system security. However, only the administrator canturn system security Off. When security is off, all users have administrator rights. When Security is On, only users listed in the Manage Users table can log into and use the SmartLinkapplication. Refer to “User Permissions” for a list of tasks each user can access. If a user logs into Windows but does not have a user login on the SmartLink application, a warning messagedisplays indicating the user does not have a valid user login and terminates the application.Turn on system security:1. From the Application menu, click Options. The SmartLink Options screen displays.2. Select Security. The Security Settings screen displays.3. Click the On radio button. A message displays indicating security will be turned on and you will be madeadministrator.4. Click OK to continue or Cancel to abort. You can now “manage users” and view the “access log”.Turn off system security:From the Security Settings screen, click the Off radio button. Security is turned off, the Access log is cleared, and theuser management field is removed.User PermissionsThe following user permissions are in effect when security is turned On.User RolePermissionsReadCan only view information in the SmartLink application. Read only users cannot add, edit,or delete information. In addition, this user can not edit report templates or view theAccess log. Read only users can generate and print patient reports.Read-writeCan only add or edit information in the SmartLink application. This user cannot deletepatient-related data, modify/delete report templates, or view the Access log.AdminCan perform system security, user management, report template management, and deletepatient information and report templates, with the exception of the default report template.Admin users can view, clear, and print the Access log.ADD PATIENT TO DATABASETo add a patient to the database:1. From the Home tab, select New and then Patient. The New Patient screen displays.2. Populate the form with patient-specific information. Refer to “Field Descriptions” for more information.3. Click Save to continue or Cancel to abort. The patient is added to the database.EN - 4A-DV5SS2
ADD DEVICE TO DATABASE Note:You must provide a valid serial number for the device you want to add. Once the serial number isentered the software automatically decodes and displays the corresponding model number and device.To add a device to the database:1. From the Home tab, select New and then Device. The New Device screen displays.2. Populate the form with device-specific information. Refer to “Field Descriptions” for specific information.3. When complete click Save or Cancel to abort. The device is added to the database.DOWNLOAD DEVICE INFORMATION USING DATA CARD Note:While downloading data, the database performs a date limit check. If the data entered is earlier than01/01/2008, data from the device is rejected. In addition, the software checks for duplicate records. If duplicaterecords are found, these records are not imported into the database. If an error is encountered during the download, a message displays indicating errors were detected and somedata may be lost.To download device information using a data card:1. Insert the data card from the patient device into PC.2. From the Home tab, select Download. The Download Data screen displays.3. Select Data Card as the device type.4. Select the data card from the List of Available Devices and click Next.a. If the device does not exist in the database or is a new device is connected, the data is addedautomatically.b. If the device and system settings do not match in the database, an error message displays indicating thesettings do not match for the selected device and model.c. If the device is assigned to a patient, the software confirms the new device data and assigns the deviceto the current patient.d. If the patient has another device assigned, a message displays asking to confirm the user is assignedmultiple devices.5. Click Finish when complete or Cancel to abort. The data from data card is downloaded to the SmartLinkdatabase.To assign device to another user:1. To assign the device to another patient, click Change Patient.2. Select a patient and click Next. The device is reassigned to the selected patient. To modify information, clickBack to make changes and click Next to save changes.3. Click Finish when complete or Cancel to abort. The data is saved to the SmartLink database and data card.To assign device to a new user:1. To assign the device to a new patient, click Create New. The New Patient screen displays.2. Populate the form with patient-specific information. Refer to “Add Patient” for more information.3. Click Save when complete or Cancel to abort. The new patient information is saved.4. Click Next to continue. The device is reassigned to the selected patient. To modify information, click Back tomake changes and click Next to save changes.5. Click Finish when complete or Cancel to abort. The data is saved to the SmartLink database and data card.A-DV5SS2EN - 5
VIEW REPORTTo view a report:1. From the SmartLink toolbar, select a patient you want to view report data for. A list of patient-relatedinformation displays.2. Select Reports. The Reports screen displays.3. Select the type of report you want to view. The selected report displays.SMARTLINK NAVIGATIONSmartLink contains the following components to navigate around the application: Application Menu Provides a list of tasks associated with managing the SmartLink application.Contains Save and Undo/Redo buttons and is similar to Microsoft Outlook. This Quick Access Toolbar toolbarcan be customized. Application Ribbon SmartLink Dashboard Contains patient-related data modules that can be customized and displayed onthe left and/or right columns in the SmartLink Display Area. SmartLink Display Displays selected module(s) or screens, when selected. rovides groups of tasks using the Home, Data, Reminders, and Reports SelectionPtabs.SmartLink Toolbar Provides access to patients, devices, physicians, payors, reminders, and thedashboard.213456EN - 6A-DV5SS2
SET PREFERENCESThis section provides the procedures to set preferences in the SmartLink application.Set Application LanguageSmartLink provides multiple language support in: English, French, German, Spanish, Italian, Dutch, Danish, Finnish,Norwegian, Swedish, Polish, and Turkish.To set the application language:1. From the Application menu, select Language. A list of languages displays.2. Select a language for the application. A check mark displays next to the selected language.Set Unit MeasurementThe unit measurement for SmartLink data is set as English or Metric. This measurement unit is used for calculatingof the Body Mass Index (BMI) field located in the patient’s information.To set the unit measurement:1. From the Application menu, click Options. The SmartLink Options screen displays.2. Select General. The General Options screen displays.3. Select the radio button next to the measurement units you want to use: either English or Metric. The radiobutton is highlighted.4. Click OK to continue or Cancel to abort. The measurement unit for SmartLink data is set.Set Document Storage LocationAll uploaded documents are saved to a default location: [CommonApplicationData]\DeVilbiss Healthcare\SmartLinkDesktop. The document storage location can be changed to another location.To set the document storage location:1. From the Application menu, click Options. The SmartLink Options screen displays.2. Select General. The General Options screen displays.3. Click Browse to select the document storage location from the Browse for Folder dialog.4. Click OK to select the location or Cancel to abort.5. Click OK to save the changes, or Cancel to abort the changes. The document storage location is set.SMARTLINK ONLINE HELPThe SmartLink application comes with comprehensive online help to quickly guide you through the SmartLinkapplication. Online help includes managing patient-related data, setting device prescription settings, managing andmonitoring patient data, and generating patient reports.Online help contains step-by-step instructions, search capabilities for topics and keywords, and a comprehensiveindex.To access SmartLink online help:From the SmartLink application, click the(help) button. The SmartLink help file displays. You can select a topicfrom the table of contents, search for a topic or keyword, and display topics using the index.A-DV5SS2EN - 7
DeVilbiss Healthcare LLC100 DeVilbiss DriveSomerset, PA 15501-2125USA800-338-1988 814-443-4881DeVilbiss Healthcare LtdSunrise Business ParkHigh StreetWollaston, West MidlandsDY8 4PSENGLAND 44-1384-446858DeVilbiss Healthcare Ltd*Unit 3, Bloomfield ParkBloomfield RoadTipton, DY4 9APUNITED KINGDOM*opening 01.June 2012DeVilbiss Healthcare Pty. Limited15 Carrington Road, Unit 5Castle Hill NSW 2154AUSTRALIA 61-2-9899-3144DeVilbiss Healthcare SAS13/17, Rue Joseph Priestley37100 ToursFRANCE 33 (0) 2 47 42 99 42EC REP0044DeVilbiss Healthcare GmbHKamenzer Straße 368309 MannheimGERMANY 49-621-178-98-230DeVilbiss Healthcare LLC 100 DeVilbiss Drive Somerset, PA 15501 USA800-338-1988 8 1 4 - 4 4 3 - 4 8 8 1 w w w. D e Vi l b i s s H e a l t h c a r e . c o mDeVilbiss , SmartLink , IntelliPAP , SleepCube and AutoAdjust are registered trademarks of DeVilbissHealthcare. 2012 DeVilbiss Healthcare LLC. 04.12 All Rights Reserved.A-DV5SS2 Rev. B
A-DV5SS2 EN - 3 BEFORE YOU BEGIN are: CAUTION: Do not use the DeVilbiss SmartLink Desktop software on computers with Operating Systems (OS) that have not been tested by DeVilbiss for compatibility.