Transcription
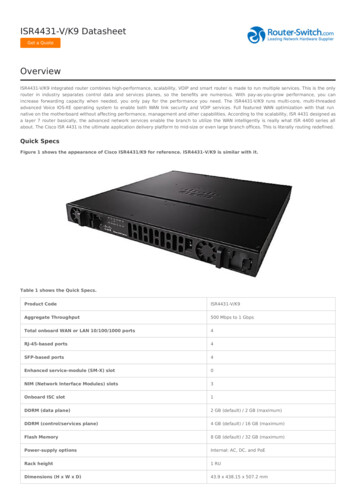
Cisco Router Configuration TutorialCisco Inter-network Operating System:Cisco IOS Modes of OperationThe Cisco IOS software provides access to several different command modes.Each command mode provides a different group of related commands.For security purposes, the Cisco IOS software provides two levels of access tocommands: user and privileged. The unprivileged user mode is called user EXECmode. The privileged mode is called privileged EXEC mode and requires apassword. The commands available in user EXEC mode are a subset of thecommands available in privileged EXEC mode.The following table describes some of the most commonly used modes, how toenter the modes, and the resulting prompts. The prompt helps you identify whichmode you are in and, therefore, which commands are available to youMode ofOperationUser EXECPrivileged EXECGlobal ConfigInterface ConfigSetupUsageChange terminalsettings on a temporarybasis, perform basictests, and list systeminformation.System administration,set operatingparameters.Modify configuration thataffect the system as awhole.Modify the operation ofan interface.Create the initialconfiguration.How to Enter theModeFirst level accessed.PromptFrom user EXECmode, enter enablepassword commandFrom privilegedEXEC, enterconfigure terminal.From global mode,enter interface typenumber.From privileged EXECmode, entercommand setup.Router#Router Router(config)#Router(config-if)#Prompted dialog
User EXEC Mode:When you are connected to the router, you are started in user EXEC mode. Theuser EXEC commands are a subset of the privileged EXEC commands.Privileged EXEC Mode:Privileged commands include the following: Configure – Changes the software configuration. Debug – Display process and hardware event messages. Setup – Enter configuration information at the prompts.Enter the command disable to exit from the privileged EXEC mode and return touser EXEC mode.Configuration ModeConfiguration mode has a set of submodes that you use for modifying interfacesettings, routing protocol settings, line settings, and so forth. Use caution withconfiguration mode because all changes you enter take effect immediately.To enter configuration mode, enter the command configure terminal and exit bypressing Ctrl-Z.Note:Almost every configuration command also has a no form. In general, use the noform to disable a feature or function. Use the command without the keyword noto re-enable a disabled feature or to enable a feature that is disabled by default.For example, IP routing is enabled by default. To disable IP routing, enter the noip routing command and enter ip routing to re-enable it.
Getting HelpIn any command mode, you can get a list of available commands by entering aquestion mark (?).Router ?To obtain a list of commands that begin with a particular character sequence,type in those characters followed immediately by the question mark (?).Router#co?configure connect copyTo list keywords or arguments, enter a question mark in place of a keyword orargument. Include a space before the question mark.Router#configure ?memoryConfigure from NV memorynetworkConfigure from a TFTP network hostterminalConfigure from the terminalYou can also abbreviate commands and keywords by entering just enoughcharacters to make the command unique from other commands. For example,you can abbreviate the show command to sh.
Configuration FilesAny time you make changes to the router configuration, you must save thechanges to memory because if you do not they will be lost if there is a systemreload or power outage. There are two types of configuration files: the running(current operating) configuration and the startup configuration.Use the following privileged mode commands to work with configuration files. configure terminal – modify the running configuration manuallyfrom the terminal. show running-config – display the running configuration. show startup-config – display the startup configuration. copy running-config startup-config – copy the runningconfiguration to the startup configuration. copy startup-config running-config – copy the startupconfiguration to the running configuration. erase startup-config – erase the startup-configuration in NVRAM. copy tftp running-config – load a configuration file stored on aTrivial File Transfer Protocol (TFTP) server into the runningconfiguration. copy running-config tftp – store the running configuration on aTFTP server.
IP Address ConfigurationTake the following steps to configure the IP address of an interface.Step 1: Enter privileged EXEC mode:Router enable passwordStep 2: Enter the configure terminal command to enter global configurationmode.Router#config terminalStep 3: Enter the interface type slot/port (for Cisco 7000 series) or interfacetype port (for Cisco 2500 series) to enter the interface configuration mode.Example:Router (config)#interface ethernet 0/1Step 4: Enter the IP address and subnet mask of the interface using the ipaddress ipaddress subnetmask command.Example,Router (config-if)#ip address 192.168.10.1 255.255.255.0Step 5: Exit the configuration mode by pressing Ctrl-ZRouter(config-if)#[Ctrl-Z]
Routing Protocol ConfigurationRouting Information Protocol (RIP)Step 1: Enter privileged EXEC mode:Router enable passwordStep 2: Enter the configure terminal command to enter global configurationmode.Router#config terminalStep 3: Enter the router rip commandRouter(config)#router ripStep 4: Add the network number to use RIP and repeat this step for all thenumbers.Router(config-router)#network network-numberExample: Router(config-router)#network 192.168.10.0Note: To turn off RIP, use the no router rip command.Router(config)#no router ripOther useful commands Specify a RIP VersionBy default, the software receives RIP version 1 and version 2 packets, but sendsonly version 1 packets. To control which RIP version an interface sends, use oneof the following commands in interface configuration mode:Commandip rip send version 1ip rip send version 2ip rip send version 12PurposeConfigure an interface to send only RIPversion 1 packets.Configure an interface to send only RIPversion 2 packets.Configure an interface to send only RIPversion 1 and version 2 packets.To control how packets received from an interface are processed, use one of thefollowing commands:
Commandip rip receive version 1ip rip receive version 2ip rip receive version 12 PurposeConfigure an interface to accept onlyRIP version 1 packets.Configure an interface to accept onlyRIP version 2 packetsConfigure an interface to accept onlyRIP version 1 or 2 packets.Enable or Disable Split HorizonUse one of the following commands in interface configuration mode:Commandip split-horizonno ip split-horizonPurposeEnable split horizon.Disable split horizon.Open Shortest Path First (OSPF)Step 1: Enter privileged EXEC mode:Router enable passwordStep 2: Enter the configure terminal command to enter global configurationmode.Router#config terminalStep 3: Enter the router ospf command and follow by the process-id.Router(config)#router ospf process-idPick the process-id which is not being used. To determine what idsare being used, issue the show process command.Router(config)#show processStep 4: Add the network number, mask and area-idRouter(config-router)#network network-number mask area area-idThe network-number identifies the network using OSPF. The mask tells whichbits to use from the network-number, and the area-id is used for determiningareas in an OSPF k 192.168.10.0 255.255.255.0 area0.0.0.0
Repeat this step for all the network numbers.To turn off OSPF, use the following command.Router(config)#no router ospf process-idOther useful commands Configure OSPF Interface ParametersYou are not required to alter any of these parameters, but some interfaceparameters must be consistent across all routers in an attached network.In interface configuration mode, specify any of the following:Commandip ospf cost costip ospf retransmit-intervalsecondsip ospf transmit-delaysecondsip ospf priority numberip ospf hello-intervalsecondsip ospf dead-intervalsecondsip ospf authentication-keypasswordPurposeExplicitly specify the cost of sending apacket on an OSPF interface.Specify the number of seconds betweenlink state advertisement retransmissionsfor adjacencies belonging to an OSPFinterface.Set the estimated number of seconds ittakes to transmit a link state updatepacket on an OSPF interface.Set router priority to help determine theOSPF designated router for a network.Specify the length of time, in seconds,between the hello packets that a routersends on an OSPF interface.Set the number of seconds that arouter’s hello packets must not havebeen seen before its neighbors declarethe OSPF router down.Assign a specific password to be usedby neighboring OSPF routers on anetwork segment that is using OSPF’ssimple password authentication.Interior Gateway Routing Protocol (IGRP) Create the IGRP Routing ProcessTo create the IGRP routing process, use the following required commandsstarting in global configuration mode.
Step12Commandrouter igrpautonomous-systemnetwork networknumberPurposeEnable an IGRP routing process, whichplace you in router configuration mode.Associate networks with an IGRProuting process. Disable HolddownThe holddown mechanism is used to help avoid routing loop in the network, buthas the effect of increasing the topology convergence time.To disable holddowns with IGRP, use the following command in routerconfiguration mode. All devices in an IGRP autonomous system must beconsistent in their use of holddowns.CommandNo metric holddownPurposeDisable the IGRP holddownperiod. Enforce a Maximum Network DiameterDefine a maximum diameter to the IGRP network. Routes whose hop countsexceed this diameter are not advertised. The default maximum diameter is 100hops. The maximum diameter is 255 hops.Use the following command in router configuration mode.Commandmetric maximum-hopshops PurposeConfigure the maximum networkdiameter.To turn off IGRP, use the following command.Router(config)#no router igrp autonomous-systemBorder Gateway Protocol (BGP) Enable BGP RoutingUse the following commands in global configuration mode.Step Command1router bgp autonomoussystem2network network-number[mask network-mask] [routemap route-map-name]PurposeEnable a BGP routingprocess, which places you inrouter configuration mode.Flag a network as local to thisautonomous system and enterit to the BGP table.
Configure BGP NeighborsBGP must completely understand the relationships it has with its neighbors.Commandneighbor {ip-address peergroup-name} remote-as numberPurposeSpecify a BGP neighbor. Reset BGP ConnectionsUse either of the following commands in EXEC mode to reset BGP connectionsCommandclear ip bgp addressclear ip bgp * PurposeReset a particular BGPconnection.Reset all BGP connections.To turn off BGP, use the following command.Router(config)#no router bgp autonomous-system
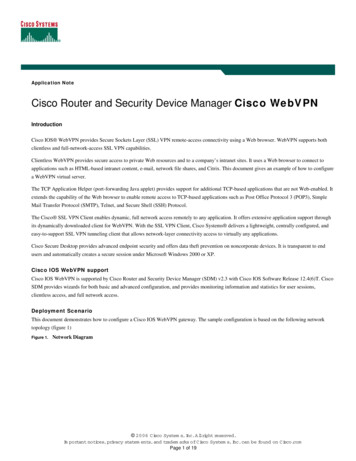
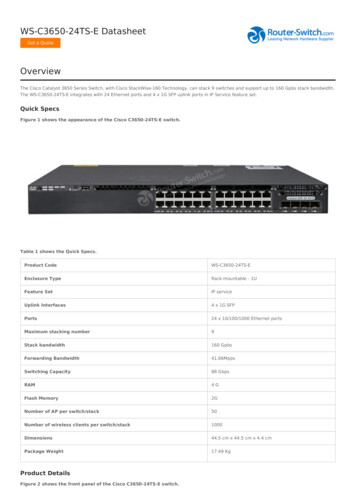
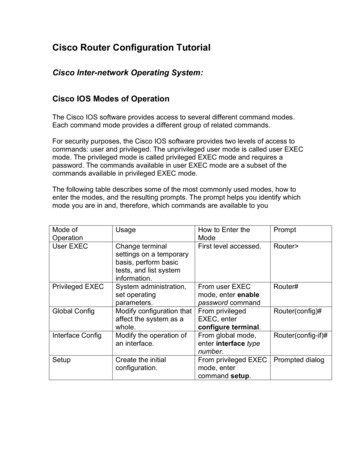
How to read router/link statusStatus of router and links can be easily determined by power LED of router andlink LED of each interface (if any). However, you may find a transceiverconnected to an AUI port looks like the following:When this transceiver is correctly connected, the “POWER” LED should light.Similarly, the “LINK” and “POLARITY” LEDs should light when you inserted thecable into the RJ45 socket on the transceiver. (Note that to get this result; theother end of the cable should be connected to some other devices as well.) Ifthese LEDs are not light, you probably have problems with the link (cable).
Router enable password Step 2: Enter the configure terminal command to enter global configuration mode. Router#config terminal Step 3: Enter the router ospf command and follow by the process-id. Router(config)#router ospf process-id Pick the process-id which is not being used. To determine what ids are being used, issue the show process command.File Size: 203KB