Transcription
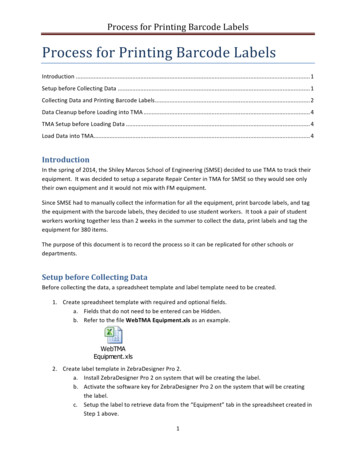
Process for Printing Barcode LabelsProcess for Printing Barcode LabelsIntroduction . 1Setup before Collecting Data . 1Collecting Data and Printing Barcode Labels . 2Data Cleanup before Loading into TMA . 4TMA Setup before Loading Data . 4Load Data into TMA. 4IntroductionIn the spring of 2014, the Shiley Marcos School of Engineering (SMSE) decided to use TMA to track theirequipment. It was decided to setup a separate Repair Center in TMA for SMSE so they would see onlytheir own equipment and it would not mix with FM equipment.Since SMSE had to manually collect the information for all the equipment, print barcode labels, and tagthe equipment with the barcode labels, they decided to use student workers. It took a pair of studentworkers working together less than 2 weeks in the summer to collect the data, print labels and tag theequipment for 380 items.The purpose of this document is to record the process so it can be replicated for other schools ordepartments.Setup before Collecting DataBefore collecting the data, a spreadsheet template and label template need to be created.1. Create spreadsheet template with required and optional fields.a. Fields that do not need to be entered can be Hidden.b. Refer to the file WebTMA Equipment.xls as an example.WebTMAEquipment.xls2. Create label template in ZebraDesigner Pro 2.a. Install ZebraDesigner Pro 2 on system that will be creating the label.b. Activate the software key for ZebraDesigner Pro 2 on the system that will be creatingthe label.c. Setup the label to retrieve data from the “Equipment” tab in the spreadsheet created inStep 1 above.1
Process for Printing Barcode Labelsd. Refer to the file SMSE-Label.lbl as an example3. For testing, install the label printer on the system that will be creating the label.Following is the example SMSE-Label.lbl label template:Following is an example of an actual label using the SMSE-Label.lbl label template:Note: This screen shot was taken with a Demo copy of the ZebraDesigner Pro 2 software, so every lowercase “e” is replaced with “Z”. Once the software key is activated, the lower case “e” displays correctly.Collecting Data and Printing Barcode LabelsSetup required:1. ZebraDesigner Pro installed on the system printing the barcode labelsa. Software key needs to be Activated on the system printing the barcode labels2
Process for Printing Barcode Labels2. ZebraDesigner Pro label template file accessible to the system printing the barcodelabels3. Excel spreadsheet template accessible to the system collecting the data and printing thelabels4. Zebra printer driver installed on the system printing the barcode labels5. Zebra printer attached to the system printing the labelsProcess:1. Enter data into Excel and Save – (i.e., WebTMA Equipment.xls)2. Open label file (i.e., SMSE-Label.lbl)a. ZebraDesigner Pro will open with the template loaded3. Select Print from the menu bar4. Press Select Records to select which labels to print5. Check off which labels to print then press OK3
Process for Printing Barcode Labels6. Select Print on the Print screenData Cleanup before Loading into TMAPrior to loading the data in the database, some data cleanup will be required in the completedspreadsheet.1. Unhide all Hidden columns and update appropriately.a. Update spreadsheet with Floor, Building, Facility2. Add Vendors and Manufacturers to “Vendors and Manufacturers” tab.a. Get last vendor number from f vendor table in TMA and start with next number.3. Update “Vendor Repair Center Link” tabTMA Setup before Loading Data1. Create new Repair Center in TMA2. Create users and assign access to new Repair Center in TMALoad Data into TMAYou can use whatever tool is available to load the Excel data into TMA. If you choose to use Access,refer to the file TMAEquipDev.accdb. It has the Append queries already setup to load the data.If you choose to use Access:1. Copy the files TMADev.dsn and TMAProd.dsn to My Documents on the C: drive2. Open the file TMAEquipDev.accdb3. Relink the spreadsheet tables to point to the correct filea. External Data à Linked Table Manager4. Query the table f repairCenter to locate the value of rc pk for the new Repair Center5. Update the following Queries to change the value of xxx rc fk to the value found in #44
Process for Printing Barcode Labelsa. 2 – Insert Vendor Repair Center Linki. Update venrc rc fkb. 4 – Insert Equipment Type Repair Center Linki. Update fcrc rc fkc. 5 – Insert Dept Repair Center Linki. Update dprc rc fkii. Update dp name to name of Department that is assigned to the new RepairCenterd. 7 – Insert Equip Repair Center Linki. Update fmrc rc fk6. Update the following Query with the new Equipment Types found in 3 – Insert Equipment Types:a. 6 – Insert Equipmenti. Update fc description, or change to fc code and put in new Equip Type Codes ifthey are unique7. Run the Queries in order:The above process will load the data into TMA Dev database.Once the Queries have been updated and are working correctly, you can relink the tables to TMA Prod.After the tables have been relinked to Prod, run the Queries in numeric order to load the data intoProduction.5
Process for Printing Barcode Labels 2 d. Refer to the file SMSE-Label.lbl as an example 3. For testing, install the label printer on the system that will be creating the label. Following is the example SMSE-Label.lbl label template: Following is an example of an actual label using the SMSE-Label.lbl label template: