Transcription
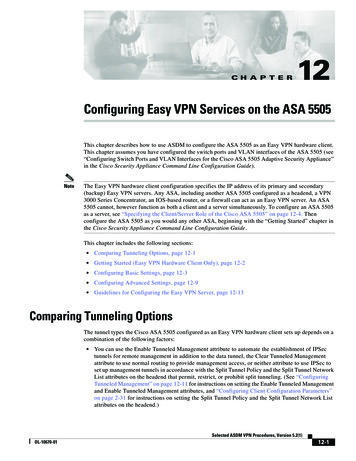
C H A P T E R12Configuring Easy VPN Services on the ASA 5505This chapter describes how to use ASDM to configure the ASA 5505 as an Easy VPN hardware client.This chapter assumes you have configured the switch ports and VLAN interfaces of the ASA 5505 (see“Configuring Switch Ports and VLAN Interfaces for the Cisco ASA 5505 Adaptive Security Appliance”in the Cisco Security Appliance Command Line Configuration Guide).NoteThe Easy VPN hardware client configuration specifies the IP address of its primary and secondary(backup) Easy VPN servers. Any ASA, including another ASA 5505 configured as a headend, a VPN3000 Series Concentrator, an IOS-based router, or a firewall can act as an Easy VPN server. An ASA5505 cannot, however function as both a client and a server simultaneously. To configure an ASA 5505as a server, see “Specifying the Client/Server Role of the Cisco ASA 5505” on page 12-4. Thenconfigure the ASA 5505 as you would any other ASA, beginning with the “Getting Started” chapter inthe Cisco Security Appliance Command Line Configuration Guide.This chapter includes the following sections: Comparing Tunneling Options, page 12-1 Getting Started (Easy VPN Hardware Client Only), page 12-2 Configuring Basic Settings, page 12-3 Configuring Advanced Settings, page 12-9 Guidelines for Configuring the Easy VPN Server, page 12-13Comparing Tunneling OptionsThe tunnel types the Cisco ASA 5505 configured as an Easy VPN hardware client sets up depends on acombination of the following factors: You can use the Enable Tunneled Management attribute to automate the establishment of IPSectunnels for remote management in addition to the data tunnel, the Clear Tunneled Managementattribute to use normal routing to provide management access, or neither attribute to use IPSec toset up management tunnels in accordance with the Split Tunnel Policy and the Split Tunnel NetworkList attributes on the headend that permit, restrict, or prohibit split tunneling. (See “ConfiguringTunneled Management” on page 12-11 for instructions on setting the Enable Tunneled Managementand Enable Tunneled Management attributes, and “Configuring Client Configuration Parameters”on page 2-31 for instructions on setting the Split Tunnel Policy and the Split Tunnel Network Listattributes on the headend.)Selected ASDM VPN Procedures, Version 5.2(1)OL-10670-0112-1
Chapter 12Configuring Easy VPN Services on the ASA 5505Getting Started (Easy VPN Hardware Client Only) Use of the Client Mode attribute to isolate the addresses of the inside hosts, relative to the client,from the enterprise network, or the network extension mode attribute to make those addressesaccessible from the enterprise network.Figure 12-1 shows the types of tunnels that the Easy VPN hardware client initiates, based on thecombination of attribute settings.Figure 12-1Easy VPN Hardware Client Tunneling Options for the Cisco ASA 5505Work zonePhase 2 TunnelsSource proxy1) Public to PublicPublic IP2) Managementa) on proxyPublic IPN/APublic IPAny or ST-List (*3)c) tunnelPublic IPSpecified on ClientNEM NetworkAny or ST-List (*3)Assign IPAny or ST-List (*3)3) Inside to Insidea) NEM Modeb) Client modeConfiguration factors:1. Certs or Preshare Keys (Phase 1- main mode or aggressive mode)2. Mode: Client or NEM3. All-or-nothing or Split-tunneling4. Management Tunnels* Only for ASA or VPN3000 Headends5. IUA to VPN3000 or ASA headend153780b) defaultThe term “All-or-nothing” refers to the presence or absence of an access list for split tunneling. Theaccess list distinguishes networks that require tunneling from those that do not.Getting Started (Easy VPN Hardware Client Only)Before configuring the ASA 5505 as an Easy VPN hardware client, you need to do the following: Retrieve one of the following sets of data, depending on the authentication method required by theserver:– If the headend requires a preshared key for authentication, you need the tunnel group name andpreshared key (that is, the group password). If the headend is an ASA, an ASDM connection tothat headend displays the tunnel group name in the Configuration VPN General TunnelGroup window. Double-click the tunnel group name and open the IPSec tab to view thePre-shared key.– If the headend requires a trustpoint for authentication, you need the trustpoint name and whethersending the certificate chain is active. You also need to configure the trustpoint on the ASA 5505that you are using as an Easy VPN hardware client. If the headend is an ASA, an ASDMconnection to that headend displays the trustpoint name and certificate chain indicator in theSelected ASDM VPN Procedures, Version 5.2(1)12-2OL-10670-01
Chapter 12Configuring Easy VPN Services on the ASA 5505Configuring Basic SettingsConfiguration VPN General Tunnel Group Add or Edit tunnel IPSec tab. Beforeproceeding, define the complementary trustpoint on the ASA 5505 that you are using as an EasyVPN hardware client, as described in the “Creating the Trustpoint” section on page 1-3. (Optional) Retrieve the username and password from the server for the Easy VPN hardware clientto use in response to an IKE Extended Authenticate (Xauth) challenge from the server. IP addresses of the primary and backup headends that will take the role of the Easy VPN servers.Configuring Basic SettingsThe basic settings for the Cisco ASA 5505 determine whether it functions as an Easy VPN hardwareclient, and if so, whether it exposes or hides the IP addresses of the hosts on the inside network fromthose on the enterprise network, the group or user security settings it uses to establish a connection tothe headend, and the primary and backup headends to which it connects.To configure the basic settings, choose Configuration VPN Easy VPN Remote. The Easy VPNRemote window opens (Figure 12-2).Selected ASDM VPN Procedures, Version 5.2(1)OL-10670-0112-3
Chapter 12Configuring Easy VPN Services on the ASA 5505Configuring Basic SettingsFigure 12-2Easy VPN RemoteThe following sections describe how to assign settings to the attributes displayed in this window.Specifying the Client/Server Role of the Cisco ASA 5505The Cisco ASA 5505 functions as a Cisco Easy VPN hardware client (also called “Easy VPN Remote”)or as a server (also called a “headend”), but not both at the same time.Specify the role of the ASA 5505 in the network as follows:Step 1Remove or disable the following objects only if you configured the ASA 5505 as a headend and want tochange it to a hardware client: To remove all user-defined tunnel groups, choose Configuration VPN General Tunnel Group,select each tunnel group that is not a default tunnel group and click Delete, then click Apply. To disable the IPSec over TCP global IKE setting, choose Configuration VPN IKE GlobalParameters, uncheck IPSec over TCP, then click Apply.Selected ASDM VPN Procedures, Version 5.2(1)12-4OL-10670-01
Chapter 12Configuring Easy VPN Services on the ASA 5505Configuring Basic Settings To remove the IKE policies, choose Configuration VPN IKE Policies, select each policy andclick Delete, then click Apply. To remove IPSec rules, choose Configuration VPN IPSec IPSec Rules, select each rule andclick Delete, then click Apply. To disable WebVPN, choose Configuration VPN WebVPN WebVPN Access, select eachinterface and click Disable, then click Apply.NoteStep 2ASDM displays an error window if the configuration contains conflicting objects, and you tryto enable the ASA 5505 as an Easy VPN hardware client (called “Easy VPN Remote” in Step 3below) and click Apply. The error window identifies the types of objects remaining in theconfiguration that must be removed before you can successfully save the Easy VPN Remotesetting to the configuration.Choose Configuration VPN Easy VPN Remote.The Easy VPN Remote window opens (Figure 12-2).Step 3Do one of the following: Check Easy VPN Remote to specify the role of the ASA 5505 in the network as an Easy VPNhardware client. Uncheck Easy VPN Remote to specify the role of the ASA 5505 in the network as a headend.ASDM dims the remaining attributes in this window if you uncheck this attribute.NoteIf you uncheck this attribute, click Apply, then configure the ASA 5505 as you would any otherASA, beginning with the “Getting Started” chapter in the Cisco Security Appliance CommandLine Configuration Guide. Disregard the remaining sections in this chapter.With the exception of the User Settings area, ASDM requires that you assign settings to the remainingattributes in this window before you click Apply if you checked Easy VPN Remote. Complete theinstructions in the sections that follow to assign settings to these attributes, then click Apply to save thechanges to the running configuration.Specifying the ModeThe Easy VPN hardware client supports one of two modes of operation: client mode or networkextension mode. The mode of operation determines whether the IP addresses of the inside hosts relativeto the Easy VPN hardware client are accessible from the Enterprise network over the tunnel. Specifyinga mode of operation is mandatory before making a connection because the Easy VPN hardware clientdoes not have a default mode.Specify the mode of the Easy VPN hardware client as follows:Step 1Choose Configuration VPN Easy VPN Remote.The Easy VPN Remote window opens (Figure 12-2).Step 2Check one of the following Mode options:Selected ASDM VPN Procedures, Version 5.2(1)OL-10670-0112-5
Chapter 12Configuring Easy VPN Services on the ASA 5505Configuring Basic Settings Client mode—Also called port address translation (PAT) mode, client mode isolates the IPaddresses of all devices on the Easy VPN hardware client private network from those on theenterprise network. The Easy VPN hardware client performs PAT for all VPN traffic for its insidehosts.Note IP address management is neither required for the Easy VPN hardware client inside interfacenor the inside hosts.Network extension mode (NEM)—Makes the inside interface and all inside hosts routeable acrossthe enterprise network over the tunnel. Hosts on the inside network obtain their IP addresses froman accessible subnet (statically or via DHCP) pre-configured with static IP addresses. PAT does notapply to VPN traffic in NEM. This mode does not require a VPN configuration for each client. TheCisco ASA 5505 configured for NEM supports automatic tunnel initiation. The configuration muststore the group name, user name, and password. Automatic tunnel initiation is disabled if secure unitauthentication is enabled.ASDM activates the Auto connect check box only if you check Network extension mode.Step 3Use the following instructions if you checked Network extension mode: Step 4NoteAuto connect—The Easy VPN Remote establishes automatic IPSec data tunnels unless both of thefollowing are true: Network extension mode is configured locally, and split-tunneling is configuredon the group policy pushed to the Easy VPN Remote. If both are true, checking this attributeautomates the establishment of IPSec data tunnels. Otherwise, this attribute has no effect.Click Apply only if the configuration of the Easy VPN Client is complete and you have opened the EasyVPN Remote window to modify attributes in the Mode area. Otherwise, continue with the remainingsections for the Easy VPN Remote window, then click Apply.If the Easy VPN hardware client is using NEM and has connections to secondary servers, establish anASDM connection to each headend, open the Configuration VPN IPSec IPSec Rules TunnelPolicy (Crypto Map) - Advanced tab on that ASDM connection, and check Enable Reverse RouteInjection to configure dynamic announcements of the remote network using RRI.Specifying a Tunnel Group or TrustpointWhen configuring the Cisco ASA 5505 as an Easy VPN hardware client, you can specify the pre-sharedkey or the name of the trustpoint configured on the Easy VPN server. See the section that names theoption used for the authentication configured on the headend that you are using as the Easy VPN server: Specifying the Pre-shared Key Specifying the TrustpointSelected ASDM VPN Procedures, Version 5.2(1)12-6OL-10670-01
Chapter 12Configuring Easy VPN Services on the ASA 5505Configuring Basic SettingsSpecifying the Pre-shared KeySpecify the pre-shared key of the Easy VPN hardware client to match that of the headend, as follows:Step 1Choose Configuration VPN Easy VPN Remote.The Easy VPN Remote window opens (Figure 12-2).Step 2Click Pre-shared Key under Group Settings.A description of this attribute follows: Step 3Step 4Pre-shared key—Indicates the use of an IKE pre-shared key for authentication and makes availablethe subsequent Group Name, Group Password, and Confirm Password fields for specifying thegroup policy name and password containing that key.Assign values to the following attributes: Group Name—Enter the name of the VPN tunnel group configured on the headend. You mustconfigure this tunnel group on the server before establishing a connection. Group Password—Enter the IKE pre-shared key used for authentication on the headend.Click Apply only if the configuration of the Easy VPN Client is complete and you have opened the EasyVPN Remote window to modify the group settings. Otherwise, continue with the remaining sections forthe Easy VPN Remote window, beginning with the “Configuring Automatic Xauth Authentication”section on page 12-8, then click Apply.Specifying the TrustpointSpecify the trustpoint configured on both the headend and the associated one on the Easy VPN hardwareclient you are configuring (see “Getting Started (Easy VPN Hardware Client Only)” on page 12-2), asfollows:Step 1Choose Configuration VPN Easy VPN Remote.The Easy VPN Remote window opens (Figure 12-2).Step 2Step 3Assign values to the following attributes in the Group Settings area of this window: X.509 Certificate—Click to indicate the use of an X.509 digital certificate, supplied by a CertificateAuthority, for authentication. Select Trustpoint—Select the trustpoint identifying the RSA certificate to use for authentication.The trustpoint name can take the form of an IP address. To define a trustpoint to populate thisdrop-down list, click Trustpoint(s) configuration to the right. Send certificate chain—(Optional) Enables sending a certificate chain, not just the certificate itself.This action includes the root certificate and any subordinate CA certificates in the transmission.Click Apply only if the configuration of the Easy VPN Client is complete and you have opened the EasyVPN Remote window to modify the group settings. Otherwise, continue with the remaining sections forthe Easy VPN Remote window, then click Apply.Selected ASDM VPN Procedures, Version 5.2(1)OL-10670-0112-7
Chapter 12Configuring Easy VPN Services on the ASA 5505Configuring Basic SettingsConfiguring Automatic Xauth AuthenticationThe ASA 5505 configured as an Easy VPN hardware client automatically authenticates when it connectsto the Easy VPN server if all of the following conditions are true: Secure unit authentication is disabled on the server. The server requests IKE Extended Authenticate (Xauth) credentials.Xauth provides the capability of authenticating a user within IKE using TACACS or RADIUS.Xauth authenticates a user (in this case, the Easy VPN hardware client) using RADIUS or any of theother supported user authentication protocols. The client configuration contains an Xauth username and password.Thus, configuring Xauth login credentials on the Easy VPN hardware client is optional.Configure the Xauth login credentials, as follows:Step 1Choose Configuration VPN Easy VPN Remote.The Easy VPN Remote window opens (Figure 12-2).Step 2Step 3Assign values to the following attributes in the Group Settings area of this window: User Name—Enter the user name that the Easy VPN hardware client can use in response to anXauth challenge from the authentication server or headend. The name can be between 1 and 64characters, but must be configured on the server or headend. User Password—Enter the password that the Easy VPN hardware client can use in response to anXauth challenge from the authentication server or headend. The password can be between 1 and 64characters, but must be configured on the server or headend. Confirm Password—Enter the User Password again for verification.Click Apply only if the configuration of the Easy VPN Client is complete and you have opened the EasyVPN Remote window to modify the user settings. Otherwise, continue with the next section, then clickApply.Specifying the Addresses of the Easy VPN ServersBefore establishing a connection with an Easy VPN hardware client, you must specify the IP address ofat least one headend to act as the Easy VPN server. Any ASA, including another ASA 5505 configuredas a headend, a VPN 3000 Series Concentrator, an IOS-based router, or a firewall can act as an Easy VPNserver.Configure the IP addresses of the primary Easy VPN server and the Easy VPN servers that you wouldlike to use as backups, as follows:Step 1Choose Configuration VPN Easy VPN Remote.The Easy VPN Remote window opens (Figure 12-2).Step 2Use the following attribute description to assign a value in the Easy VPN Server To Be Added area ofthis window:Selected ASDM VPN Procedures, Version 5.2(1)12-8OL-10670-01
Chapter 12Configuring Easy VPN Services on the ASA 5505Configuring Advanced SettingsName or IP Address—Enter the IP address or DNS name of the headend to serve as the primary EasyVPN server and click Add. ASDM inserts it into the Easy VPN Server(s) list. Repeat for each backupEasy VPN server.Step 3Select an entry and click Move Up or Move Down to prioritize the client connection attempt to theassociated Easy VPN server.Step 4Select an entry and click Remove if you want to remove the associated Easy VPN server from the list.Step 5Click Apply to save the changes you made in this window to the running configuration.NoteThe ASDM session retains the settings in the window if an error window identifies objects thatconflict with the configuration of the ASA 5505 as an Easy VPN hardware client. The errorwindow identifies the object types remaining in the configuration that must be removed beforeyou can successfully save the changes in this window. After removing the conflicting objects,return to this window and click Apply again.Configuring Advanced SettingsThe advanced settings for the Easy VPN hardware client are optional. They let you do the following: Identify devices on the inside network to exclude from individual user authentication requirements. Automate the creation of IPSec tunnels to provide management access from the corporate networkto the outside interface of the ASA 5505. Enable or disable TCP encapsulation of IPSec. Configure the Easy VPN hardware client to accept only connections to Easy VPN servers withdigital certificates identified by a specified certificate map.To configure the advanced settings for the Easy VPN hardware client, choose Configuration VPN Easy VPN Remote, then click Advanced at the bottom of the Easy VPN Remote window. ASDM opensthe Advanced Easy VPN Remote Properties window (Figure 12-3).Selected ASDM VPN Procedures, Version 5.2(1)OL-10670-0112-9
Chapter 12Configuring Easy VPN Services on the ASA 5505Configuring Advanced SettingsFigure 12-3NoteAdvanced Easy VPN Remote PropertiesEach area is optional and is independent from the others; the attribute settings in one area do not requiresettings in another area of this window.The following sections describe how to assign settings to the attributes in this window.Configuring Device Pass-ThroughDevices such as Cisco IP phones, wireless access points, and printers are incapable of performingauthentication. If individual user authentication is enabled, use the following instructions to exempt suchdevices from authentication, thereby providing network access to them:Step 1Choose Configuration VPN Easy VPN Remote, then click Advanced at the bottom of the Easy VPNRemote window.ASDM opens the Advanced Easy VPN Remote Properties window (Figure 12-3). The MAC Exemptionarea at the top of the window lets you configure device pass-through.Selected ASDM VPN Procedures, Version 5.2(1)12-10OL-10670-01
Chapter 12Configuring Easy VPN Services on the ASA 5505Configuring Advanced SettingsStep 2Assign values to the following attributes: MAC Address—Enter the MAC address, in dotted hexadecimal notation, of the device for whichyou want to bypass individual user authentication. MAC Mask—Enter the network mask for the corresponding MAC address. A MAC mask offfff.ff00.0000 matches all devices made by the same manufacturer. A MAC mask of ffff.ffff.ffffmatches a single device.NoteStep 3You only need to enter the first six characters of the MAC address if you enter the MAC maskffff.ff00.0000 to specify all devices by the same manufacturer. For example, Cisco IP phoneshave the Manufacturer ID 00036b, so entering 0003.6b00.0000 as the MAC address andffff.ff00.0000 as the MAC mask command exempts any Cisco IP phone, including Cisco IPphones you might add in the future. Entering the MAC address 0003.6b54.b213 and the MACmask ffff.ffff.ffff provides greater security but less flexibility because it exempts onespecific Cisco IP phone.Click Add.ASDM inserts the MAC Address and MAC Mask into MAC Address/Mask list.Step 4Repeat Steps 2 and 3 for each additional device you want to exempt from user authenticationrequirements.Step 5Select an entry and click Remove if you want to remove the device from the list.Step 6Click OK, then Apply if these attributes are the only ones you are modifying in the Advanced Easy VPNProperties window. Otherwise, continue with the next section.Configuring Tunneled ManagementThe Cisco ASA 5505, operating as an Easy VPN hardware client, supports management access usingSSH or HTTPS, with or without a second layer of additional encryption. You can configure the EasyVPN hardware client to require IPSec encryption within the SSH or HTTPS encryption already presentin management sessions.Step 1Choose Configuration VPN Easy VPN Remote, then click Advanced at the bottom of the Easy VPNRemote window.ASDM opens the Advanced Easy VPN Remote Properties window (Figure 12-3).Step 2Choose one of the following options: Enable Tunneled Management—Check to automate the creation of IPSec tunnels to providemanagement access from the corporate network to the outside interface of the ASA 5505. The EasyVPN hardware client and server create management tunnels automatically when they create the datatunnel. Clear Tunneled Management—Check to use normal routing to provide management access fromthe corporate network to the outside interface of the ASA 5505 (no tunneling of managementpackets). Check this attribute if a NAT device is operating between the Easy VPN hardware clientand the Internet.Selected ASDM VPN Procedures, Version 5.2(1)OL-10670-0112-11
Chapter 12Configuring Easy VPN Services on the ASA 5505Configuring Advanced Settings NoteStep 3Step 4Leave both the Enable Tunneled Management and Clear Tunneled Management check boxesblank to set up IPSec for management tunnels in accordance with the split-tunnel-policy andsplit-tunnel-network-list commands.Steps 3 through 6 apply only if you checked Enable Tunneled Management.See the descriptions to assign values to the following attributes: IP Address—Enter the IP address of the remote network or host to automate the creation of an IPSectunnel for management access. Mask—Select the subnet mask associated with the IP address you entered.Click Add.ASDM inserts the IP Address and mask into the IP Address/Mask list.Step 5Repeat Steps 3 and 4 for each additional network or host for which you want to automate the creation ofan IPSec tunnel for remote management access.Step 6Select an entry and click Remove if you want to remove the device from the list.Step 7Click OK, then Apply if these attributes are the last or only ones you are modifying in the AdvancedEasy VPN Properties window. Otherwise, continue with the next section.Configuring IPSec over TCPBy default, the Easy VPN hardware client and server encapsulate IPSec in User Datagram Protocol(UDP) packets. Some environments, such as those with certain firewall rules, or NAT and PAT devices,prohibit UDP. To use standard Encapsulating Security Protocol (ESP, Protocol 50) or Internet KeyExchange (IKE, UDP 500) in such environments, you must configure the client and the server toencapsulate these packets within TCP packets to enable secure tunneling. If your environment allowsUDP, however, configuring IPSec over TCP adds unnecessary overhead.Enable or disable TCP encapsulation of IPSec, as follows:Step 1Choose Configuration VPN Easy VPN Remote, then click Advanced at the bottom of the Easy VPNRemote window.ASDM opens the Advanced Easy VPN Remote Properties window (Figure 12-3).Step 2See the following description to set the attributes in the IPSec Over TCP area: Enable (IPSec Over TCP)—Check to use TCP to encapsulate IPSec over UDP packets. Uncheckto use UDP only.ASDM activates the Enter port Number box if you check this attribute. Step 3Enter port Number—Enter the port number to use for IPSec over TCP. By default, the Easy VPNhardware client uses port 10000, however, you must enter a port number if you checked Enable(IPSec Over TCP). Enter 10000, or use the same port number assigned on the headend.Click OK, then Apply if these attributes are the last or only ones you are modifying in the AdvancedEasy VPN Properties window. Otherwise, continue with the next section.Selected ASDM VPN Procedures, Version 5.2(1)12-12OL-10670-01
Chapter 12Configuring Easy VPN Services on the ASA 5505Guidelines for Configuring the Easy VPN ServerNoteChoose Configuration VPN IPSec Pre-Fragmentation, double-click the outside interface, and setthe DF Bit Setting Policy to Clear if you configure the Easy VPN Remote connection to useTCP-encapsulated IPSec. This action clears the Don't Fragment (DF) bit from the encapsulated header.A DF bit is a bit within the IP header that determines whether the packet can be fragmented. Thiscommand lets the Easy VPN hardware client send packets that are larger than the MTU size.Configuring Certificate FilteringYou can configure the Easy VPN hardware client to accept only connections to Easy VPN servers withdigital certificates identified by a specified certificate map. Before doing so, you must create the map,using the Configuration VPN IKE Certificate Group Matching Rules menu path. Then assign thecertificate map, as follows:Step 1Choose Configuration VPN Easy VPN Remote, then click Advanced at the bottom of the Easy VPNRemote window.ASDM opens the Advanced Easy VPN Remote Properties window (Figure 12-3).Step 2Use the following description to set the attribute at the bottom of the window: Step 3Server Certificate—Select the certificate map that identifies the certificates that you want the EasyVPN hardware client connections to support. The mapping names in the first table of the Ruleswindow accessed by the Configuration VPN IKE Certificate Group Matching Rules menupath populate the drop-down list.Click OK, then Apply.Guidelines for Configuring the Easy VPN ServerThe following sections address the Easy VPN hardware client considerations that apply to the Easy VPNserver: Authentication Options Group Policy and User Attributes Pushed to the ClientSelected ASDM VPN Procedures, Version 5.2(1)OL-10670-0112-13
Chapter 12Configuring Easy VPN Services on the ASA 5505Guidelines for Configuring the Easy VPN ServerAuthentication OptionsThe ASA 5505 supports the following authentication mechanisms, which it obtains from the grouppolicy stored on the Easy VPN Server. The following list identifies the authentication options supportedby the Easy VPN hardware client, however, you must configure them on the Easy VPN server: Require Interactive Client Authentication (Also called secure unit authentication) on theConfiguration VPN General Group Policy Add or Edit Internal Group Policy HardwareClient tabWhen enabled, this attribute ignores the Xauth login credentials (described in “ConfiguringAutomatic Xauth Authentication” on page 12-8) and requires the user to authenticate the ASA 5505by entering a password. Require Individual User Authentication, also on the Hardware Client tabWhen enabled, this attribute requires users behind the ASA 5505 to authenticate before grantingthem access to the enterprise VPN network.Caution Do not use IUA if the client might have a NAT device.User Authentication Idle Timeout, also on the Hardware Client tabThis attribute sets or remove the idle timeout period after which the Easy VPN Server terminates theclient’s access. Authentication by HTTP redirectionThe Cisco Easy VPN server intercepts HTTP traffic and redirects the user to a login page if one ofthe following is true:– SUA or the username and password are not configured on the Easy VPN hardware client.– IAU is enabled.HTTP redirection is automatic and does not require configuration on the Easy VPN Server. Preshared keys, digital certificates, tokens and no authenticationThe ASA 5505 supports preshared keys, token-based (e.g., SDI one-time passwords), and “no userauthentication” for user authentication. NOTE: The Cisco Easy VPN server can use the digitalcertificate as part of user authorization. See “Enrolling for Digital Certificates” on page 1-1 forinstructions.Selected ASDM VPN Procedures, Version 5.2(1)12-14OL-10670-01
Chapter 12Configuring Easy VPN Services on the ASA 5505Guidelines for Configuring the Easy VPN ServerGroup Policy and User Attributes Pushed to the ClientUpon tunnel establishment, the Easy VPN server pushes the values of the group policy or user attributesstored in its configuration to the Easy VPN hardware client. Therefore, to change certain attributes usedby the Easy VPN hardware cl
The Cisco ASA 5505 functions as a Cisco Easy VPN hardware client (also called "Easy VPN Remote") or as a server (also called a "headend"), but not both at the same time. Specify the role of the ASA 5505 in the network as follows: Step 1 Remove or disable the following objects only if you configured the ASA 5505 as a headend and want to