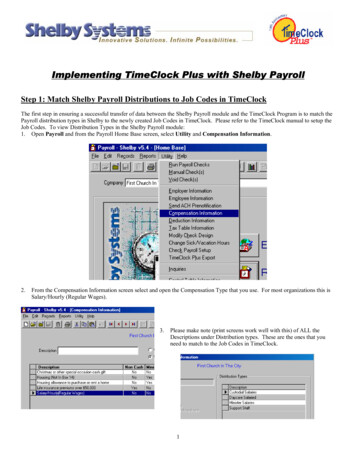
Transcription
TimeClock PlusEMPLOYEES TRAINING
Biggest Changes Employees MUST verify their timecards weekly and Supervisors MUSTverify their employees leaves/timecards weekly. Verifying and ApprovingMUST be completed by Tuesday at 12pm (Noon) for the previous week. Student Hourly/Non-Student Hourly Part- time will use TimeClock Plus toclock his or her time. They MUST Clock- In and Clock- Out daily. Employees no longer have the capability to correct a late clock-in. Thismust be done by your supervisor.
Using the WebClock1. Access WebClock by selecting the TimeClock Plus icon in myCampus. Followprompts to continue logging-in using your A-State email address and password.2. You have now arrived at your Dashboard. From here, you can select Clock In orClock Out.
Clocking In or Out Using WebClock After making your selection, youwill be on the Confirmationscreen. You will see your nameand the current database time, aswell as buttons to Cancel orContinue. If the name and timeare correct, click Continue. If you have more than one jobcode, select the job code fromthe list. (ONLY Student- Hourly orNon-Student Hourly) Click Ok on the "Clock in/outoperation successful" window.
Missed Clock In or OutIf you fail to clock, amessage willappear the nexttime you clock in orout.Read thenotification to seeif it is a missedClock In or missedClock Out.Click Continue.
Missed Clock In or OutIt will notify youthat your last punchwas either a clockin or a clock outand it will displaythe date and time.Select continue toenter the missed inor out time. Youcan only correct thetime that is notgrayed.Enter the correcttime and clickContinue.
Missed Clock In or OutOnce the correction has been made the following screen will appear with thecorrected information.Click Continue.
Using the DashboardThe Dashboard gives the employees the capability to do the following:1. Clock in and out.2. View hours, last punch, accruals, and messages.3. Request time off/leave.
How to View HoursThe View Hours option allows you to view the hours worked in any given week.This screen allows you to approve segments each week.Navigating the View HoursWindow:1. After logging into WebClock,select View, and View Hours.2. Select the appropriate weekwith the Next and Prevbuttons.All of the segments workedduring that week can be seen inthe grid below
How to View Last PunchThe View Last Punch option allows you to view the last time you clocked in. Afterselecting View Last Punch, you will be able to see the time of your last punch aswell as the job code assigned to it.
How to View AccrualsThe View Accruals option allows you to view your leave accruals.Please be mindful that the balances that are listed are a pay period behind.
Request Leave Using ComputerClick on Requests, calendar will appear.
Request Leave Using Computer1. Click Request. Click on the Add button or click the plus sign ( ) on thedesired date of the request.
Request Leave Using Computer2. Select the Start time. This willbe the anchor time for the leavetime sheet. Enter in the length ofthe leave request in the Hoursfield. For example, if you want tocreate a leave request from 8:00AM to 5:00 PM, enter a start timeof 8:00 AM and amount of hoursas 8.3. Select how many days are beingrequested. By default, the requestwill only be entered for the initialdate requested. To createidentical requests on subsequentdays, select the number from theDays field.
Requesting Multiple Days Using ComputerIf you are requesting consecutivedays off and the days areThursday, Friday, and Monday orFriday, Monday, and Tuesday, youwill have to enter 2 requests.IF NOT, it will include theweekend days, Saturday andSunday.Enter the number of daysof request.
Request Leave Using Computer4. Select the appropriate Templateto be used for this time off request.Please note that any unspecifiedleave codes must be replaced with avalid leave code before the segmentcan be approved.5. Click Save.
Viewing Requested Leave Using ComputerThe View Requests feature allows employees to enter time off requests.Time off requests are used when employees want to request a certainamount of time off for vacation, sick, or other reasons. These requestscan be made in any leave code the employee has access to and willdraw from relevant accrual banks.
Submitting Inclement Weather and Authorized Leave**This function is ONLY available when INCLEMENT WEATHER orAUTHORIZED LEAVE has been activated**The Manage Time Sheet feature allows employees to enter a flat amount of leavetime (example: 8 hours) when inclement weather or authorized leave has beenactivated.
Submitting Inclement Weather and Authorized Leave1. Select Manage Time Sheet.
Submitting Inclement Weather and Authorized Leave2. Click Add. Enter Start time for Authorized Leave or Inclement Weather. Enterthe number of leave hours. Select Approved.
Submitting Inclement Weather and Authorized Leave3. You can also select Edit to enter your information.
Submitting Inclement Weather and Authorized LeaveOnce you have finished editing the time sheet entry, check to Approve box toapprove that day, or choose Approve Week to approve all entries for that week.Then click Accept at the top of the screen to commit your changes.
Weekly Time Approval1. After logging intoWebClock, select View, andView Hours.2. Select the appropriateweek with the Next andPrev buttons.3. Find the segment youwant to approve and clickon the check mark in the [E]column. If you want toapprove all the shifts onscreen, click on the [E]column.
Reviewing Time After ApprovedYou can review your timecard when leave has been approved toensure hours are correct.
Best Practices Use the Computer for requesting leave. Use the Computer for reviewing and verifying timecards. Please review your absences when requesting leave for accurate payrollprocessing. Become familiar with the software so that it can be utilized to the best capacity. Do not share passwords, clock-in in your assigned area, do not abuse leave, do notabuse working hours, do not overuse the ability to correct/revise punches. Any reports of suspicious abuse will be investigated. Once TimeClock Plus goes live, visit our website where we provide training videos,presentations, and Handbooks.
TimeClock PlusQuestions?Thank you!
Using the WebClock 1. Access WebClock by selecting the TimeClock Plus icon in myCampus.Follow prompts to continue logging-in using your A-State email address and password. 2. You have now arrived at your Dashboard.From here, you can select Clock In or Clock Out.