Transcription
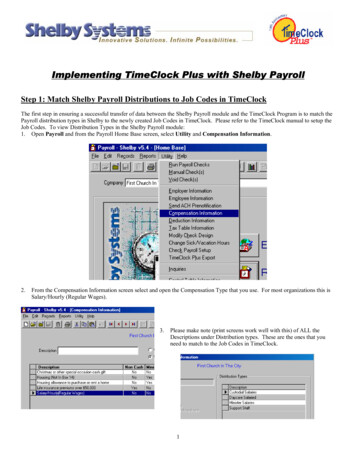
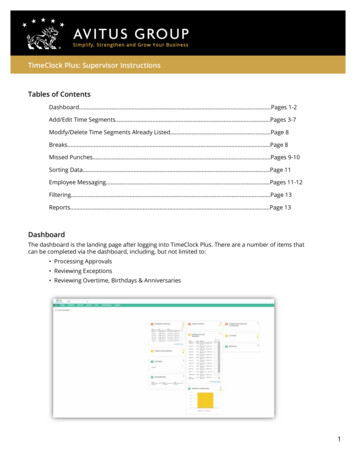
TimeClock Plus: Supervisor InstructionsTables of ContentsDashboard.Pages 1-2Add/Edit Time Segments.Pages 3-7Modify/Delete Time Segments Already Listed.Page 8Breaks.Page 8Missed Punches.Pages 9-10Sorting Data.Page 11Employee Messaging.Pages 11-12Filtering.Page 13Reports.Page 13DashboardThe dashboard is the landing page after logging into TimeClock Plus. There are a number of items thatcan be completed via the dashboard, including, but not limited to: Processing Approvals Reviewing Exceptions Reviewing Overtime, Birthdays & Anniversaries1
The Dashboard can be personalized. Any customization is created on a per/user basis and only applicable to that user.Each widget will have a separate settings button. The widgets can be filtered and configured to show thepreferred data, for specific date ranges and with various options:Be sure to clickSaveto finalize any changes made.2
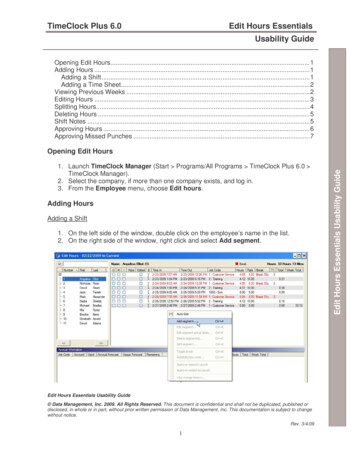
Add/Edit Time SegmentsHours (Time Segments) can be added for an employee individually or in bulk (for multiple employees).To add hours for a single employee:Step 1. Navigate to Hours Individual Hours:Step 2. Select the applicable employee:Step 3. Select the Add button:3
Step 4. Add the applicable Time Segment Detail: Time Segments are commonly entered with “Time sheet entry,” but can also be added with TimeIn and Time Out. Select the applicable date(s). Select the “anchor” time (segment start-time).o For Time In and Time Out entries, both values will need to be supplied. Select the applicable Job Code. Enter any applicable shift notes. Select the number of days.o For example, a 2/19/2019 entry for 2 days will add the same entry for 2/19/2019and 2/20/2019. Click Save.To add hours for multiple employees:Step 1) Access the Manager URL and log in with your UserID and Password.Step 2) Navigate to Hours Mass Hours:4
Step 3. Employees can be selected by Filter, Work Filter or from a list.To leverage a Filter to select employees:A. SelectB. SelectSelect using filtersFilterC. Choose your filter criteria and select Filter.To leverage a Filter to select employees:A. SelectB. SelectSelect using filtersWork FilterC. Choose your filter criteria and select Filter.5
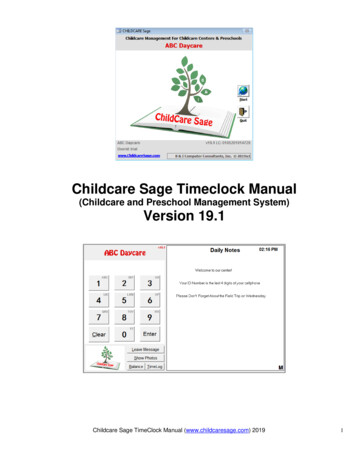
To select employees from a list:A. SelectSelect using filtersB. Choose the necessary employees from the list and click Next:NextStep 4. Choose the Add Hours operation and click:Step 5. Enter the Time Segments.A. Select:B. Enter the date of the time segment here, starting the segment at 8:00 am:C. Set for number of hours needed:D. Select appropriate job code:E. Select number of days to apply:F. Click:Next6
G. Review the summary to ensure it is valid for the number of employees and that the segment detailsare correct:H. Click:ProcessI. If prompted, review & correct any Exceptions:Show ExceptionsExceptions will list for various reasons, but most often for employees who don’t have the applicable jobcode, for example:**The employee will need to have this Job Code added or will need the time segment added withthe appropriate Job Code.J. Click Ok.K. Review employee segments (via Individual or Group Hours) for validity.L. Repeat for next bulk entry, as needed.7
Modify/Delete Time Segments Already ListedManageVia Individual or Group Hours, select the segment and right-click, double-click, or select: The Audit Log will show a history of changes made to the selected Time Segment.BreaksThe picture below reflect multiple Time Segments that are linked to one shift. Hovering over the BreakLength will display 30u, for example, denoting a 30 minute unpaid break taken during the shift.8
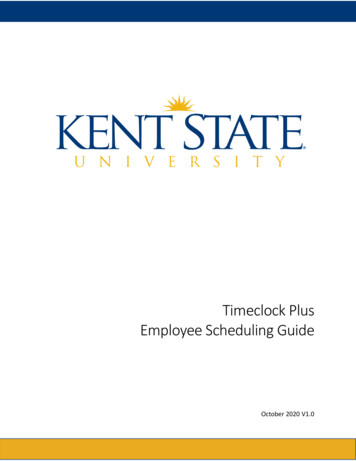
Missed PunchesWhen employees miss a punch, the system will generate the message below. The employee will need tocontinue through all prompts associated with the Missed Punch operation in order to enter the missedpunch time.This will then show up on the Dashboard under the Missed Punches section. It will also be highlighted in blueduring review via Individual or Group Hours. All Missed Punches must be approved by a manager within theTimeClock Plus Manager Portal.9
Missed Punch Approval In the Dashboard, the Missed Punches will display as shown below:o Click the Check Mark to approve the Missed Punch. “Jump to Group Hours” can be selected to review the segment and/or to edit/approve. The segmentwill display as follows: To Approve the Missed Punch:o Approved Missed Punch will appear in Green (changing from Blue).10
Sorting DataUsers can sort employees by clicking the Sort By button: The selection made here will only save on a per/user basis.Employee MessagingThis feature allows users to send messages to employee(s) that will be reviewed the next time the employee(s)log into the TimeClock Plus clock.11
Step 1. Select Compose Message:Step 2. Choose the audience, build the message and set the start, expire and the capability to “mark as read”:o Company Wide bulletins will send to all employees.o Message are only available within the TimeClock Plus portals (they will not be permitted tosend via email or SMS).12
FilteringTimeClock plus allows for filtering on a number of different criteria at virtually every screen.These filters include:o Employee Filteringo Job Code Filteringo Cost Code Filteringo Segment Filteringo Exception Filteringo Implement these filters, choose the appropriate filter mechanism and then base the filter onthe desired criteria, ensuring theFilterbutton is clicked to implement the filter.ReportsTimeClock Plus comes pre-loaded with a wide array of report and also possesses the capability to createCustom & Automated Reports.For instructions on Period & Automated reports, please see this link.Please relay any TimeClock Plus Questions to the Assigned Avitus Group Payroll Specialist or Account Manager.13
Sorting Data Users can sort employees by clicking the Sort By button: The selection made here will only save on a per/user basis. Employee Messaging This feature allows users to send messages to employee(s) that will be reviewed the next time the employee(s) log into the TimeClock Plus clock.