Transcription
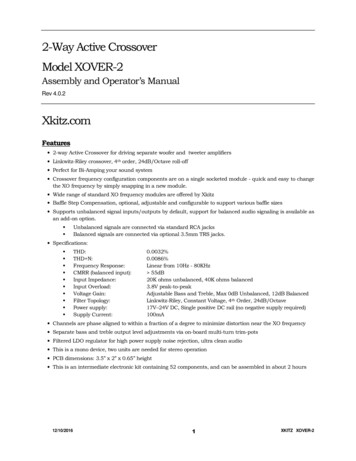
2-Way Active CrossoverModel XOVER-2Assembly and Operator’s ManualRev 4.0.2Xkitz.comFeatures 2-way Active Crossover for driving separate woofer and tweeter amplifiers Linkwitz-Riley crossover, 4th order, 24dB/Octave roll-off Perfect for Bi-Amping your sound system Crossover frequency configuration components are on a single socketed module - quick and easy to changethe XO frequency by simply snapping in a new module. Wide range of standard XO frequency modules are offered by Xkitz Baffle Step Compensation, optional, adjustable and configurable to support various baffle sizes Supports unbalanced signal inputs/outputs by default, support for balanced audio signaling is available asan add-on option.Unbalanced signals are connected via standard RCA jacksBalanced signals are connected via optional 3.5mm TRS jacks. Specifications:THD:THD N:Frequency Response:CMRR (balanced input):Input Impedance:Input Overload:Voltage Gain:Filter Topology:Power supply:Supply Current:0.0032%0.0086%Linear from 10Hz - 80KHz 55dB20K ohms unbalanced, 40K ohms balanced3.8V peak-to-peakAdjustable Bass and Treble, Max 0dB Unbalanced, 12dB BalancedLinkwitz-Riley, Constant Voltage, 4th Order, 24dB/Octave17V–24V DC, Single positive DC rail (no negative supply required)100mA Channels are phase aligned to within a fraction of a degree to minimize distortion near the XO frequency Separate bass and treble output level adjustments via on-board multi-turn trim-pots Filtered LDO regulator for high power supply noise rejection, ultra clean audio This is a mono device, two units are needed for stereo operation PCB dimensions: 3.5” x 2” x 0.65” height This is an intermediate electronic kit containing 52 components, and can be assembled in about 2 hours12/10/20161XKITZ XOVER-2
What’s an Active Crossover and Why Do I Need It?Most speaker boxes have an electronic circuit inside them called a crossover. Its job is to split the sound intofrequency ranges; it sends the low frequency sounds to the woofer, and the high frequency sounds to thetweeter. This is important because each of the loudspeakers is built to produce certain frequency ranges, andthey don’t sound very good outside of their proper range.In fact, loudspeakers can actually distort within their natural frequency range if they are also presented withfrequencies outside their natural range. In other words if you send low frequencies to your tweeter, the highfrequency sound reproduced by the tweeter will be distorted by the presence of the low frequency signal.When you separate the frequencies with a crossover, each loudspeaker is able to focus on producing only thefrequencies that they’re designed to produce.Most speaker boxes you see have passive crossovers, which are made up of some inductors and capacitorsthat filter the low frequencies from the highs. But passive crossovers have a number of very significantdrawbacks. One big problem with passive crossovers is they don’t have a very sharp roll-off. This means thatsome of the bass frequency energy will still reach the tweeter, and some of the treble energy will still reach thewoofer. Another major disadvantage with passive crossovers is efficiency; they waste a huge amount of thepower you’re amplifier is providing. High frequency sounds are prevented from going to the woofer (and lowfrequencies prevented from going to the tweeter) by essentially just shorting them out; so power is wasted in theform of heat dissipated in the crossover components.But by far the biggest problem with passive crossovers is that they significantly degrade the quality of thesignals that pass through them by introducing distortion in the following ways: Channel phasing: Once the crossover splits the audio signal, the woofer and tweeter signals will be outof phase from each other (which means one leads or lags the other). This causes distortion at andaround the crossover frequency because at these frequencies both the tweeter and the woofer will bedriven, but each will be at a different phase. At various points of time in the wave the woofer andtweeter will be either fighting one another or re-enforcing one another. This leads to a muddying of thesound definition. Channel Cross-talk due to Back-EMF: The mass of the loudspeaker cones will continue to move in thedirection they are being driven by the amplifier for a short period of time after the signal changesdirection, and this induces currents in the voice coils that couple back into the passive crossover andcauses unpredictable non-linear crosstalk between the channels of the crossover. Frequency response degradation: any time you put large capacitors and inductors in series or parallelwith your audio signal it will invariably affect frequency response of the signals. The ways in which thiscan happen depend on the design of the crossover and the characteristics of the loudspeakers. Thenature of this distortion is so complex it becomes almost impossible to accurately model.All of this adds significant distortion to the final sound emitted. Audio engineers for decades have tried in vain tocome up with ever more complex passive filter arrangements to try and resolve, or mask, these inherentproblems.An active crossover, like the XOVER-2, on the other hand, is built from the highest quality operationalamplifiers (op-amps) and the filter functions are applied to the high impedance, line-level preamp input insteadof the low impedance, high voltage level amplifier output. Active filters have a much sharper roll-off,24dB/octave, allowing each of the loudspeakers to perfectly focus on producing just the frequencies they aredesigned to handle (see Figure 3, crossover frequency graph). Active crossovers are also more efficient from apower standpoint because of the fact that the filters are applied in the line-level audio input signal; only theenergy meant for a particular driver is sent to the amplifier that drives it, so there is no waste. But the biggestadvantage of active crossovers is the sound quality. A vanishingly small amount of noise and distortion isintroduced in the op-amp filter circuits, on the order of 0.00005% total harmonic distortion.All of this results in extremely clean, precise, and well defined audio output to your amplifiers.12/10/20162XKITZ XOVER-2
What is Bi-Amping?In the pro audio community the idea of applying an active crossover to drive separate amplifiers for the wooferand tweeter is called Bi-Amping, specifically ‘Horizontal Bi-Amping’. Most modern professional poweredspeakers are Bi-Amped, because this provides scalability and extremely high fidelity sound. The idea has a greatfollowing in the DIY audio community as well, although many consider it to be out of reach to most due to thehigh cost of providing a specialized pre-amp with an active crossover to drive separate power amplifiers to drivethe woofers and tweeters separately.12/10/20163XKITZ XOVER-2
Unpacking Your KitCarefully unpack and take stock of the components in your kit. The electronic components are packed in 1 baglabeled ‘Bag A’. See Table 1 for a complete listing of your components.Assembly InstructionsIt is very important that you read and understand all of the following instructions before you start yourassembly so that you don’t make any mistakes that might be difficult to recover from. The assembly should bedone in the order listed in Table 1 or you may have difficulty physically accessing components for soldering.What you’ll needSoldering iron with small or medium tipDamp sponge for tip cleaningSolderSolder wick or solder sucker in case of solder bridging (stranded wire could substitute)Small needle nose pliers.Small wire cuttersSmall straight screwdriverSharp knifeMagnifying glass to read the markings on the tiny componentsGeneral Assembly GuidelinesTake your time!! Most mistakes are made when rushing through the assembly. Taking the time todouble check every step will pay off with a first-time functional device.In cases where it is necessary to re-form the leads on components (such as resistors and diodes),be very careful not to put stress where the lead enters the component itself. The physicalattachment of the lead to the component can sometimes be very fragile and the lead may break offif too much force is applied. Reforming the leads can be done by gripping the lead with smallneedle-nose pliers at the base of the component while bending the lead on the other side of thepliers.Use as little heat and solder as necessary to affix the components to the PCB (printed circuitboard). Many of the parts in this kit are temperature sensitive. Overheating may damage them.Always clean the soldering iron tip on the damp sponge prior to every solder joint. Re-tin wheneverthe tip gets a little dull. (tinning is the application of fresh solder to the tip of the iron until itsshiny, wipe excess on a damp sponge).Inspect the solder joints. They should be shiny and smoothly connect the pad to the lead. A dulllooking joint may indicate it is ‘cold’, meaning that either the pad or the lead weren’t heated enoughto allow reliable connection. This could lead to erratic operation of the device. Re-flow the jointagain with the soldering iron, apply equal heat to both the pad and the lead, apply a little moresolder if needed to get a good shiny connection.When clipping the excess leads of the through-hole parts, don’t try to clip too close to the PCB. Clipjust above the solder joint to avoid fracturing the solder joint, which could lead to device failuresometime in the future.Carefully inspect each solder joint to make sure you didn’t accidentally form a ‘solder bridge’, orconnect two adjacent pads together. Remove solder bridges by using solder wick or a solder sucker.If the bridge is small you may be able to remove it by just reheating the joint and sliding thesoldering iron across the bridge. If not, see the next step.If you need to remove solder from a hole (or a solder bridge) and you don’t have solder wick or asolder sucker, you can use stripped stranded wire in place of solder wick. Place the stranded wireacross the hole and touch the soldering iron to the wire, above the hole. As the wire heats it willmelt the solder in the hole, and the melted solder will tend to wick up into the stranded wire. Whenthe wire fills up with solder, move a clean part of the wire over the hole and repeat until the hole isclear of solder.12/10/20164XKITZ XOVER-2
Circuit Board AssemblyYou’re ready to begin assembling your XOVER-2 circuit board. Assemble the board in the order listed in Table 1.The components for the standard kit supporting UNBALANCED signal mode are in the bag marked ‘Bag A’. Ifyou purchased the BALANCED signal mode upgrade, you will have a second bag labeled ‘Balanced ModeUpgrade’, which contains the components required to configure the XOVER-2 to support balanced inputs andoutputs. Use the install check boxes on the right side to track your progress. The ‘Install Notes’ column will alertyou to any special instructions (listed on the next page) for each of the components. We recommend reading andunderstanding all the design notes before you start your assembly.Table 1.Parts List - Bag A – for standard kit supporting UNBALANCED signalingPack DeviceValueMarkingQtyCIRCUIT BOARD (PCB)REV 4.0XOVER-21RESISTOR1K, STORCAPACITOR10K, 1%10K, 1%20K, 1%15, OR0.1uF, 10%1044CAPACITOR10uF, 10%106 (BLUE COLORED)8CAPACITOR0.015uF, 5%153 (BLUE COLORED)10BSC Configuration Cap:One of: (See Table 3).022uF 223.033uF 333.047uF 473CAPACITORSOCKET – 14 PINSOCKET – 20 PINCOMPONENT CARRIER –20 PINTRIMPOTELECTROLYTIC CAPACIT.RCA JACKTERM BLOCK 2VOLTAGE REGULATOROP AMP CHIPSTable 2.Pack 5,C56,C57,C58InstallNotes12231C4231U1,U2,U3XO MODULE451XO 678910TL074 or OPA42273U1,U2,U311R10K100uFInstall Parts List – Balanced Mode Upgrade – for the optional BALANCED signaling upgradeDeviceRESISTORRESISTOR3.5MM TRS K, 0.1%20K, Qty323ReferenceDesignatorsR21,R22,R23R20, R24J1,J5,J7InstallNotes228Install XKITZ XOVER-2
Circuit Board Component Installation Notes:1.You will have extra 10K resistors after this step. These extras will be used in the next step.2.Install the 1% tolerance 10K and 20K resistors included in the standard kit ONLY if you’re running inUN-BALANCED input signal mode. If you purchased the optional BALANCED mode upgrade, thendiscard these 1% 10K and 20K resistors, and install the 0.1% tolerance 10K and 20K resistorsincluded in your upgrade packet instead.To configure the Baffle Step Compensation circuit, install the appropriate cap value in C42. There are3 possible cap values to install for C42, depending on your baffle size. See Table 3 below.3.4.Solder the three 14 pin sockets into the PCB to hold the op amps. Align the notches on one end of thesockets to the notches shown on the PCB silkscreen.5.Install the 20 pin socket in the location on the board marked ‘XO MODULE’ (the row of resistors fromR57 at the top through R56 at the bottom). Install with the pin 1 notch toward ‘R57’ at the top of theMODULE. Carefully insert the 20-pin component carrier into the 20-pin socket marked ‘XO MODULE’with the chamfered corner matching that of the PCB pattern. Solder the 10 resistors included in theXO component pack to the component carrier to configure your crossover frequency. Use the partsplacement diagram below and the instruction slip in your XO component pack to assemble theModule. The 10 resistors are simply inserted across the component carrier and slipped into the twohorizontally adjacent, fork shaped pins. When you’ve do
When you separate the frequencies with a crossover, each loudspeaker is able to focus on producing only the frequencies that they’re designed to produce. Most speaker boxes you see have passive crossovers, which are made up of some inductors and capacitors that filter the low frequencies from the highs. But passive crossovers have a number of very significantFile Size: 1MBPage Count: 12