Transcription
OMRONGetting Started with CX-Server OPCCX-Server OPCUser ManualGetting StartedVersion 2.0Page 1
OMRONGetting Started with CX-Server OPCNoticeOMRON products are manufactured for use according to proper procedures by a qualifiedoperator and only for the purposes described in this manual.The following conventions are used to indicate and classify precautions in this manual. Alwaysheed the information provided in them. Failure to heed precautions can result in injury topeople or damage to the product.DANGER!Indicates information that, if not heeded, is likely to result in loss of lifeor serious injury.WARNINGIndicates information that, if not heeded, could possibly result in loss oflife or serious injury.CautionIndicates information that, if not heeded, could result in relativelyserious or minor injury, damage to the product, or faulty operation.OMRON Product ReferencesAll OMRON products are capitalised in this manual. The word “Unit” is also capitalised when itrefers to an OMRON product, regardless of whether or not it appears in the proper name of theproduct.The abbreviation “PLC” means Programmable Logic Controller and is not used as anabbreviation for anything else.Page 2
OMRONGetting Started with CX-Server OPCVisual AidsThe following headings appear in the left column of the manual to help you locate differenttypes of information.Note:1, 2, 3 Indicates information of particular interest for efficient and convenientoperation of the product.Indicates lists of one sort or another, such as procedures, checklists etc.Represents a shortcut on the Toolbar to one of the options available on the menu ofthe same window.Indicates a program must be started, usually by clicking the appropriate option underthe standard Windows ‘Start’ button.Note:Indicates procedures that are specific to Visual Basic. OMRON, 2008All rights reserved. No part of this publication may be reproduced, stored in a retrieval system,or transmitted, in any form, or by any means, mechanical, electronic, photocopying, recording,or otherwise, without the prior written permission of OMRON.All copyright and trademarks acknowledged.No patent liability is assumed with respect to the use of the information contained herein.Moreover, because OMRON is constantly striving to improve its high-quality products, theinformation contained in this manual is subject to change without notice. Every precaution hasbeen taken in the preparation of this manual. Nevertheless, OMRON assumes no responsibilityfor errors or omissions. Neither is any liability assumed for damages resulting from the use ofthe information contained in this publication.Page 3
OMRONGetting Started with CX-Server OPCAbout this ManualThis manual describes the CX-Server OPC application and its ability to interface with OMRONCS, CV and C PLCs. It does not provide detailed information concerning the PLCs themselves,for this information the commercial manual for the device must be consulted.This manual contains the following information: Getting Started with CX-Server OPC: This describes the CX-Server OPC software ingeneral terms. Using the OPC Server: This describes running and setting up the OPC Server for use byany OPC Client. Using Omron OPC Client Components: This describes using the supplied ActiveXcomponents to access PLC data and includes a tutorial for Excel and Visual Basic hostapplications. Appendix A Component Properties: This appendix summarises the available propertiesfor the ActiveX objects. Appendix B Script Interface: The Visual Basic script interface for the OPC Servercommunications control.A Glossary of Terms and Index are also provided.Warning:Failure to read and understand the information provided in thismanual may result in personal injury or death, damage to theproduct, or product failure. Please read each chapter in itsentirety and be sure you understand the information provided inthe chapter and related chapters before attempting any of theprocedures or operations given.Page 4
OMRONGetting Started with CX-Server OPCTable of ContentsGetting Started with CX-Server OPC. 6About this Manual. 6System Requirements . 7Installing/Uninstalling CX-Server OPC . 8The Help system, and How to Access it. 9Technical Support. 9Using the OPC Server. 11What is OPC?.11Starting CX OPC Server .11Using the CX-Server Communications Utilities.13Fins Gateway Option.13Using with Third Party OPC Clients.14Configuring the PC for remote connection.14Using CX-Server OPC offline.15Using CX-Server OPC Device Redundancy Functionality.15Predefined System Points .18Controlling CX-Server Input Optimisations .19PLC Opening Option.19String Option.19Silent Mode Option.20Command Line Options .20Using the OPC Client Components. 21Objects Overview.21Using the OPC Server.22Step 1: Viewing Data using Omron Graphical Controls.23Step 2: Inserting Data in Cells .25Step 3: Adding Third Party ActiveX Controls.26Other Features .27Appendix A Component Properties. 32Appendix B Script Interface . 35Functions .35Appendix C Temperature Controller Support. 42Parameter support.42Device support.43Glossary of Terms . 44Index . 46Page 5
OMRONGetting Started with CX-Server OPCGetting Started with CX-Server OPCThis book introduces the CX-Server OPC application to a new user.CX-Server OPC allows PLC data collected by the OMRON CX-Server and Fins Gatewaycommunications software to be accessed by standard OPC clients. It allows existing processdata to be collected and analysed, plus it includes graphical components allowing easy creationof simple SCADA applications.Included with CX-Server OPC is the CX-Server runtime system, plus a range of ActiveXcomponents that can be dragged and dropped onto your Workbook or Form. A Fins Gatewayruntime system installer is also provided on the CX-Server OPC CD, as Fins Gateway may beused as an alternative to the CX-Server communications drivers for Ethernet and ControllerLink communication to CS/CJ PLCs.About this ManualThis manual helps a new user get started with CX-Server OPC, by describing the softwareinstallation and computer configuration, and by leading the user through the basics of CXServer OPC.Separate OMRON manuals describe the related CX Automation Suite products; CX-Server,CX-Programmer and CX-Supervisor.Small example applications are included to demonstrate the basic features of the product.These can be used to help with product familiarity.CX-Server OPC comes with a comprehensive on-line help system, which is designed tocomplement this manual, and provide a quick reference at any point in the CX-Server OPCapplication when the manual is not to hand. This general help system uses a fast 'hypertext'system that allows progressively more information to be obtained about any topic by selectingkeywords within the descriptive text.Throughout this manual, it is assumed that a working knowledge of Microsoft Windows isobtained, and that the user can: Use the keyboard and mouse.Select options from Windows menus.Operate dialog boxes.Locate, open and save data files.Edit, cut and paste text.Drag and drop.Use standard Help systems including Index and Find features. Start programs from the “START” button.If Windows has not been used before, it is recommended that some time working with theMicrosoft documentation is spent before using CX-Server OPC.Page 6
OMRONGetting Started with CX-Server OPCThis introductory section deals with several important aspects of installing CX-Server OPC andsetting it up for use. It is recommended that this entire section be read before installing thesoftware.System RequirementsCX-Server OPC operates on IBM compatible personal computers with at least a 400 MHzPentium II central processor. It is designed to run in the Microsoft NT 4.0 / 2000 / XP / Vistaenvironments.Note:CX-Server OPC is not guaranteed to be compatible with computers runningWindows emulation (e.g. Apple Macintosh).Hardware RequirementsThe following configuration is the minimum system requirements for running CX-Server OPC IBM PC compatible Pentium II processor 512 Mbytes of RAM 30 Mbytes available hard disk space, 800 x 600 Super VGA display.The Recommended minimum is: IBM PC compatible Pentium 4 processor, 1024 Mbytes of RAM 50 Mbytes available hard disk space, 1024 x 768 Super VGA display.Operating Systems and EnvironmentsThe operating systems on which this software will run are: Microsoft Windows NT 4.0 (Service Pack 5 and later), Microsoft Windows 2000 (Service Pack 2 and later), Microsoft Windows XP Professional Microsoft Windows Vista Business and Ultimate editionsContainers in which this software will run are: Microsoft Excel 97 and later, Microsoft Visual Basic version 5.0 and later. Microsoft Visual C 6.0. CX-Supervisor v1.1 and later (v2. 0 and later recommended)The recommended Operating System is Microsoft Windows XP Professional or Vista Business.For use in Microsoft .Net, see the separate “Guide to Using CX-Server Lite in Microsoft .Net”Page 7
OMRONGetting Started with CX-Server OPCInterfaces to Hardware - PLC CommunicationsInterfaces to PLC and temperature controller hardware are via the CX-Server and/or FinsGateway 2003 runtime systems.Interfaces to Network Service Boards (NSBs) are achieved using a Fins Gateway driver whichis supplied and supported as part of the CX-Server product.Interfaces to Hardware - PeripheralsInterfaces to PC hardware (printers, graphics, keyboard, mouse, Ethernet etc) are supported bydrivers installed and supported by Windows.Installing/Uninstalling CX-Server OPCThe CX-Server OPC software is supplied on CD-ROM and is installed easily from withinWindows.To install CX-Server OPC1, 2, 3 1.Close all programs.2.Insert the CD labelled CX-Server OPC into your CD-ROM drive. If Autorunis enabled on your system, the installation starts automatically, otherwisesee the README.TXT on the CD-ROM for instructions to launch manually3.Follow the instructions on the screen.By default, CX-Server OPC is installed in C:\Program Files\Omron. AdditionalOmron applications will be installed in a subfolder under Omron. mmonFiles\Omron\ComponentsTo uninstall CX-Server OPCWhen you uninstall, your CX-Server OPC project data remains intact – uninstall only removesprogram files. It is recommended, however, that you copy and move any projects you saved inthe CX-Server OPC folder. Save a copy of your projects in another location on your hard drive(such as your My Documents folder) before uninstalling CX-Server OPC.1, 2, 3 1.2.3.From the Start menu, select Settings – Control Panel.Double-click the Add/Remove Programs.Click the Install/Uninstall tab.4.5.6From the list programs that you can remove, select CX-Server OPC.Click Add/Remove.At the prompt, select the Remove item and click Next and follow any furtherpromptsWait until the uninstall program indicates that the process is complete.7Page 8
OMRONGetting Started with CX-Server OPCThe Help system, and How to Access itCX-Server OPC comes with a detailed help system. At any time while using the software, it ispossible to get help on a particular point that is currently being worked on, or on generalaspects of CX-Server OPC. This system is intended to complement the manual, by providingon-line reference to specific functions of the software and how to use them. The manual isdesigned to provide tutorial information and discuss the various facilities offered by CX-ServerOPC.Help TopicsThe help can be launched in several ways. The Contents page can be launched byselecting Help from the CX -Server OPC folder on the Start button. Alternatively, if theserver is running right click the CX logo in the system tray and select Help from the menu.The help system provides a standard look-up dialog under the Contents tab showing thecontents of the CX-Server OPC Help file. Double-click on an item to read the associatedinformation.Refer to Microsoft Windows documentation for further information on using the Index and Findfeatures.About CX-Server OPCThe OPC Server menu includes an About dialog contains essential version number informationand includes details of the version of CX-Server installed that are required for obtainingtechnical support. The CX-Server ActiveX Components also include an About dialog containingessential version number information, which is accessible from their properties menu.In addition, a brief description of CX-Server OPC and the CX-Automation Suite can beaccessed from the main help contents dialog.Technical SupportIf the installation instructions for this application have been followed, no difficulties should beencountered.If a problem occurs, check that it does not relate to a fault outside CX-Server OPC, for instance,with external components. Check the following: The PC is working correctly,Page 9
OMRONGetting Started with CX-Server OPC The external system or application is working correctly, The communications system is set up correctly, Any errors are cleared in the associated PLCs.When Customer Services need to be contacted, keep the following details to hand. A clear andconcise description of the problem is required, together with the exact text of any errormessages.Note:Use the About dialog to obtain the version number of the application.Page 10
OMRONGetting Started with CX-Server OPCUsing the OPC ServerThis section introduces the OPC Server application to a new user.What is OPC?OPC stands for OLE for Process Control, and is a standard published by the OPCFoundation. The basic aim of the OPC standard is to allow hardware vendors to producesoftware drivers (called OPC Servers) and for software vendors to produce applications (calledOPC Clients) that use a standard method for data interchange. This allows software andhardware from different vendors to be used together.The most widely used version of the OPC standard is version 2. This replaces the earlierversion 1 standard.CX-Server OPC provides an OPC version 2 Server by adding an OPC version 2.05 interface tothe CX-Server runtime used for communication to Omron PLCs. Note that the OPC version1.0a interface is also supported by the CX-Server OPC Server, but has now been superseded,and the version 2 interface should be used wherever possible. The CX-Server OPCCommunications Client only uses the version 2 interface. Unless otherwise stated, thisdocument refers to use with the OPC version 2 standard.Users of CX-Server OPC, who have existing OPC clients or intend to use the OPC clientfunctionality included may need some basic understanding of OPC. OPC client developers willneed a complete understanding of OPC, and the interfaces defined. For more information onOPC, see the OPC Foundation web site at www.opcfoundation.org.Starting CX OPC ServerTo launch the OPC Server:1, 2, 3 1.2.3.From the Start button, select OPC Server from the section Programs,Omron, CX-Server OPC.The server will start. Note the CX logo in the system tray:Configure the server namespace by clicking the CX logo with the rightmouse button and selecting Select CX-Server Project from the popupmenu.Page 11
OMRONGetting Started with CX-Server OPCi. To open an existing CX-Server Project (.CDM) file: Click the Open button and in the Open Project dialognavigate to the file you wish to open. When you click the Open button, the full path name of theselected file will be entered into the Project field.Caution: When sharing a CDM file with other applications it is importantto realise that any changes that are made to the CDM file mayaffect the other applications.ii. To create a new CX-Server Project (.CDM) file:4.5. Click the New button and in the Create Project dialognavigate to the directory in which you wish to create the newfile. In the File Name field, enter the new file name. When you clickthe Save button, the full path name of the new file will beentered into the Project field.Click the OK button.Projects can be edited by clicking the Edit Project button and thenmaking the required changes from the Project Editor Dialog. This is aCX-Server runtime utility – invoke help from within it for details of how toadd and configure PLCs and Points.Click the OK button to complete the configuration.The OPC Server is now ready for use by any OPC Client that is compliant with OPC DataAccess version 2 interface.The CX-Server project file cannot be changed while clients are connected. To select a differentCX-Server project file at a later date, either start the OPC Server manually from the Start buttonor if the server is running, select Disconnect Clients and then follow steps 3-5 of the aboveprocedure.Tip: You can make the OPC Server start automatically when the PC starts, by copying theshortcut on the Start button in the CX-Server OPC folder to the Startup folder.Page 12
OMRONGetting Started with CX-Server OPCUsing the CX-Server Communications UtilitiesCX-Server OPC is supplied with CX-Server. This powerful communications middlewareincludes a set of utilities typically used for configuring or monitoring PLC networks, e.g. as partof a CX-Programmer application. These utilities can also be used with CX-Server OPC. Theyare accessed from the “Communications Utilities” submenu that is obtained by right-clicking onthe CX-Server OPC icon which is present in the Windows task bar whenever CX-Server OPC isrunning.Most of these utilities are only available when CX-Server OPC is connected to a PLC (i.e. whena client is connected), in which case a PLC selection dialog is shown before the utility islaunched. The utility will then automatically connect to the PLC.The Network Configuration Tool and Performance Monitor Tool are always available. TheNetwork Configuration Tool is particularly powerful, including options to scan serial ports forPLCs, or to check communications with a PLC, go online and configure it.For full details of these utilities consult the CX-Server help files.Note: If access to these powerful utilities is not required, and no other program that requiresthem (e.g. CX -Programmer, CX-Supervisor) is being used on a machine, then they can beremoved by uninstalling CX -Server PLC Tools from the Windows Control Panel.Fins Gateway OptionCX-Server OPC normally uses the Omron CX-Server Communications software for both deviceand point configuration, and also for runtime communications (reading and writing values from aPLC).Another Omron product, “Fins Gateway 2003”, also provides communications drivers that canbe used for interfacing to Omron devices. Some users may already have this software installedon their computers, and may prefer to use it. In addition, a suitable Fins Gateway 2003 installeris supplied on the CX-Server OPC CD.The “Server Info” dialog, which can be reached by clicking on the CX-Server OPC WindowsToolbar icon using the right-mouse button, contains options for configuring communications.One of these options controls the use of Fins Gateway. If the Fins Gateway option is set, andFins Gateway 2003 is present on a computer, then the Fins Gateway drivers will automaticallybe used for runtime communication to CS/CJ devices via Ethernet and Controller Link. CXServer will still be used for any non CS/CJ devices, and for any devices that don’t use eitherEthernet or Controller Link. In addition it will still be used for any devices for which dual-networkredundancy is enabled. CX-Server is also always used for configuring the point data.Note: This is an advanced option. For most applications, communications via the standardOmron CX-Server communications drivers is ideal, but in some cases performance may bebetter or more consistent using the Omron Fins Gateway 2003 drivers. This option allows theuser to choose between the two sets of drivers.Page 13
OMRONGetting Started with CX-Server OPCUsing with Third Party OPC ClientsThe exact procedure for connecting Third Party OPC Clients to the OPC Server will depend onthe client being used. Consult your OPC Client documentation for full details. However, thefollowing is a basic overview:1, 2, 3 1.Start and configure the OPC Server as described above.2.3.Start the OPC Client.Depending on the client, either browse for local OPC servers and selectOMRON.OpenDataServer.1 or type the name directly.Note: If the client supports browsing for servers, but the server is notshown, the client may not be fully OPC version 2 compliant.Create an OPC Group from the client.4.5.Create an OPC Item from the client. If the client supports OPC itembrowsing facilities, browse the OPC Server to list the namespace groupsand items to create the OPC Item ID. Otherwise, type the CX-Serverlogical name as the OPC Item ID.Configuring the PC for remote connectionThe OPC interface uses a Microsoft technology called DCOM. This allows the OPC client andOPC server to be seamlessly ‘Distributed’ over a PC network. The OPC Server should berunning on the PC with direct connection to the PLC or PLC network. However, the OPC Client,or indeed multiple OPC Clients, can be run on different networked PCs and will automaticallyread and write data over the PC network. To do this, the PC running the OPC Server must becorrectly configured. For full details of DCOM configuration and security issues see yourMicrosoft documentation. The following is a quick guide:Configuring DCOM1, 2, 3 1.2.Start DCOMCNFG.EXE e.g. by selecting RUN from the Start button. Thedefault location on NT is C:\WINNT\SYSTEM32.View the Default Properties tab (found under the properties section of ‘MyComputer’ in the Computers section of Component Services on XP).Ensure that the Enable Distributed COM on this computer is checked.Page 14
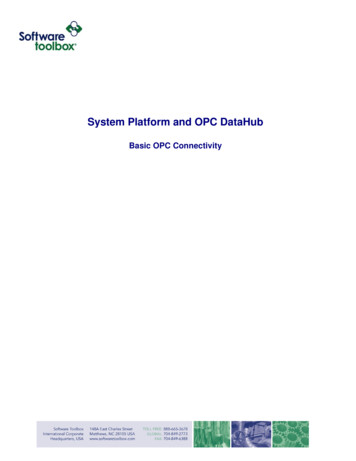
OMRONGetting Started with CX-Server OPC3.From the Default Properties tab, configure the Default AuthenticationLevel to Connect and the Default Impersonation Level to Identify.Setup the access permissions by either:a) On the Default Security tab, adding the user to the Access, Launchand Configuration lists by clicking the Edit Default button in eachcase. The user added should have Administrator rights on the local PC.If not, it may be necessary to add user groups ‘INTERACTIVE’ and‘NETWORK’ as well.b) From the Applications tab, configure the properties forOpenDataServer and OpcEnum. On the Security tab, add therequired users to each of the Custom Permissions. The users addedshould have Administrator rights on the local PC. If not, it may benecessary to add user groups ‘INTERACTIVE’ and ‘NETWORK’ aswell.Using CX-Server OPC offlineCX-Server OPC can be used offline (not connected to a PLC). To use this mode of operationset the “local values” option on the “Server Info” dialog (accessed by right-clicking with themouse on the CX-Server OPC icon in the taskbar that is present whenever CX-Server OPC isrunning.) The OPC Server should be closed and restarted after setting or unsetting this optionto ensure correct operation.Using CX-Server OPC Device Redundancy FunctionalityCX-Server OPC supports device and network redundancy in a way that is transparent to theOPC client. In order to achieve the full benefits the use of specialist function blocks running inthe PLCs is required. These are usually supplied separately (e.g. on the Installation CD) alongwith technical documentation describing their usage. Those documents should be consulted fordetailed technical information on how to set up device redundancy. This section only contains abrief general overview.The redundancy is enabled via the “redundant configuration” checkbox on the main “Select CXServer Project” dialog, and a separate configuration file is used to store the redundancyconfiguration information. The relevant settings are shown below:Page 15
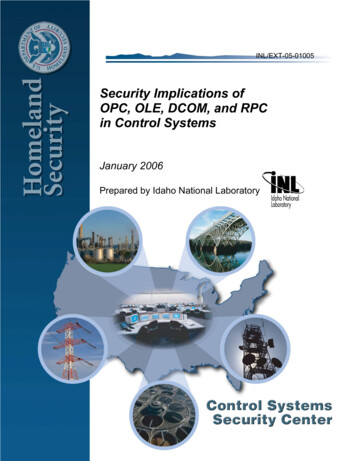
OMRONGetting Started with CX-Server OPCWith device redundancy an OPC client sees a single device connection, which in fact consistsof two physical devices which are effectively duplicates of each other in terms of programs,data, I/O connectivity etc. In normal operation reading of data occurs from one of the devices,but data written is sent to both. If the device being read from fails, then a switch is seamlesslymade to the “partner” PLC. In order to ensure that operation proceeds smoothly, and the PLCstransfer status data between themselves correctly, the use of specialist Function Blocks(produced by Omron) is required.For each device in the CX-Server file redundancy can be turned on or off. A partner IP addressand node number can be specified for all suitable (CS/CJ) Ethernet devices. In addition a“status location” can be specified – this represents the start address of the status data used bythe Omron-supplied function blocks.In addition to the device-level redundancy there is also network-level redundancy- i.e. for eachdevice two separate Ethernet connections, associated with two different networks, can bespecified. It is possible for example, to connect to a PLC via two entirely separate Ethernetnetworks, with the only common hardware being the PC and the PLC.Page 16
OMRONGetting Started with CX-Server OPCDevice and Network redundancy can be used separately, or together (i.e. it is possible to haveup to two network connections to each single or paired device).The Fins Gateway communications option can be used for device-level redundancy, but willhave no effect where network-level redundancy is in use (i.e. CX-Server will still be used tocommunicate to any device that is configured to have access via a second network).System points that provide access to PLC redundancy function block data include:PLCNAME Active – Whether a PLC is currently the active device (boolean)PLCNAME Inactive – Whether a PLC is currently the inactive device (boolean)PLCNAME ForcedRun – Whether the PLC forced run bit is setPLCNAME ProgChangeAlm – Whether the PLC FB “Program Change Alarm” bit is set.PLCNAME PartnerFailAlm – Whether the PLC FB “Partner Change Alarm” bit is set.PLCNAME Lifecycle – Whether the PLC FB “Lifecycle” bit is set.PLCNAME PrimaryNodeNum – PLC FB Primary Node NumberPLCNAME MakeActive – When set, makes a PLC ActivePLCNAME MakeInactive – When set, makes a PLC InactivePLCNAME ForceRunPLC – When set, forces a PLC to runPLCNAME UseFBInput – Signals that the Function Block Input data should be usedPLCNAME AutoSwitch – When set, indicates that the server should treat a device as inactivewhen communications with it is lost (otherwise the FB Active and Inactive s
CX-Server OPC operates on IBM compatible personal computers with at least a 400 MHz Pentium II central processor. It is designed to run in the Microsoft NT 4.0 / 2000 / XP / Vista environments. Note: CX-Server OPC is not guaranteed to be compatible with computers running Windows emulation (e.g. Apple Macintosh). Hardware Requirements