Transcription
Alliance SystemQuick Guide
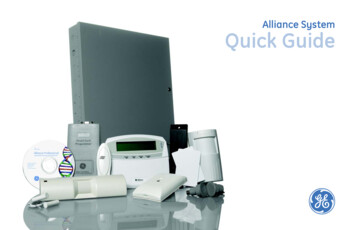
IntroductionThis Alliance System Quick Guide helps operators use an Alliance System after it is installedby the installer. It includes step-by-step instructions that show how to perform basicsystem functions.The Alliance System platform unites intrusion detection and access control with smart cardoperations and remote communications. Alliance is built using modular components, andall of its functions work together from a single control panel.Keypad operationsSoftware operationsThis guide provides intructions for thefollowing keypad operations:Instructions for the following softwareoperations in Alliance Professional areincluded in this guide: Arming/disarming the systemOpening doorsLocking/unlocking doorsResetting an alarm Activating a systemRunning reportsAdding/removing usersCreating/issuing photo ID cardsSetting up badge armingTip. You’ll find special items such as tipsand cautions in the page margins. Thesemake setup and basic operation easier.If you have a problem configuring oroperating Alliance, try these solutions inthis order:1. Read this Quick Guide.2. Read the corresponding sections ofthe user manual.3. Call technical support:Monday through Friday, excludingholidays, between 6 a.m. and 5 p.m.Pacific Time).Toll-free: 888.GESECURity (888.437.3287in the US, including Alaska and Hawaii;Puerto Rico; Canada).Outside the toll-free area: 503.885.5700.Outside the US: 011-1-541-754-9134.Copyright 2005, GE Security Inc. All rights reserved.Document number/revision: 1054410A. September 2005.Alliance SystemQuick Guide2
Arming/disarming the systemArm your system when areas within thepremises are unoccupied. If an eventoccurs while the system is armed, such assomeone forcing open a door, an alarm isset off.Once you have armed the system, leavethe area within the preset exit time toavoid setting off the alarm. Inform allusers of this time limit.Disarm your system to access an areawithout setting off an alarm. When youenter an area, the Alliance system allows apreset entry time for you to disarm thearea before an alarm occurs.To arm/disarm the system:1. Verify that there are no alarms in thearea.2. Enter your PIN code on the keypad.3. Press the ON/NEXT button to arm thesystem, or the OFF button to disarm.If your system is not programmed todisplay the areas assigned to yourPIN code, all areas are automaticallyarmed/disarmed. If a list of areasassigned to your PIN code displays,proceed to step 4.4. You can perform the following optionsto arm/disarm the areas listed on thedisplay: Press 0, ENTER to arm/disarm allareas at once. To arm/disarm a specific area,enter the area number into thekeypad, then press ENTER. PressON/NEXT to display the next areaon the list or to scroll through theareas. When you are finished,press ENTER. Press CLEAR to exit the menu andreturn to the original display.You may not be able to arm/disarmspecific areas because: Your keypad has beenprogrammed to arm/disarm onlyspecific areas in the premises.Make sure you know which keypadto use if there is more than one. Your PIN code has beenprogrammed to arm/disarm onlyspecific areas. Make sure youknow which areas you can arm/disarm. You cannot arm an area if it has azone input device not properlyclosed, such as the magneticcontacts on a door or window.Before arming, make sure all doorsand windows are properly closed.The illuminated red LEDs on the keypadindicate which areas are armed.Alliance SystemQuick Guide3
Opening doorsYou can use the keypad to open a door by entering a door code.Most systems with access control use an alarm code prefix. The alarm code prefix is thenumber of digits to subtract from the beginning of your PIN code to get your door code.For example, if your alarm code prefix is two digits long and your full PIN code is 123456,you subtract the first two digits from your PIN to get a door code of 3456.A door code only opens doorsprogrammed for that code. If you enteran invalid code, or if the code is not validfor that arming station, the keypadsounds seven quick beeps.You can open a door with your PIN code ifit is programmed to allow you to arm/disarm the system and open doors.To open a door:1. Verify that Code: is displayed on thekeypad.2. Enter your door code or PIN code.3. Perform one of the following options: If you entered your door code,press ENTER to open the door. If you entered your PIN code, pressON/NEXT to arm (or OFF to disarm)and open the door.Alliance SystemQuick Guide4
Locking/unlocking doorsYou can lock, unlock, enable, and disabledoors using menu 23 in the keypad.Menu 23 can only be used on doorscontrolled by a four-door DGP, and thedoors must be programmed to openwith your PIN code.To lock/unlock or enable/disable a door:1. Press MENU, *, enter your PIN code,then press ENTER.2. Press 23, ENTER to select menu 23.3. Enter the number of the function youwant to perform:1Unlock2Lock3Disable4Enable4. Press ENTER.5. Enter the door number and pressENTER.6. Press ENTER again to exit the menu.Alliance SystemQuick Guide5
Resetting an alarmWhen there is an alarm, the area LED flashes red on the keypad and Alarm On is displayed.Because an area can have several zones, it is important that you know which zone iscausing the alarm so that you can quickly locate and fix the problem.Resetting a local alarmResetting a zoneTo reset a local alarm:To reset a zone in alarm:1. Press ENTER, ENTER on the keypad.1. Enter your PIN code.2. The zones causing the alarm arelisted. Enter the zone number andpress ENTER to display the completezone name. Press ON/NEXT todisplay the next zone on the list.2. Press OFF.3. Press 0, ENTER to acknowledge thealarm. Depending on your systemprogramming, a user code may berequired to reset the alarm.3. The keypad displays the areas in thezone. Enter the area number of thezone in alarm.If you are unable to reset an alarmbecause the conditions require a servicetechnician, notify your alarm company.If you have fixed the cause and reset thealarm, contact your central stationcompany to ensure that they take nofurther action.CAUTION: You can only reset analarm for an area that isassigned to your PIN code.4. Press ENTER.If your system has been programmed toremind you about alarms, it willautomatically realarm after a preset timeunless the cause of the alarm has beenfixed. This occurs no matter how manytimes you acknowledge the alarm.Alliance SystemQuick Guide6
Activating a systemYou can manage more than one systemusing the Alliance Professional software.To communicate with a specific system,you need to activate the system in thesoftware.To start Alliance Professional, double-clickthe shortcut icon on your computerdesktop, or click Start Programs GESecurity Alliance Professional. In theAlliance login window, enter your username and password, then click OK.Only one system at a time can be active.To activate a system:1. Select System Select to open theSystem list window.If you do not have a login, the defaultuser name is ALLIANCE INSTALLER withthe password 998765.2. Highlight the name of the system youwant to activate and click OK.3. Select System Activate to connectto the control panel.4. In the Connection Links Controlwindow, highlight the control panelname, then click the green checkmarkbutton to establishcommunication withthat panel.Alliance SystemQuick Guide7
Running reportsYou can generate over 40 differentreports in Alliance Professional thatprovide you with a record of yoursystem's settings and events.See below for information about thetypes of reports available along withinstructions for running the reports.User reports. Display detailedAlliance user information, includinguser details, door groups, floorgroups, holidays, users by area,users by door, and users by floor.To run a User report, select Reports User and choose the report type.Admin reports. Display Alliancesystem details, including companyinformation, control panel details,connection links, DVMRconfiguration, and operatorpermissions.To run an Admin report, selectReports Admin and choose thereport type.Alliance panel reports. Display theprogramming details of a singleAlliance panel, including the zone,area, RAS and DGP databases,alarm groups, time zones, etc.To run an Alliance panel report,select Reports Alliance panel andchoose the report type.Print all reports. Allows you to printa complete archive of all yoursettings or view all reports at once.To print all reports, select Reports Print all. Uncheck any reports youdo not want to print, then clickPrint.Users in regions. Lists the regionsused in four-door/four-elevatorcontrollers and displays the userscurrently in each region.To run a Users in regions report,select Reports Users in Regions.Select the regions to include in thereport and the sort option, thenclick OK.Alliance SystemQuick Guide8
Event tree. Displays a list of all eventflags programmed into control panelsand where they are used.To run an Event tree report, selectReports Event tree. Specify thepanel number, then click Print.History reports. Displays the eventhistory log.To run a History report, select History Reports. In the History log window,click Print to preview the report. Toprint the report, click the printer iconat the top of the screen.Double-click any of the entries in theHistory log window to open a windowthat explains the details of the event.Click the Restrict button in the Historylog window to create a history reportwith specific data, such as a dangerange or type of event.Alliance SystemQuick Guide9
Adding/removing usersTo add or remove users in AllianceProfessional, select Users Users to bringup the User details window where userrecords are stored.ButtonFunctionAdding a userSearchTo add a user:Upload/download to panel1. Click the New button.2. In the Users tab, enter the user'sname, number, department, type, PINcode, and other info.3. Click the Photo ID tab to create andissue a security card for the user.4. Click the Alarm grp, Door grp, andFloor grp tabs to assign alarm, door,and floor groups to the user.5. Click the Cmmts tab to add anycomments about the user.6. Click the Card issue tab to enter/editdetails and write data to the card.PrintNewSaveCancelDelete7. Click the Credit issue tab if you wantto add credits to the user's account.8. Click the Card security tab to set theaccess level and locations where thecredits can be used.9. Click Save to save the user record.Alliance SystemQuick Guide10
Removing a userTo remove a user:1. Click the Search button to bring up alist of users in the User list window.2. Highlight the user you want toremove, then click OK.3. In the User details window, click theDelete button to remove the user.4. Click Yes to confirm the deletion.Alliance SystemQuick Guide11
Creating/issuing photo ID cardsTo create and issue a photo ID card to auser:1. Select Users Users to open the Userdetails window.2. Click the Photo ID tab.3. Load a picture of the user. Click the Capture button to scan ortake a picture of the user if youhave a scanner or digital cameraconnected to your PC. Click the Load button to load adigital picture of the user, saved ineither JPEG or BMP format. Use thecropping square in the File ImageLoader screen to center the image,then click Accept.4. Click the Issue button to preview thecard. If you are satisfied with theappearance, click the print icon toprint the card on your card printer.If you use smart card credits, you canchange a user’s credits by clicking onthe Credit issue tab in the User detailswindow. Select one of the four accountsand change the number of credits.5. To program a smart card, click theCard issue tab. Lay the card in thesmart card programmer, then clickthe Write button on your screen.Alliance SystemQuick Guide12
Setting up badge armingThe Alliance system provides you theoption of using a card reader instead of thekeypad to arm or disarm the system. Afteryou enable this function in the reader,authorized users present their cards threetimes in rapid succession to arm thesystem, or one time to disarm the system.To set up badge arming:1. Select Alliance panel ArmingStations.2. In the Arming station window, checkthe following boxes at the bottom ofthe screen: Card autodisarm Card arms after 3 badges3. Click the Save button.4. Click the red down-arrow button todownload the setting into the controlpanel.Alliance SystemQuick Guide13
Alliance System Quick Guide 7 Activating a system You can manage more than one system using the Alliance Professional software. To communicate with a specific system, you need to activate the system in the software. To start Alliance Professional, double-click the shortcut icon on your computer desktop, or click Start Programs GE
