Transcription
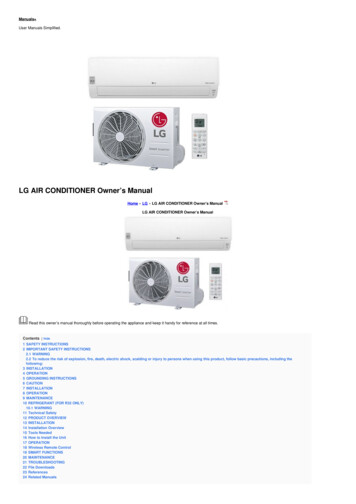
OWNER’S MANUALAIR CONDITIONERRead this owner’s manual thoroughly before operating the applianceand keep it handy for reference at all times.TYPE : WINDOW 9*MFL71860109Rev.01 110321www.lg.comCopyright 2021 LG Electronics Inc. All Rights Reserved
TABLE OF CONTENTSSAFETY INSTRUCTIONS.3IMPORTANT SAFETY INSTRUCTIONS.4PRODUCT OVERVIEW.8Exterior Parts.8Interior Parts.8INSTALLATION.9Electrical Data.9Parts Included (Appearance May Vary).10Tools Needed.10How to Install the Unit. 11Window Requirements. 11Storm Window Requirements. 11Preparation of the Cabinet.12Cabinet Installation.13Unit Installation.14OPERATION.16Control Panel and Remote Control.16Using the Light Off Function.17Using the Auto Clean Function.17Wireless Remote Control.18Air Direction.19Additional Features .19SMART FUNCTIONS.20LG ThinQ Application.20Smart Diagnosis.21MAINTENANCE.23Air Filter.23TROUBLESHOOTING.24Before Calling for Service.24Normal Sounds You May Hear.24WARRANTY.28
SAFETY INSTRUCTIONSENREAD ALL INSTRUCTIONS BEFORE USEYour safety and the safety of others are very important.We have provided many important safety messages in this manual and onyour appliance. Always read and follow all safety messages.This is the safety alert symbol.This symbol alerts you to potential hazards that can kill or injure youand others.All safety messages will follow the safety alert symbol and either theword WARNING or CAUTION.These words mean:WARNINGYou may be killed or seriously injured if you do not follow instructions.CAUTIONYou may be injured or cause damage to the product if you do not followinstructions.All safety messages will tell you what the potential hazard is, tell youhow to reduce the chance of injury, and tell you what may happen if theinstructions are not followed.The following symbols are displayed on units.This symbol indicates that this appliance uses a flammablerefrigerant. If the refrigerant is leaked and exposure to anexternal ignition source, there is a risk of fire.This symbol indicates that the Operation Manual should be readcarefully.This symbol indicates that a service personnel should behandling this equipment with reference to the Installation Manual.This symbol indicates that information is available such as theOperating Manual or Installation Manual.3
ENIMPORTANT SAFETY INSTRUCTIONSWARNINGTo reduce the risk of explosion, fire, death, electric shock, scalding orinjury to persons when using this product, follow basic precautions,including the following:INSTALLATION 4Before use, the appliance must be properly installed as described in this manual.Contact the authorized service technician for repair or maintenance of this unit.Contact the installer for installation of this unit.Young children should be supervised to ensure that they do not play with the air conditioner.When the power cord is to be replaced, replacement work shall be performed by authorizedpersonnel only using only genuine replacement parts.Installation work must be performed in accordance with the National Electric Code by qualified andauthorized personnel only.Connect to a properly rated, protected, and sized power circuit to avoid electrical overload.Always plug into a grounded outlet.Do not under any circumstances, cut or remove the third (ground) prong from the power cord.When installing or moving the appliance, be careful not to pinch, crush, or damage the power cord.Plug in the power plug properly.Do not modify or extend the power cord.Do not start/stop operation by plugging/unplugging the power cord.If the cord/plug is damaged, have it replaced by an authorized service person using authorizedreplacement parts.Use a dedicated circuit.Do not disassemble or modify the product.Adhere to all industry recommended safety procedures including the use of long-sleeved glovesand safety glasses.Disconnect the power cord or circuit breaker before installing or servicing the appliance.Keep packaging materials out of the reach of children. These materials can pose a suffocation riskto children.Store and install the product where it will not be exposed to temperatures below freezing orexposed to outdoor weather conditions.Do not store or use gasoline or other flammable vapors and liquids in the vicinity of this or anyother appliance.
ENOPERATION Use this appliance only for its intended purpose. Never attempt to operate this appliance if it is damaged, malfunctioning, partially disassembled, orhas missing or broken parts, including a damaged cord or plug. Repair or immediately replace all power cords that have become frayed or otherwise damaged. Donot use a cord that shows cracks or abrasion damage along its length or at either end. Do not run cord under carpets or mats where it could be stepped on and damaged. Keep the cord out from under heavy objects like tables or chairs. Do not place the power cord near a heat source. Do not use an adaptor or plug the product into a shared outlet. Do not tamper with controls. If you detect a strange sound, a chemical or burning smell, or smoke coming from the appliance,unplug it immediately, and contact the LG Electronics Customer Information Center. Never unplug the appliance by pulling on the power cord. Always grip the plug firmly and pullstraight out from the outlet. Do not grasp the power cord or touch the appliance controls with wet hands. If water enters the product, turn off the power at the main circuit, then unplug the product and call for service. If the product has been submerged, contact the LG Electronics Customer Information Center forinstructions before resuming use. Unplug the product when unused for long periods. Unplug the product before cleaning. In the event of a gas leak (propane gas, etc.) do not operate this or any other appliance. Open awindow or door to ventilate the area immediately. This appliance is not intended for use by persons (including children) with reduced physical, sensoryor mental capabilities, or lack of experience and knowledge, unless they have been given supervisionor instruction concerning the use of the appliance by a person responsible for their safety. The interior of the product must only be cleaned by an authorized service center or a dealer. Do not use solvent-based detergent on the product. Doing so can cause corrosion or damage,product failure, electrical shock, or fire.GROUNDING INSTRUCTIONS The power cord of this appliance is equipped with a three-prong (grounding) plug. Use this witha standard three-slot (grounding) wall power outlet to minimize the hazard of electric shock. Thecustomer should have the wall receptacle and circuit checked by a qualified electrician to makesure the receptacle is properly grounded. DO NOT CUT OR REMOVE THE THIRD (GROUND)PRONG FROM THE POWER PLUG. Situations when the appliance will be disconnected occasionally; Because of potential safetyhazards, we strongly discourage the use of an adapter plug. However, if you wish to use anadapter, a TEMPORARY CONNECTION may be made. Use UL-listed adapter, available frommost local hardware stores. The large slot in the adapter must be aligned with the large slot inthe receptacle to assure a proper polarity connection. Attaching the adapter ground terminal to the wall receptacle cover screw does not ground theappliance unless the cover screw is metal, and not insulated, and the wall receptacle is groundedthrough the house wiring. The customer should have the circuit checked by a qualified electricianto make sure the receptacle is properly grounded. Disconnect the power cord from the adapter, using one hand on each. Otherwise, the adapterground terminal might break. Do not use the appliance with a broken adapter plug. Situations when the appliance will be disconnected often; Do not use an adapter plug in thesesituations. Unplugging the power cord frequently can lead to an eventual breakage of the groundterminal. The wall power outlet should be replaced by a three-slot (grounding) outlet instead.5
ENCAUTIONTo reduce the risk of minor or moderate injury to persons,malfunction, or damage to the product or property when using thisproduct, follow basic precautions, including the following:INSTALLATION Take care when installing the product that exhaust or condensation does not damage nearbyproperty. Follow installation instructions exactly to avoid excessive vibration or water leakage. Wear gloves and use caution when unpacking and installing the appliance. Screws or sharp edgescan cause injuries.OPERATION This appliance is not intended for use as a precision refrigeration system. Do not use it for specialpurposes such as maintaining pets, food, precision machinery, or art objects. When installing or moving the appliance, be careful not to pinch, crush, or damage the power cord. Make sure the air inlet and outlet are free from obstructions. Use a soft cloth to clean the appliance. Do not use waxes, thinners, or harsh detergents. Do not step on or place heavy objects on top of the appliance. Do not operate the appliance without the filter securely installed. Do not drink water drained from the appliance. Be sure to ventilate sufficiently when the air conditioner and a heating appliance such as a heaterare used simultaneously. Do not expose people, animals, or plants to the cold or hot wind from the air conditioner forextended periods of time. Remove the batteries if the remote control is not to be used for an extended period of time. Never mix different types of batteries, or old and new batteries for the remote control. Stop using the remote control if there is a fluid leak in the battery. If your clothes or skin areexposed to the leaking battery fluid, wash off with clean water. If the leaking battery fluid has been swallowed, rinse the inside of the mouth thoroughly andconsult a doctor. Do not recharge or disassemble the batteries.MAINTENANCE Clean the filter every two weeks. Never touch the metal parts of the air conditioner when removing the air filter. Never use strong cleaning agents or solvents when cleaning the air conditioner or spray water.Use a smooth cloth.6
ENREFRIGERANT (FOR R32 ONLY)WARNING Do not use means to accelerate the defrosting process or to clean, other than those recommendedby the manufacturer. The appliance shall be stored in a room without continuously operating ignition sources (forexample: open flames an operating gas appliance or an operating electric heater). Do not pierce or burn. Be aware that flammable refrigerants may not contain an odor.CAUTION This unit contains flammable refrigerant and has special safety precautions not normallyassociated with older units. Please follow all precautions and advisories. Use caution while handling and prevent damage to unit. Do not put any holes into product forany reason. This can cause damage to product and prevent unit from cooling. Maintenance and cleaning of unit should be performed by trained personnel. Failure to properlyclean unit can result in damage to the refrigeration system and or the electrical system. Make certain that all the air circulation/ventilation openings are free from obstruction. Service should only be performed by technicians properly trained and certified in the use offlammble refrigerants. Any service performed by unauthorized servicers/individuals will void allwarranties. When storing the appliance, do not put in a room with any open flame appliance, such as gaswater heaters or furnaces. Also keep away from electric heaters. Damaged units should berepaired before storage.SAVE THESE INSTRUCTIONS7
PRODUCT OVERVIEWENExterior PartsInterior Parts3942187516768543281Control Panel1Evaporator2Remote Control2Air Guide3Air Filter3Control Box4Vertical Air Deflector (Horizontal Louver)4Brance5Horizontal Air Deflector (Vertical Louver)5Compressor6Air Inlet6Condenser7Front Grille7Base Pan8Cabinet8Power Cord9Air Outlet
INSTALLATIONENElectrical DataPower cord may include a current interrupterdevice. TEST and RESET buttons are providedon the plug case. The device should be tested ona periodic basis by frist pressing the TEST buttonand then the RESET button. If the TEST buttondoes not trip or if the RESET button will not stayengaged, discontinue use of the air conditionerand contact a qualified service technician.for 120 VWARNING This appliance should be installed inaccordance with the National Electrical Code. Use of extension cords could cause seriousinjury or death. Do not use an extension cord with thiswindow air conditioner. Do not use surge protectors or multi-outletadapters with this window air conditioner. Never push the TEST button during operation.Doing so can damage the plug. Do not remove, modify, or immerse thisplug. If this device trips, the cause should becorrected before further use.CAUTIONUse Wall ReceptacleStandard 120 V, 3-wiregrounding receptacle rated15 A / 120 VAC / 60 HzPower SupplyUse 15 A, timedelay fuse or 15 A,circuit breaker. The conductors inside this cord are surroundedby shields, which monitor leakage current.These shields are not grounded. Periodicallyexamine the cord for any damage. Do notuse this product in the event the shieldsbecome exposed. Avoid shock hazard. Thisunit cannot be user-serviced. Do not open thetamperresistant sealed portion. All warrantiesand performance will be voided. This unit is notintended to be used as an ON/OFF switch.9
ENParts Included (Appearance May Vary)Heatproof foam (2)(Adhesive backed)Foam-PE (2)(adhesive-backed)Foam strip(non-adhesive)Right curtain panelFrame guide (2)Window lockingbracketLeft curtainpanelType “A” Screws(14)Sill bracket (2)Type “B” Screws(3)Type “C” Screws(5)Bolts(2)Phillips-head screwdriverAdjustable wrenchLevelGlovesTape measureScissors or Cutting knifePencilLock Nuts(2)Tools Needed10
ENHow to Install the Unit1To prevent vibration and noise, make sure theunit is installed securely and firmly.23Install the unit out of direct sunlight.There should be no obstacles, such as afence or wall, within 20” from the back of thecabinet because it will prevent heat radiationof the condenser. Restriction of outside air willgreatly reduce the cooling efficiency of the airconditioner.FenceAwningCooled airNOTE All supporting parts should be secured to firmwood, masonry, vinyl, fiberglass, or metal. This product is a window air conditioner. Assuch, a standard single-hung or double-hungwindow is required for proper installation. Nonwindow installations, including using sleeves orwall openings, and other installation methodsare not recommended.Storm Window Requirements1Windows that include a storm window framemay prevent the air conditioner from tiltingdown toward the outside to drain properly. Forproper drainage, attach a 2” x 2” piece of woodto the inner sill, trimmed to a length which fitsinside the window frame. The top of the woodshim must be at least 1 1/4” higher than thetop of the storm window frame. Attach thewood securely to the sill with nails or screws.2If necessary, attach another 2” x 2” wood stripflush against the back of the inner sill.30" 60"HeatradiationAbout 1/2"Over 20"CAUTION DO NOT cover or block any of the side and toplouvers. All side louvers of the cabinet mustremain exposed to the outside of the structureand unobstructed.4Install the unit slightly tilted so the back isslightly lower than the front (about 1/2”). Thiswill force condensed water to flow to theoutside.5Install the unit with the bottom between30” 60” above the floor level.Wood Strip Mountedon Top of Inner SillInner SillNail or screwIndoors1 1/4” higher thanstorm window frameStormWindow FrameOuter SillOutdoorsWindow Requirements This unit is designed for installation in standarddouble hung windows with actual openingwidths from 27” to 39”.The top and bottom window sashes must opensufficiently to allow a clear vertical opening of16” from the bottom of the upper sash to theinside sill.27” to 39”16” min11
ENPreparation of the Cabinet14Remove 4 screws which fasten the cabinet atboth sides and at the back. (Keep the screwsfor later use.)Insert the hooks on the lower panel guidesinto the slots on the bottom of the cabinet.Make sure that the flanges on the lower panelguides will face toward the inside of the room.ShippingScrewsHook2Slide the unit from the cabinet by gripping thebase pan handle and pulling forward whilebracing the cabinet.Indoor5Insert the top and bottom rails of the curtainpanels into the upper and lower panel guides.Upper Panel GuideLeft Curtain PanelRight Curtain PanelCAUTION The unit is heavy. To prevent injury, use properlifting techniques when pulling unit forwardfrom cabinet. Obtain assistance from anotherperson if possible.3Cut the window sash seals (Foam-PE) to theproper length. Peel off the backing and attachthe adhesive-backed foam to the undersideof the window sash and the bottom of thewindow frame.Foam-PE(Adhesive backed)Lower PanelGuideCAUTION The lower panel guides are easily broken. Becareful with them when installing the cabinet.6Fasten the curtain panels to the unit with 8type A screws.Fasten the screws behind the curtain panel.Screws(Type A)Screws(Type A)NOTE Use a long screwdriver to make installing thescrews easier.12
ENCabinet InstallationCenter Hole4Inside SillOutside Sill1Use 2 type A screws to attach a sill supportto the cabinet track holes on one side. Usethe cabinet track holes that will place the sillsupport nearest to the outer edge of the sill.The longer side of the sill support should befacing outside the window.Repeat with the second sill support on theopposite side of the cabinet.Open the window. Mark a line on the center ofthe inside sill.Carefully place the cabinet in the window andalign the center hole on the cabinet bottomfront with the center line on the sill.Cabinet Track HolesScrews (Type A)OutdoorInside SillIndoorCenter Hole2Pull the bottom window sash down behind theupper guide until It meets the cabinet.Window Sash5Install the cabinet with a slight tilt (about 1/2”)downward on the outside.Use the bolt and nut to adjust the tilt of thecabinet.Upper PanelGuideabout 1/2”CabinetCAUTIONNOTE Do not pull the window sash down so tightlythat the movement of the curtain panels isrestricted.3 Do not drill a hole in the bottom pan.The product is designed to operate withapproximately 1/2” of water in the bottom pan.There is no need to add water if the pan is dry.Loosely assemble each sill support.Sill SupportNutBoltNOTE If the distance to the outer window sill is notthat deep, you may not need the bolt and nut.13
EN6Mount the cabinet to the window sill using 3type B screws in the holes on the front angle.Sash TrackFront AngleScrews (Type B)7Pull each curtain panel out until it meets thewindow sash track.CAUTION The unit is heavy. Use an assistant to helplift the unit and set it in place. Lifting andmaneuvering the unit by yourself could resultin injury. Hold the unit firmly in place until the windowframe is lowered to meet the top surface of theunit directly behind the upper guide. If the unitfalls from the window, it could cause personalinjury or property damage.2Cut the non-adhesive foam strip to the properlength and insert it between the upper windowsash and the lower window sash.Upper PanelGuideFoam Strip(Non-adhesive)Sash TrackInside Window SillFront Angle8Use a screwdriver or power drill to attachthe curtain panels to the window sashes byinserting type C screws into the sashes throughthe cabinet holes shown in the figure below.Screws(Type C)Unit Installation114With the aid of an assistant, slide the unit into thecabinet. Do not push on the controls or the finnedcoils. Reinstall the screws removed from thecabinet sides in step 1 of preparation of cabinet.3To prevent broken glass or damageto windows, on vinyl or other similarlyconstructed windows, attach the windowlocking bracket with a type C screw.VinylScrew(Type C)Window Locking BracketWoodScrew(Type C)
EN4Connect the wire harness before assemblingthe front grille.7After the air conditioner is installed, measurethe curtain panel on each side and cut theadhesive-backed heatproof foam to fit eachpanel. The size of the panels may differ.Remove the backing from the heatproof foamand attach the foam to the curtain panels.(Adhesive Backed)W15W2W2Attach the front grille to the cabinet byinserting the tabs on the grille into the slots onthe front top of the cabinet.Push the grille in until it snaps into place.Heatproof Foam6HW1HNOTE Guide the lever carefully through the grille asyou push it in.WHNOTE Heatproof foam improves the cooling capabilityof the air conditioner. See the Electrical Data section for informationon attaching the power cord to an electricaloutlet.Open and remove the inlet grille from theproduct. Secure the front grille assembly with2 type A screws. Assemble the inlet grille tothe front grille again.Screws(Type A)Inlet Grille15
OPERATIONENControl Panel and Remote Control56Remote Control78819Auto Clean(3 s)47Light Off(3 s)34321021NOTE The feature may be changed according to the type of model.1PowerPress to turn the air conditioner ON orOFF.2Sleep ModeThis mode keeps operating noise to aminimum and turns the air conditioner offafter a set time. The timer can be set from1 to 12 hours. In the Sleep Mode, the settingtemperature increases by 2 F after30 minutes and additional 2 Fafter another 30 minutes for a morecomfortable sleep. The setting temperature increases up to4 F from the preset temperature.3Delay ON/OFF TimerDelay ON - When the air conditioner is off,set it to automatically turn on from 1 to 24hours later, at its previous mode and fansettings.Delay OFF - When the air conditioner ison, set it to automatically turn off from 1 to24 hours later.NOTE Each press of the Timer buttonadvances the timer by 1 hour. Afterthe last press the display returns to thetemperature setting.164Operation ModePress the Mode button to cycle between 4types of air conditioner operation: EnergySaver / Cool / Fan / Dry.Energy Saver - In this mode the compressorand fan turn off when the set temperatureis achieved. Approximately every 3 minutesthe fan turns on to allow the unit sensor toaccurately determine if more cooling is needed.Cool - This mode is ideal on hot days to cooland dehumidify the room quickly. Use theTempbuttons to set the desired roomtemperature and use the Fan Speed button toset the desired fan circulation speed.Fan - In this mode the fan circulates air but thecompressor does not run. Use the Fan Speedbutton to set fan speed to High, Medium orLow. In this mode, you cannot adjust the settemperature.Dry - This mode is ideal for rainy and dampdays to dehumidify the room rather than coolingit significantly. Humidity is removed fromthe room by the combination of compressoroperation and the fan speed fixed at Low.The compressor and fan turn off once the settemperature is reached. Fan speed cannot beadjusted in Dry mode.
EN5Wi-FiEnables connection of the air conditioner tothe home Wi-Fi.NOTE Follow instructions on ThinQ applicationon how to connect to your unit.6Clean FilterThe Clean Filter LED lights up to notify youthat the filter needs to be cleaned. Aftercleaning the filter, press Temp andtogether on the control panel to turn off theClean Filter light.NOTE The filter reset must be done using thecontrol panel, not the remote control. This feature is a reminder to clean theair filter for more efficient operation.The LED light turns on after 250 hoursof operation.7Fan SpeedPress to set the Fan Speed to Low (F1),Medium (F2) or High (F3).8Temperature ControlThe thermostat monitors roomtemperature to maintain the desiredtemperature. The thermostat can be setbetween 60 F–86 F (16 C–30 C).Press or arrows to increase ordecrease temperature setting.9Energy SaverIn this mode the compressor and fanturn off when the set temperature isachieved. Approximately every 3 minutesthe fan turns on to allow the unit sensorto accurately determine if more cooling isneeded.NOTE Auto Restart : If the air conditioner turnsoff due to a power outage, it will restartautomatically once the power is restored, withthe same settings as were set before the unitturned off. Energy Saver : The unit defaults to the EnergySaver mode each time the unit is switched onexcept in Fan mode or when power is restoredafter an electrical power outage. The remote control will not function properly ifthe AC infrared sensor is exposed to direct lightor if there are obstacles between the remotecontroller and the air conditioner.Using the Light OffFunctionYou can set the brightness of the control panel, Press Mode button on the remote control for 3seconds, or Press Mode and Sleep button button togetheron the control panel.NOTE Turn on/off the control panel.Using the Auto CleanFunctionIn the Cooling and Dry Mode, Moisture isgenerated inside the indoor unit. This functionremoves such moisture. Press Energy Saver button on the remotecontrol for 3 seconds. is displayed on the remote control.NOTE If you turn off the unit, the fan continues to runfor 10 minutes and cleans the inside of theindoor unit.NOTE This function is available with CoolingMode.10ClearCancel Sleep and Timer settings.17
ENWireless Remote ControlInserting BatteriesIf the display screen of the remote control beginsto fade, replace the batteries. Insert AAA (1.5 V)batteries before using the remote control.1Remove the cover on the back of the remotecontrol.2With the plus and minus poles facing asmarked, insert two new AAA 1.5V batteries.NOTE Two new batteries are supplied with the airconditioner for use in the remote control. Do not use a rechargeable battery. Make surethat the battery is new. In order to prevent discharge, remove thebattery from the remote control if the airconditioner is not going to be used for anextended period of time. Keep the remote control away from extremelyhot or humid places. To maintain optimal operation of the remotecontrol, the remote sensor should not beexposed to direct sunlight.18
ENAir DirectionAdditional FeaturesAirflow can be adjusted by changing the directionof the air conditioner’s louvers.Slinger FanAdjusting Horizontal AirflowDirectionThe horizontal airflow is adjusted by moving thelevers of the vertical louvers to the left or right.This air conditioner is equipped with a slinger fan.(See drawing.)The fan’s outer ring picks up the condensed waterfrom the base pan if the water level gets highenough. The water is then picked up by the fanand expelled through the condenser, making theair conditioner more efficient.RingAdjusting Vertical AirflowDirectionTouch the horizontal louvers to adjust the airflowup or down.NOTE When the weather is extremely hot, the unitmay turn off automatically to protect thecompressor.19
SMART FUNCTIONSLG ThinQ ApplicationThis feature is only available on models withthe b or ThinQ logoThe LG ThinQ application allows you tocommunicate with the appliance using asmartphone.EN3Connect your smartphone to the wirelessrouter.LG ThinQ Application FeaturesCommunicate with the appliance from asmartphone using the convenient smart features.Smart DiagnosisIf you experience a problem while using theappliance,this smart diagnosis feature will help youdiagnose the problem.SettingsAllows you to set various options on the applianceand in the application.NOTE If you change your wireless router, internetservice provider, or passwor
9 Auto Clean(3 s) Light Off(3 s) NOTE The feature may be changed according to the type of model. 1 Power Press to turn the air conditioner ON or OFF. 4 Operation Mode Press the Mode button to cycle between 4 types of air conditioner operation: Energy Saver / Cool / Fan / Dry. Energy Saver - In this mode the compressor