Transcription
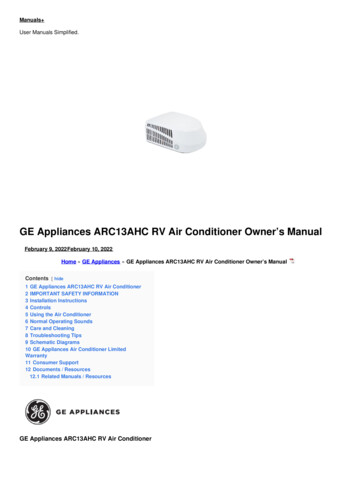
Manuals User Manuals Simplified.GE Appliances ARC13AHC RV Air Conditioner Owner’s ManualFebruary 9, 2022February 10, 2022Home » GE Appliances » GE Appliances ARC13AHC RV Air Conditioner Owner’s ManualContents [ hide1 GE Appliances ARC13AHC RV Air Conditioner2 IMPORTANT SAFETY INFORMATION3 Installation Instructions4 Controls5 Using the Air Conditioner6 Normal Operating Sounds7 Care and Cleaning8 Troubleshooting Tips9 Schematic Diagrams10 GE Appliances Air Conditioner LimitedWarranty11 Consumer Support12 Documents / Resources12.1 Related Manuals / ResourcesGE Appliances ARC13AHC RV Air Conditioner
Rooftop or AssembliesRARMNRARENRAREDWrite the model and serial numbers here:Model #Serial #You can find them on a label on the air conditioner.GE is a trademark of the General Electric Company. Manufactured under trademark license.THANK YOU FOR MAKING GE APPLIANCES A PART OF YOUR RVWhether you grew up with GE Appliances, or this is your first, we’re happy to have you in the family.We take pride in the craftsmanship, innovation and design that goes into every GE Appliances product, and we think you will too.Among other things, registration of your appliance ensures that we can deliver important product information and warranty detailswhen you need them.Register your GE appliance now online. Helpful websites and phone numbers are available in the Consumer Support section of thisOwner’s Manual.IMPORTANT SAFETY INFORMATIONREAD ALL INSTRUCTIONS BEFORE USING THE APPLIANCEWARNING For your safety, the information in this manual must be followed to minimize the risk of fire, electric shock or personalinjury.This air conditioner must be properly installed in accordance with the Installation Instructions before it is used.Replace immediately all electric service cords that have become frayed or otherwise damaged.Turn the unit OFF and disconnect all power to the vehicle before cleaning and servicing.To avoid risk of injury or property damage, the air conditioner should only be serviced by a qualified servicer who holds acurrent valid certificate from an industry-accredited assessment authority, which authorizes their competence to handlerefrigerants safely in accordance with industry recognized assessment specifications.For your safety, do not store or use combustible materials, gasoline or other flammable vapors or liquids in the vicinity of this orany other appliance.All air conditioners contain refrigerants, which under federal law must be removed prior to product disposal. If you are getting ridof an old product with refrigerants, check with the company handling disposal about what to do.These R410A air conditioning systems require contractors and technicians to use tools, equipment and safety standardsapproved for use with this refrigerant. DO NOT use equipment certified for R22 refrigerant only.READ AND SAVE THESE INSTRUCTIONSInstallation Instructions
Questions? Call 1-877-540-7837 or Visit our Website at: GEAppliances.comBEFORE YOU BEGINRead these instructions completely and carefully.Save these instructions for local inspector’s use.Observe all governing codes and ordinances.Note to Installer – Be sure to leave these instructions with the ConsumerNote to Consumer – Keep these instructions for future reference.Skill level – Installation of this appliance requires a qualified RV technician.Completion time – Approximately 1 hourWe recommend that two people install this product.Proper installation is the responsibility of the installer.Product failure due to improper installation is not covered under the Warranty.TOOLS YOU WILL NEEDCAUTIONBe cautious of sharp edges as they may cause injury. When lifting the air conditioner, use 2 people to lift.Electrical wiring may be present between roof and ceiling. Be sure that power is disconnected at the mains and battery. Be surethat the gas supply is shut off.Failure to do so may result in injury or death.Table #1 – Model Compatibility List,QGRRU 8QLWVBreaker SizeRARMNRARENRAREDMCAMechanicalNon- DuctedElectronic NonDuctedMIN CircuitElectronicAmpacityDuctedMAX CircuitRating ofOvercurrentARC13AHC 99915A20AARC13AAC 99920A20AARC15AAC LWVMOP
,QGRRU 8QLWVRARMNRARENRAREDMechanicalNon-DuctedElectronic Non- ElectronicDuctedDuctedElec. ControlRARMCRAREC99WallThermostatRARWT99RARMN - Mechanical Non-DuctedCheck the contents of the accessories supplied with your air conditioner as shown below:Number Part NameQTY.1Filter Cover12Filter13Knobs24Ceiling Panel15Side Discharge Ports46Direct Discharge Guide17Mounting template18Junction Box Cover19Connection Shield110Air division baffle111M8 Mounting Bolts412Wood screws813Sheet metal screws2RAREN - Electronic Non-DuctedCheck the contents of the accessories supplied with your air conditioner as shown below:
Number Part NameQTY.1Filter Cover12Filter13Ceiling Panel14Side Discharge Ports45Direct Discharge Guide16Mounting template17Blanking Plate18Air division baffle19M8 Mounting Bolts410Wood screws811Sheet metal screws8RARED - Electronic DuctedCheck the contents of the accessories supplied with your air conditioner as shown below:
Number Part NameQTY.1Filter Cover12Filter13Screw Cover (left and right) 24Ceiling Panel15Mounting template16Air division baffle17M8 Mounting Bolts48Wood Screws89Sheet metal screws9WARNING ELECTRICAL SHOCK HAZARDDeath or serious injury can result from failure to follow these instructions.Disconnect 115VAC and 12VDC power supply before beginning installation and/or servicingEnsure product is properly grounded according to the applicable codesReplace all parts and panels before operatingA. ROOF REQUIREMENTS AND DETERMINING LOCATION FOR INSTALLATIONAir conditioners covered in this manual are designed for installation on an RV’s roof.Installation of this air conditioner must be in accordance with NFPA 1192 and NFPA 70.For proper installation, there must be a 14 3/8” x 14 3/8” ( /-1/4”) square opening in the roof and ceiling of the RV.There must be 2 to 6 inches between the RV ceiling and roof.Air conditioners covered in this manual are designed to fit over preexisting roof vent openings.If a roof vent opening isn’t available, use the following guidelines:respect to the RV roof if parked on a flat, level surface. Roof at the point of installation can have a maximum 15 degree tilt towardsthe front or rear of the RV.Figure 1: Outdoor UnitFigure 2: Indoor Non-Ducted Unit
Figure 3: Indoor Ducted UnitB. ROOF REQUIREMENTS AND PREPARATIONIf a preexisting roof vent opening will be used:1. 8QVFUHZ DQG UHPRYH URRI YHQW IURP 59.2. Seal all holes and seams with a weather resistant sealant.3. Measure the width and length of the vent If the opening doesn’t comply with the requirements from section A, it must be resized.If a preexisting opening will not be used, a new opening will be cut through both the roof and ceiling of the RV.1. This opening must be between structural roof members.2. Do NOT cut structural roof members to create opening for this air conditioner. Doing so may cause damage to RV and air3. Do NOT create a low spot on the RV roof. Water can pool and may leak through theThe square opening must be boxed with framing at least 3/4” thick to withstand the load from the compression bolts.Be sure to provide an access hole for RV wiring toward the front of the 14 3/8” x 14 3/8” opening.Roof and RV structure at point of install must be strong enough to support air conditioner without any deflection. If in doubt, pleasecontact your RV manufacturer. Deflection will allow water to pool at the air conditioner’s gasket, and may cause a leak.C. ELECTRICAL REQUIREMENTSThese models require a 115-volt, 60-Hz protected with either a 15-amp or 20-amp time-delay fuse or circuit breaker (see table 1 onpage 4).Use a minimum of sheathed, 12 AWG copper wire with ground.Be sure that 16” of supply wire is passed through the framing. This ensures enough wire is available for an easy connection in thejunction box.
D. PLACING UNIT ON ROOFCAUTION LIFTING HAZARD. Ensure proper lifting methods and controls are used when lifting unit to the RV roof. Failure to do socan result in injury.1. Remove unit from packaging and dispose of packaging.2. Do not slide the unit on its mounting gasket.Damage to gasket can cause a leak. Using two people, lift the unit and place it over the prepared opening. The front of the unitmust face the RV’s direction of travel. Damage to condenser fan and coil will occur if this instruction is not followed.WARNINGIt is important that these installation instructions are read and understood before installation and use.Failure to securely install the unit to the RV before moving the RV may result in personal injury or death.Do not operate the unit or recreational vehicle until the unit is fully secured on roof.3. Bring the ceiling assembly with all provided mounting hardware into the RV. All work on the exterior of the RV is now complete.E. MECHANICAL NON-DUCTED INSTALLATION (RARMN )1. From inside the RV, double check the gasket’s position and alignment above the roof opening. Adjust if necessary. The airconditioner can be moved and adjusted by pushing upwards from inside the RV.2. Reach through the base pan and pull the electrical power cord from the air conditioner through the ceiling opening.3. Measure ceiling to roof thickness.4. Cut rows from the bottom of the foam baffle according to the table below:Best Practice:Cut away one row at a time and check installation position of baffle. With the top foam compressed onto the air conditioner’sbase pan, the bottom of the baffle should be flush to the ceiling opening.5. Install 2 baffle retainer plates onto the ceiling assembly (Optional).6. Place foam baffle into position between 2 retainer plates.7. Push the mounting template into the roof opening, and begin hand-threading each of the 4 mounting bolts through the nuts inthe base pan.8. Tighten the 4 bolts evenly to 35 5 inch pounds using a torque wrench at least rated for 0-60 in-lbs. Even compression isrequired to prevent leaks through the gasket.9. Remove 6 pin connection cover from the ceiling .Plug 6 pin connector from the roof mounted air conditioner into the electronic control box.Reassemble the 6 pin connection cover to the ceiling assembly.Remove junction box cover.Route the 115 VAC power cord through the strain relief of the ceiling assembly. Tighten the strain relief, making sure not todamage the wires.Using wire connectors , connect line to black neutral to white, and ground to green.Using electrical tape, secure the connector to prevent any potential movement due to vehicle vibration.Push wires and connections into the junction box. Reinstall junction box cover.Align plastic ceiling panel to the metal assembly.Install the 2 control knobs.Install the 2 provided sheet metal screws to attach the plastic panel to the metal assembly. The filter must be removed to installthese screws.Apply pressure to the center of the plastic panel, drive the 2 wood screws at the location shown in the figure below. The airdischarge doors should be partially open; otherwise, these screws will be difficult to drive.Drive the remaining 6 wood screws. The air discharge doors should be hinged partially open; otherwise, these screws will bedifficult to drive.Assemble the filter to the plastic panel.Installation is complete. Refer to “Controls” on page 12 before attempting to operate the air conditioner.F. ELECTRONIC DUCTED (RARED ) INSTALLATION1. From inside the RV, double check the gasket’s position and alignment above the roof opening. Adjust if necessary. The airconditioner can be moved and adjusted by pushing upwards from inside the RV.
2. Reach through the base pan and pull the electrical power cord from the air conditioner through the ceiling opening3. Push the ceiling mounting template into the roof opening and begin hand-threading each of the 4 mounting bolts through thenuts in the base pan4. Tighten the 4 bolts evenly to 35 5 inch pounds using a torque wrench at least rated for 0-60 in-lbs. Even compression isrequired to prevent leaks through the gasket.5. Place dividing baffle into position on the ceiling assembly. Ensure baffle is pressed against the base pan, forming an airtightseal.6. Mount the dividing baffle to the mounting template using three screws.7. Mount the dividing baffle to the framing timber using two screws on each side, creating an airtight seal.8. Mount the Main Control Box (RARMC ) to the mounting template using four screws.9. Remove three screws from main control box, allowing the bottom section to hinge open. Control board is now visible andaccessible.10. Route the 115 VAC power cord through the strain relief of the control box. Tighten the strain relief, making sure not to damagethe wires.11. Using wire connectors , connect line to black neutral to white, and ground to green.12. Using electrical tape, secure the connector to prevent any potential movement due to vehicle vibration.13. The Indoor Coil Freeze sensor should be installed in the Thermistor Well on the outdoor unit (pictured below). The sensor has a2-pin connector that needs to be plugged into “T2” on the circuit board. If the sensor is not installed in the outdoor unit, theninstall the one provided with the main control (RARMC ). Heat-Pump models also have a 4-pin connector that needs to beplugged into “T4”.14. Rotate lower section of control box upwards, making sure not to crush any wires. Drive three screws, securing the control boxclosed.15. Align plastic ceiling panel to the metal assembly.16. Install the 6 provided sheet metal screws to attach the plastic panel to the metal assembly. The filter and screw covers must beremoved to install these screws.17. Assemble the filter and screw covers to the plastic panel.18. Installation is complete. Refer to thermostat operating instructions before attempting to operate.Note for RARED models the mounting template can be installed prior to placing the rooftop unit on the coach per the followingsequence:1.2.3.4.5.6.7.8.9.Measure and attach the dividing baffle to the mounting template using 3 screws.Push the mounting template into the roof opening and drive 4 screws through the plate holes and into the roof of the coach.Follow steps 7-12Follow step 14Follow steps 1-2Hand thread the mounting bolts through the mounting template and into the corresponding holes in the rooftop unitFollow step 4Follow Step 13Follow Steps 15-20ControlsFeatures and appearance will vary.
AirConditioner ControlsControls1. Power OffThe air conditioner is off in this position.2. Air Conditioning ModesIn these positions, the compressor and fans will run to provide cold air. The three modes correspond to low, medium, and highfan speeds.3. Fan Only ModesIn these modes, the fans will run to circulate air in the RV. The three modes correspond to low, medium, and high fan speeds.4. Temperature SelectionThis knob determines the room set point temperature. Turn this knob to increase or decrease how cold the air conditioner willmake the room.CAUTIONTo prevent circuit breaker from tripping, wait a minimum of 3 minutes between turning the compressor off and then back on (i.e.wait 3 minutes before moving the dial from position 1A to 1B back to 1A or moving from position 2A to 2B back to 2A (picturedabove)Using the Air ConditionerIMPORTANT:When you turn off the air conditioner, wait at least 3 minutes before turning it back on. This prevents the compressor fromoverloading. This 3 minute delay also applies when switching from cool mode to fan and back.Do not operate your air conditioner in the Cool mode when the outside temperature is below 60 F (15 C). The insideevaporator coil may freeze up, and the air conditioner will not operate properly.Air DirectionUse the lever to open and close vent on face of panel.
Open or close 4 side ports to adjust airflow from the air conditioner.Normal Operating SoundsCare and CleaningIndoor PanelTurn the air conditioner off and disconnect power from the air conditioner before cleaning.To clean, use water and a mild detergent. Do not use bleach or abrasives.Air FilterThe air filter should be checked every 2 weeks and cleaned if necessary.DO NOT operate the air conditioner without a filter because dirt and lint will clog it and reduce performance.Cleaning the Air Filter1. Turn off the air conditioner.2. Remove the air filter cover per the figures on the right to gain access to the filter.3. Use a vacuum cleaner to clean the air. If the air filter is very dirty, wash it in warm water with a mild detergent. Do not wash theair filter in the dishwasher or use any chemical cleaners. Air dry the air filter completely before replacing to ensure maximumefficiency.4. Reassemble the air filter to the grill.5. Carefully reassemble the grill and filter assembly to the main panel.6. Turn on the air conditioner.
Annual MaintenanceYour air conditioner needs annual maintenance to help ensure steady, top performance throughout the year.Call your local authorized dealer to schedule an annual checkup. The expense of an annual inspection is your responsibility.Troubleshooting TipsBefore you call for serviceSave time and money! Review the charts on the following pages first and you may not need to call for service.
ProblemAirConditionerdoes notoperateAirconditionerblows fusesPossible CauseWhat To DoAn RV fuse has blown, orcircuit breaker has tripped.Replace the fuse or reset the circuit breaker.If the problem continues, call an electrician.See “Electrical Requirements.”The mode setting is in theOFF position.Press POWER or turn the Mode control to anactive setting.The local power has failed.Wait for power to be restored.Too many appliances arebeing used on the samecircuit.8QSOXJ RU UHORFDWH DSSOLDQFHVWKDW VKDUH WKH VDPH FLUFXLW.Time-delay fuse or circuitbreaker of the wrongcapacity is being used.Replace with a time-delay fuse or circuitbreaker of the correct capacity. See“Electrical Requirements.”or trips circuitYou are trying to restart thebreakersWait at least 3 minutes after turning off theair conditioner too soonair conditioner before trying to restart the airafter turning off the airconditioner.conditioner.8VH H[KDXVW YHQW IDQV ZKLOHFRRNLQJ RU EDWKLQJ DQG WU\ QRWAirconditionerseems to runtoo muchThe air conditioner is in aheavily occupied room, orheat-producing appliancesare in use in the room.The air conditioner is notproperly sized for your RV.Check the cooling capabilities of your RV airconditioner.The filter is dirty orobstructed by debris.Clean the filter.There is excessive heat ormoisture (open containercooking, showers, etc.) inthe room.Airconditionercycles on andoff too muchor does notcool room incooling modeto use heat producing appliances during thehottest part of the day. A higher capacity airconditioner may be required depending onthe size of the room being cooled.8VH D IDQ WR H[KDXVW KHDW RUPRLVWXUH IURP WKH URRP. 7U\ QRWto use heat-producing appliances during thehottest part of the day.The louvers or ducts areclosed.Make sure louvers are open.The outside temperature isbelow 60 F (15 C).Do not try to operate your air conditioner inthe cooling mode when the outsidetemperature is below 60 F (15 C).The temperature of the roomAllow extra time for the air conditioner to coolyou are trying to cool isoff a very hot room.extremely hot.Windows or doors to theoutside are open.Close all windows and doors.Adjust the TEMP control to a cooler settingThe Temperature control is by pressing the minus button to reduce thenot at a cool enough setting. temperature. Set the Fan Speed control tothe highest setting.Water dripsfrom cabinetinto yourhouseWall thermostat improperlyinstalledVerify proper installation of Wall Thermostatper installation instructions (pg. 5 not onexterior wall or in direct sunlight in anarea affected by a vent or duct )The indoor coil may befrozen.De-ice by running the fan only until clear.The air conditioner’sCheck mounting bolts and tighten to 45 5mounting gasket may not bein-lbs if necessary.sealed against the roof.Schematic Diagrams
Electronic Controls RARWT ; RARMC ; RAREC
GE Appliances Air Conditioner Limited WarrantyAll warranty service must be provided by certified RV Service Centers.To schedule service call 1-877-540-7837Have serial number and model number available when calling for service.For The Period Of: GE Appliances Will Replace:Two YearsAny part of the air conditioner which fails due to a defect in materials orFrom the date of the workmanship. During this limited two-year warranty, GE Appliancesoriginal purchasewill also cover all labor and related service to replace the defective part.What GE Appliances Will Not Cover:Improper installation, delivery or maintenance. If you have an installation problem, or if the air conditioner is of improper coolingcapacity for the intended use, contact your dealer or installer. You are responsible for providing adequate electrical connectingfacilities.Failure of the product resulting from modifications to the product or due to unreasonable use including failure to providereasonable and necessary maintenance.Replacement of house fuses or resetting of circuit breakers.Damage to the product caused by improper power supply voltage, accident, fire, floods or acts of God.Incidental or consequential damage caused by possible defects with this air conditioner.Damage caused after delivery.EXCLUSION OF IMPLIED WARRANTIES—Your sole and exclusive remedy is product repair as provided in this Limited Warranty.Any implied warranties, including the implied warranties of merchantability or fitness for a particular purpose, are limited to two yearsor the shortest period allowed by law.
Staple your receipt here. Proof of the original purchase date is needed to obtain service under the warranty.This limited warranty is extended to the original purchaser and any succeeding owner for products purchased.Some states do not allow the exclusion or limitation of incidental or consequential damages. This limited warranty gives you specificlegal rights, and you may also have other rights which vary from state to state. To know what your legal rights are, consult your localor state consumer affairs office or your state’s Attorney General.Warrantor: GE Appliances, a Haier companyLouisville, KY 40225Consumer SupportGE Appliances WebsiteHave a question or need assistance with your appliance? Try the GE Appliances Website 24 hours a day, any day of the year! Youcan also shop for more great GE Appliances products and take advantage of all our on-line support GEAppliances.comRegister Your ApplianceRegister your new appliance on-line at your convenience! Timely product registration will allow for enhanced communication andprompt service under the terms of your warranty, should the need arise. You may also mail in GEAppliances.com/registerSchedule ServiceCall 1-877-540-7837 during normal business hours.Extended WarrantiesPurchase a GE Appliances extended warranty and learn about special discounts that are available while your warranty is still ineffect. You can purchase it on-line anytime. GEAppliances.com/extended-warranty or call 800.626.2224 during normal businesshours.Remote ConnectivityFor assistance with wireless network connectivity (for models with remote enable),visit our website at rts and AccessoriesIndividuals qualified to service their own appliances can have parts or accessories sent directly to their homes (VISA, MasterCard andDiscover cards are accepted). Order on-line today 24 hours every day.GEApplianceparts.com or by phone at 877.959.8688 during normal business hours.Instructions contained in this manual cover procedures to be performed by any user. Other servicing generally should be referred toqualified service personnel. Caution must be exercised, since improper servicing may cause unsafe operation.Contact UsIf you are not satisfied with the service you receive from GE Appliances, contact us on our Website with all the details including yourphone number, or write to:General Manager, Customer Relations GE Appliances, Appliance Park Louisville, KY 40225 GEAppliances.com/contactDocuments / ResourcesGE Appliances ARC13AHC RV Air Conditioner [pdf] Owner's ManualRooftop Units, ARC13AHC , ARC13AAC , ARC15AAC , ARH13AHC , ARH15AAC , Indoor Assemblies,RARMN , RAREN , RARED , ARC13AHC RV Air Conditioner, RV Air Conditioner, Air ConditionerRelated Manuals / ResourcesGE Appliances APCA09 Portable Room Air Conditioner Owner's ManualAPCA09 Portable Room Air Conditioner Portable Room AIR CONDITIONER IMPORTANT SAFETY INFORMATION . . . . . . GE Appliances AHEK08AC Room Air Conditioner Owner's ManualAHEK08AC Room Air Conditioner ROOM AIR CONDITIONER SAFETY INFORMATION . . . . . . . . .3 JENSEN JCR-255 Radio Despertador Digital AM FM con Vibrador Debajo de la Almohada User ManualJCR-255 Radio Despertador Digital AM FM con Vibrador Debajo de la Almohada Radio Despertador Digital AM/FM con Vibrador
Hisense Air Conditioner User MenualHisense Air Conditioner User Menual - Download [optimized] Hisense Air ConditionerUser Menual - DownloadManuals ,homeprivacy
Home » GE Appliances » GE Appliances ARC13AHC RV Air Conditioner Owner's Manual Contents [ hide 1 GE Appliances ARC13AHC RV Air Conditioner 2 IMPORTANT SAFETY INFORMATION . 60-Hz protected with either a 15-amp or 20-amp time-delay fuse or circuit breaker (see table 1 on page 4). Use a minimum of sheathed, 12 AWG copper wire with ground .