Transcription
Administration Guide - NetApp File Archiver AgentAdministration Guide - NetApp File ArchiverTABLE OF CONTENTSOVERVIEWIntroductionKey FeaturesTerminologySYSTEM REQUIREMENTSDEPLOYMENTInstallationMethod 1: Interactive InstallMethod 2: Install Software from CommCell ConsoleGETTING STARTED - NETAPP FILE ARCHIVER AGENT DEPLOYMENT ON A CLUSTERGETTING STARTED - NETAPP FILE ARCHIVER AGENT CONFIGURATIONGETTING STARTED - NETAPP FILE ARCHIVER AGENT MIGRATION ARCHIVINGPerform An ArchiveWhat Gets ArchivedWhat Does Not Get ArchivedGETTING STARTED - NETAPP FILE ARCHIVER AGENT RECOVER DATAPerform A Data RecoveryCONFIGURATION - NETAPP FILE ARCHIVER AGENTUnderstanding the CommCell ConsoleConfiguring Rules for ArchivingBased on File Access TimeBased on File Modified TimeBased on File SizeConfiguring Post Archiving OptionsReplacing Archived Files with StubsDeleting Archived FilesSetting up Stub Retention RulesConfiguring a Secondary FPolicy Instance for RecallsConfiguring FiltersFiltering Files from ArchivingConfiguring Exclusion to FiltersDeleting a FilterSetting up Archiving of System and Hidden FilesCreating a Subclient to Backup StubsProtecting Stubs Using Incremental BackupsSetting up On Demand ArchivingCreating Content FilesCreating an On Demand Archive SetAdding Files and Folders with Unicode Characters to Content FilesPreventing DuplicatesConfiguring the Maximum Number of Simultaneous Stub Recalls (Recall Throttling)Examples of Recall ThrottlingEnabling Notifications for End UsersModifying an Instance, Archive Set or SubclientModifying a Client, Instance or Subclient Using the Command LinePage 1 of 100
Administration Guide - NetApp File Archiver AgentModifying a ClientModifying an InstanceModifying a SubclientDeleting an Agent, Instance, Archive Set or SubclientDeleting an AgentDeconfiguring an AgentDeleting an InstanceDeleting an Archive SetDeleting a SubclientMIGRATION ARCHIVING - NETAPP FILE ARCHIVER AGENTScheduling an Archive JobRunning a Backup to Protect StubsScheduling Stub BackupsManaging JobsRestarting JobsControlling JobsAdditional OptionsRECOVER DATA - NETAPP FILE ARCHIVER AGENTStub Recovery OptionsCopying Stubs without Triggering a RecallRecover Data Using CommCell ConsoleRestoring DataPerforming a Direct RestorePerforming and Out-of-Place RestorePerforming a Cross-Platform RestoreRestoring to a UNC Path/NFS-Mounted File SystemOverwriting Data During RestoresOverwriting Data Only if it Exists on the DestinationOverwriting Data Only if it is a StubRestore by JobsBrowse and RestoreFind and RestoreList MediaScheduling a RecoveryResubmitting a Restore JobManaging Recovery JobsAdditional Recover OptionsDATA AGING- FILE ARCHIVER FOR NETAPPADDITIONAL OPERATIONS- NETAPP FILE ARCHIVER AGENTAudit TrailStorage PolicySchedule PolicyAuxiliary CopyOperation WindowUninstalling ComponentsGlobal FiltersOnline Help LinksTROUBLESHOOTING - NETAPP FILE ARCHIVER AGENTPage 2 of 100
Administration Guide - NetApp File Archiver AgentOverview - NetApp File Archiver AgentTABLE OF CONTENTSIntroductionKey FeaturesTerminologyINTRODUCTIONFile Archiver for NetApp Agent is installed as a stand alone archiving agent to archive and recover data residing on a NetApp File Server. The Data is alwaysarchived on CIFS share.The Archived data allows preservation, transparent retrieval, and discovery of information held within file system environment. It reduces the size of data onthe primary storage and decreases the duration of backup operations by the corresponding iDataAgent. Migrating data from file systems to secondary, tieredstorage maximizes storage utilization across the enterprise.The File Archiver for NetApp can optionally create stubs that contain information about the archived data to facilitate end-users with non-browse recoveryoperations from third-party applications. Migrated data can also be recovered from the CommCell Console using the browse recovery operation whether thestubbing feature is enabled or disabled. Additionally, it employs centralized, policy-based storage to reduce costs and simplify management.KEY FEATURESThe NetApp File Archiver involves the following key features:RECALL THROTTLINGYou can configure the stub recovery parameters, such that, you can set the Maximum Number of Stubs in a Recall Job, Time between recalls and Time to waitafter maximum successive recalls limit is reached.POINT IN TIME RESTOREYou can restore the system state of a client, backed up on a specific date and time.STUB PRUNINGIn the archive phase, File Archiver for NetApp will archive files meeting the pre-set archive criteria and, if applicable, put them into a list for the stubbing phaseand prune the expired stubs. This helps in secondary storage space reclamation.TERMINOLOGYThe NetApp File Archiver documentation uses the following terminology:PROXY CLIENTMIGRATIONARCHIVINGSTUBBINGDATA RECOVERYA proxy client is any computer on which the File Archiver Agent is installed to archive and recover data residing on a NetApp FileServer.Migration archiving is a process of periodically moving unused or infrequently used NetApp data on a host computer to secondarystorage, thereby reducing the size of data on the primary storage.The stubbing phase starts after the archive phase succeeds. Stubs are placeholders of the original data after it has been migrated tothe secondary storage. Stubs replace the archived files in the location selected by the user during the archive. However, stubs willonly be created if the subclient properties were configured to create them during archive.The archived and migrated data can be recovered in any of the following three methods:zRecovery of archived files per file paths provided using the CommCell Console.zBrowse and Recovery of archived files using the CommCell Console.zRecall of archived files from stubs using third-party applications like: Windows Terminal or Console window.STUB RECOVERYIf the subclient is configured to create stubs, you can perform a recall operation from a Windows workstation for recovering the stubs.A recall is any action that causes an open and read to be executed on the stub, which automatically initiates a recovery operation.PERSISTENTRECOVERYMultiple stub recoveries are submitted to the Job Controller as one job called a Persistent Recovery job. The job will wait forapproximately 5 seconds in order to allow other stub recovery requests being submitted on the same client to be batched into thesame job.Page 3 of 100
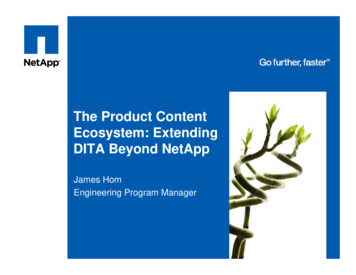
Administration Guide - NetApp File Archiver AgentGetting Started - NetApp File Archiver Agent DeploymentWHERE TO INSTALLInstall the software on a computer with connectivity to the NetApp File Server. The client computer must satisfy the minimum requirements specified in theSystem Requirements.INSTALLATIONThe software can be installed using one of the following methods:METHOD 1: INTERACTIVE INSTALLUse this procedure to install the software directly on client computer.BEFORE YOU BEGINDownload Software PackagesDownload the latest software package to perform the install.System RequirementsVerify that the computer in which you wish to install thesoftware satisfies the System Requirements.METHOD 2: INSTALL SOFTWARE FROM COMMCELL CONSOLEUse this procedure to remotely install the software on a client computer.PREREQUISITESEnsure the following:zUser has administrative privileges on the NetApp File Server.zUser has administrative privileges on the computer where NetApp File Archiver agent will be installed.METHOD 1: INTERACTIVE INSTALL1.Run Setup.exe from the Software Installation Disc on a client computer.2.Select the required language.Click Next.3.Select the option to install software on this computer.The options that appear on this screen depend on the computer in whichthe software is being installed.4.Select I accept the terms in the license agreement.Click Next.Page 4 of 100
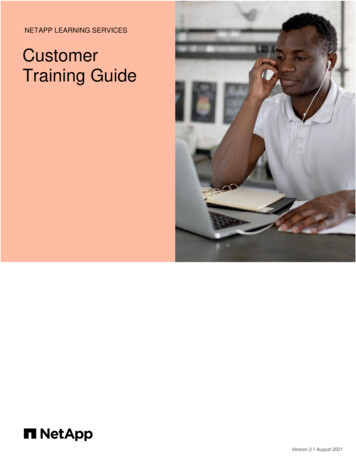
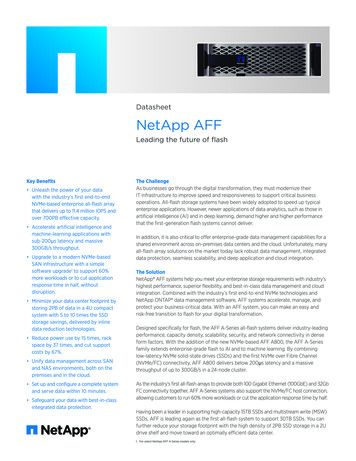
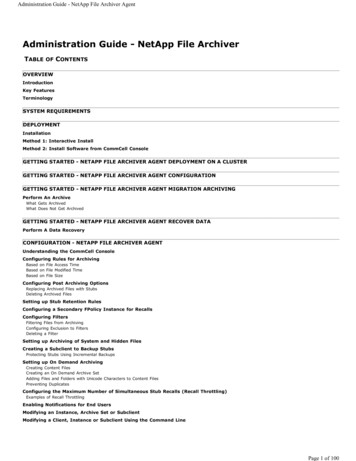
Administration Guide - NetApp File Archiver Agent5.Expand Client Modules Archive Management and select File Archiver forWindows AgentClick Next.6.If this computer and the CommServe is separated by a firewall, select the Configurefirewall services option and then click Next.For firewall options and configuration instructions, see Firewall Configuration andcontinue with the installation.If firewall configuration is not required, click Next.7.Enter the fully qualified domain name of the CommServe Host Name.Click Next.Do not use space and the following characters when specifying a newname for the CommServe Host Name:\ !@# % &*() /?,[]{}:;'"8.Click Next.Page 5 of 100
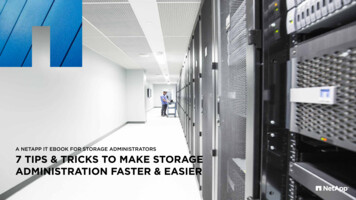
Administration Guide - NetApp File Archiver Agent9.Select Add programs to the Windows Firewall Exclusion List, to add CommCellprograms and services to the Windows Firewall Exclusion List.Click Next.This option enables CommCell operations across Windows firewall byadding CommCell programs and services to Windows firewall exclusionlist.It is recommended to select this option even if Windows firewall isdisabled. This will allow the CommCell programs and services to functionif the Windows firewall is enabled at a later time.10.Verify the default location for software installation.Click Browse to change the default location.Click Next.zDo not install the software to a mapped network drive.zDo not use the following characters when specifying the destinationpath:/:*?" #It is recommended that you use alphanumeric characters only.11.Select a Client Group from the list.Click Next.This screen will be displayed if Client Groups are configured in theCommCell Console.12.Click Next.Page 6 of 100
Administration Guide - NetApp File Archiver AgentIf you do not have Storage Policy created, this message will be displayed.Click OK.You can create the Storage Policy later in step 1613.Click Next.14.Click Next.15.Click Finish.If you already have a storage policy selected in step 12, click the Next buttonavailable on the bottom of the page to proceed to the Configuration section.Page 7 of 100
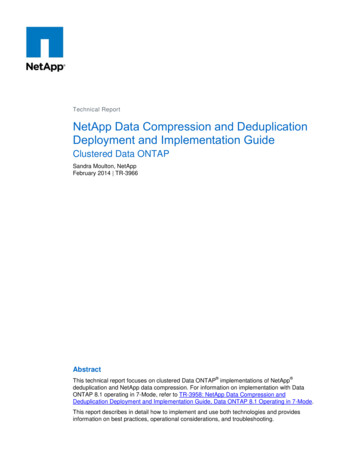
Administration Guide - NetApp File Archiver AgentIf you do not have Storage Policy created, continue with the following step.16.Create a Storage Policy:1.From the CommCell Browser, navigate to Policies.2.Right-click the Storage Policies and then click New Storage Policy.3.Follow the prompts displayed in the Storage Policy Wizard. The required optionsare mentioned below:{Select the Storage Policy type as Data Protection and Archiving and clickNext.{Enter the name in the Storage Policy Name box and click Next.{From the Library list, click the name of a disk library to which the primarycopy should be associated and then click Next.Ensure that you select a library attached to a MediaAgent operating in thecurrent release.{From the MediaAgent list, click the name of a MediaAgent that will be usedto create the primary copy and then click Next.{For the device streams and the retention criteria information, click Next toaccept default values.{Select Yes to enable deduplication for the primary copy.{From the MediaAgent list, click the name of the MediaAgent that will be usedto store the Deduplication store.Type the name of the folder in which the deduplication database must belocated in the Deduplication Store Location or click the Browse button toselect the folder and then click Next.{Review the details and click Finish to create the Storage Policy.METHOD 2: INSTALL SOFTWARE FROM COMMCELL CONSOLE1.From the CommCell Browser, select Tools Add/Remove Software InstallSoftware.2.Click Next.3.Select Windows.Click Next.Page 8 of 100
Administration Guide - NetApp File Archiver Agent4.Select Manually Select Computers.Click Next.5.Enter the fully qualified domain name of the client computer.For example: apple.domain.company.comClick Next.6.Click Next.7.Specify UserName and Password of the client computer.Click Next.Page 9 of 100
Administration Guide - NetApp File Archiver Agent8.Select File Archiver for Windows Agent.Click Next.9.10.11.zSelect Client Group from Available and click Add.zSelect Storage Policy from Storage Policy to use drop-down list.zClick Next.zSelect Reboot.zClick Next.zSelect Immediate.zClick Next.Page 10 of 100
Administration Guide - NetApp File Archiver Agent12.Click Finish.13.You can track the progress of the job from the Job Controller or Event Viewerwindow.14.Once the job is complete, right-click the CommServe computer, click View and thenclick Admin Job History.15.Select Install/Upgrade/Remove Software.Click OK.Page 11 of 100
Administration Guide - NetApp File Archiver Agent16.You can view the following details about the job by right-clicking the job:zEvent of the job displaying that the software installation has started andcompleted.zDetails of where the job was run.zDate of the job.zClient computer name on which the software was installed.zLogs of the job.Page 12 of 100
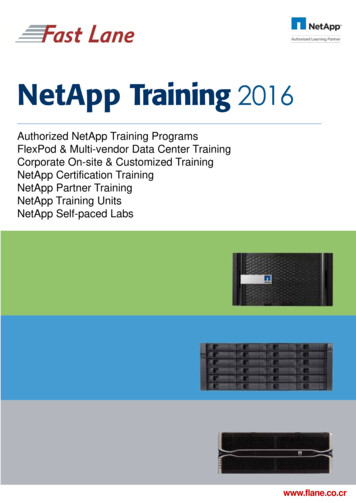
Administration Guide - NetApp File Archiver AgentGetting Started - NetApp File Archiver Agent Deployment on aClusterSKIP THIS PAGE IF YOU ARE NOT INSTALLING THIS AGENT ON A CLUSTER.Clickto continue with the deployment.WHERE TO INSTALLInstall the software from the active node in the cluster group. The driver for the File ArchiverAgent must be installed onto all the physical nodes of the cluster. Once the driver is installed,install the software from the active node. The software is automatically installed on all theavailable nodes of the cluster.Make sure the cluster group satisfies the minimum requirements specified in the SystemRequirements.BEFORE YOU BEGINDownload Software PackagesDownload the latest software package to perform the install.System RequirementsVerify that the computer in which you wish to install thesoftware satisfies the System Requirements.PREREQUISITESEnsure the following:zUser has administrative privileges on the NetApp File Server.zUser has administrative privileges on the computer where NetApp File Archiver agent will be installed.1.Run Setup.exe from the software installation package on a client computer.2.Select the required language.Click Next.3.Select the option to install software on this computer.The options that appear on this screen depend on the computer in whichthe software is being installed.4.Click Next.Page 13 of 100
Administration Guide - NetApp File Archiver Agent5.Click OK.6.Select I accept the terms in the license agreement.Click Next.7.Select Install on the Physical Node.Click Next.8.Expand Client Modules Archive Management and select Driver for FileArchiver.Click Next.9.If this computer is separated from the CommServe by firewall(s), type Yes and thenpress Enter.Page 14 of 100
Administration Guide - NetApp File Archiver AgentFor firewall options and configuration instructions, see Firewall Configuration andcontinue with the installation.If you do not wish to configure the firewall services, type No and then press Enter.10.Enter the fully qualified domain name and Click Next.zDo not use space and the following characters when specifying a newname for the CommServe Host Name:\ !@# % &*() /?,[]{}:;'"11.Click Next.12.Select Add programs to the Windows Firewall Exclusion List, to add CommCellprograms and services to the Windows Firewall Exclusion List.Click Next.This option enables CommCell operations across Windows firewall byadding CommCell programs and services to Windows firewall exclusionlist.It is recommended to select this option even if Windows firewall isdisabled. This will allow the CommCell programs and services to functionif the Windows firewall is enabled at a later time.13.Click Next.It is recommended to select the Download latest update pack(s)option to automatically install the available updates during installation.Page 15 of 100
Administration Guide - NetApp File Archiver Agent14.Verify the default location for software installation.Click Browse to change the default location.Click Next.zDo not install the software to a mapped network drive.zDo not use the following characters when specifying the destinationpath:/:*?" #It is recommended that you use alphanumeric characters only.15.Select a Client Group from the list.Click Next.This screen will be displayed if Client Groups are configured in theCommCell Console.16.Click Next.17.Click Next.Page 16 of 100
Administration Guide - NetApp File Archiver Agent18.To install the software on the remaining nodes of the cluster, click Yes.To complete the install for this node only, click No.19.Select cluster nodes from the Preferred Nodes list and click the arrow button tomove them to the Selected Nodes list.Once you complete your selections, click Next.20.zThe list of Preferred Nodes displays all the nodes found in thecluster; from this list you should only select cluster nodes configuredto host this cluster group server.zDo not select nodes that already have multiple instances installed.Specify User Name and Password for the Domain Administrator accountInformation to perform the remote install on the cluster nodes you selected in theprevious step.Click Next.21.The progress of the remote install for the cluster nodes is displayed; the install can beinterrupted if necessary.Click Stop to prevent installation to any nodes after the current ones complete.Click Advanced Settings to specify any of the following:zMaximum number of nodes on which Setup can run simultaneously.zTime allocated for Setup to begin executing on each node, after which the installattempt will fail.zTime allocated for Setup to complete on each node, after which the install attemptwill fail.Page 17 of 100
Administration Guide - NetApp File Archiver Agent22.Read the summary for remote installation to verify that all selected nodes wereinstalled successfully.Click Finish.zIf, during the remote install of a cluster node, setup fails to completeor is interrupted, you must perform a local install on that node. Whenyou do, the install begins from where it left off, or from the beginningif necessary. For procedures. follow from Step 1.23.Click Finish.24.Run Setup.exe from the software installation package on a client computer.25.Select the required language.Click Next.Page 18 of 100
Administration Guide - NetApp File Archiver Agent26.Select the option to install software on this computer.The options that appear on this screen depend on the computer in whichthe software is being installed.27.Click Next.28.Click OK.29.Select I accept the terms in the license agreement.Click Next.30.Select Configure a Virtual Server.Click Next.31.Select the disk group in which the cluster group resides.Click Next.Page 19 of 100
Administration Guide - NetApp File Archiver Agent32.Expand Client Modules Archive Management and select File Archiver forWindows Agent.Click Next.33.If this computer is separated from the CommServe by firewall(s), type Yes and thenpress Enter.For firewall options and configuration instructions, see Firewall Configuration andcontinue with the installation.If you do not wish to configure the firewall services, type No and then press Enter.34.Enter the fully qualified domain name and Click Next.zDo not use space and the following characters when specifying a newname for the CommServe Host Name:\ !@# % &*() /?,[]{}:;'"35.Click Next.Page 20 of 100
Administration Guide - NetApp File Archiver Agent36.Select Add programs to the Windows Firewall Exclusion List, to add CommCellprograms and services to the Windows Firewall Exclusion List.Click Next.This option enables CommCell operations across Windows firewall byadding CommCell programs and services to Windows firewall exclusionlist.It is recommended to select this option even if Windows firewall isdisabled. This will allow the CommCell programs and services to functionif the Windows firewall is enabled at a later time.37.Click Next.It is recommended to select the Download latest update pack(s)option to automatically install the available updates during installation.38.Verify the default location for software installation.Click Browse to change the default location.Click Next.zDo not install the software to a mapped network drive.zDo not use the following characters when specifying the destinationpath:/:*?" #It is recommended that you use alphanumeric characters only.39.Select a Client Group from the list.Click Next.This screen will be displayed if Client Groups are configured in theCommCell Console.Page 21 of 100
Administration Guide - NetApp File Archiver Agent40.Click Next.41.Click Next.42.To install the software on the remaining nodes of the cluster, click Yes.To complete the install for this node only, click No.43.Select cluster nodes from the Preferred Nodes list and click the arrow button tomove them to the Selected Nodes list.Once you complete your selections, click Next.44.zThe list of Preferred Nodes displays all the nodes found in thecluster; from this list you should only select cluster nodes configuredto host this cluster group server.zDo not select nodes that already have multiple instances installed.Specify User Name and Password for the Domain Administrator accountInformation to perform the remote install on the cluster nodes you selected in theprevious step.Page 22 of 100
Administration Guide - NetApp File Archiver AgentClick Next.45.Read the summary for remote installation to verify that all selected nodes wereinstalled successfully.z46.If, during the remote install of a cluster node, setup fails to completeor is interrupted, you must perform a local install on that node. Whenyou do, the install begins from where it left off, or from the beginningif necessary. For procedures. follow from Step 24.Click Finish.Page 23 of 100
Administration Guide - NetApp File Archiver AgentGetting Started - NetApp File Archiver Agent ConfigurationCONFIGURATIONOnce the NetApp File Archiver Agent has been installed, configure an Instance and create a Subclient as follows:1.2.zFrom the CommCell Browser, navigate to Client File Archiver.zRight-click File Archiver, point to All Tasks Create Instance and then clickFPolicy.zIn the Instance Name box enter the instance name.zIn the Filer Name box enter the Filer name.For Vfiler, it should use vfiler name instead of physicalmachine name.z3.Click Configure Password.Enter credentials for an account with administrative access to the file server.If you have two or more instances of NAS File Archiverconfigured on your CommCell Console, then use thesame credentials for all instances. If you plan to usedifferent credentials, file server must have access tothose credentials.4.Navigate to Client File Archiver FPolicy Instance DefaultArchiveSet,point to All Task and select New Subclient.Page 24 of 100
Administration Guide - NetApp File Archiver Agent5.In the Subclient Name box enter the subclient name.6.zClick the Content tab.zClick Add Path and add the path of the folders on the filer that has files to bearchived.zClick OK.zClick the Rules tab.zSelect Enable All Rules.zClick the Storage Device tabzSelect Storage PolicyzClick OK7.8.Clickto continue. If you do not have Storage Policy created, click CreateStorage Policy.9.1.Click Create Storage Policy.2.Follow the prompts displayed in the Storage Policy Wizard. The required optionsare mentioned below:{Select the Storage Policy type as Data Protection and Archiving.{Select No to allow legal hold to use the policy.{Specify the name of the Storage Policy.{Specify the name of the primary copy. The primary copy is automaticallycreated along with the Storage Policy.Page 25 of 100
Administration Guide - NetApp File Archiver Agent{Select No for use of an existing global deduplication policy.{Specify name of the default library to which the Primary Copy should beassociated. This must be a disk library. Ensure that you select a libraryattached to a MediaAgent operating in the current release.{Select the MediaAgent.{Verify the device streams and the retention criteria information.{Select Yes to enable deduplication for the primary copy. Select the EnableClient Side Deduplication option.{Name of the Deduplication Store, MediaAgent hosting the Deduplication Store,and the location of the Deduplication Store.{Review the details and click Finish to create the Storage Policy. The primarycopy is also created.Page 26 of 100
Administration Guide - NetApp File Archiver AgentGetting Started - NetApp File Archiver Agent MigrationArchivingWHAT GETS ARCHIVEDWHAT DOES NOT GET ARCHIVEDFiles on the NetApp file serverEncrypted FilesFiles with extensions *.dll, *.bat, *.exe, *.cur, *.ico, and *.lnkSparse FilesPERFORM AN ARCHIVE1.2.zFrom the CommCell Console, navigate to Client Computers File Archiver Instance name defaultArchiveSet.zRight-click the Subclient in the right-pane and click Archive.zSelect Immediate to run the job immediately.zClick OK.3.You can track the progress of the job from the Job Controller or Event Viewerwindow of the CommCell console.4.Once the archive process is completed, files that meet the stubbing rules arestubbed.5.6.zStubs are placeholders of the original data after it has been migrated to thesecondary storage.zStubs replace the archived files in the location of the file.zAfter stubbing, the size of the files on the disk reduces.zOnce job is complete, view the details of job from the Archive Job History. Rightclick the subclient and select View Archived History.zClick OK.zYou can view a list of the files archived during the archive job.zRight-click the job.zClick View Stub File List.Page 27 of 100
Administration Guide - NetApp File Archiver AgentPage 28 of 100
Administration Guide - NetApp File Archiver AgentGetting Started - NetApp File Archiver Agent Recover DataPERFORM A DATA RECOVERYIt is recommended that you perform a recovery operation of an archived file after your first archive operation to understand the process. Follow the stepsgiven below to perform a restore of a file or multiple files:1.2.3.4.5.zNavigate to the folder with the stubs by mapping a network drive to the share orthrough the UNC path.zPerform an action that executes an open and read on an archived file to initiate therecovery operation.zYou can track the progress of the job from the Job Controller window of theCommCell console.zMultiple stub recoveries are submitted to the Job Controller as one job called aPersistent Recovery job.zOnce job is complete, view the details of job from the Recover History.zRight-click the ArchiveSet and select View Recovery History.zClick OK.zRight-click the job and select View Job Details.zAfter recovery, stubs are replaced by files in the location specified.If the subclient is configured to create stubs, by choosing the option Replace theFile with a Stub, files that qualify the archiving rule will get stubbed. You canrestore stubs following the same steps listed above (step 1 - step 4).Page 29 of 100
Administration Guide - NetApp File Archiver AgentAdvanced Configuration - File ArchiverTABLE OF CONTENTSUnderstanding the CommCell ConsoleConfiguring Rules for ileAccess TimeModified TimeSizeAttributeConfiguring Post Archiving OptionsReplacing Archived Files with StubsDeleting Archived FilesSetting up Stub Retention RulesConfiguring a Secondary FPolicy Instance for RecallsConfiguring FiltersFiltering Files from ArchivingConfiguring Exclusion to FiltersDeleting a FilterCreating a Subclient to Backup StubsProtecting Stubs Using Incremental BackupsSetting up On Demand ArchivingCreating Content FilesCreating an On Demand Archive SetAdding Files and Folders with Unicode Characters to Content FilesPreventing DuplicatesConfiguring the Maximum Number of Simultaneous Stub Recalls (Recall Throttling)Examples of Recall ThrottlingConfiguring for NetApp File Servers On ONTAP 7.0Configuring for RestubbingModifying an Instance, Archive Set or SubclientModifying a Client, Instance or Subclient Using the Command LineModifying a ClientModifying an InstanceModifying a SubclientDeleting an Agent, Instance, Archive Set or SubclientDeleting an AgentDeconfiguring an AgentDeleting an InstanceDeleting an Archive SetDeleting a SubclientUNDERSTANDING THE COMMCELL CONSOLENetApp File Archiver agent uses following main components to perform archive and recoveryoperations from the CommCell Console.Instance - represents the type of file system that needs to be archived.Archive Set - collective information of all the data that needs to be archived for the client.Subclient - defines the data to be archived.CONFIGURING RULES FOR ARCHIVINGIn order to perform archiving operations, you need to initially configure archiving rules. Archiving rules specify the criteria for the type of data to be archived.The basic archving criteria is the maximum file size in a particular scanned volume/directory. Files that meet this criteria are rendered available for archiving ifthey satisfy any or all the archiving rules.BASED ON FILE ACCESS TIMEYou can set rules to archive files based on the last accessed date of each file within the volume or folder/directory. Files older than the specified date will bePage 30 of 100
Administration Guide - NetApp File Archiver Agentarchived.1.From the CommCell Console, navigate to the Client Computers Client FileArchiver Instance ArchiveSet.2.In the right pane right-click the Subclient and click Properties.3.Select the Rules tab.4.Enter the number of days elapsed since the file was last accessed in the Archive fileaccess time older than n Days box.5.Select Any one of the file selection rules are satisfied.6.Click OK.BASED ON FILE MODIFIED TIMEYou can also set rules to archive file based on the last modified time. Files that were modified earlier than the specified time will be archived.1.From the CommCell Console, navigate to the Client Computers Client FileArchiver Instance ArchiveSet.2.In the right pane right-click the Subclient and click Properties.3.Select the Rules tab.4.Enter the number of days elapsed since the file was last modified Archive filemodified time older than n Days box.5.Select Any one of the file
The File Archiver for NetApp can optionally create stubs that contain information about the archived data to facilitate end-users with non-browse recovery operations from third-party applications. Migrated data can also be recovered from the CommCell Console using the browse recovery operation whether the