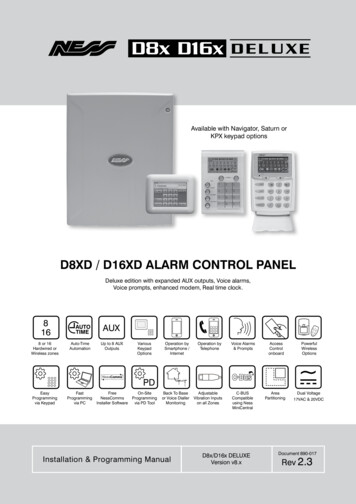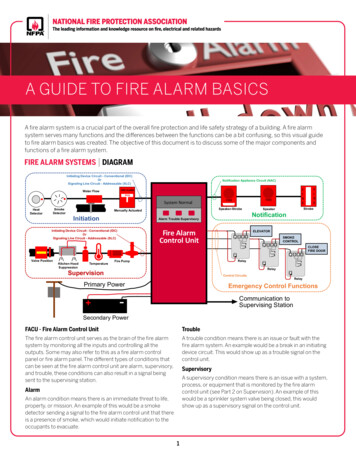
Transcription
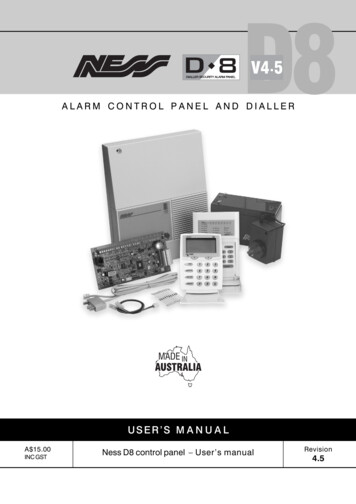
D8ALARM CONTROL PANEL AND DIALLERUSER’S M A N U A LA 15.00INC GSTNess D8 control panel – User’s manualRevision4.5
QualityEndorsedCompanyISO9001Ness Security Products Pty LtdWWW.NESS.COM.AU“Australia’s largestdesigner andmanufacturer ofhigh qualitysecurity products”HEAD OFFICE:Ness Security Products Pty LtdABN 28 069 984 3724 / 167 Prospect HwySeven Hills NSW 2147 AustraliaPh 61 2 8825 9222Fax 61 2 9674 2520ness@ness.com.auSYDNEY02 8825 9222MELBOURNE03 9878 1022BRISBANE07 3343 7744ADELAIDE (Aquavia Controls)08 8277 7255PERTH08 9328 2511NEW ZEALAND (NFS NZ) 64 9 573 0401NESS SECURITY PRODUCTSAustralian Communications AuthorityTELECOMMUNICATIONS COMPLIANCENESS D8 USER MANUALRevision 4.5June 2002Document Part Number: 890-264For products:100-191 D8 LED Control Panel (V4.5)100-688 D8 LCD Control Panel (V4.5) 2002 Ness Security Products Pty Ltd ABN 28 069 984 372D8 V4 User rev4.5 pmo140602Specifications may change without notice.LIC.No. QEC2074NSW Head Office only
CONTENTSFeatures . 4Introduction . 5Keypad . 6Visual Indicators . 7KEYPAD OPERATION . 8Arming . 9Disarming . 10Resetting Alarms . 10Monitor Mode . 11Keypad Panic . 12Keypad Duress . 12Keypad Fire Alarm . 13Keypad Medical Alarm . 13Excluding Zones . 14View Memory . 15RADIO KEY OPERATION . 16MONITORING OPERATION . 17PROGRAMMING . 18Programming Options Table . 19User Code programming . 20Entry/Exit Timer programming . 21Telephone Number programming . 21Remote Operation by Telephone . 22-23Ness Accessories . 24-25Troubleshooting . 26Installation Record . 27OPERATION SUMMARY . 28
NESS D8 FEATURES 8 Fully programmable zones Any combination of hardwire or radiozones Comes complete with an AC plug packand supports a 12V 7Ah battery tomaintain systems security under allpower supply conditionsFull radio supervision Monitor Mode (Home Mode) Contact ID Dialler Format Outputs are separately fused withAutomatic Reset Fuses Ultra-Modern and Impact resistantHousing Day Mode and Door Chime feature. Ness Audible Dialler Format 30 Event Memory "Follow Me" Audible Dialler Option Separate 24 Hour Tamper inputSupports 8 Radio Devices (RadioPIRs, Radio Reeds etc) Single or Double Trigger Zones Supports 14 Radio Keys Remote LED or LCD Keypads (Max 3) Fully programmable via the systemKeypad - Eliminates the need forexpensive programmers or Proms.All inputs and outputs are heavilyprotected against lightning and highvoltage supply transients. An earthterminal is provided for extra protection Inbuilt Vibration Sensor Analyser 15 User Codes All programming data is permanentlystored in a non-volatile EEprommemory ‘Arm only’ codes can be programmed Programmable Inputs to activateselectable Outputs Designed utilising the latest SMDTechnology Simple to Program and Use. Windows based Up\Down loadSoftware allows remote programmingand event status True Dynamic Battery Test every timethe Panel is armed / disarmed andevery hour Area Partitionable (2 Areas). Any Zonecan be programmed to any area, aswell as common areas4NESS D8 V4.5 CONTROL PANEL - USER MANUAL
INTRODUCTIONThe Ness D8 micro computer based 8 zonecontrol panel is the heart of your securitysystem to which all your detection devicesconnect.Arming the system may be done through thekeypad or with the use of optional Radio Keysfor Arming by remote control from outside thepremises.Each Zone of the panel can be connected toone or more detection devices to protectseparate rooms of your premises.When you enter the premises the panel willignore selected zones for the Entry Delay Timeand will not alarm unless you don’t Disarm thepanel during this allowed time.Detection devices may be connected to theD8 control system directly by cabling or withoptional wireless (Radio) devices.Detection devices called Passive Infra-RedDetectors (or P.I.R’s for short) can detect themovement of an intruder by sensing their bodyheat. P.I.R’s are used to cover various criticalareas of your premises where an intruder mayenter or trespass. Another detection deviceused is called a Reed Switch. Reed Switchesare attached to windows and doors to detect ifa window or door has been opened. A ReedSwitch consists of a magnet which is normallyattached to the moving part of a window ordoor and the Reed switch which mounts to thedoor or window frame.The panel is “Armed” when it is set to detectan intruder. At other times it is “Disarmed”.Normally a zone is considered Sealed.Activation of a detection device will cause thezone to be Unsealed and may cause an alarm.Detectors such as fire detectors and panicbuttons must be able to generate an alarm atall times regardless of the panel setting. A zonewith this assignment is called a 24 hour zone.Some detection devices may be required togenerate an alarm or warning only when thepanel is Disarmed. A zone with this assignmentis called a Day zone.Before leaving the premises you must Arm thepanel to enable it to detect intruders andgenerate an alarm. After arming, the panel willignore detectors during the Exit Delay Timeto enable you to depart without triggering analarm.Disarming the system may be done by keypador with the use of optional Radio Keys.Monitor mode allows you to Arm selectedzones while others are ignored. Typically,perimeter zones (doors and windows) can bemonitored while you are at home.If you wish to split your alarm system into twoareas with access limited to each area by codenumbers then Area operation is used. RadioKeys can also Arm and Disarm Areas.The control panel housing and the covers overexternal sirens are protected by tamperswitches to detect someone attempting todisable the security system. Activation of theseswitches will cause an instant tamper alarm.If a detector becomes faulty, you can Excludethe associated zone so that it is totally ignoredand cannot generate an alarm. Including thezone will enable it to generate an alarm again.The control panel is fitted with a rechargeablestand-by battery to ensure your securitysystem continues to operate if the mains poweris interrupted. This control panel automaticallytests the battery every hour and whenever youArm/Disarm the panel. (Dynamic Battery test).Whenever an alarm occurs, it may be silencedwith a User Code or by optional Radio Keys,otherwise it will reset at the end of Alarm ResetTime.All alarms are stored in memory and may beviewed at any time by entering Memory Mode.NESS D8 V4.5 CONTROL PANEL - USER MANUAL5
KEYPADThe D8 control panel may be supplied with either the LED keypad (100-192) or the Ness LCDKeypad (100-667).The keypad provides important visual and audible indications and is the main interface foroperating and programming the D8 control panel.DISPLAY TEST (LCD Keypad only)To display all the keypad icons press and hold thewill be on whilst thebutton is held down.button for at least 2 seconds. All the iconsDisplay Test can be activated at any time either in operating mode or any program mode.105mm90mmLED KEYPADLCD KEYPADBacklit LCDicon displayMEMORY buttonPANIC buttonsPANICMEMORYARM buttonARM123MONITOR buttonMONITOR456EXCLUDE buttonEXCLUDE789PROGRAM buttonPROGRAM0Not ReadyPANIC buttonsARM123MONITOR buttonMONITOR456EXCLUDE buttonEXCLUDE789MEMORY buttonMEMORYP0EARM buttonPANICENTERPROGRAM buttonENTER buttonENTER buttonProtective flap not shownProtective flap not shownThe “Not Ready” light is on when the panel is not ready to Arm.i.e, a zone is unsealed, there may still be movement in thepremises or a door or window left openKEYPAD BEEPER SOUNDSLED keypad and LCD keypadEach key pressValid commandErrorMains Power is offorPanel Battery is low61 beep3 beeps1 long beep10 beepsKeypad beeper sounds forLED or LCD keypad.NESS D8 V4.5 CONTROL PANEL - USER MANUAL135mm150mm“Not Ready” light
KEYPAD INDICATORSKEYPAD LIGHTS IN NORMAL OPERATING MODELED KEYPADOFFLCD KEYPADZONES 1 8ONZone is sealedZone is unsealedREADYZone is unsealed, or Power faultor System is Armed,or phone line faultReady to ArmARMEDDisarmedArmed (AREA 1)ARM2DisarmedArmed (AREA 2)DisarmedMonitor ModeFLASHINGZone alarmMonitor Mode(LED Keypad only)MAINSNormalMains Power is offBATTERYNormalThe panel’s backupbattery is lowMEMORYNormalEXCLUDENormalZones are excludedTAMPERNormalTamper alarmRADIONormalReceiving radio signalIndicates that a Radio Key orother radio device has alow batteryLINENormalDialler is on linePhone line fault orfailure to communicateNormalUser Program ModeInstaller Program ModeReady to ArmNot ready to ArmPROGRAMNot ReadyMemory Mode selectedNew alarms in memoryMEMORY MODE - EVENTS INDICATED BY KEYPAD LIGHTS:LIGHTMEMORY EVENTZone lights 1–8 . Zone alarm(no lights) . Panel DisarmedARMED . Panel Armed (or Area 1 Armed)ARM2 . Area 2 ArmedMAINS . Mains power failureBATTERY . Low BatteryTAMPER . Tamper alarm (Siren cover, panel etc)EXCLUDE . Panic alarmLINE . Telephone line failRADIO, EXCLUDE . Radio Key Panic alarmRADIO, BATTERY, ZONE . Radio Device battery low, (Device number is indicated by light 1–8)RADIO, BATTERY, ARM . Radio Key battery low, (Radio Key number is NOT indicated)RADIO, TAMPER, ZONE . Radio Device tamper alarm, (Device number indicated by light 1–8)(LCD Keypad) RADIO, MONITOR, ZONE . Radio Supervision fail (Device number is indicated by light 1–8)(LED Keypad) RADIO, ZONE . Radio Supervision fail (Device number is indicated by light 1–8)NESS D8 V4.5 CONTROL PANEL - USER MANUAL7
OPERATIONThis section describes the operation of atypical control panel installation. Keep inmind that your installation may varydepending on the selected options andequipment. The operating instructionswhich follow will cover the most commonoptions.Consult your installation company if yourequire further information.All control panel operations are controlled bythe D8 LED or LCD keypad except if an optionalkey switch or radio control equipment isinstalled.OPERATING RULESGenerally, the panel will be Disarmed. Armedor Monitor modes provide different levels ofsecurity for your premises when you are homeor away. Three other temporary modes;Program, Memory and Exclude, allow you toperform various operations. The panel willautomatically exit from these temporary modesif you do not press any buttons on the keypadin a 4 minute period.If you make a mistake while entering anycodes, press the Enter or E button and startagain.When you are required to enter your accesscode, you are given five opportunities to enterit correctly. After the fifth invalid attempt thealarm is activated (requiring the correct codeto silence the alarm). This prevents anyonetrying to guess your code by entering randomnumbers.The panel then effectively operates as twoseparate systems sharing only the siren outputsand dialler.USER CODE ASSIGNMENTA User Code assigned to an Area can Armand Disarm only that Area. User Codesassigned to both Areas will operate both Areassimultaneously.COMMON AREA ZONESZones assigned to both Areas are Armed onlywhen Area1 and Area2 are both Armed. Thisallows the Common Area zone/s to be sharedby both Areas.For example, Office A and Office B operate asseparate areas but the entrance foyer usedby both offices is assigned to both areasmeaning it will automatically Arm when bothAreas have Armed. The Common Area thenautomatically disarms when either Area1 orArea2 Disarms.OPERATIONArming and Disarming is carried out as normalfrom a single keypad or separate keypadsinstalled in both areas or by Radio Key.Area operation only applies to zones when theyare in the Armed state. This means that Day,24hr and Monitor zones are independent ofthe area operations.Note: Area partitioning is in addition to MonitorMode. Any zone may be allocated to any area.AREA OPERATIONArea Partitioning allows the 8 zones to be splitinto two partitions; Area1 and Area2.8NESS D8 V4.5 CONTROL PANEL - USER MANUAL
OPERATIONARMINGLCD KEYPADLED KEYPADThe Ready light should be on.The Not Ready light should be off.Press.Press.or.ARMARMENTER[User Code]ENTERThe Armed light will turn on. Leave the premises within the Exit Delay Time. 3 beeps will sound at the end of Exit Delay Time.The control panel must be Armed prior tovacating the premises in order to detectintruders. The panel must be disarmed andnot in Program, Monitor, Memory or Excludemodes.Note: If the panel is already in alarm, you mustfirst silence the alarm before you can Arm.If something is wrong when Arming the controlpanel, the normal 3 beeps will be replaced byother warnings.1010 beeps means Mains Power isturned off or the Backup Battery is low.or.[User Code]Theicon will turn on. Leave the premises within the Exit Delay Time. 3 beeps will sound at the end of Exit Delay Time.SIREN WARNING:At the end of the exit time, all zones should beSealed. If any are Unsealed, the siren willsound for 2 seconds as a warning to indicatethat those zones have been automaticallyexcluded. For maximum security, you shouldreturn, Disarm, check the premises and thenArm again. Continual warnings could mean thata detector is faulty and may have to be manuallyexcluded.If the auto-exclude option is disabled, the sirenwill sound for the duration of reset time if azone is Unsealed at the end of exit time.One long beep indicates an invalidentry or an alarm is outstanding and needs tobe reset by entering your User Code first.NOTE: ARM ONLY codesNormal user codes can arm the panel only if it is fully disarmed first.User codes that are programmed to be Arm Only codes can arm the panel from Monitor mode orfrom the disarmed state.See page 20 for User Code Programming.NESS D8 V4.5 CONTROL PANEL - USER MANUAL9
OPERATIONDISARMINGLCD KEYPADLED KEYPADEnter the premises through a delay zoneEnter the premises through a delay zonePress. [User Code]Press. [User Code]TheENTERArmed light will turn offWhen you enter the protected premisesthrough a delay zone, the keypad respondswith regular beeps* as a reminder to Disarm.You then have your programmed entry delaytime to Disarm the panel by entering one ofyour user codes. If the panel is not Disarmedby the end of the entry delay time, an alarmwill occur.By using the optional radio keys you mayDisarm your system from within your premisesor from outside your entrance door. There isalso the option to ‘Chirp’ the outside siren threetimes and to flash the strobe light for twoTheicon will turn offseconds as an indication that you haveDisarmed your system.If you make a mistake in entering your code,then you must press enter and start again.Five incorrect entries will cause an alarm.Note that user codes can optionally beprogrammed to be Arm Only codes. Bydefinition, an Arm Only code can Arm thesystem but it cannot Disarm. (See page 18 forUser Codes programming).* If Entry Beeps are programmed on.RESETTING ALARMSALARMS, DEFINITIONYour panel can be reset and the alarm silencedby the same key sequence as Disarming thepanel.Alarms may be caused by:If you arrive at your premises and find thestrobe light flashing* (if installed), reset thepanel as above. To check the cause of thealarm, you can view the alarms in memory byentering Memory Mode.* In the event of an alarm, the strobe light continues toflash until the panel is reset by the keypad or radio key,otherwise it will time out after 72 hours.10 A zone has been triggered while Armed A Tamper has been triggered A PANIC button has been triggeredAll of these may cause your sirens and strobeto operate. Various visual indications relevantto the alarm will be retained in the memory. Ifthis occurs, Disarming your control panel willreset the alarm. The cause of the alarm can beidentified by entering the Alarm Memory Modeas described on page 15.NESS D8 V4.5 CONTROL PANEL - USER MANUAL
OPERATIONMONITOR MODELCD KEYPADLED KEYPADPress.or.MONITORMONITORPress.ENTER[User Code]ENTERThe Armed light will flash continuously Only the zones which have been programmedby your installer as Monitor zones will be Armedor.[User Code]TheMONITOR icon will turn on Only the zones which have been programmedby your installer as Monitor zones will be ArmedMonitor mode allows you to Arm selected zoneswhile others are ignored. Typically, perimeterzones (doors and windows) can be monitoredwhile you are at home.If an alarm occurs while in Monitor mode,Your installer must program which zones willbe active in Monitor mode.Using the optional Radio Keys you can enterMonitor Mode by pressing the OFF button twicewithin 4 seconds or by pressing the ON buttontwice within 5 seconds. (Your installer mustenable Radio Key Monitor Arming for this towork).The panel must be fully Disarmed beforeArming in Monitor Mode.entering [User Code]will silence the alarm.This will also Disarm the panel, so remember toenter monitor again if needed.NESS D8 V4.5 CONTROL PANEL - USER MANUAL11
OPERATIONKEYPAD PANICLCD KEYPADLED KEYPADPress.or.PANICPANICor.PANICPANIC[User Code]Both keys togetherENTERPress.Both keys togetheror.[User Code]or.ENTER(If Keypad Panic Shortcut has been enabled by your installer)The keypad PANIC function may have beenprogrammed to be either AUDIBLE - activatessiren or buzzers, or SILENT - If your system ismonitored by a Central Station, sends a PANICreport by dialler. (If PANIC reports have beenenabled by your installer).(If Keypad Panic Shortcut has been enabled by your installer)PANIC cannot be used while the panel is inProgram, Memory or Exclude mode.Note: Your installer may have installed aseparate PANIC button. To activate the panicalarm simply press that button.KEYPAD DURESS ALARMLCD KEYPADLED KEYPADPress.9Press.[User Code]Disarms and sends a Duress Alarm report by dialler.*The DURESS alarm can be used to send asilent alarm to the Central Station that you arebeing forced to Disarm the panel against yourwill. That is; you are disarming under “duress.”To Disarm and send a DURESS alarm, prefixyour User Code with one of the digits 5, 6, 8 or9 when Disarming.12[User Code]Disarms and sends a Duress Alarm report by dialler.** DURESS IS NORMALLY NOT ENABLED. TO ENABLETHE DURESS FUNCTION, CONSULT YOUR INSTALLER* DURESS ALARMS CAN ONLY USED BY SYSTEMSWHICH ARE MONITORED BY A CENTRAL STATION.* THE DURESS ALARM CAN BE PROGRAMMED TOSOUND THE INTERNAL SIREN (RESET OUTPUT). THISOPTION IS OFF BY DEFAULT.NESS D8 V4.5 CONTROL PANEL - USER MANUAL
OPERATIONKEYPAD FIRE ALARMLCD KEYPADLED KEYPADPress.Press.Sounds the siren (Fire Alarm siren sound).Sounds the siren (Fire Alarm siren sound) If Keypad Fire Alarm has been enabled by your installerSends a Fire Alarm report by dialler. If your system is monitored by a central monitoring station If Fire Alarm Report has been enabled by your installer If Keypad Fire Alarm has been enabled by your installerSends a Fire Alarm report by dialler. If your system is monitored by a central monitoring station If Fire Alarm Report has been enabled by your installerKEYPAD MEDICAL ALARMLCD KEYPADLED KEYPADPress.Press.Sends a Medical Alarm report by dialler.Sends a Medical Alarm report by dialler. If your system is monitored by a central monitoring station If Medical Alarm Report has been enabled by your installerMedical Alarm does not sound sirens. If your system is monitored by a central monitoring station If Medical Alarm Report has been enabled by your installerMedical Alarm does not sound sirens.NESS D8 V4.5 CONTROL PANEL - USER MANUAL13
OPERATIONEXCLUDING ZONESLCD KEYPADLED KEYPADPress.or.ThePress.ENTER[User Code]or.ENTERExclude light will turn on[User Code]TheEXCLUDE icon will turn onEnter the zone number of the zone/s to be ExcludedEnter the zone number of the zone/s to be Excluded[Zone No.][Zone No.]ENTER[Zone No.]ENTERThe zone light of each Excluded zone will turn onPress.TheENTERto exit Exclude modeExclude light will flash continuouslyIf a detector becomes faulty and cannot beSealed when arming the panel, then its zonemay be Excluded so that it does not generatealarms.When zones have been Excluded, theEXCLUDE light flashes continuously while thepanel is Disarmed and also when Armed.[Zone No.]The zone light of each Excluded zone will turn onPress.Theto exit Exclude modeEXCLUDE icon will flash continuouslyZone Exclude IS not permanent. Excludedzones are automatically INCLUDED next timethe panel is Disarmed.Zones can be manually included by the samemethod as Excluding. Simply use the[ZONE NUMBER]sequence to turn OFF thezone lights to be Included.Zones can be excluded while the panel is eitherDisarmed or Armed. See notes below.NOTES EXCLUDE E works only when the panel is Disarmed. EXCLUDE [User Code] E works in any state. EXCLUDE [User Code] E can only exclude the zones in the Area assigned to that code.14NESS D8 V4.5 CONTROL PANEL - USER MANUAL
OPERATIONVIEWING EVENT MEMORYLCD KEYPADLED KEYPADPress.or.ThePress.ENTER[User Code]ENTERMemory light will turn on.or.The[User Code]MEMORY icon will turn on.Press.Press.The most recent event will be displayed.The most recent event will be displayed.Press.Press.The next most recent event will be displayed.The next most recent event will be displayed.Press.Press.and so on (up to 30 events).and so on (up to 30 events).Press.ENTERto exit Memory mode.Press.to exit Memory mode.The memory is constantly upgraded and thelast 30 events are always available for viewing.TO CLEAR THE MEMORY LIGHTThe MEMORY light flashes continuously whenan alarm has occurred as a reminder to viewthe alarm memory. The MEMORY light stopsflashing after the memory is viewed as shownabove.This memory display can only be selected whilethe panel is in the Disarmed state.The MEMORY light is automatically clearednext time the panel is Armed.The D8 Control Panel stores a comprehensiveevent memory, including Arming, Disarming,Low Battery, Mains Fail and Alarm events.MEMORY MODE - EVENTS INDICATED BY KEYPAD LIGHTS:LIGHTMEMORY EVENTZone lights 1–8 . Zone alarm(no lights) . Panel DisarmedARMED . Panel Armed (or Area 1 Armed)ARM2 . Area 2 ArmedMAINS . Mains power failureBATTERY . Low BatteryTAMPER . Tamper alarm (Siren cover, panel etc)EXCLUDE . Panic alarmLINE . Telephone line failRADIO, EXCLUDE . Radio Key Panic alarmRADIO, BATTERY, ZONE . Radio Device battery low, (Device number is indicated by light 1–8)RADIO, BATTERY, ARM . Radio Key battery low, (Radio Key number is NOT indicated)RADIO, TAMPER, ZONE . Radio Device tamper alarm, (Device number indicated by light 1–8)(LCD Keypad) RADIO, MONITOR, ZONE . Radio Supervision fail (Device number is indicated by light 1–8)(LED Keypad) RADIO, ZONE . Radio Supervision fail (Device number is indicated by light 1–8)NESS D8 V4.5 CONTROL PANEL - USER MANUAL15
RADIO KEY OPERATIONNESS RADIO KEY 3 BUTTONThe optional Ness Radio Key allows you to Arm, Disarm and activatePANIC. The Radio Key can also Arm Monitor Mode, (if this hasbeen enabled by your installer).ARMINGPress the ON button. The keypad will give 3 beeps. The outside siren will give 1 ‘chirp’. (If enabled by your installer). The strobe light will flash briefly. (If Monitor Arming by Radio Keyis enabled, the chirp and flash will be delayed for 5 seconds).DISARMINGPress the OFF button. The keypad will give 3 beeps. The outside siren will give 3 ‘chirps’. (If enabled by your installer). The strobe light will flash briefly.ARMING MONITOR MODE (If enabled by your installer).Press the OFF button twice within 4 seconds .or. press the ONbutton twice within 5 seconds. The keypad will give 9 beeps. The outside siren will NOT ‘chirp’. The strobe light will flash briefly.PANICPress and hold the PANIC button for at least 4 seconds. The siren and strobe will activate, (If enabled by your installer). The dialler will report a Panic alarm, (If enabled by your installerand if your system is monitored by a central station).Press the OFF button to reset a Panic alarm.* The Ness Radio Key is optional and is not supplied with any Ness control panel as standard.* Ness radio products require a Ness Radio Interface (100-200) to be fitted to the control panel.16NESS D8 V4.5 CONTROL PANEL - USER MANUAL
MONITORINGCENTRAL STATION MONITORINGAUDIBLE MONITORINGThe D8 control panel has an on-board digitaldialler which can send detailed alarm messagesto a Central Monitoring Station.The D8 can also be programmed to send audible messagesThe digital messages can include informationabout the zone or zones which caused thealarm, tamper alarms, low battery or mainsfailure reports, and it can also (by usernumber) identify the users who Arm and Disarmthe system.Central Station Monitoring is highlyrecommended and is the most effective methodof monitoring your D8 alarm system. For furtherinformation about 24 hour monitoring, contactyour installer or Ness Security Products.to any telephone or mobile phone.When programmed for audible monitoring, the D8 calls apre-programmed number (or numbers) and sounds aseries of beeps over the phone. These beeps can identifythe zone or zones which caused the alarm and well asseveral other alarm types.FOLLOW ME TELEPHONE NUMBERThe Follow Me Telephone Number is the telephonenumber to which the D8 sends alarm reports when AudibleMonitoring is enabled.The Follow Me Telephone Number can be changed bythe user in User program Mode.If the Follow Me Telephone Number is programmed, thePrimary and Secondary telephone numbers are ignored,even if programmed. (When Audible Monitoring isenabled).CENTRAL STATION MONITORINGSee page 19 for information on programming the FollowMe Telephone Number.AUDIBLE MONITORING SEQUENCEMONITOREDPREMISESTELEPHONE LINEMONITORINGSTATIONWhen triggered by an alarm, the D8 will dial theprogrammed telephone number/s and output the audiblemessage for 45 seconds or until it is acknowledged.ACKNOWLEDGING THE ALARMThe person receiving the call can then acknowledge thekey on their telephone. Pressalarm by pressing thethekey for at least 2 seconds during pauses in theaudible message.If the alarm is not acknowledged, the keypad’s LINE lightwill flash continuously until the panel is next Armed.* The Primary and Secondary telephone numbers are normallyonly used for central station monitoring. These numbers canonly be programmed in Installer Program Mode.AUDIBLE MONITORING** The Follow Me Telephone Number replaces the Primary ANDSecondary telephone numbers.MONITOREDPREMISESTELEPHONE LINENESS D8 V4.5 CONTROL PANEL - USER MANUALANY TELEPHONE17
PROGRAMMINGVarious system options can beprogrammed by the user. These optionscan only be accessed from Program Mode.User Codes may need to be reprogrammed if a person has forgotten theircode, to give a new user access to thesystem or to give someone temporaryaccess.To enter PROGRAM MODE[Master Code]ENTER[Master Code]User Codes 2-15 can be set as Arm OnlyCodes. These codes can Arm but cannotDisarm the panel. (Useful for assigning tocleaners, tradesmen etc.)You may need to change the Entry andExit timers if you find the delays are toolong or short.To exit PROGRAM MODEENTERIf Audible Monitoring is programmed byyour installer, the ‘Follow Me’ TelephoneNumber is the telephone number the diallerwill call in the event of an alarm.If your Ness D8 panel is monitored by aCentral Station, the Follow Me number isignored.For all other programming changes, talk toyour installer.The factory defaultMaster Code is: 123The panel will automatically exit ProgramMode is no buttons are pressed within a4 minute period.18NESS D8 V4.5 CONTROL PANEL - USER MANUAL
PROGRAMMINGPROGRAMMING OPTIONS TABLEOPTION NoFACTORYDEFAULTUser Code 1 (Master Code)P11E123User Code 2P12E3 to 6 digitsUser Code 3P13E3 to 6 digitsUser Code 4P14E3 to
zone to be Unsealed and may cause an alarm. Detectors such as fire detectors and panic buttons must be able to generate an alarm at all times regardless of the panel setting. A zone with this assignment is called a 24 hour zone. Some detection devices may be required to generate an alarm or warning only when the panel is Disarmed. A zone with .